A Spoonful of Sugar

Make. Bake. Create.

SUBSCRIBE TO NEWSLETTER
×
Menu
  • Home
  • About
    • About Us
    • Advertising
    • Press
    • FAQ
    • Disclosure
    • Grab a Button
    • Contact Us
  • Crafts
    • Crochet
    • DIY
    • Embroidery/Cross stitch
    • Gift Wrapping
    • Knitting
    • Miscellaneous
    • Paper Crafts
  • Holidays
    • New Year’s
    • Australia Day
    • Back to School
    • Valentines Day
    • Easter
    • ANZAC Day
    • Mother’s Day
    • Father’s Day
    • Halloween
    • Christmas
  • Recipes
    • Appetizers
    • Bars & Slices
    • Bread & Pastries
    • Cakes
    • Cookies
    • Confectionery
    • Cupcakes & Muffins
    • Desserts
    • Drinks
    • Ice Cream
    • Jams/Preserves
    • Main Meals
  • Sewing
    • Sewing Tutorials
    • Quilting
    • Sewing & Quilting Patterns
  • Family
    • Back to School
    • Family Fun
    • Our Home
    • Parenting
    • Travel
  • Shop
    • Pattern Store
    • Etsy Store

Tea Towels

April 7, 2012 By Spoonful of Sugar - 24 Comments

As part of our kitchen re-fresh, I have made up some new tea towels. I found the perfect aqua fabric, and teamed it with some white waffle cotton (very absorbent) and ric rac.

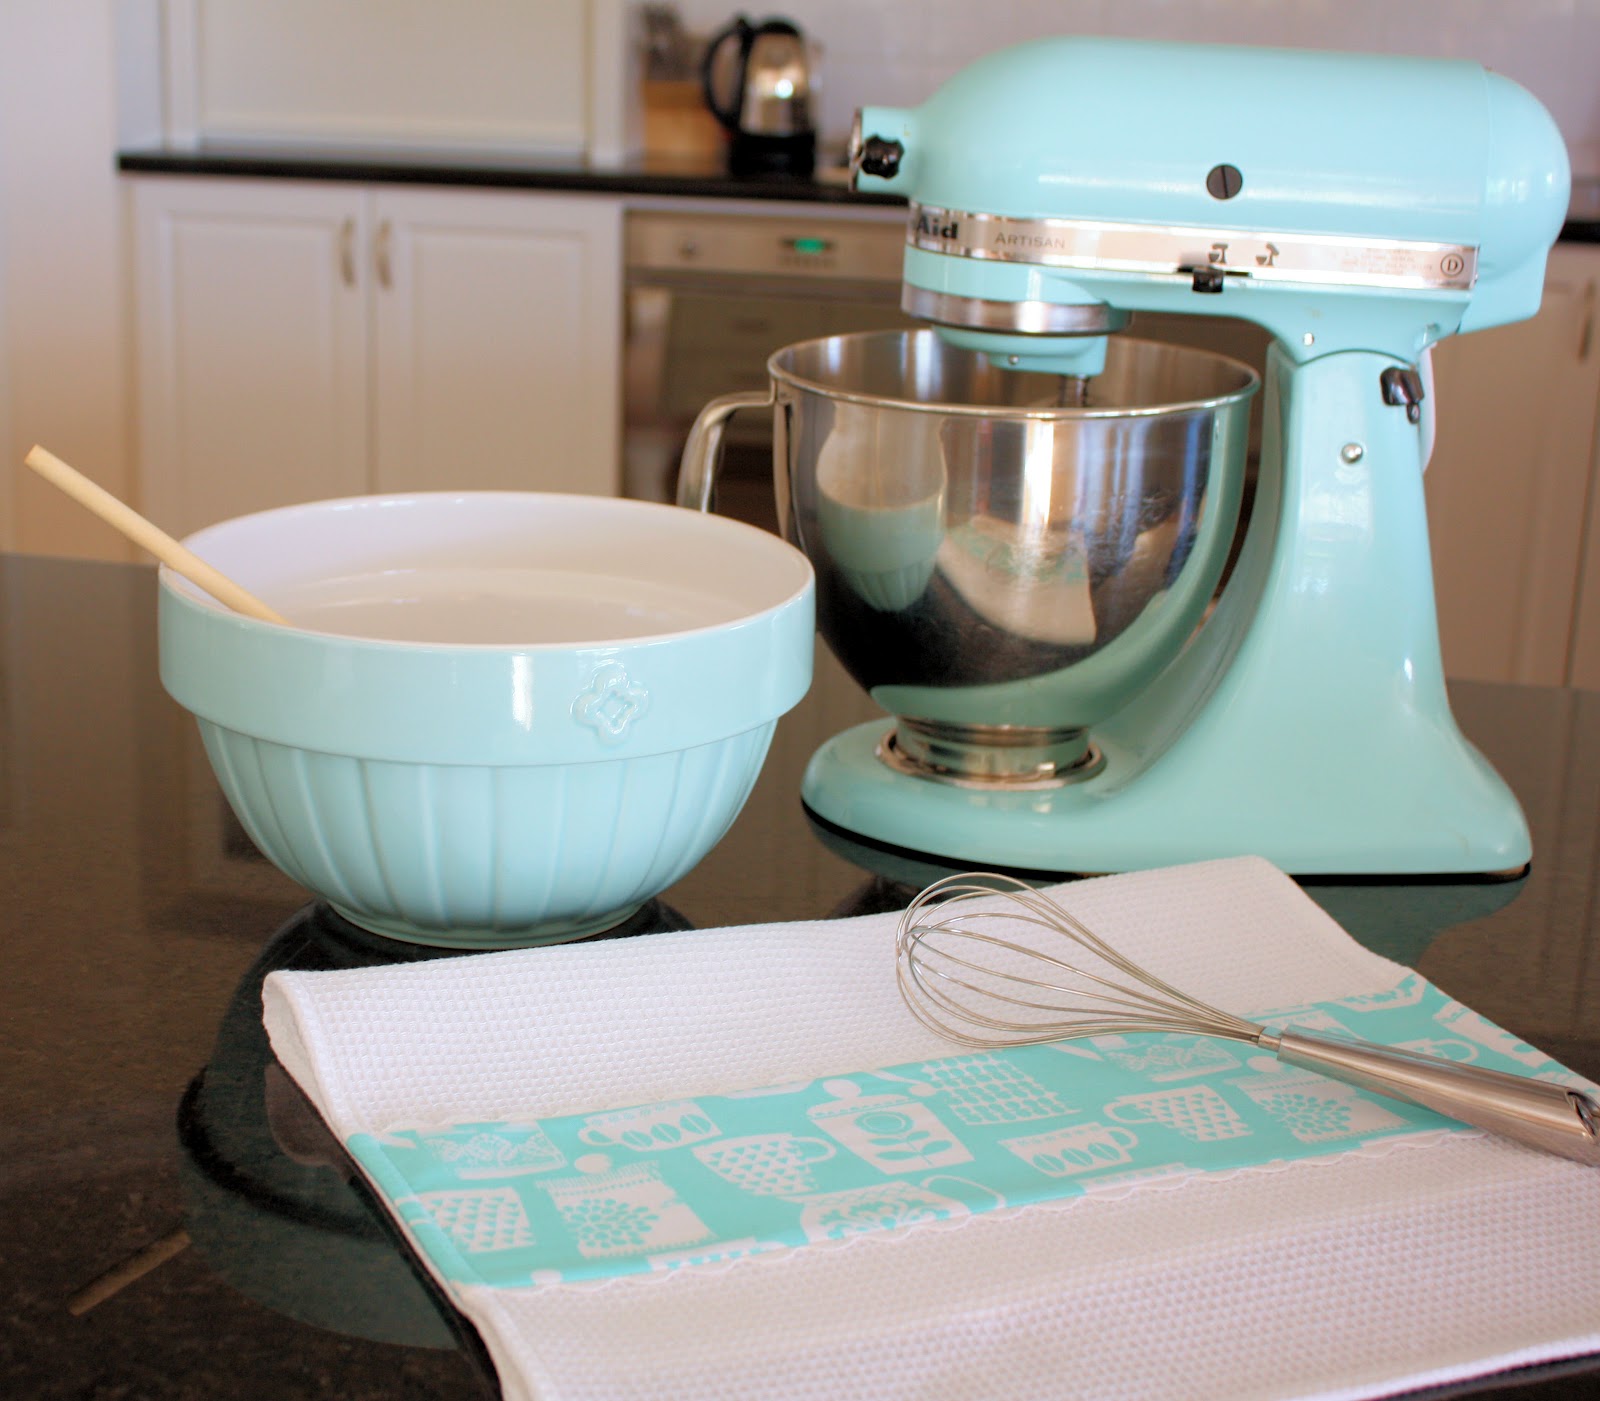
Making your own tea towels is such a quick project. I love having pops of aqua in my kitchen.

The aqua is a nice contrast to the white cabinets, stainless steel appliances, and black granite.

Tea towels are a great project for a beginner sewer or for a child learning to sew, as it is basically just hemming a rectangle of fabric. Or you can buy ready made plain towels and dress them up by sewing on a band of fabric.

If you would like to make your own you will need:

  • waffle cotton 20 x 28 inches
  • strip of quilting cotton measuring 20 x 5 inches
  • 40 inches ricrac trim
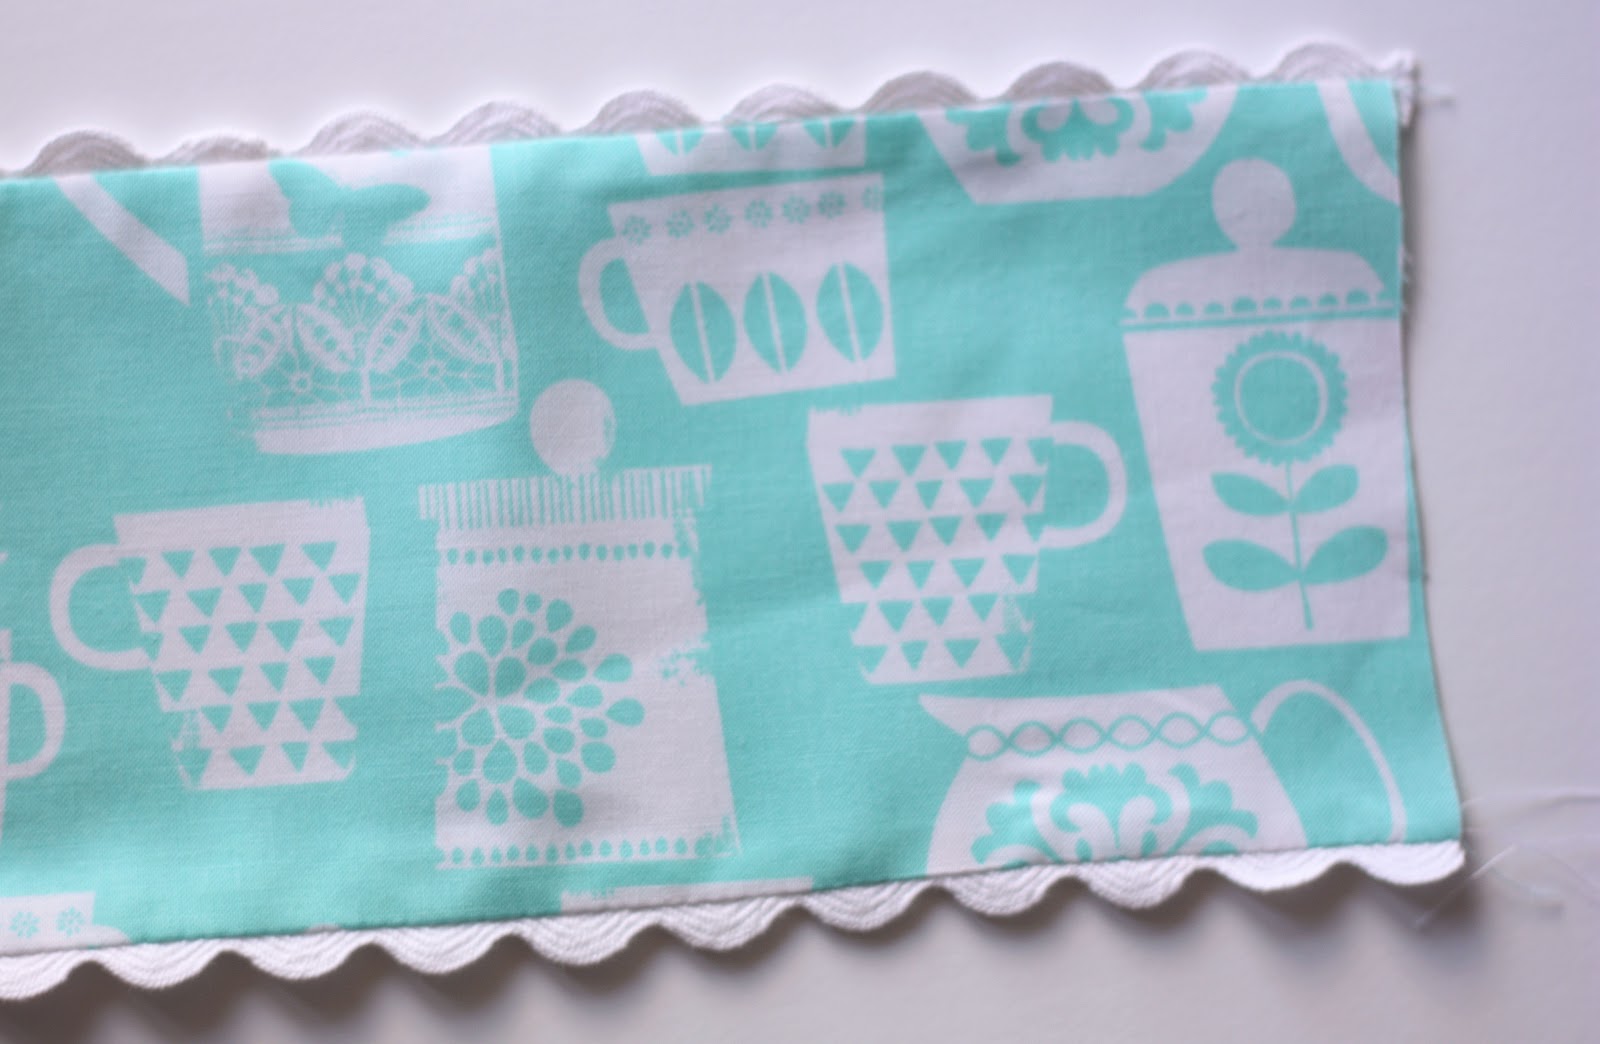
On the right side of the fabric panel, stitch the ricrac to the top and bottom edges.
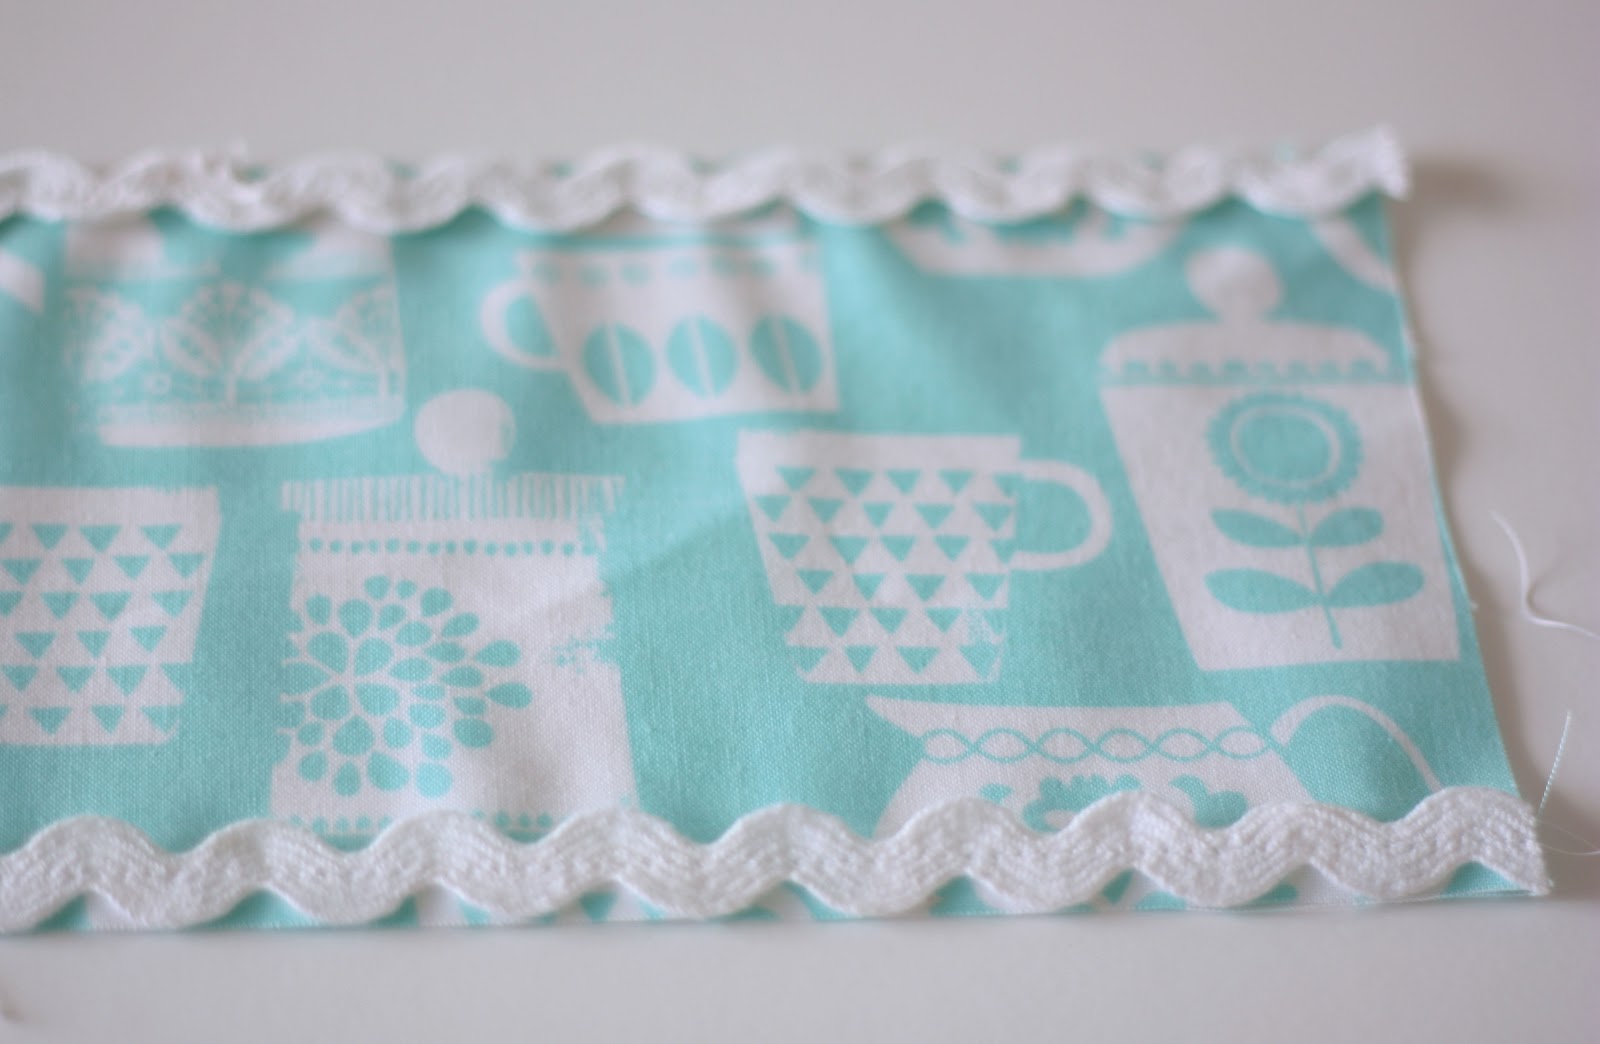
Fold the ricrac edge under so that the ricrac forms a border on the fabric strip.
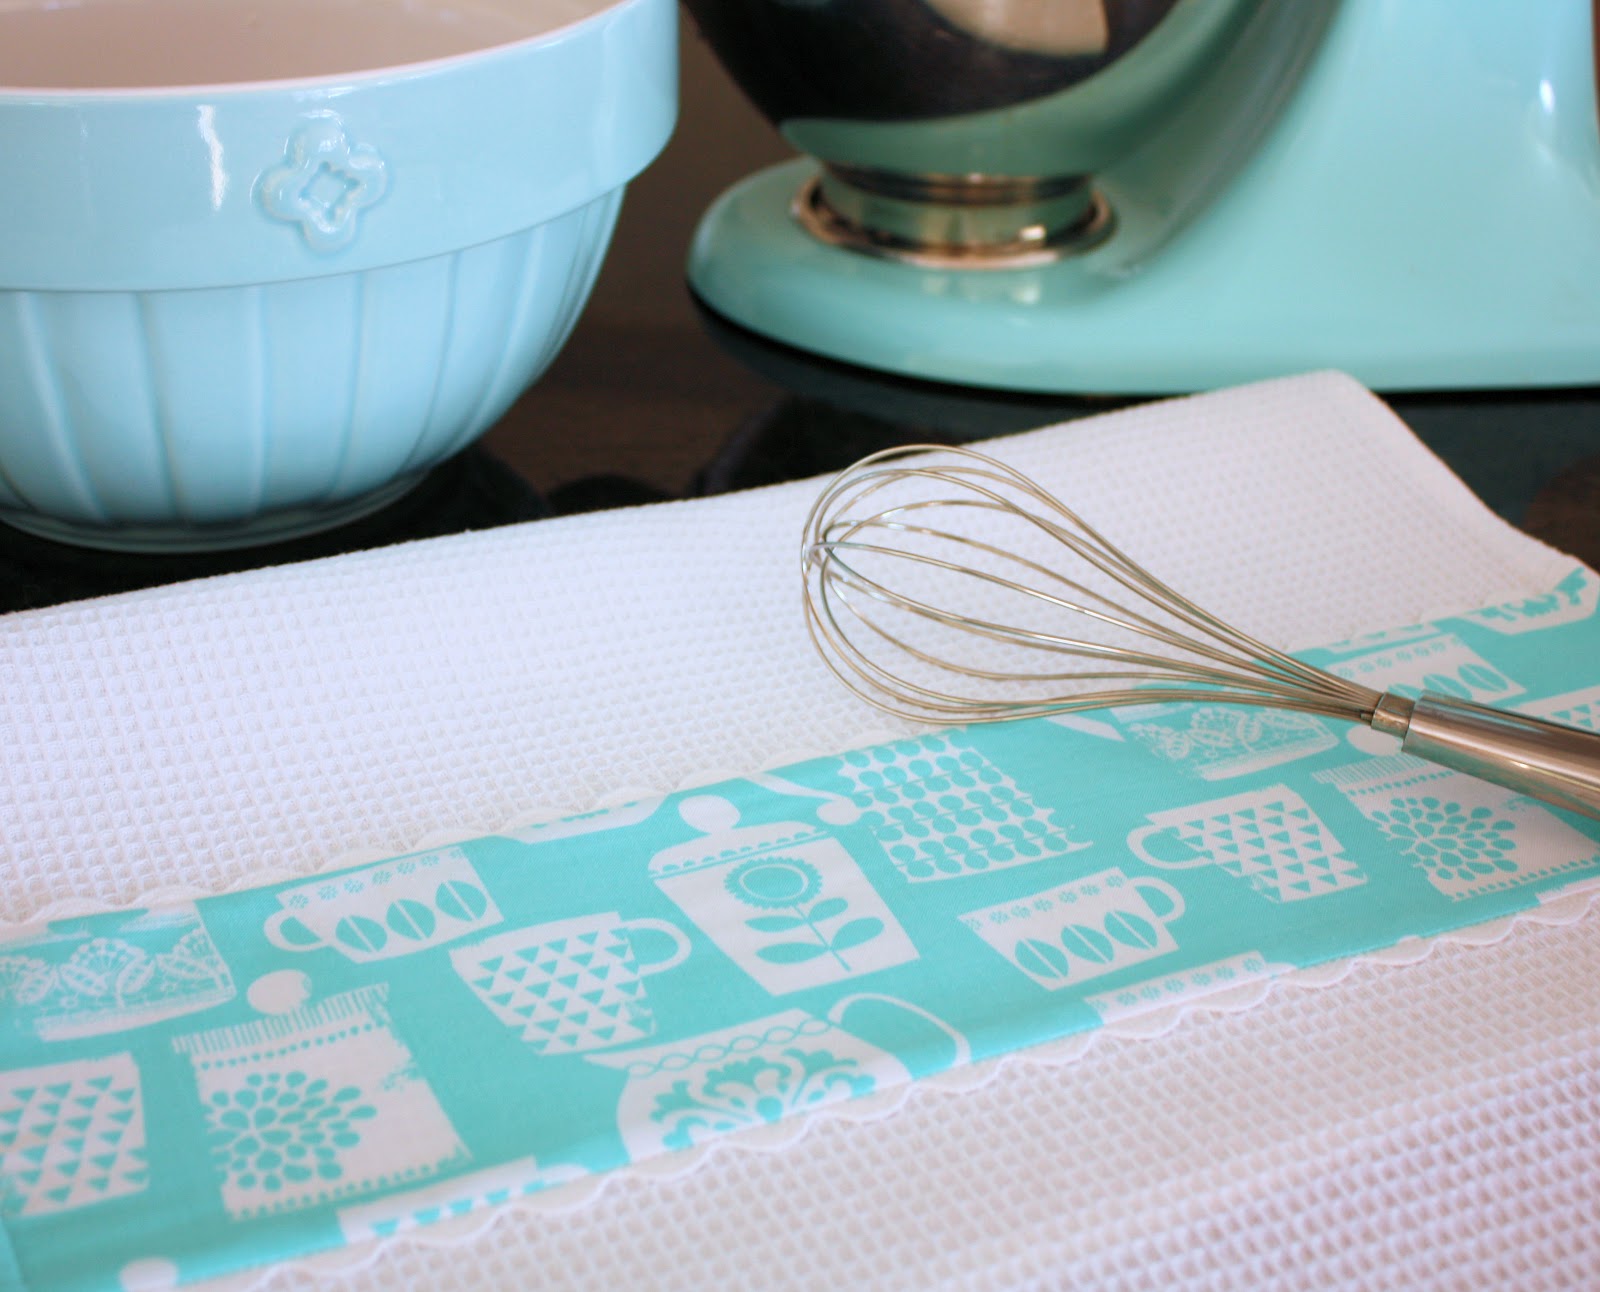
Pin the fabric strip to the tea towel, approximately 6 inches from the bottom edge, and stitch in place.
Turn under 1/2 inch on both long sides. Press. Turn under another 1/2 inch and stitch in place.
Turn under 1/2 inch on the top and bottom edges. Press. Turn under another 1/2 inch and stitch in place.
Next on the sewing list is some new pot holders. If you follow us on instagram (aspoonfulsugar) you would have already seen a sneak peak!

For your daily sugar fix you can subscribe or follow us on facebook, twitter, and google plus.  

Filed Under: Sewing, Sewing Tutorials Tagged With: kitchen, tea towel

Never miss a post.

Get fresh new ideas delivered right to your inbox!

« Book Review: Stitched Whimsy by Heidi Boyd
Lemon Curd Cupcakes »

Comments

  1. two hippos says

    April 7, 2012 at 1:12 pm

    Love the co-ordination!

    Reply
  2. A "cheery" disposition says

    April 7, 2012 at 6:19 am

    those are so pretty and they match your mixer so well 🙂

    Reply
  3. Greenville Coupon Clippers says

    April 7, 2012 at 6:30 am

    Oh I absolutely LOVE this and these colors!! Will have to do this!

    Reply
  4. Nethmi says

    April 7, 2012 at 6:36 am

    kool.. 😀

    Reply
  5. Séco says

    April 7, 2012 at 6:36 am

    Super cute and I love that it matches the KitchenAid
    Thanks for sharing this easy DiY.

    Reply
  6. Mellsy says

    April 7, 2012 at 6:39 am

    Such an awesome idea. I feel some gifts are in the making, fresh baked goods wrapped in freshly sewn tea towels. Could it get dreamier?

    Reply
  7. Happy in red says

    April 7, 2012 at 6:43 am

    That’s great!! What about the edges of the tea towels, is there a special seem you used?
    Esther.

    Reply
  8. nest full of eggs says

    April 7, 2012 at 7:04 am

    so pretty !

    Reply
  9. Svetlana says

    April 7, 2012 at 7:24 am

    adorable and easy to make, thanks for sharing.

    Reply
  10. Terriaw says

    April 7, 2012 at 7:25 am

    That aqua fabric was made for your kitchen! Perfect match. I have some of that waffle fabric, but haven’t done anything with it yet. Now I have some ideas. Great project!

    Reply
  11. Linda says

    April 7, 2012 at 7:49 am

    These tea towels look great Lisa, is waffle cotton easy to come by?
    Xx

    Reply
  12. Heleen Groot says

    April 7, 2012 at 8:13 am

    They look gorgeous! My sister has the very same mixer on order for her brand new kitchen! She is still waiting for the delivery, so there is still time to get them done!

    Reply
  13. grammajudyb says

    April 7, 2012 at 8:29 am

    I just dropped some bleach(accidently) on a fairly new olive green dish towel. Now I know what to do to fix. Add a piece of fabric. Cool <3

    Reply
  14. janice15 says

    April 7, 2012 at 9:09 am

    SO PRETTY, LOVE THEM…CUTE WITH THE CUPS FOR A DESIGN…AND I LOVE LOVE YOUR TURQUOISE MIXER…HAPPY EASTER…WITH LOVE JANICE

    Reply
  15. Janice says

    April 7, 2012 at 12:55 pm

    Gorgeous! My fave colours and indeed the colours of my kitchen!

    Reply
  16. Nat @ dear little house says

    April 7, 2012 at 6:38 pm

    I love the aqua!

    Reply
  17. Margaret says

    April 8, 2012 at 12:24 am

    Clean, fresh looking tea towels who could argue with that. Looking good.

    Reply
  18. Kjersti says

    April 8, 2012 at 2:03 am

    Hi.
    It was so nics, matched perfectly 🙂

    Reply
  19. Pam says

    April 8, 2012 at 10:03 am

    I am coveting your turquoise mixer! Mine is red, but can I justify having more than one? Probably not. Thanks for the great tutorial, I love things with rick-rack, and have some extra dish towels, so I’m going to give it a try!

    Reply
  20. Kare @ Kitchen Treaty & The Hazel Bloom says

    April 13, 2012 at 9:35 am

    I adore these (and all your other aqua accents)! I’m inspired to make my own. Thanks. 🙂

    Reply
  21. Kare @ Kitchen Treaty & The Hazel Bloom says

    April 13, 2012 at 9:35 am

    I adore these (and all your other aqua accents)! I’m inspired to make my own. Thanks. 🙂

    Reply
  22. Kare @ Kitchen Treaty & The Hazel Bloom says

    April 13, 2012 at 9:35 am

    I adore these (and all your other aqua accents)! I’m inspired to make my own. Thanks. 🙂

    Reply
  23. Nany says

    August 10, 2012 at 4:07 pm

    that beautiful and easy to make! thank!

    Reply
  24. herzlichgern.de says

    April 7, 2013 at 1:58 am

    this is so very pretty!!!!! :O)
    Could you please tell me the name or the designer of that aqua fabric with cups?
    Love,
    Claudi

    Reply

Leave a Reply Cancel reply

Your email address will not be published. Required fields are marked *

  • Email
  • Facebook
  • Instagram
  • Pinterest
  • Twitter
Follow on Bloglovin

My Book

Instagram

Are you a button lover? I love to collect vintage Are you a button lover? I love to collect vintage haberdashery and notions, but buttons and wooden cotton reels are my favourites! I especially love old buttons on their original cards. I try and incorporate my collection in my sewing photos.

Tell me in the comments what vintage haberdashery treasures you have in your sewing room. 

I have written a resource guide for lovers of vintage haberdashery. The link is listed in our profile. I hope you will check it out!

#vintagenotions #vintagebuttons #vintagehaberdashery #vintagehaberdasheryandfancygoods #buttonlover #nodtonotions #cottonreelcollection #aspoonfulofsugardesigns #aspoonfulsugar #buttons
{FPP Friday} Twisted Log Cabin Foundation Paper Pi {FPP Friday} Twisted Log Cabin Foundation Paper Piecing Quilt Block in 5 sizes

Gather you favourite scraps and make these addictive Twisted Log Cabin Blocks. They include 5 handy sizes and a colouring sheet so you can plan out the layout for your project. These would be fun to add to a bag, mini quilt, pillow, table runner and more!

Pattern Details: Twisted Log Cabin Quilt Block is available in our Pattern Store and Etsy Shop for immediate download. Store links are in our profile.

#aspoonfulofsugardesigns #aspoonfulsugar #sewistsofinstagram #sewsewsew #sewfun #quiltersofinstagram #quilting #scrapsewing #fpp #foundationpaperpiecing #quiltblock #sewingismytherapy
If you are looking for fun and easy Halloween sewi If you are looking for fun and easy Halloween sewing projects, you might want to check out our Top Halloween Sewing Projects blog post. I have compiled a list of 13 top Halloween sewing projects that are perfect for beginners and experts alike. You will find patterns and free tutorials for making cute and spooky items to decorate your home or to give as gifts. Hope you have a happy and crafty Halloween. 

1. Halloween Sewing Projects
2. Dresden Placemat
3. Hexie Garden Pouch
4. Pumpkin Patch
5. Ghoster Coaster
6. Halloween Cottage

Pattern Details: Head to the link in our profile to head to read our srticle on Halloween Sewing and see our top Beginner friendly patterns.

#aspoonfulofsugardesigns #aspoonfulsugar #Halloweensewing
#Halloween projects
#maker
#Makersgonnamake
{Pattern of the Week} Spooky Shack Sack is this we {Pattern of the Week} Spooky Shack Sack is this week's Pattern of the week and is 25% off the full price. These cute and spooky drawstring bags are ideal for trick or treating. They also encourage imaginative play with children and can be used to hold small toys.

Pattern Details: Spooky Shack Sack PDF Sewing Pattern is available in both our Pattern Shop and Etsy Store. Store links are in our profile.

#spookyshacksack #aspoonfulofsugardesigns #aspoonfulsugar #bagstosew #sewfun #sewsewsew #sewingpattern #sewistsofinstagram #drawstringbag #pouchmaker
Load More… Follow on Instagram

Featured Pattern

Travel Sewing Kit Pattern

Featured Tutorial

Retro Drawstring Bag

Featured Recipe

Lemon Pound Cake


A Spoonful of Sugar on Etsy

Categories

Archives

Connect

  • Email
  • Facebook
  • Instagram
  • Pinterest
  • Twitter

Popular Posts

  • Fall Sewing Projects: Cosy and Colourful Projects for your Home
  • Woodland Wonder Quilt Block
  • The Ultimate Resource for Vintage Haberdashery Lovers
  • Handy Guide to Quilt Sizes
  • Rotary Cutter Sewing Tool Pouch
  • Sunburst Quilt Block
  • Flower Sugar Pouches

Copyright © 2023 - Powered by Genesis Framework and a Creative Life - Designed by: Bellano Web Studio - Log in