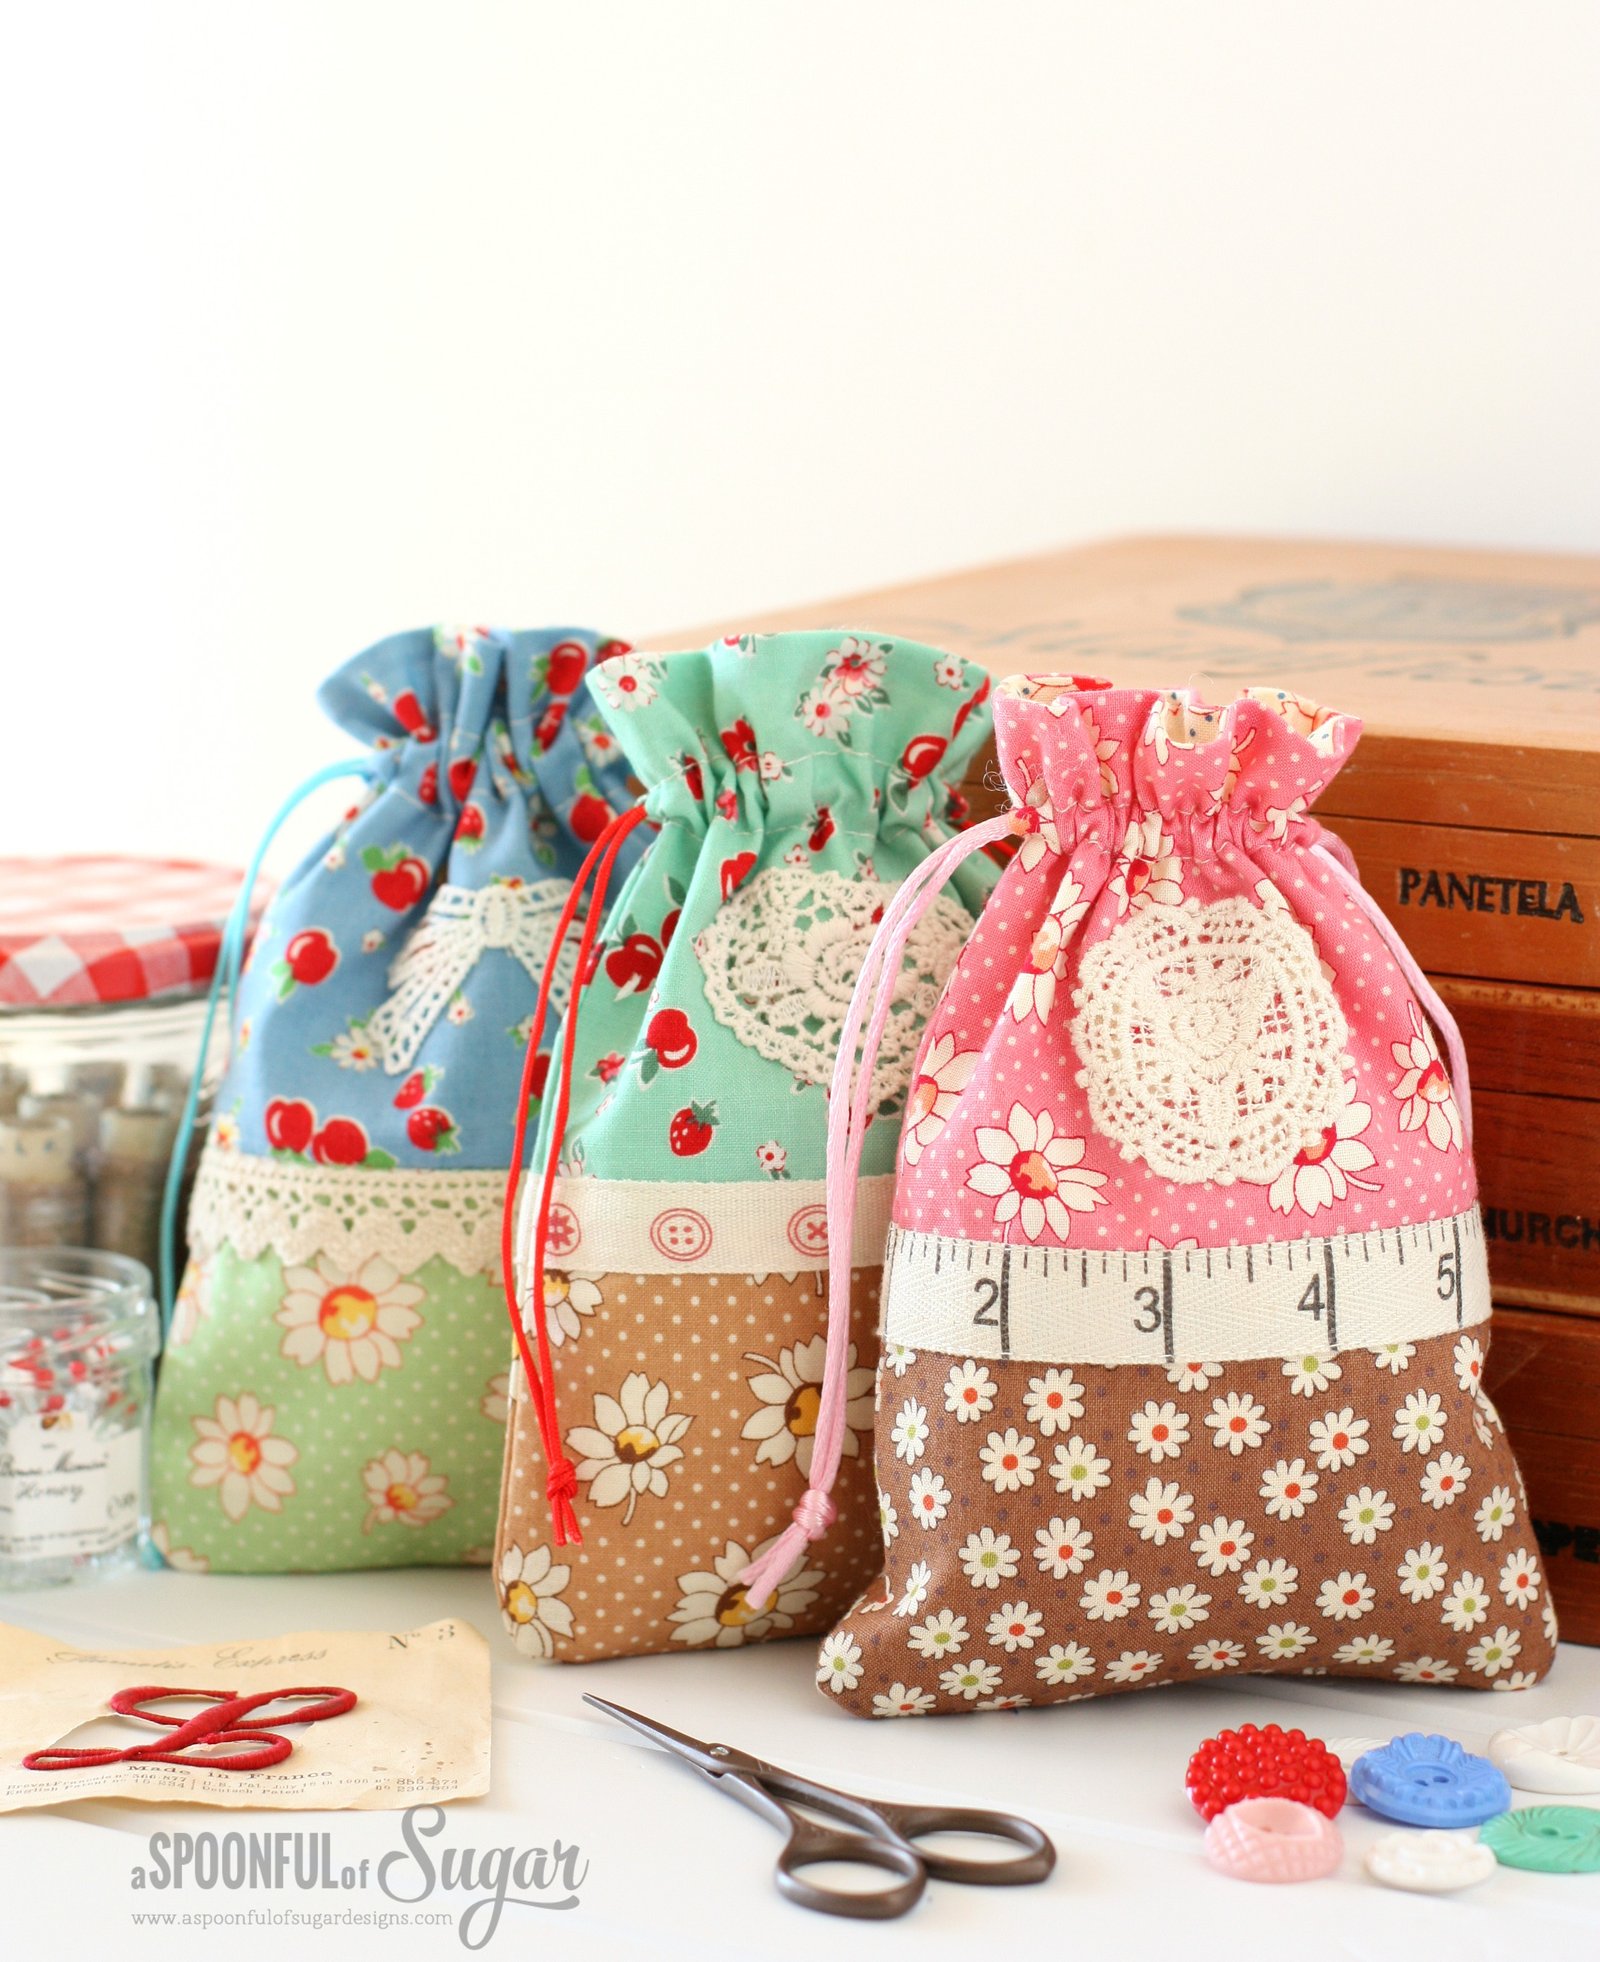
 Retro Drawstring Bags are a fun project to use your favourite stash fabrics. I love a quick sewing project that provides an opportunity to combine different fabrics and trims. I needed a couple of small gift bags for upcoming birthdays. The Retro Drawstring Bags were so much fun to make and a brilliant way to incorporate those treasured scraps and lace motifs into a project. I used fabrics from the Retro 30’s Child Smile Spring 2016 Collection by Lecien fabrics, but any small-scale prints would work in this project.

These lined drawstring bags measure 4 1/2 x 6 1/2 inches. They feature two co-ordinating prints on the outside of the bag separated by lace/trim. A lace motif has been added to the centre front for added interest. You can find lace motifs on Etsy (search for “lace motif”) or you can add a small patch or iron-on applique.

Pink and brown always work so well together and remind me of Neopolitan Ice-Cream. Vary the scale on the prints.

I love small fruity prints like this sweet print featuring apples, strawberries, and blossoms. I picked up this button trim on a holiday in Japan a few years ago – I love collecting supplies on my travels.

I love my Vintage French Mother of Pearl Buttons – old haberdashery supplies have so much history!
If you would like to make your own Retro Drawstring Bags, here are some instructions to get you started. Drawstring bags are an easy project. Due to their size, these ones are a little more fiddly when sewing the channel for the drawstring.
Materials (for one bag):
- Fabric 1: Cut 2 rectangles measuring 5 x 3 1/4 inches
- Fabric 2: Cut 2 rectangles measuring 5 x 4 1/4 inches
- Fabric 3: Cut 2 rectangles measuring 5 x 7 inches
- Trim or lace: 12 inches
- Cord: 30 inches
- Lace motif

Method:
- Place Fabric 1 and 2 together with the right sides facing, and one 5 inch edge aligned. Stitch together using a 1/4 inch seam allowance. Press seam open. Repeat for the other Fabric 1 and 2 pieces.
- Position the trim so that it is covering the seam between Fabric 1 and 2. Pin the trim in place and then stitch along both edges to secure. Repeat for the front and back of the bag.


3. Pin the front and back of the bag together with the right sides facing as shown. With a pin, mark 1 inch down from the top edge, and 1 1/2 inches down from the top edge as shown on the photo below.
4. Using a large cotton reel as a template, trace a rounded corner on both bottom corners and cut along the curved line to give the bag a rounded bottom.

5. Starting at one top edge, sew the sides and bottom of the bag. Leave a gap on each side between the pins. This will become the channel for the drawstring. Press and turn the bag.
6. Round the bottom corners of the lining. Stitch the lining together as shown, leaving a 1 1/2- 2 inch gap in the bottom for turning. (as shown by the pins in the image below).

7. Position the exterior of the bag inside the lining so that the right sides are facing and the top edge of the bag is aligned. Stitch around the top edge of the bag using 1/4 inch seam allowance. Carefully turn the bag out the right way through the gap in the lining. Press. Hand stitch the gap in the lining closed.
8. To stitch the channel for the drawstring, stitch around the top of the bag, 3/4 inch from the top edge. Sew slowly and keep manipulating the fabric. Sew a second line 1 1/4 inches from the top edge. Use the seam guide on your sewing machine throat plate as a guide or alternatively mark the line with a water soluble marker or hera marker.
9. Cut the cord in two pieces. Using a small safety pin, thread the cord through the gap in the side seam. Thread it right around the bag and out the same side. Repeat on the other side with the other piece of cord. Tie the ends of the cord and trim the ends.

10. Hand stitch the lace motif to the centre front of the bag. (You could also attach this at Step 2 if you prefer).

The options for embellishing these little Retro Drawstring Bags are endless. They are perfectly sized to hold small gifts or supplies. I love to use them to hold gift cards or small items of jewellery. Be warned – it is hard to stop at one! They are multiplying in my sewing room.
Check out our Christmas Retro Drawstring Bag, a variation of the Retro Drawstring Bag.
Hello! Are you new here? If so, be sure to sign up for our newsletter here and receive a bonus sewing pattern and welcome discount. Our newsletter includes free tutorials, articles, and new patterns. Welcome to the world of sewing enthusiasts.







Do you close the lining gap? If so when it didnot say. Some small gift,tags on cord with a,word desciribing inside gift or name of person getting gift or a “handmade,by “??” For “you” all hand stiched or marker for,type of tag.
Hi Gina – lovely idea to incorporate a gift tag – might do this on the ones i am making for Christmas.
Hello Lisa & Sarah
Your creations are one of a kind this I know comes from the Lord, I’m very delighted that I came across
your site.. Greaty appreciate youe work. Greeting from USA Maine. Sincerely, Lynn Laf
In #6.
Just lovely, thank you so much for the tutorial. x
You are very welcome Kay! Thanks so much for stopping by and have wonderful week.
Want to thank you for excepting me. An this bag is Awesome
Always read through your beautiful blog, I just L?Ve it! 🙂 thank you for sharing all your wonderful ideas, I just recently made a gaggle of sachet pillows for a friend, and have a get together coming up that I will incorporate one of these beautiful bags. We are stamping cards, some seasoned scampers and some new scampers and thought how perfect to give them each a bag to take home their treasures in! ??thank you so very much!
Thanks so much Annie – what a lovely idea to give your friends theses at your next card making gathering. have a wonderful week.
These are so cute! Are going to be perfect as packaging for Christmas gifts – hmm, need some Christmassy fabric! Thanks as always for another great project. x
So pretty and original, Lisa 🙂 thanks! I love your tutorials; I really must think of an occasion to make one of this for
So nice pouch! Fabric and design are excellent. Thanks a lot!
Thanks Lya – they are so much fun to make!
These are just so lovely! I can see why it’d be hard to stop making these….they are adorable! Thanks for sharing 😉
Thanks Michelle for your sweet message – I have plans for more! Enjoy your week.
such a loveley tutorial, i sew four little bags efter your pattern :0)
perhaps will you take a look on it on my blog?
Greetings from denmark
Ulrike
These bags are gorgeous and I adore your photography & styling! I’m a newbie blogger on dressmaking and your photos have inspired me to find some stylish ‘props’! Thank you.
Thanks Maxine – I love vintage haberdashery and I enjoy adding some of my treasures to my photos.
I love them, thanks so much for the tutorial
These are just lovely!!!
I cut per pattern, but my lining is much larger than bag exterior. Anyone else have this problem?
Maybe your measurements are off or you were not following the sewing allowance guideline. I just did this bag and it turned out very pretty. 🙂
Girly Dice Bags!!!!!!! <3
Thank you so much for posting this tutorial. I made a dozen of these litlle bags & filled them with Ferrero Roche chocolates for my husband to give to the ladies at work for Xmas. They were a great hit!
I think I might be making more at Easter for my granddaughters;)
Thanks for this great tutorial. Your bags are so pretty and cute. I am looking for ideas to make bags for the “Hope in a Suitcase” scheme for foster-care children and I think these drawstring bags would be perfect for either girls or boys.
THANK YOU for telling me about HOPE IN A SUITCASE! I looked it up online and now I’m really excited about helping!
Great bag to store small hand sanitizer and mask! Hang on backpack, purse, and keep in car.
I have been sewing different types of gift bags for years and want to find patterns that are pretty but do together quickly. This pattern is PERFECT. Thank you so much. I will be checking in regularly for other ideas.
^–^
>k< Stay healthy and sew!
Kate
Oh WOW these are just the most delightful little bags. Brilliant gift ideas for Christmas, birthdays & other special dates throughout the year. They’d be perfect for making those end of year ‘teacher’ gifts 🙂 Brilliant 🙂 Thank you for sharing your tutorial.
Is there a written tutorial for the Retro Drawstring Bags that is more consolidated than printing all of these pages?
I would love to make some, but would like written instructions.
Hi Betty – this is a free tutorial and as such is not formatted for printing. I do sell many PDF Patterns for similar projects in my Pattern store which have full sized templates and are more professionally presented. shop.aspoonfulofsugardesigns.com
Thanks for this pattern. The little bags are so cute and I found the tutorial very easy to follow.
Do I have permission to make some bags to sell on a stall to raise funds for charity?
You are welcome to make and sell in small quantities. I would appreciate that you marketed it as made from a pattern by A Spoonful of Sugar Designs.
Thank you Spoonful of Sugar. I will definitely credit you.
Thank you for the patterns & tutorials you share. They are always welcome.
Your items are always so cute an direction are great
Enjoy !!
Thanks so much Ellen! Happy sewing.
Eu amo saquinhos, acho tão úteis para organizar e os seus ficaram tão lindos, com uma combinação de cores harmoniosa. Parabéns!
So sweet. Thanks for sharing the step-by-step.