A Spoonful of Sugar

Make. Bake. Create.

Menu
  • Home
  • About
    • About Us
    • Press
    • FAQ
    • Disclosure Policy
    • Contact Us
  • Crafts
    • Crochet
    • DIY
    • Embroidery/Cross stitch
    • Gift Wrapping
    • Knitting
    • Miscellaneous
    • Paper Crafts
  • Holidays
    • New Year’s
    • Australia Day
    • Back to School
    • Valentines Day
    • Easter
    • ANZAC Day
    • Mother’s Day
    • Father’s Day
    • Halloween
    • Christmas
  • Recipes
    • Appetizers
    • Bars & Slices
    • Bread & Pastries
    • Cakes
    • Cookies
    • Confectionery
    • Cupcakes & Muffins
    • Desserts
    • Drinks
    • Ice Cream
    • Jams/Preserves
    • Main Meals
  • Sewing
    • Sewing Tutorials
    • Quilting
    • Sewing & Quilting Patterns
  • Family
    • Back to School
    • Family Fun
    • Our Home
    • Parenting
    • Travel
  • Shop
    • Pattern Store
    • Etsy Store

Classic Vanilla Cupcakes

May 9, 2012 By A Spoonful of Sugar - 16 Comments

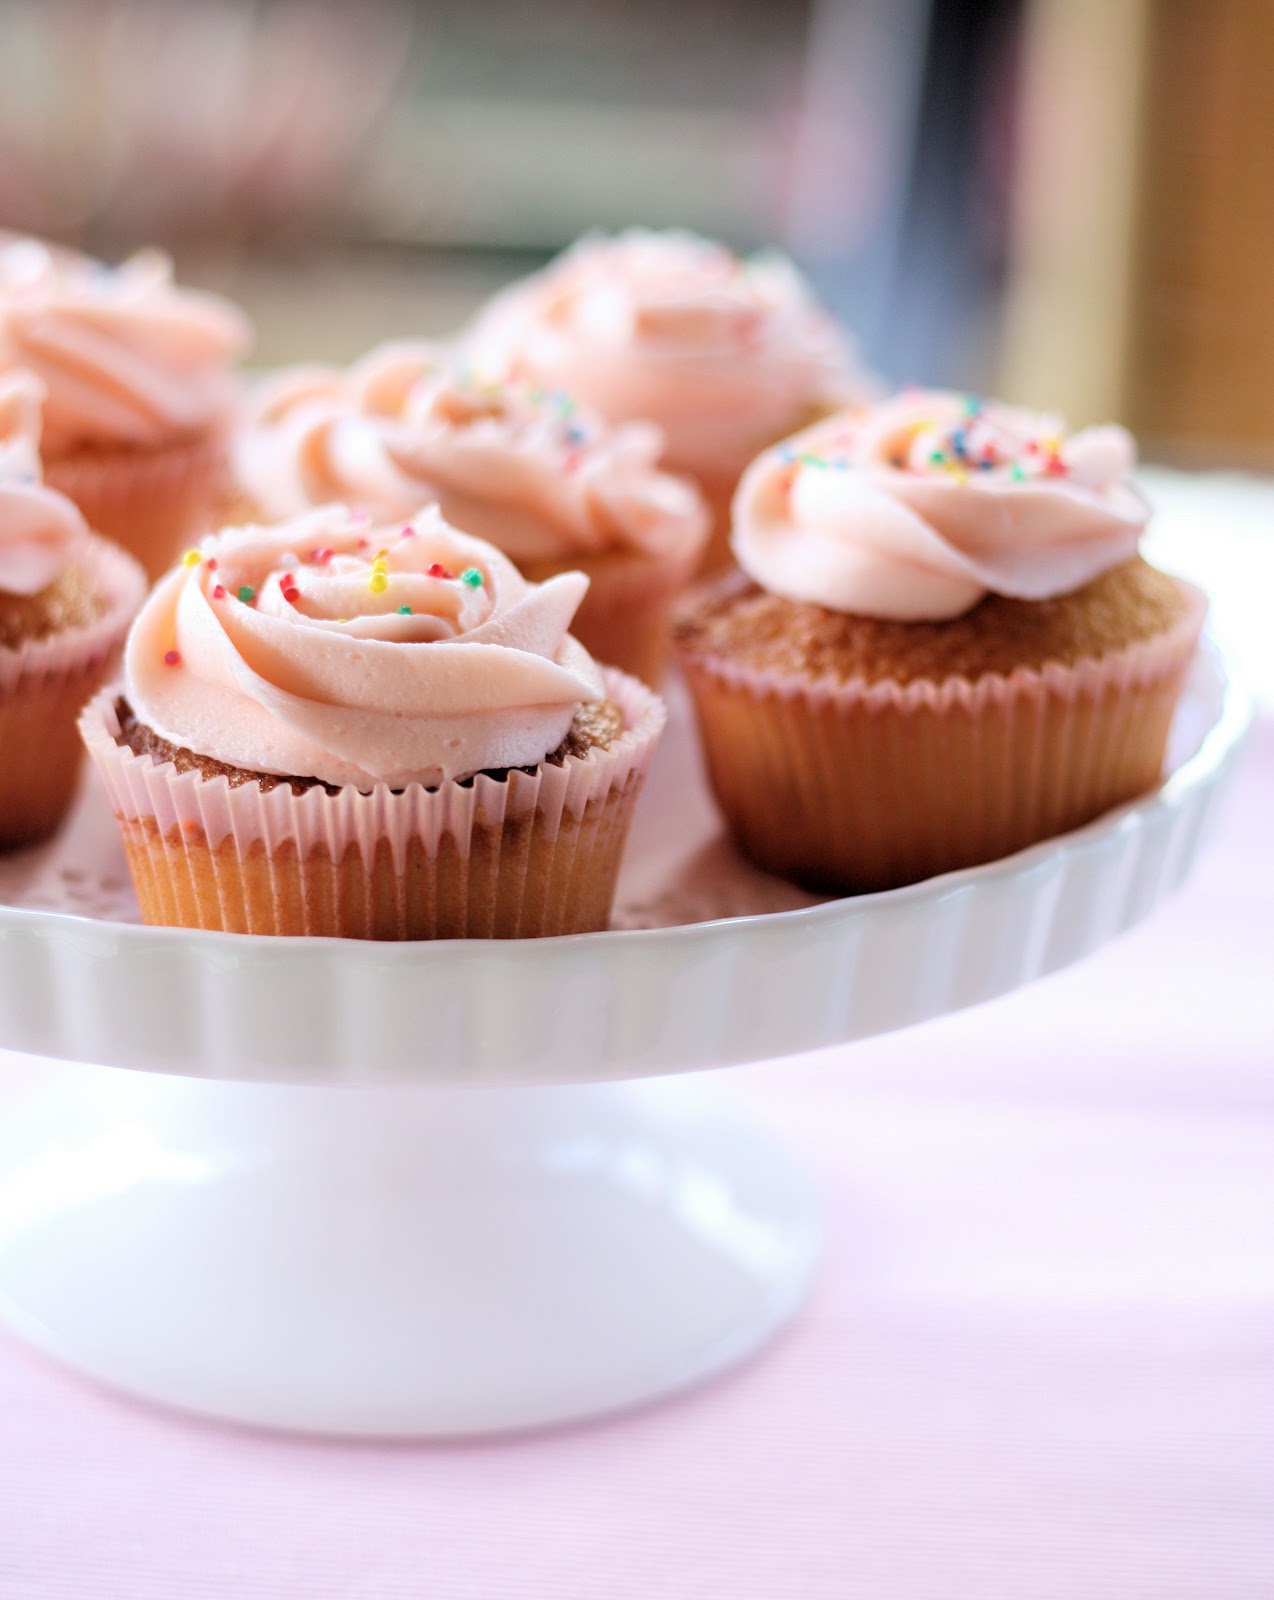
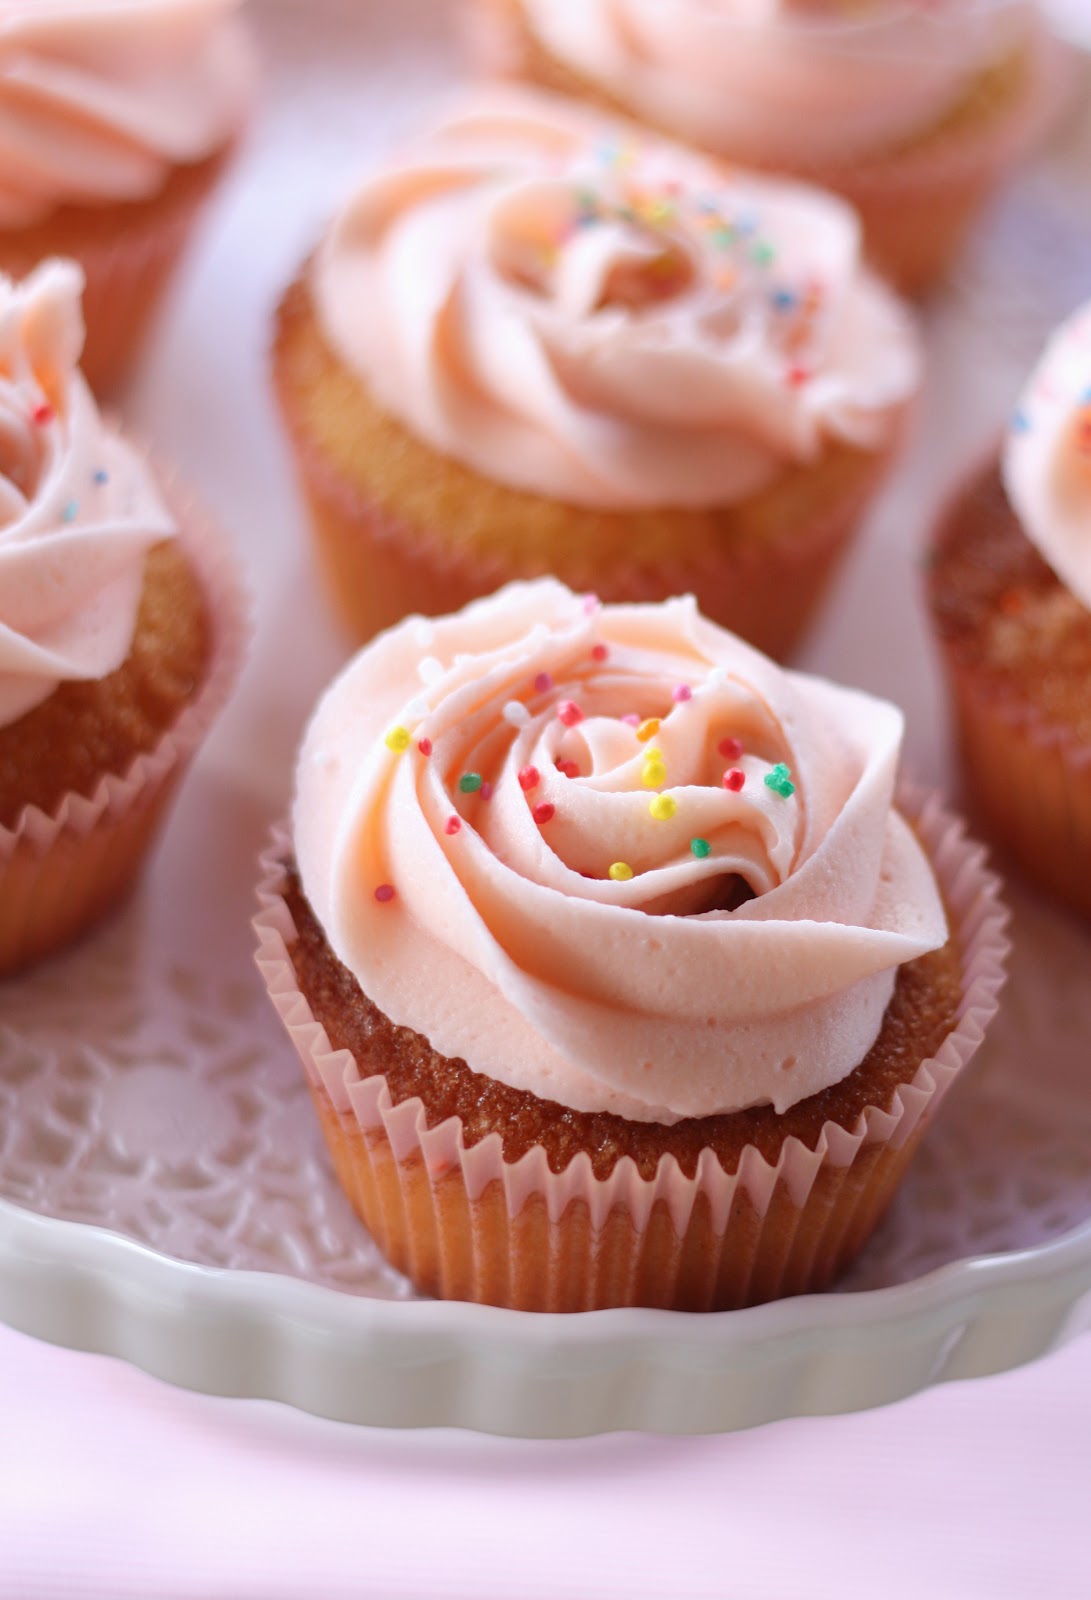
To celebrate my birthday last weekend, Sarah made up a batch of delicious Vanilla Cupcakes with a Buttercream Frosting. She used the Wilton 2D Decorating Tip to make the lovely swirls.

Vanilla Cupcakes (makes 18)


Cupcakes:
Ingredients:
  • 1 1/8 cups self-raising flour
  • 1  cup plain (all-purpose) flour
  • 3/4 cup (1 1/2 sticks) unsalted butter, softened
  • 1 1/2 cups sugar
  • 3 large eggs, at room temperature
  • 3/4 cup milk
  • 1 teaspoon vanilla bean paste (or vanilla extract)

Method:
Preheat oven to 180 deg C (350 degrees F).
Line muffin tins with cupcake liners.
In a small bowl, combine the flours. Set aside.
In a large bowl, on the medium speed of an electric mixer, cream the butter until smooth. Add the sugar gradually and beat until fluffy, about 3 minutes. Add the eggs, 1 at a time, beating well after each addition. Add the dry ingredients in 3 parts, alternating with the milk and vanilla. With each addition, beat until the ingredients are incorporated but do not over beat. Using a rubber spatula, scrape down the batter in the bowl to make sure the ingredients are well blended. Carefully spoon the batter into the cupcake liners, filling them about 3/4 full. Bake for 20 to 25 minutes, or until a cake tester inserted into the center of the cupcake comes out clean.
Cool the cupcakes in tins for 15 minutes. Remove from the tins and cool completely on a wire rack before icing.

Frosting:
Ingredients:
125 g butter (1 stick), softened
3 cups icing (confectioners sugar)
2 – 4 tablespoons milk
1 teaspoon vanilla
pink food colouring
sprinkles

Method:
Place the butter in a large mixing bowl and on medium speed of an electric mixer beat until smooth. Add  the sugar, 2 tablespoons of milk, and vanilla. Beat until smooth and creamy, about 5-7 minutes. Gradually add the remaining milk or until the icing is thick enough to be of good spreading consistency. Add a few drops of food coloring and mix thoroughly. 

Place icing in piping bag with 2D Tip. Pipe swirls onto cupcakes and add sprinkles as desired.

Thanks Sarah for the fabulous cupcakes!

Filed Under: Cupcakes & Muffins, Recipes Tagged With: vanilla

« Flower Tape Measure
Home Sweet Home – A Mothers Day Project »

Comments

  1. Heleen Groot says

    May 9, 2012 at 1:56 am

    Talk about a HAPPY (if belated) BIRTHDAY! The cakes look amazing!

    Reply
  2. Ely says

    May 9, 2012 at 2:16 am

    Mmmmmm gnam gnam! ^_^

    Reply
  3. Christy says

    May 9, 2012 at 2:35 am

    very pretty cupcakes!

    Reply
  4. notyet100 says

    May 9, 2012 at 2:47 am

    I luv vanilla cupcakes and they look yum,,,:) belated birthday wisheshj

    Reply
  5. Miriam says

    May 9, 2012 at 3:05 am

    A belated Happy Birthday!!

    The cakes look yum! 🙂

    Reply
  6. Senka I says

    May 9, 2012 at 5:14 am

    Hi there,

    We’ve recently launched the site RecipesUS.com where users can search through hundreds of thousands of recipes from American food sites and food blogs.

    We noticed that you have a great number of tasty recipes on your blog (url) and we would like to suggest you have a look at our Top Food Blogs section here: http://www.recipesus.com/top-food-blogs

    If you want to add your food blog to the list and have your recipes indexed on RecipesUS.com, all you have to do is follow the instructions here: http://www.recipesus.com/add-your-food-blog

    Our concept is already live in Sweden, Denmark, Norway and Spain, and we deliver thousands of visitors to food blogs daily. Some of the top food blogs receive 20,000+ visitors from us on a weekly basis.

    Hopefully your food blog will be up there in the top!

    Warm regards,
    Senka
    RecipesUS.com, Hittarecept.se, Findeopskrifter.dk, Alleoppskrifter.no, Todareceta.es

    Reply
  7. Thimbleanna says

    May 9, 2012 at 5:55 am

    They look amazing Lisa — Happy Belated Birthday!

    Reply
  8. Terriaw says

    May 9, 2012 at 6:41 am

    Happy belated birthday to you! How wonderful to be treated with such lovely homemade cupcakes. Sara always frosts and decorates so beautifully.

    Reply
  9. Laura says

    May 9, 2012 at 10:32 am

    OMNOMS! <3

    Reply
  10. Fiona @ Dragonfly-Crafts says

    May 10, 2012 at 2:40 am

    Yum Yum, happy belated birthday too 🙂

    Reply
  11. herzlichgern.de says

    May 9, 2012 at 10:56 pm

    Happy Birthday!!!!!!! Hope, you had a wonderful Birthday!
    The Cupcakes look very very nice! Yummi!!!
    Love
    Claudi

    Reply
  12. Cybele's patch says

    May 10, 2012 at 2:57 am

    Happy Birthday dear Lisa. Hope you had a wonderful day.
    Thank you for sharing all those lovely projects with us.

    Reply
  13. Linda says

    May 10, 2012 at 6:05 am

    Happy belated birthday Lisa, the cup cakes look delicious.
    Xx

    Reply
  14. Pencil Kitchen says

    May 10, 2012 at 1:45 pm

    Happy Belated Birthday! So cool someone baked you such lovely cupcakes! 😀

    Reply
  15. Nurse Vicki says

    May 10, 2012 at 3:20 pm

    Happy Birthday Lisa, mine was last weekend too, Sunday to be exact. These cupcakes look yummy hope you enjoyed them and you had a great Birthday.

    Reply
  16. Wanda says

    June 13, 2012 at 9:51 am

    Oh Sarah your cupcakes look absolutely delicious! I just want to grab one and eat 😀 My frosting never sets well maybe because of the hot weather here but I will sure give it try!

    Reply

Leave a Reply Cancel reply

Your email address will not be published. Required fields are marked *

  • Email
  • Facebook
  • Instagram
  • Pinterest
  • Threads
  • TikTok
SUBSCRIBE TO NEWSLETTER
×

Categories

Archives

PURCHASE PDF PATTERNS

We offer over 100 affordable PDF sewing patterns available for download from our store website or Etsy store. Each pattern includes detailed instructions, numerous photos, and templates.

WEB STORE ETSY STORE

Instagram

The Scrappy Strips Pouch is one of my favourite wa The Scrappy Strips Pouch is one of my favourite ways to use up leftover fabric strings. Today’s version is made from patchwork strips — a fun, relaxing sew that turns scraps into something beautiful and practical.The Scrappy Strips Pouch pattern has two versions - patchwork strings and selvedges - and two sizes. Comment SELVEDGE (or SELVAGE) for a link to the pattern.Pattern Details: Scrappy Strips Pouch Sewing Pattern is in our Pattern Store and Etsy Shop.#ScrappyStripsPouch #ScrapBustingSewing #PatchworkPouch #StringQuilting #SewingProjects
If you’ve ever wanted to add eyelets or grommets t If you’ve ever wanted to add eyelets or grommets to your sewing projects, here’s a quick look at how I install them using my DK93 snap press. It’s the same tool I use for snaps — and it makes installing eyelets beautifully quick and consistent.Here’s how I install the eyelets:Punch out the four holes using a hole‑cutting die.Place the eyelet into the hole.Press it into place using the snap press.That’s it — simple, sturdy, and it gives the Ribbon Pouch such an elevated, professional finish. I love how clean and secure the result is.Fabric shown: Tilda Something Blue, releasing June 1 — thank you @tilda_australia for the beautiful fabric.✨ If you’d like the Ribbon Pouch pattern (3 sizes), comment RIBBON and I’ll send the link straight to you.Ribbon Pouch Sewing Pattern: available in my Pattern Store and Etsy Shop (links in profile).#tildasomethingblue #tildafabric #sewingtips #handmadeeveryday #sewingtools
The Ribbon Pouch is one of my favourite quick‑to‑s The Ribbon Pouch is one of my favourite quick‑to‑sew gift bags, and I couldn’t resist making a light and dark version using the new Tilda Something Blue collection. Both pouches use the same print in different colourways — such a pretty way to show how fabric choice changes the whole mood.They’re finished with satin ribbon threaded through grommets, and topped with a tiny star tag. The boxed base helps them stand beautifully, and the ribbon closure makes them perfect for birthdays, thank‑you gifts, treats, or little treasures.This is a beginner‑friendly, scrap‑friendly, quick project you’ll want to sew again and again. Pattern includes 3 sizes.If you’d like the pattern, comment RIBBON and I’ll send the link straight to you.Pattern Details: Ribbon Pouch (3 Sizes) available in my Pattern Store and Etsy Shop.Fabric Details: Tilda Something Blue - releasing on 1 June 2026. Thanks to @tilda_australia#TildaSomethingBlue #TildaFabric #SewingPattern #BeginnerSewingProject #QuickSewingProject   
Sewing with scraps is one of my favourite ways to Sewing with scraps is one of my favourite ways to get creative — small pieces, leftover corners, charm‑square offcuts… they all have so much potential.Here are 10 scrap‑friendly projects that use small pieces beautifully. They’re quick to sew, beginner‑friendly, and perfect for gifting ✂️✨Save this for the next time you want to turn your scraps into something pretty.Which one would you sew first?  Tell me in the comments — I love seeing what you’re making.Patterns are available in my pattern store (link in profile) or comment PATTERNS and I will send you the link. #scrapsewing #scrapbusting #scrapfriendly #sewinginspiration #sewingideas
I save every selvedge (or selvage) — the colour do I save every selvedge (or selvage) — the colour dots, the tiny prints, the designer names… they’re too pretty to throw away.Here’s how I turn them into something useful:
• lay them diagonally on a square of fusible interfacing
• overlap slightly
• stitch close to the printed edge
• keep building until you have a panelIt’s such a fun way to use scraps and create something totally unique ✂️✨If you’d like the Scrappy Strips Pouch pattern, comment SELVEDGE or SELVAGE and I’ll send you the link.Pattern Details: Scrappy Strips Pouch Pattern is available in my Pattern Store and Etsy Shop.#scrappystripspouch #selvage #scrapbuster #sewingcommunity #sewingtip
A little Something Blue for tonight’s sewing sessi A little Something Blue for tonight’s sewing session 💙I’m packing my Makers Caddy with supplies for my next project — fabric, thread, tassels, lavender… I can’t wait to share it with you soon.There’s something so calming about soft blues, tidy supplies, and a project all ready to go — it makes the whole sewing process feel extra special.Hope this brings a little mid‑week inspiration to your feed ✂️✨If you’d like the link to the Makers Caddy, comment CADDY and I’ll send it to you.Fabric: Tilda Something Blue with thanks to @tilda_australiaPattern Details: Makers Caddy Sewing Pattern - available in our Pattern Store and Etsy Shop.#tildasomethingblue #ilovetilda #sewingcommunity #tildaaustralia #sewingpattern
Follow on Instagram

Featured Pattern

Travel Sewing Kit Pattern

Featured Tutorial

Retro Drawstring Bag

Featured Recipe

Lemon Pound Cake

Connect

  • Email
  • Facebook
  • Instagram
  • Pinterest
  • Threads
  • TikTok
SUBSCRIBE TO NEWSLETTER
×

Popular Posts

  • Cord Cosy
  • Tips for Threading a Needle
  • Travel Accessories to Sew
  • Liberty Tissue Cover
  • Charm Square Fabric Tray
  • Happy Scrappy Cards
  • Crocheted Scarf {Free Pattern}

Copyright © 2026 Lisa. K. Cox - A Spoonful of Sugar