A Spoonful of Sugar

Make. Bake. Create.

Menu
  • Home
  • About
    • About Us
    • Press
    • FAQ
    • Disclosure Policy
    • Contact Us
  • Crafts
    • Crochet
    • DIY
    • Embroidery/Cross stitch
    • Gift Wrapping
    • Knitting
    • Miscellaneous
    • Paper Crafts
  • Holidays
    • New Year’s
    • Australia Day
    • Back to School
    • Valentines Day
    • Easter
    • ANZAC Day
    • Mother’s Day
    • Father’s Day
    • Halloween
    • Christmas
  • Recipes
    • Appetizers
    • Bars & Slices
    • Bread & Pastries
    • Cakes
    • Cookies
    • Confectionery
    • Cupcakes & Muffins
    • Desserts
    • Drinks
    • Ice Cream
    • Jams/Preserves
    • Main Meals
  • Sewing
    • Sewing Tutorials
    • Quilting
    • Sewing & Quilting Patterns
  • Family
    • Back to School
    • Family Fun
    • Our Home
    • Parenting
    • Travel
  • Shop
    • Pattern Store
    • Etsy Store

Jam Recipe

January 7, 2012 By Spoonful of Sugar - 14 Comments

I usually make jam the traditional way but have been keen to try out jam making in the breadmaker. My breadmaker machine is an older style Breville Baker’s oven (approx 15 years old), and from my research it looks like most breadmakers these days have a jam setting.

The recipe is easy:

400g chopped/diced fruit of your choice
1 – 1 1/3 cups of sugar, depending on the pectin level of the fruit
1 3/4 tablespoons Jam Setta *

*Jam Setta is a jam setting mixture which contains the ingredient pectin which is usually naturally occurring in fresh fruit. It is the pectin in fruit which when cooked produces a gel. The addition of Jam Setta to bread making jam ensures a thicker setting action. It is available in supermarkets.

Follow the instructions on your breadmaker manual. On mine, there is a Jam Mode that is selected on the control panel, and then the breadmaker firstly heated the ingredients for 15 minutes, and then the jam was heated and mixed for approx 50 minutes. When cooked, pour the hot jam into hot sterilised jars and seal immediately. The jam thickens upon cooling and storage.

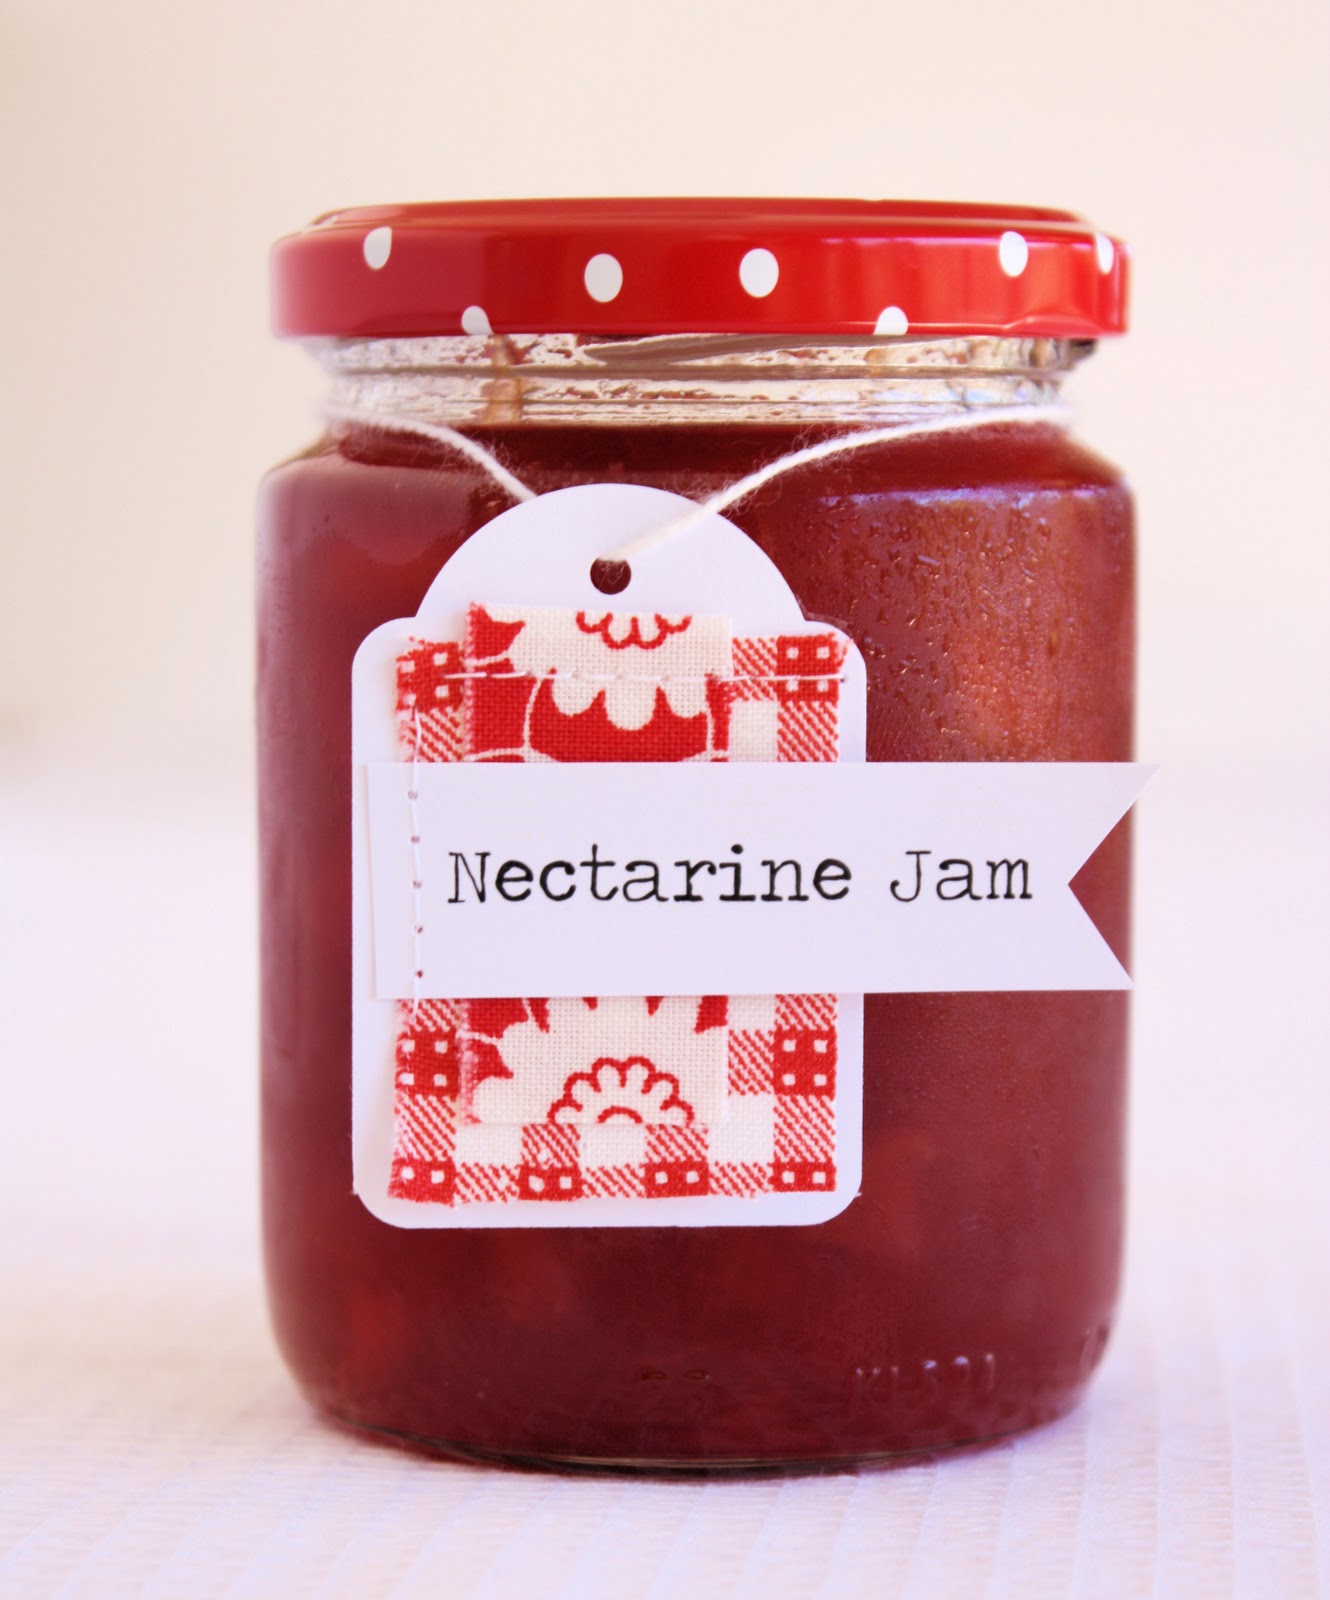
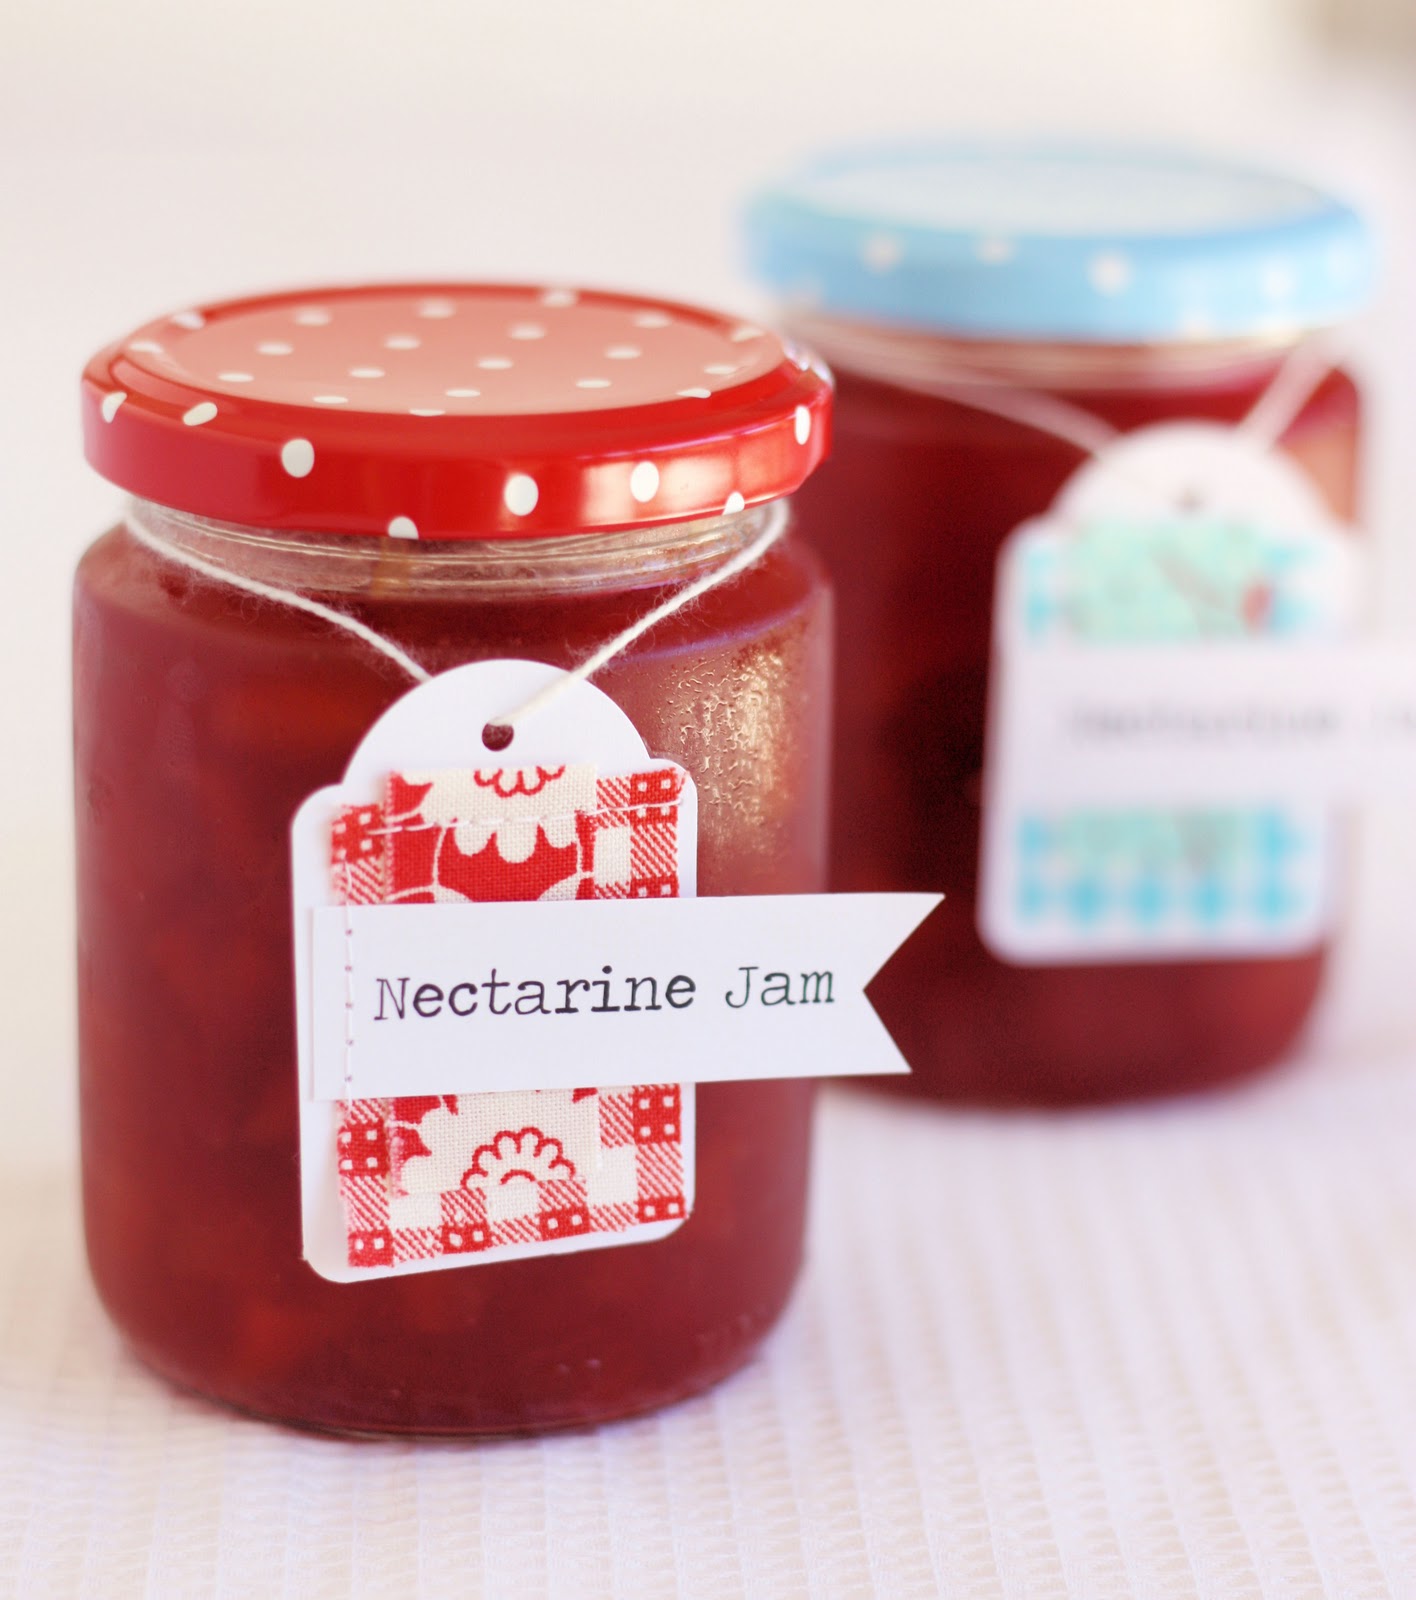
I used nectarines to produce a delicious Nectarine Jam – one of my favourites. At this time of year in Australia, nectarines are plentiful and cheap. It will mean we can have the taste of summer later in the year. You can find my other recipe for nectarine jam made the traditional way here.

Overall, I found the jam making to be quicker, easier and a less messy process in the breadmaker. I didn’t have to stand by the stove, stirring the pot regularly, and testing the mixture to see if it had reached the “gel” stage. However, the recipe only yielded two small jars, a much smaller quantity than I usually make. It would be great if you only wanted to make up small batches at a time.

I made up some fabric tags to label the jam (refer to our Scrap Buster Gift Tags).

What is your favourite type of jam to make? Which method do you prefer?

Edit: I bought the polka dotted jar lids from Lark last year – they are no longer in stock.

For your daily sugar fix you can subscribe or follow us on facebook, twitter, and google plus.

Filed Under: Jams/Preserves Tagged With: fruit, nectarine

« Flourless Chocolate Cake
Dust Cover »

Comments

  1. Linda says

    January 8, 2012 at 7:52 am

    I always make my jam in the bread maker. I have a breville as well how ever I usually get 4 jars. I have never made nectarine jam though ,I will give this a go.

    Reply
  2. Chocolate Cat says

    January 8, 2012 at 11:17 am

    I’ve never heard of making jam in the bread maker before, I am going to have to pull ours out and have a look! sounds nice and easy! I love the sound of nectarine jam!!

    Reply
  3. Stephanie says

    January 8, 2012 at 1:45 pm

    I’ve never made jam. I’m lucky to have jam making friends. Most recently I’m using a jar of Peach Habernaro with the fruit and peppers grown in my friends yard.

    Reply
  4. Melita says

    January 8, 2012 at 4:00 pm

    Sounds nice and easy! Where did the cute jars come from?

    Reply
  5. Anonymous says

    January 8, 2012 at 4:31 pm

    I’ve had my machine 10 years and never knew it could make jam! I just checked and there are several recipes in my owners manual. I cant wait to make some. Thanks for the info!

    Reply
  6. Jill says

    January 8, 2012 at 5:44 pm

    Jam in a bread maker! Wow! I’ve never heard of that! I’ve never made it myself, but remember each year my dad used to make marmalade – and spend hours in the kitchen with it bubbling!

    Thanks for linking to a Round Tuit!
    Hope you have a fabulous week!
    Jill @ Creating my way to Success
    http://www.jembellish.blogspot.com/

    Reply
  7. Nat @ dear little house says

    January 8, 2012 at 7:27 pm

    I’m about to try making jam for the first time, I don’t have a bread maker so I guess I’ll have to do it the old fashioned way 🙂

    Reply
  8. Mego says

    January 8, 2012 at 7:40 pm

    OH MY! Not only does it sound delicious in LOOKS fabulous! LOVE the jars! Over here in Seattle we are in the dead of winter and the look like bits of sunshine!!!

    Reply
  9. Lenna Green of Stitching Cow says

    January 8, 2012 at 9:31 pm

    I also made jam on the weekend, although did it the old fashioned way.
    Love your spotty lids. Where did you get your jars from?

    Reply
  10. Danielle says

    January 9, 2012 at 9:35 am

    I love homemade Jam it is seriously way better than store bought ones. I am having a homemade Year on my blog Blissful and Domestic and would LOVE for you to link up to my Homemade Year Linky Party:)

    http://blissfulanddomestic.blogspot.com/p/my-homemade-year-linky-party.html

    Reply
  11. Thimbleanna says

    January 9, 2012 at 3:21 pm

    Wow — I didn’t know you could make jam with a bread maker — you learn something new everyday! Your little jam tags are adorable!

    Reply
  12. Shannon says

    January 11, 2012 at 3:05 pm

    Sounds delicious – and, as always, your packaging is brilliant!

    Reply
  13. Rachel says

    November 26, 2015 at 12:40 pm

    I have just tried using my ‘Jam Mode’ on my Breville bread maker this week! I’ve tried the Two Fruits Marmalade recipe that came in the manual as I had a bunch of oranges that I needed to use up. Despite my best efforts, I’ve found that it doesn’t seem to be a long enough ‘bake’ time for the peel. The peel is still quite tough to bite through

    Reply
    • A Spoonful of Sugar says

      December 1, 2015 at 8:46 pm

      Hi Rachel – Sorry to hear your marmalade was quite tough 🙁 I generally prefer the traditional way for making jam on the stove top and have only use the bread maker for softer jams, like nectarine jam. Hope you have more success next time!

      Reply

Leave a Reply Cancel reply

Your email address will not be published. Required fields are marked *

  • Email
  • Facebook
  • Instagram
  • Pinterest
  • Threads
  • TikTok
SUBSCRIBE TO NEWSLETTER
×

Categories

Archives

PURCHASE PDF PATTERNS

We offer over 100 affordable PDF sewing patterns available for download from our store website or Etsy store. Each pattern includes detailed instructions, numerous photos, and templates.

WEB STORE ETSY STORE

Instagram

I designed the Makers Caddy because I wanted a pro I designed the Makers Caddy because I wanted a project that was as practical as it was pretty. Beginner friendly construction, quick to construct, and giftable.This version shows all my favourite details: structured shape, pockets, a wide base, and those little finishing touches like the leather patch and tag. It’s simple to sew, satisfying to use, and one of the most versatile organisers in my sewing room.Comment CADDY and I’ll send you the pattern link.Pattern: Makers Caddy — available in my Pattern Store and Etsy Shop.#makerscaddy #sewingcommunity #sewingpatterns #sewingroom #aspoonfulofsugardesigns
A little drawstring bag that always comes to the r A little drawstring bag that always comes to the rescue. This one stitches up quickly, uses small cuts of fabric, and is perfect for treats, tiny gifts, or organising your sewing space. It’s one of those patterns you’ll make again and again — simple, satisfying, and endlessly useful.Comment HANDY and I’ll send you the pattern link.Pattern: Handy Drawstring Bag (3 Sizes) — available in my Pattern Store and Etsy Shop.#handydrawstringbag #sewingcommunity #scrapfriendlysewing #sewingpatterns #aspoonfulofsugardesigns
A tiny sewing kit that goes everywhere with me. I A tiny sewing kit that goes everywhere with me. I love how something so small can keep all my essentials organised — room for buttons, pins, needles, and tiny scissors. It’s a quick, scrap‑friendly project and such a handy little make for travel, retreats, everyday sewing, or gifting.Comment TRAVEL and I’ll send you the pattern link.Pattern details: Travel Sewing Kit PDF Pattern - available in my Pattern Store and Etsy Shop.#travelsewingkit #sewingorganization #scrapfriendlysewing #sewingprojects #aspoonfulofsugardesigns
A quick desk reset with my Makers Caddy — it’s ama A quick desk reset with my Makers Caddy — it’s amazing how much calmer everything feels when your favourite tools have a home. This little project is scrap‑friendly, beginner‑friendly, and one of my most‑used makes in the sewing room.Comment CADDY and I’ll send you the pattern link.Pattern Details: Makers Caddy PDF Sewing Pattern - available in my Pattern Store and Etsy Shop.#makerscaddy #sewingorganization #sewingroominspo #scrapfriendlysewing #aspoonfulofsugardesigns
🐱✨ Sleepy Cat Coaster ✨🐱 A simple, relaxing EPP pr 🐱✨ Sleepy Cat Coaster ✨🐱 A simple, relaxing EPP project that’s beginner‑friendly, scrap‑friendly, and comes together quickly. It’s a useful little make on its own and also works well as a gift‑ready set if you sew a few at once.Perfect for easing into hand sewing or using up leftover fabric in a practical way.📣 Comment SLEEPY below and I’ll send you the pattern link 🧵Pattern: Sleepy Cat Coaster Sewing Pattern - available in my Pattern Store and Etsy Shop.#englishpaperpiecing #scrapbustingsewing #handsewingproject #sewingpatternshop #aspoonfulofsugardesigns
The Flower Power Pouch is one of those sweet, sati The Flower Power Pouch is one of those sweet, satisfying makes that always brings a smile. With its five‑petal shape and flat base, it’s perfect for holding small gifts, treats, or a few sewing essentials — and it comes together beautifully with scraps.Check our a few of my favourite fabric combinations. It’s a fun weekend sew if you’re looking for something quick, cheerful, and a little bit different.🌸 Comment FLOWER for a link to the pattern
🛍 Available in our Pattern Store and Etsy Shop (link in profile)What colours or prints would you choose for your Flower Power Pouch?#flowerpowerpouch #scrapfriendlysewing #handmadegiftideas #sewingproject #weekendsewing
Follow on Instagram

Featured Pattern

Travel Sewing Kit Pattern

Featured Tutorial

Retro Drawstring Bag

Featured Recipe

Lemon Pound Cake

Connect

  • Email
  • Facebook
  • Instagram
  • Pinterest
  • Threads
  • TikTok
SUBSCRIBE TO NEWSLETTER
×

Popular Posts

  • Fabric Gift Pouch
  • Sewing and Quilting on a Budget
  • How to Sew Mugrugs like a Pro: Essential Tips and Tricks
  • Charm Square Fabric Tray
  • Sewing with Liberty Fabric
  • Triangle Pouch
  • Retro Drawstring Bag

Copyright © 2026 Lisa. K. Cox - A Spoonful of Sugar