A Spoonful of Sugar

Make. Bake. Create.

Menu
  • Home
  • About
    • About Us
    • Press
    • FAQ
    • Disclosure Policy
    • Contact Us
  • Crafts
    • Crochet
    • DIY
    • Embroidery/Cross stitch
    • Gift Wrapping
    • Knitting
    • Miscellaneous
    • Paper Crafts
  • Holidays
    • New Year’s
    • Australia Day
    • Back to School
    • Valentines Day
    • Easter
    • ANZAC Day
    • Mother’s Day
    • Father’s Day
    • Halloween
    • Christmas
  • Recipes
    • Appetizers
    • Bars & Slices
    • Bread & Pastries
    • Cakes
    • Cookies
    • Confectionery
    • Cupcakes & Muffins
    • Desserts
    • Drinks
    • Ice Cream
    • Jams/Preserves
    • Main Meals
  • Sewing
    • Sewing Tutorials
    • Quilting
    • Sewing & Quilting Patterns
  • Family
    • Back to School
    • Family Fun
    • Our Home
    • Parenting
    • Travel
  • Shop
    • Pattern Store
    • Etsy Store

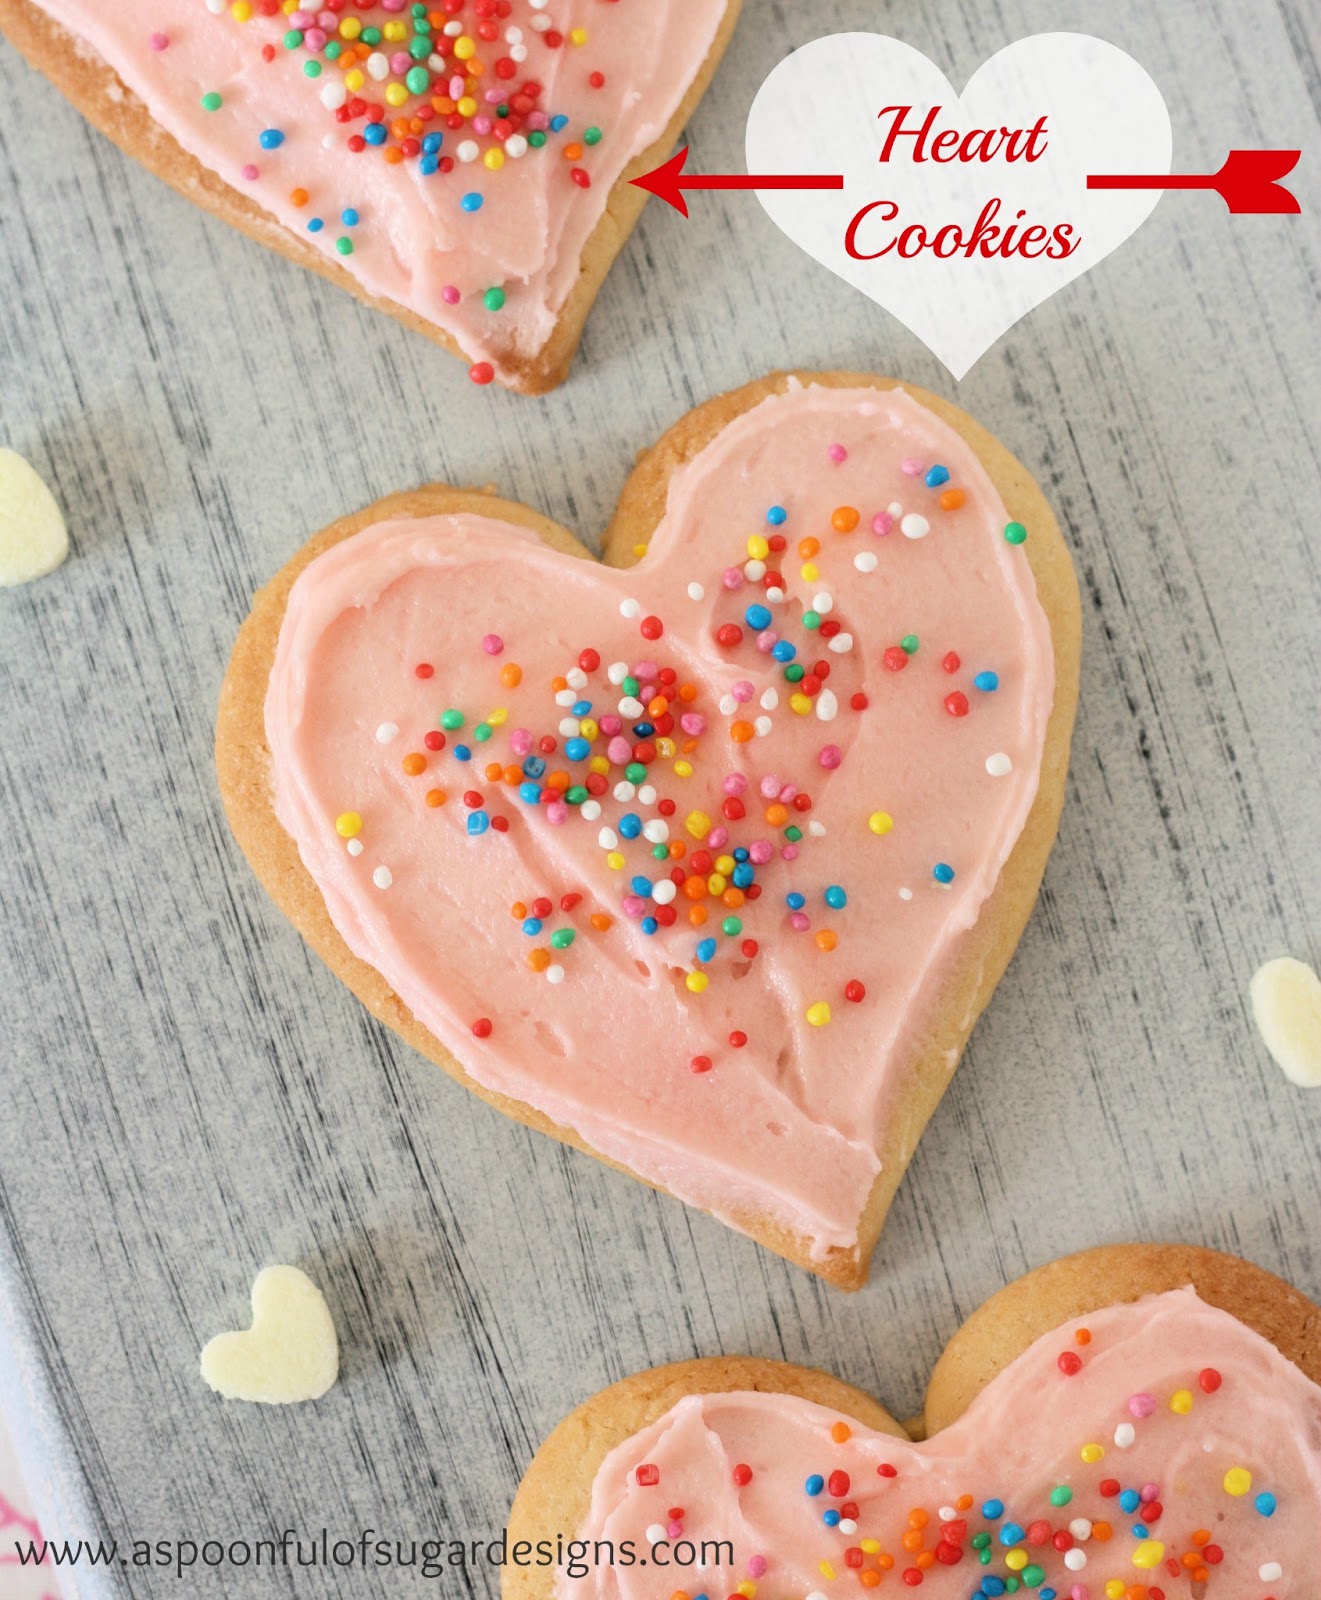
Heart Cookies

January 31, 2013 By Spoonful of Sugar - 7 Comments

One of the many things we loved about living in the USA, was all the holidays that get celebrated. It was lovely to see my son come home from elementary school with lots of Valentines from his classmates.  At that time in Australia, Valentines Day was mainly celebrated between couples, and it wasn’t really a holiday that was embraced by younger kids. Any holiday that is about sharing and caring is sweet, whatever your age. Since our time in Texas, we always celebrate Valentines – usually with some home made treats. This year, Sarah has baked some heart shaped sugar cookies with a pink frosting.
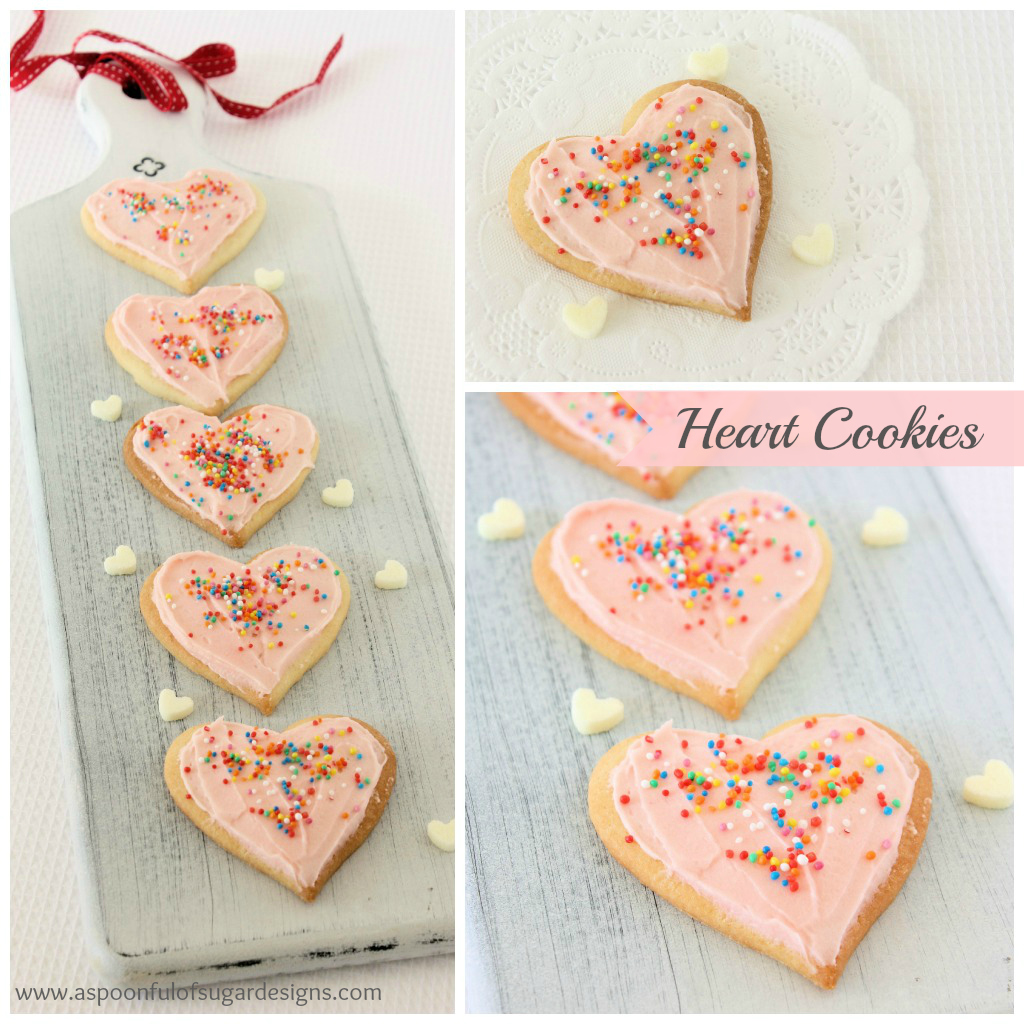
Heart Cookies

Ingredients


·         2 1/2 cups plain flour (cake flour), plus extra for dusting work surface 

·         2 tsp cornflour ( cornstarch) 

·         1 1/2 tsp baking powder 

·         1/4 tsp salt 

·         149 g (1 ¼ sticks) butter, softened 

·         1 cup sugar (granulated) 

·         1 large egg 

·         1 large egg white 

·         2 tsp vanilla extract 

Vanilla Frosting

·         5 Tbsp unsalted butter, at room temperature 

·         3 cups icing sugar (confectioners sugar) 

·         3/4 tsp vanilla extract 

·         3 1/2 Tbsp milk 

·         Pink food colouring, optional 

·         sprinkles 

·        

Directions

·         Sift flour, cornflour, baking powder and salt into a large bowl, and set aside. In the bowl of an electric mixer, on medium speed, whip together butter and sugar until very pale and fluffy, about 4 minutes, scrapping down the sides of the bowl as needed. Add in egg and mix until combined. Then add egg white and vanilla and mix until combined. With mixer running, slowly add in dry ingredients until just combined. Shape dough into a ball and transfer to an airtight container and refrigerate 1 1/2 – 2 hours. Preheat oven to 180 deg C (370 deg F) during the last 10 minutes of refrigeration. 

·         Remove dough from refrigerator and sprinkle a clean work surface and top of dough lightly with flour. Evenly roll dough out to 8 mm (1/3-inch). Cut into desired shapes. Transfer to baking paper lined baking sheets. Bake in preheated oven 8 – 11 minutes (cookies should NOT brown, they should remain a pale colour). Remove from oven and allow to cool on baking sheet several minutes before transferring to wire rack to cool. Cool completely then frost with Vanilla Frosting and add sprinkles if desired. Store in an airtight container at room temperature. 

 
Vanilla Frosting 

·         Combine all ingredients in a large mixing bowl, using an electric hand mixer, whip mixture on low speed until combine, then increase mixer to medium-high speed and whip until frosting is pale, smooth and fluffy.

Makes approximately 20 cookies

Recipe adapted from Cooking Classy

For your daily sugar fix you can subscribe or follow us on facebook, pinterest, twitter, and google plus.

Filed Under: Cookies, Valentines Day

« 6 Valentine Crafts
How to Make a Bookmark »

Comments

  1. Shannon says

    January 31, 2013 at 6:55 pm

    These look wonderful. I have been wondering what to do for Valentine’s day this year and now I think I know. Thank you!

    Reply
  2. haggiz says

    February 1, 2013 at 2:29 am

    These look so sweet (no pun intended!) Julie x

    Reply
  3. Chocolate Cat says

    February 1, 2013 at 3:51 am

    These are so cute! Would like one for with my coffee now!

    Reply
  4. JoJoand Eloise says

    February 1, 2013 at 9:48 am

    These are REALLY Cute!!! I must admit I was admiring the Frosting 🙂 I love Frosting 🙂
    xo
    Angelina

    Reply
  5. The Polka Dot Closet says

    February 1, 2013 at 7:24 pm

    How sweet, I thought everyone in the world celebrated valentines day, so glad you are now, it’s just a silly sweet day!

    Carol

    Reply
  6. Mary @ Ms. Redo says

    February 3, 2014 at 8:28 am

    Shared this today on my blog post “10 Pretty, Fun, Delicious Valentine Idea” – thanks for sharing it with us!

    Mary

    Reply
    • A Spoonful of Sugar says

      February 3, 2014 at 3:17 pm

      Thanks so much Mary for the link love 🙂

      Reply

Leave a Reply Cancel reply

Your email address will not be published. Required fields are marked *

Heart Cookies

February 5, 2012 By Spoonful of Sugar - 10 Comments

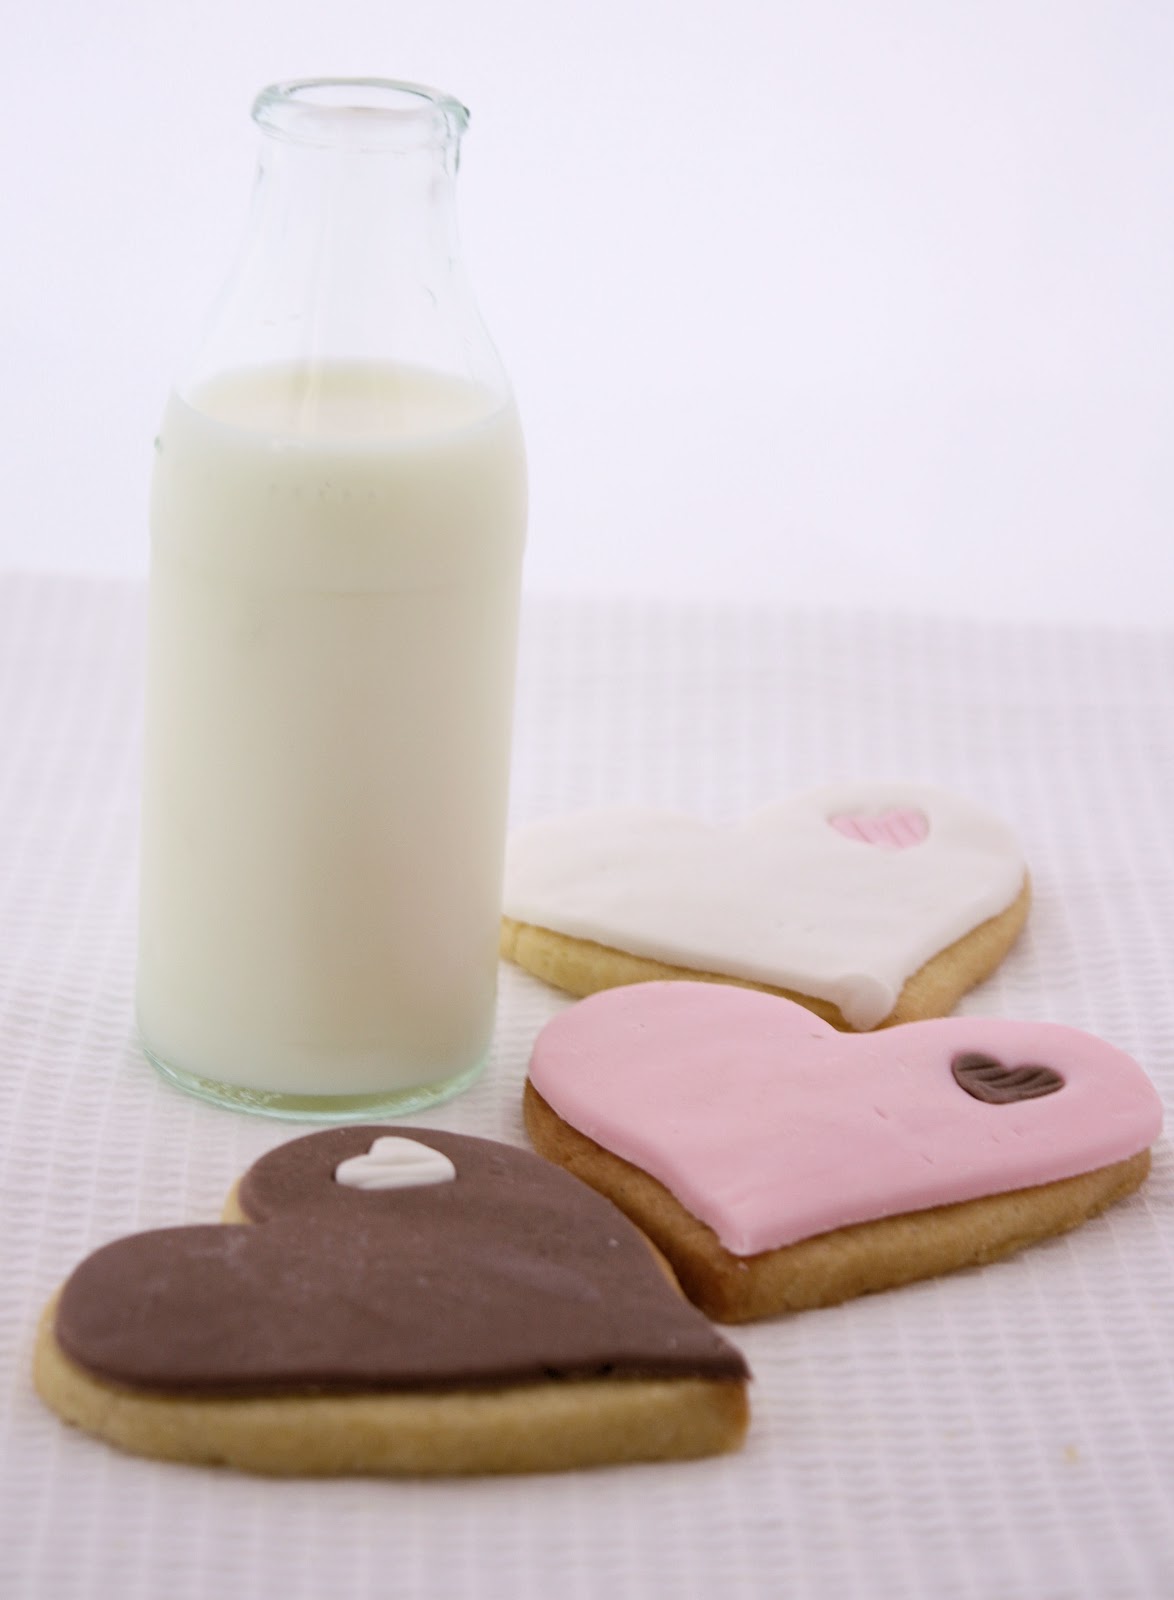
There is no better way to spoil a loved one than through the gift of home baked and decorated cookies. Sarah made up a big batch of heart cookies, and decorated them with fondant, in lovely Neapolitan shades. Perfect for Valentines Day!

Sarah has been experimenting with different sugar cookie recipes lately and I think she has found the perfect recipe. These sugar cookies tasted great on their own, and they didn’t spread during baking and held their shape perfectly.

The recipe was from Our Best Bites. We will be using this sugar cookie recipe again!

Sarah used some ready made fondant icing from a local cake decorating store, and coloured it in shades of pink (using Wilton’s gel) and chocolate. To make the chocolate fondant, Sarah melted 10g chocolate and mixed it with approx 1 teaspoon of cocoa powder until she achieved the right consistency and colour. It was then kneaded into the fondant.
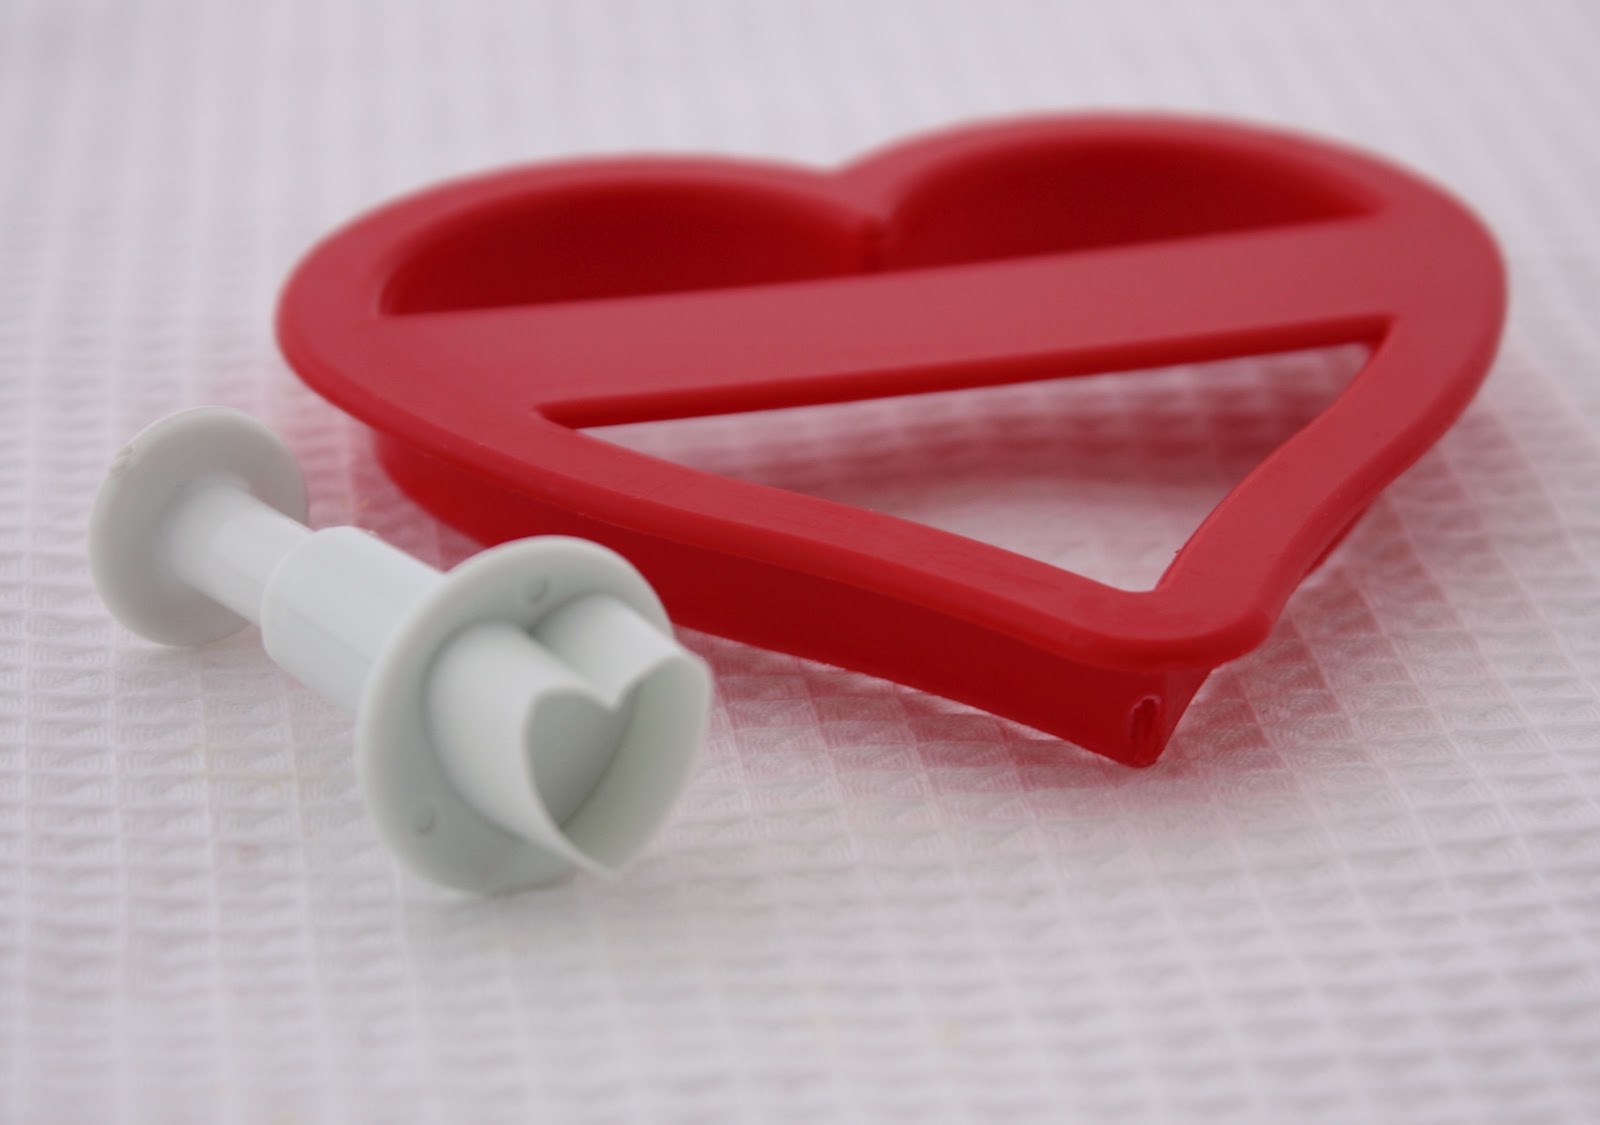
The Heart Cookies were easy to decorate by cutting thinly rolled fondant with a cookie cutter. The small hearts were cut using a smaller icing cutter. The cookies were brushed with a transparent piping gel (available from cake decorating stores) before adding the layer of fondant.

For your daily sugar fix you can subscribe or follow us on facebook, twitter, and google plus.

Filed Under: Cookies, Valentines Day

« Free Printable Valentine’s Cards
Loyalty Card Wallet »

Comments

  1. shez says

    February 5, 2012 at 4:47 am

    they are so cute Sarah,well done.xx

    Reply
  2. The AfterCraft says

    February 5, 2012 at 5:49 am

    I soooo want to make valentines cookies for the office. These are fab!

    Reply
  3. Stephanie says

    February 5, 2012 at 6:15 am

    I have my grandmother’s sugar cookie recipe — my favorite. I’ve never used fondant. Your cookies are picture perfect.

    Reply
  4. KaHolly says

    February 5, 2012 at 7:47 am

    The timing of this post is impeccable. I’ve beendoing the same – trying different recipes, looking for that perfect one. I need to make some today, so I’m pretty excited. Thanks a million! ~karen

    Reply
  5. Terriaw says

    February 5, 2012 at 8:00 am

    Lovely cookies! I especially love the neapolitan colors. Thanks for the tip on a good sugar cookie recipe. I will definitely have to try that one.

    Reply
  6. Karina Agostinho says

    February 5, 2012 at 9:35 am

    So cute!
    I love your blog!

    Reply
  7. The Pinkhouseladies says

    February 5, 2012 at 1:01 pm

    what a nice cookies! I’m in love with the cookies hahah

    greetss

    Reply
  8. Stitching Cow says

    February 5, 2012 at 4:02 pm

    Biscuits look fabulous girls, so yummy.

    Reply
  9. Bela says

    February 5, 2012 at 5:19 pm

    Sarah is so talented in the kitchen too!!! Those sweeties look delicious!!!
    Have a wonderful week, dear ladies!!!

    Reply
  10. Rachael Rabbit says

    February 6, 2012 at 8:07 am

    I’ve never seen such a tiny tool before – that is an amazing idea … I’ll be hunting one of those down!

    Reply

Leave a Reply Cancel reply

Your email address will not be published. Required fields are marked *

  • Email
  • Facebook
  • Instagram
  • Pinterest
  • Threads
  • TikTok
SUBSCRIBE TO NEWSLETTER
×

Categories

Archives

PURCHASE PDF PATTERNS

We offer over 100 affordable PDF sewing patterns available for download from our store website or Etsy store. Each pattern includes detailed instructions, numerous photos, and templates.

WEB STORE ETSY STORE

Instagram

Sewing with scraps is one of my favourite ways to Sewing with scraps is one of my favourite ways to get creative — small pieces, leftover corners, charm‑square offcuts… they all have so much potential.Here are 10 scrap‑friendly projects that use small pieces beautifully. They’re quick to sew, beginner‑friendly, and perfect for gifting ✂️✨Save this for the next time you want to turn your scraps into something pretty.Which one would you sew first?  Tell me in the comments — I love seeing what you’re making.Patterns are available in my pattern store (link in profile) or comment PATTERNS and I will send you the link. #scrapsewing #scrapbusting #scrapfriendly #sewinginspiration #sewingideas
I save every selvedge (or selvage) — the colour do I save every selvedge (or selvage) — the colour dots, the tiny prints, the designer names… they’re too pretty to throw away.Here’s how I turn them into something useful:
• lay them diagonally on a square of fusible interfacing
• overlap slightly
• stitch close to the printed edge
• keep building until you have a panelIt’s such a fun way to use scraps and create something totally unique ✂️✨If you’d like the Scrappy Strips Pouch pattern, comment SELVEDGE or SELVAGE and I’ll send you the link.Pattern Details: Scrappy Strips Pouch Pattern is available in my Pattern Store and Etsy Shop.#scrappystripspouch #selvage #scrapbuster #sewingcommunity #sewingtip
A little Something Blue for tonight’s sewing sessi A little Something Blue for tonight’s sewing session 💙I’m packing my Makers Caddy with supplies for my next project — fabric, thread, tassels, lavender… I can’t wait to share it with you soon.There’s something so calming about soft blues, tidy supplies, and a project all ready to go — it makes the whole sewing process feel extra special.Hope this brings a little mid‑week inspiration to your feed ✂️✨If you’d like the link to the Makers Caddy, comment CADDY and I’ll send it to you.Fabric: Tilda Something Blue with thanks to @tilda_australiaPattern Details: Makers Caddy Sewing Pattern - available in our Pattern Store and Etsy Shop.#tildasomethingblue #ilovetilda #sewingcommunity #tildaaustralia #sewingpattern
A little mid‑week sewing inspiration for you ✂️💗 H A little mid‑week sewing inspiration for you ✂️💗 Here are 10 of my most‑loved projects from the past few months — all beginner‑friendly, scrap‑friendly, and quick to sew. Perfect for a cosy weekend at your machine.Save this for later… and tell me which one you’d love to see as a reel next.  If you’d like the patterns, comment PATTERNS and I’ll send the link straight to you.  #sewingprojects #sewinginspiration #beginnersewing #sewingideas #fabricstash
I've been sewing up a Makers Caddy in the upcoming I've been sewing up a Makers Caddy in the upcoming fabric line Something Blue by Tilda — releasing worldwide on June 1.I loved adding all the tiny details: the label, ribbon, tag, and sweet embellishments that make this project feel so special. The Makers Caddy is beginner‑friendly, scrap‑friendly, quick to sew, and makes the loveliest gift‑ready project for any maker in your life.This soft blue palette is such a joy to work with — thank you to @tilda_australia for the beautiful fabric.Comment CADDY for a link to the pattern.Pattern Details: Makers Caddy Sewing Pattern - available in my Pattern Store and Etsy Shop.#ilovetilda #tildasomethingblue #makerscaddy #sewingprojects #sewingpattern
Sharing the tiny detail that makes the Scrappy Str Sharing the tiny detail that makes the Scrappy Strips Pouch feel polished and gift‑ready — the little cord end caps. They’re simple, quick, and such a sweet finishing touch for your drawstring bags.This pattern includes two practical sizes, and you can sew the feature panel using selvedges/selvages or patchwork strings. A beginner‑friendly project that turns treasured scraps into something beautiful and useful.A few of you asked about the cord end caps — just search “plastic bell cord end caps with lid” and you’ll find plenty of options in lots of colours.Comment SELVEDGE or SELVAGE and I’ll send the pattern link straight to your inbox.Pattern Details: Scrappy Strips Pouch ( 2 sizes) is available in our Pattern Store and Etsy Shop.#scrappystripspouch #drawstringbag #sewingpattern #scrapsewing #aspoonfulofsugardesigns
Follow on Instagram

Featured Pattern

Travel Sewing Kit Pattern

Featured Tutorial

Retro Drawstring Bag

Featured Recipe

Lemon Pound Cake

Connect

  • Email
  • Facebook
  • Instagram
  • Pinterest
  • Threads
  • TikTok
SUBSCRIBE TO NEWSLETTER
×

Popular Posts

  • Tips for Threading a Needle
  • Travel Accessories to Sew
  • Charm Square Fabric Tray
  • Pretty Handmade Gifts for Women: 15 Lovely Projects to Sew
  • Happy Scrappy Cards
  • Make your own linen napkins Make Your Own Linen Napkins
  • Patchwork Fabric Tray

Copyright © 2026 Lisa. K. Cox - A Spoonful of Sugar