A Spoonful of Sugar

Make. Bake. Create.

Menu
  • Home
  • About
    • About Us
    • Press
    • FAQ
    • Disclosure Policy
    • Contact Us
  • Crafts
    • Crochet
    • DIY
    • Embroidery/Cross stitch
    • Gift Wrapping
    • Knitting
    • Miscellaneous
    • Paper Crafts
  • Holidays
    • New Year’s
    • Australia Day
    • Back to School
    • Valentines Day
    • Easter
    • ANZAC Day
    • Mother’s Day
    • Father’s Day
    • Halloween
    • Christmas
  • Recipes
    • Appetizers
    • Bars & Slices
    • Bread & Pastries
    • Cakes
    • Cookies
    • Confectionery
    • Cupcakes & Muffins
    • Desserts
    • Drinks
    • Ice Cream
    • Jams/Preserves
    • Main Meals
  • Sewing
    • Sewing Tutorials
    • Quilting
    • Sewing & Quilting Patterns
  • Family
    • Back to School
    • Family Fun
    • Our Home
    • Parenting
    • Travel
  • Shop
    • Pattern Store
    • Etsy Store

Charming Ornaments

November 26, 2009 By A Spoonful of Sugar - 49 Comments


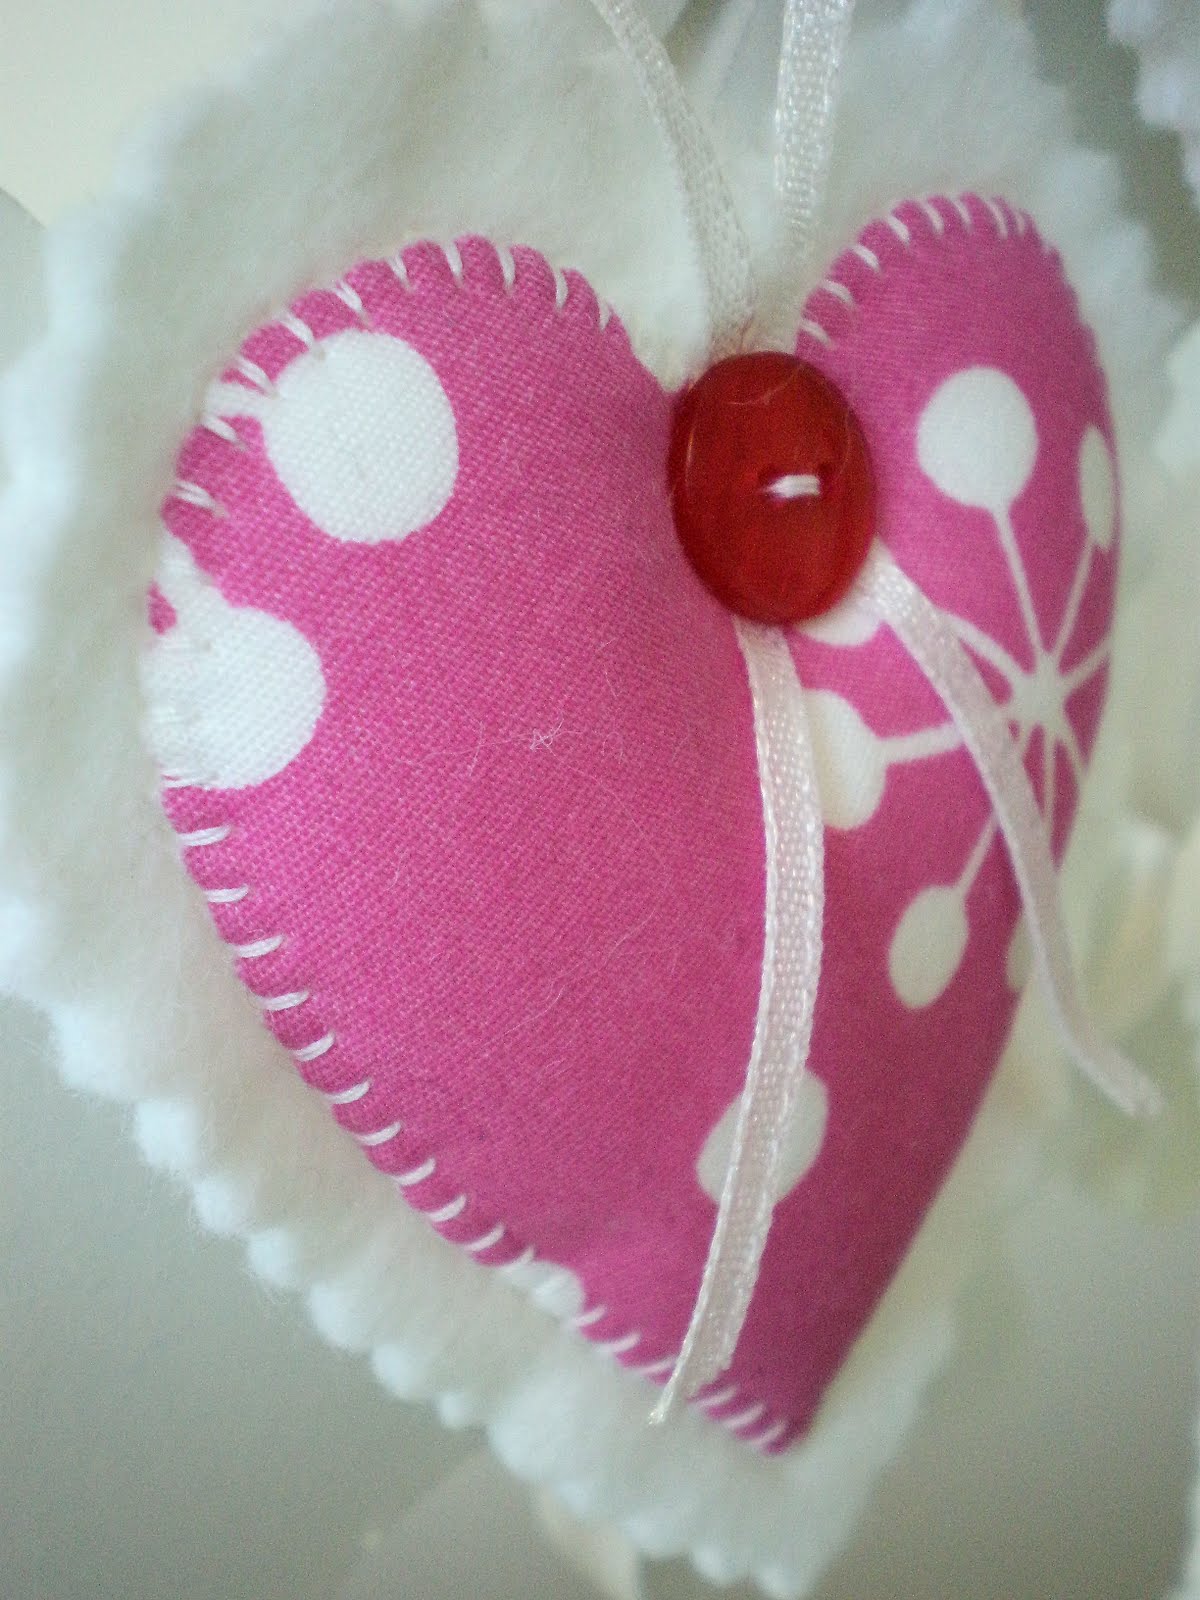
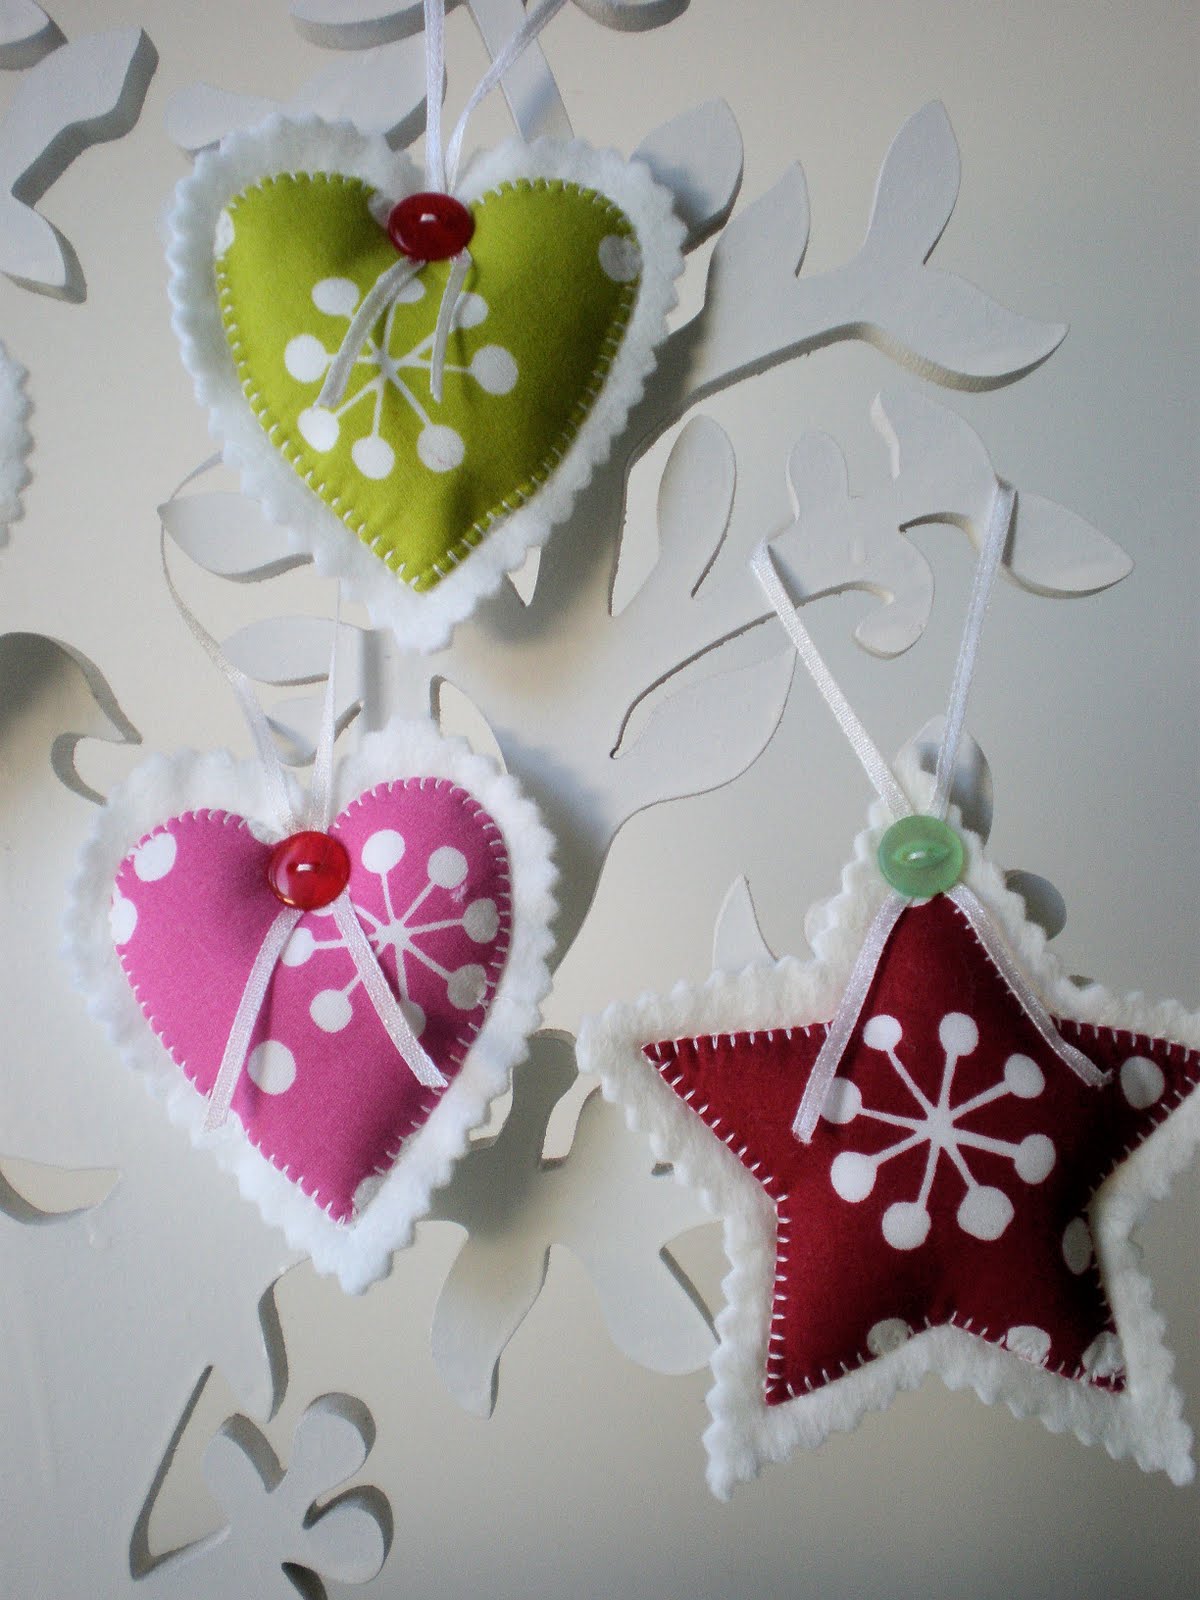
Some scraps of Prints Charming fabric were put to good use on these felt ornaments. This year I am planning on wrapping gifts in shiny white paper, tied with red ribbons, and will attach a felt ornament for decoration. Simple but festive!

Edit: You can find the tutorial here. 

Posted by Lisa

Filed Under: Christmas

« Beautiful Bloggers
Charming Ornaments – Part 2 – How To »

Comments

  1. anne from finland says

    November 26, 2009 at 3:03 am

    They are so lovely! Nice to see and lovely to touch!

    Reply
  2. Anonymous says

    November 26, 2009 at 3:07 am

    What a great idea..they look terrific!

    Reply
  3. Sandrine says

    November 26, 2009 at 3:34 am

    very cute!

    Reply
  4. Janice says

    November 26, 2009 at 3:35 am

    So sweet and simple.

    Reply
  5. Gina says

    November 26, 2009 at 3:37 am

    So simple yet very pretty and effective!

    Reply
  6. texmorg says

    November 26, 2009 at 4:04 am

    That’s a present in itself. Where do you find the time?
    Linda

    Reply
  7. clare's craftroom says

    November 26, 2009 at 4:12 am

    Oh how lovely ! I just so happen to have some of the green scraps mmm thanks for that .

    Reply
  8. Kelly says

    November 26, 2009 at 7:28 pm

    They are gorgeous! Your gifts are going to be beautiful!!

    Reply
  9. Jessica says

    November 26, 2009 at 4:44 am

    Those would be a perfect gift for people at work!

    Reply
  10. Stephanie says

    November 26, 2009 at 4:45 am

    Beautiful and there’s that lovely tree again! :o)

    Reply
  11. Brittney aka Milmomma says

    November 26, 2009 at 4:52 am

    So love these! Some very lucky people to get these on their presents!

    Reply
  12. crafty things says

    November 26, 2009 at 5:02 am

    Wow, so simple but so pretty. Love the pinked edges.

    Reply
  13. Sue Bone says

    November 26, 2009 at 5:17 am

    So cute. I’ll have to work out how you made them now.

    Reply
  14. Christy says

    November 26, 2009 at 6:43 am

    Truly festive! You have the best ideas!

    Reply
  15. peppermintpatcher says

    November 26, 2009 at 6:45 am

    Very clever!

    Reply
  16. Renee says

    November 26, 2009 at 7:31 am

    They will look beautiful Lisa. I especially like the red.

    xoxo

    Reply
  17. Happy Cottage Quilter says

    November 26, 2009 at 7:50 am

    These are so very lovely!

    Reply
  18. Sheri Howard says

    November 26, 2009 at 8:12 am

    I am wrapping my gifts in shiney white paper with ribbons of the same family….one color for one family, one color for another…now I will have to add theese cute ornaments…thanks for the idea!

    Reply
  19. The Quilt Buddy says

    November 26, 2009 at 8:13 am

    What a great way to dress up your presents! How many did you make?

    Thanks for sharing.

    Reply
  20. Ariane says

    November 26, 2009 at 8:24 am

    These are so cute!! I love them!!

    Reply
  21. soyee says

    November 26, 2009 at 8:31 am

    lovely colourful ornaments.

    Reply
  22. Cybele's patch says

    November 26, 2009 at 10:29 am

    The hearts are so cute. You are so creative.

    Reply
  23. Christina says

    November 26, 2009 at 10:42 am

    I absolutely loves these! How did you make them?

    Reply
  24. Chocolate Cat says

    November 26, 2009 at 11:02 am

    I like these!!! I will be wrapping all my gifts in red this year with a gorgeous white candy cane ribbon but will be attatching candy canes not beautiful felt hearts like these!!!!!

    Reply
  25. Simone de Klerk says

    November 26, 2009 at 11:56 am

    Great ornaments and so happy!!!

    Reply
  26. sewkalico says

    November 26, 2009 at 12:08 pm

    Wow, your gift wrapping ideas sound awesome. Love these hearts, they are so cheerful!

    Reply
  27. Celestial Charms says

    November 26, 2009 at 1:31 pm

    So very pretty. I just love these types of ornaments.

    Reply
  28. Sandi says

    November 26, 2009 at 2:50 pm

    What a lovely idea, Lisa. Your presents will all look gorgeous sitting under the tree.

    Reply
  29. Aimee says

    November 26, 2009 at 3:35 pm

    What a great idea! Simple and gorgeous!

    Reply
  30. Dogwood says

    November 26, 2009 at 3:57 pm

    Very darling ornaments. Your gifts are going to look beautiful.

    Reply
  31. Philip, Melissa, & Summer says

    November 26, 2009 at 4:26 pm

    I love these. Great idea.

    Reply
  32. Philip, Melissa, & Summer says

    November 26, 2009 at 4:26 pm

    I love these. Great idea.

    Reply
  33. Philip, Melissa, & Summer says

    November 26, 2009 at 4:26 pm

    I love these. Great idea.

    Reply
  34. Philip, Melissa, & Summer says

    November 26, 2009 at 4:26 pm

    I love these. Great idea.

    Reply
  35. Philip, Melissa, & Summer says

    November 26, 2009 at 4:26 pm

    I love these. Great idea.

    Reply
  36. Renee says

    November 26, 2009 at 7:37 pm

    these are gorgeous – what a great idea to use them on presents with a plain paper wrap. I was hoping to wrap all my presents in brown paper with some raffia bows – but do you think I can find any brown paper!? Of course not because I really want it!

    Reply
  37. Marcia says

    November 26, 2009 at 10:03 pm

    Super cute!

    Reply
  38. pocketful of patterns says

    November 27, 2009 at 7:05 am

    Ooooh – these are really pretty; thanks for sharing! 🙂

    Reply
  39. Sew Useful Designs says

    November 28, 2009 at 12:45 am

    Absolutely beautiful!!! xxx

    Reply
  40. Cath Ü says

    November 28, 2009 at 12:40 pm

    Lisa.. these look lovely… I will have to get some of these made.. but when is the question… thank goodness Christmas comes around every year… thank you for this tut..
    Cath Ü

    Reply
  41. Eve says

    November 30, 2009 at 10:18 am

    These hearts are so cute ..
    It’s really a good idea 😉
    Thanks a lot
    Eve ( from France 😉

    Reply
  42. Kristin says

    December 1, 2009 at 10:46 am

    Those are so lovely! I wish I had the craftastic skills needed to make them. Ah ha

    Reply
  43. Roseanne says

    December 1, 2009 at 8:53 pm

    This comment has been removed by the author.

    Reply
  44. Roseanne says

    December 1, 2009 at 8:57 pm

    I just love your hearts. I will have to have a go at these. I like the idea of puting them on presents. Thay would made lovely gifts.
    razzy

    Reply
  45. itmom says

    December 2, 2009 at 9:36 pm

    These are BEAUTIFUL. I would love to try and create something like this myself. Thanks so much for sharing. 🙂

    Reply
  46. HOPE says

    December 3, 2009 at 8:50 am

    These are Precious!!!

    Hope you had a lovely Thanksgiving.

    Blessings in the New Year!
    HOPE

    Reply
  47. Art Garden Diva says

    December 5, 2009 at 8:57 am

    Thnak you for the lovely idea and tutorial.

    Reply
  48. Shannon says

    December 6, 2009 at 9:04 am

    These make me happy. Love your colors!

    Reply
  49. shez says

    January 12, 2011 at 5:55 am

    these decorations are stunning you are very clever.
    cheers Sheryl
    http://shez-enjoyinglife.blogspot.com

    Reply

Leave a Reply Cancel reply

Your email address will not be published. Required fields are marked *

  • Email
  • Facebook
  • Instagram
  • Pinterest
  • Threads
  • TikTok
SUBSCRIBE TO NEWSLETTER
×

Categories

Archives

PURCHASE PDF PATTERNS

We offer over 100 affordable PDF sewing patterns available for download from our store website or Etsy store. Each pattern includes detailed instructions, numerous photos, and templates.

WEB STORE ETSY STORE

Instagram

The Twirling Treasures Hot Pad & Placemat Set show The Twirling Treasures Hot Pad & Placemat Set showcases one of my favourite FPP designs — a stunning kaleidoscope‑style block that always turns out beautifully. Kaleidoscope blocks are some of my most popular FPP patterns, and this set is such a fun way to use them.  This set includes six sizes, making it incredibly versatile: use them as hot pads, trivets, placemats, or simply as a way to add a pop of colour to your kitchen.For these samples, I went with a monochromatic scrap‑busting approach, pairing fabrics from the same colour family with a low‑volume background. The black‑and‑white striped binding adds such a crisp, modern finish. It’s a wonderful project for building your FPP confidence — and a fantastic way to use up those treasured scraps.The Twirling Treasures Hot Pad set is our Pattern of the Week. It is currently 25% off this week in our Pattern Store and Etsy Shop.If you’d like to sew your own set, comment TWIRL and I’ll send the pattern link straight to you.Happy sewing! Lisa 🌸#FoundationPaperPiecing #Quilting #HotPads #ScrapBuster #KitchenSewing
The Ribbon Pouch is one of those little makes that The Ribbon Pouch is one of those little makes that feels special from the very first stitch. I made this sweet trio in the Liberty Gifts from the Garden collection, and the colours couldn’t be more perfect for gifting, organising, or adding a little beauty to your everyday.Each pouch features: 🌼 A simple ribbon tie closure 🎀 Optional sew‑in tags or DIY felt/fabric labels 🧵 Three practical sizes — perfect for notions, treats, or small gifts ✨ A quick, beginner‑friendly sewIf you’d like to make your own, comment RIBBON and I’ll send the pattern link straight to your inbox. Save this for your next weekend project — it’s such a satisfying little sew. Pattern is available in our Pattern Store.Thanks to @regent_street_fabric for the Gifts from the Garden fabric collection. (released Jan 2026)#SewingInspiration #SewingProjects #LibertyFabric #SewingPatterns #BeginnerSewing
Let’s sew a Penguin Love Coaster — the sweetest li Let’s sew a Penguin Love Coaster — the sweetest little project for Valentine’s Day gifting. Penguin Love is an irresistibly cute mugrug featuring a tiny penguin offering up a heart, brought to life with simple raw‑edge appliqué. It’s scrap‑friendly, beginner‑friendly, and such a joyful way to use those favourite little fabric pieces you’ve been saving.Whether you’re sewing for Valentine’s Day, Mother’s Day, or simply to brighten someone’s day, this quick make delivers instant charm. It’s gift‑ready, fun, and full of personality — the perfect little addition to your sewing table or a thoughtful handmade surprise for someone you love.Pattern Details: Penguin Love Mugrug PDF Sewing Pattern is available in our Pattern Store & Etsy Shop.If you’d like the link, comment PENGUIN and I’ll send the link straight to you.#rawedgeapplique #ValentinesDaySewing #HandmadeValentine #SewingProjects #BeginnerFriendlySewing
If you love making handmade gifts, here’s one of m If you love making handmade gifts, here’s one of my favourite ways to make them feel extra special — it’s all in the details. ✨This is my All Seasons Gift Tote, sewn in the beautiful Liberty Gifts from the Garden fabric. It’s a simple, versatile tote… but the right finishing touches can take it from “homemade” to handcrafted and professional.In the reel I’m sharing three of my go‑to upgrades:
✔️ Cotton bag strapping for structure and durability
✔️ Linen labels for a soft, elevated finish
✔️ Sew‑in tags to give your project that boutique feelThese little additions are quick, inexpensive, and make such a difference — especially when you’re gifting your makes.If you’d like more details on the All Seasons Gift Tote pattern, comment Seasons below and I’ll send the link straight to you.Happy sewing, friends. I hope this inspires you to add a little extra magic to your next project. ✂️Pattern Details: All Seasons Gift Tote available in my Pattern Store
Fabric Details: Gifts from the Garden by Liberty fabrics. Printed on Lasenby cotton. Thanks to @Regent_street_fabrics#libertyfabric #sewinginspiration #sewingtips #weekendsewing #bagmaking
10 Valentine’s Projects to Sew This Weekend ✨ If y 10 Valentine’s Projects to Sew This Weekend ✨ If you’re ready to add a little sweetness to your sewing table, this week’s carousel is packed with heart‑themed inspiration. These projects are quick, beginner‑friendly, and perfect for using scraps or mini charm squares — my favourite kind of weekend sewing.Valentine’s Day doesn’t have to be big or elaborate. Sometimes the most meaningful gifts are the ones made slowly, thoughtfully, and by hand. Whether you’re stitching for someone special, decorating your home, or simply enjoying a creative moment for yourself, these little makes are such a joy.Inside the carousel you’ll find 10 of my most loved Valentine’s sewing patterns — all available in my pattern store.If you’d like the links to the patterns, simply comment Valentines below and I’ll send them straight to you.Happy sewing, friends — I hope this collection sparks your creativity for the season ahead.#sewingpattern #valentinesewing #scrapbustingproject #minicharmsquares #aspoonfulofsugardesigns weekendsewing
For those who are new here — hi, I’m Lisa 👋 And th For those who are new here — hi, I’m Lisa 👋 And this is the story of how a simple mother‑daughter blog changed my life.Back in 2008, my 11‑year‑old daughter and I started a little blog to share our sewing, crafts, and baking with family and friends. At the time, I was working as an occupational therapist, and sewing was my creative escape — something fun we could do together.But over the years, that tiny blog grew. I began contributing sewing patterns to books and magazines… I even wrote my own sewing book… And slowly, what started as a hobby became a side hustle — and a dream I quietly held onto.In early 2024, I retired from the public service and finally took the leap into full‑time creative work.Now I’m happily self‑employed in retirement — designing patterns, creating content, and sharing the joy of sewing with this wonderful community.It’s been the most unexpected, fulfilling chapter… and I’m so grateful you’re here.✨ Tell me — what’s YOUR dream job? I’d love to hear your story too. #sewingstory #meetthemaker #creativelife #sewistsofinstagram #sewingcommunity
Follow on Instagram

Featured Pattern

Travel Sewing Kit Pattern

Featured Tutorial

Retro Drawstring Bag

Featured Recipe

Lemon Pound Cake

Connect

  • Email
  • Facebook
  • Instagram
  • Pinterest
  • Threads
  • TikTok
SUBSCRIBE TO NEWSLETTER
×

Popular Posts

  • Merry Little Christmas Sewing Projects
  • Charm Square Fabric Tray
  • {Back to School} Tissue Cover
  • Fabric Gift Pouch
  • Raw Edge Applique Tips
  • Sewing Gifts 101: Easy and Affordable Ideas for Your Crafty Friends
  • Free Holiday Sewing Tutorials

Copyright © 2026 Lisa. K. Cox - A Spoonful of Sugar