A Spoonful of Sugar

Make. Bake. Create.

Menu
  • Home
  • About
    • About Us
    • Press
    • FAQ
    • Disclosure Policy
    • Contact Us
  • Crafts
    • Crochet
    • DIY
    • Embroidery/Cross stitch
    • Gift Wrapping
    • Knitting
    • Miscellaneous
    • Paper Crafts
  • Holidays
    • New Year’s
    • Australia Day
    • Back to School
    • Valentines Day
    • Easter
    • ANZAC Day
    • Mother’s Day
    • Father’s Day
    • Halloween
    • Christmas
  • Recipes
    • Appetizers
    • Bars & Slices
    • Bread & Pastries
    • Cakes
    • Cookies
    • Confectionery
    • Cupcakes & Muffins
    • Desserts
    • Drinks
    • Ice Cream
    • Jams/Preserves
    • Main Meals
  • Sewing
    • Sewing Tutorials
    • Quilting
    • Sewing & Quilting Patterns
  • Family
    • Back to School
    • Family Fun
    • Our Home
    • Parenting
    • Travel
  • Shop
    • Pattern Store
    • Etsy Store

How to Make a Laundry Bag

February 22, 2013 By Spoonful of Sugar - 9 Comments

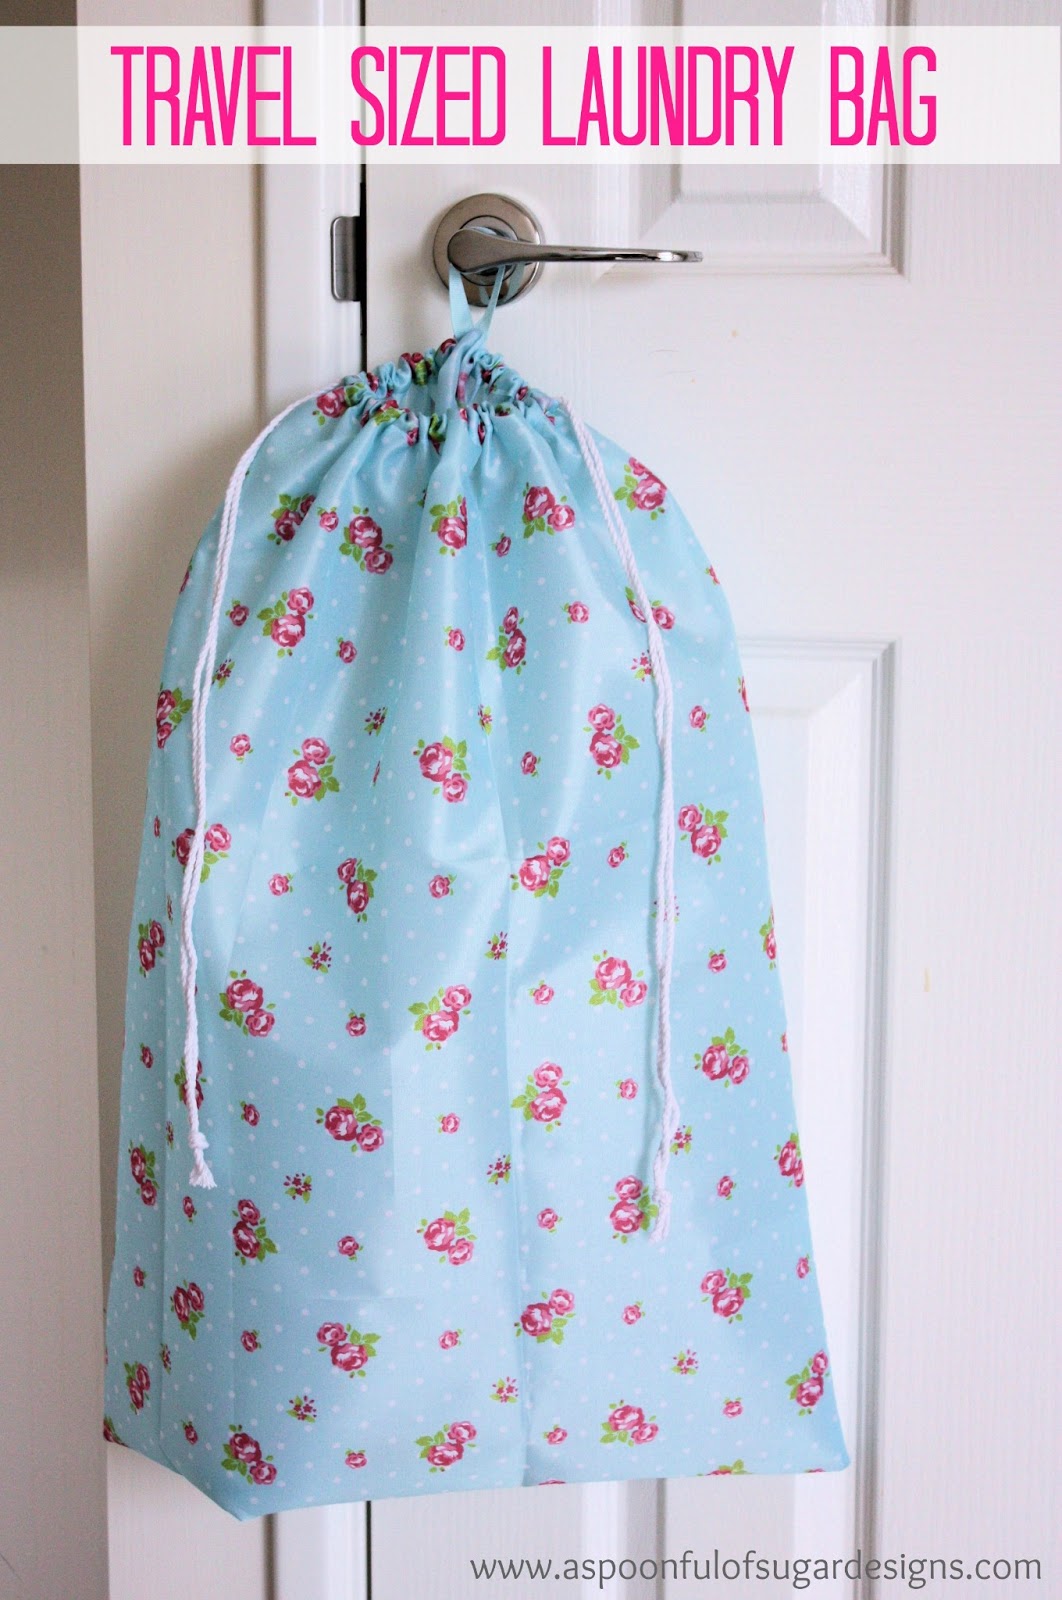
We love to travel and have got packing down to a fine art. When we are moving from place to place, it can be challenge to keep our suitcases organised (especially when we have been shopping). We have made some travel sized laundry bags to keep in our suitcases so we can easily separate our clothing. Made from printed ripstop nylon with a drawstring closure, it is light and compact when folded. We made it using French seams to give a neat finish on the inside of the laundry bag.

These would make a great gift for a traveller. If you would like to know how we made our laundry bag, follow our steps below.

How To Make  Laundry Bag (Travel Sized)

Finished Size: 17 x 22 inches
Materials:
Ripstop Nylon – two pieces measuring 18 x 24 inches
Cord – two pieces measuring 40 inches in length
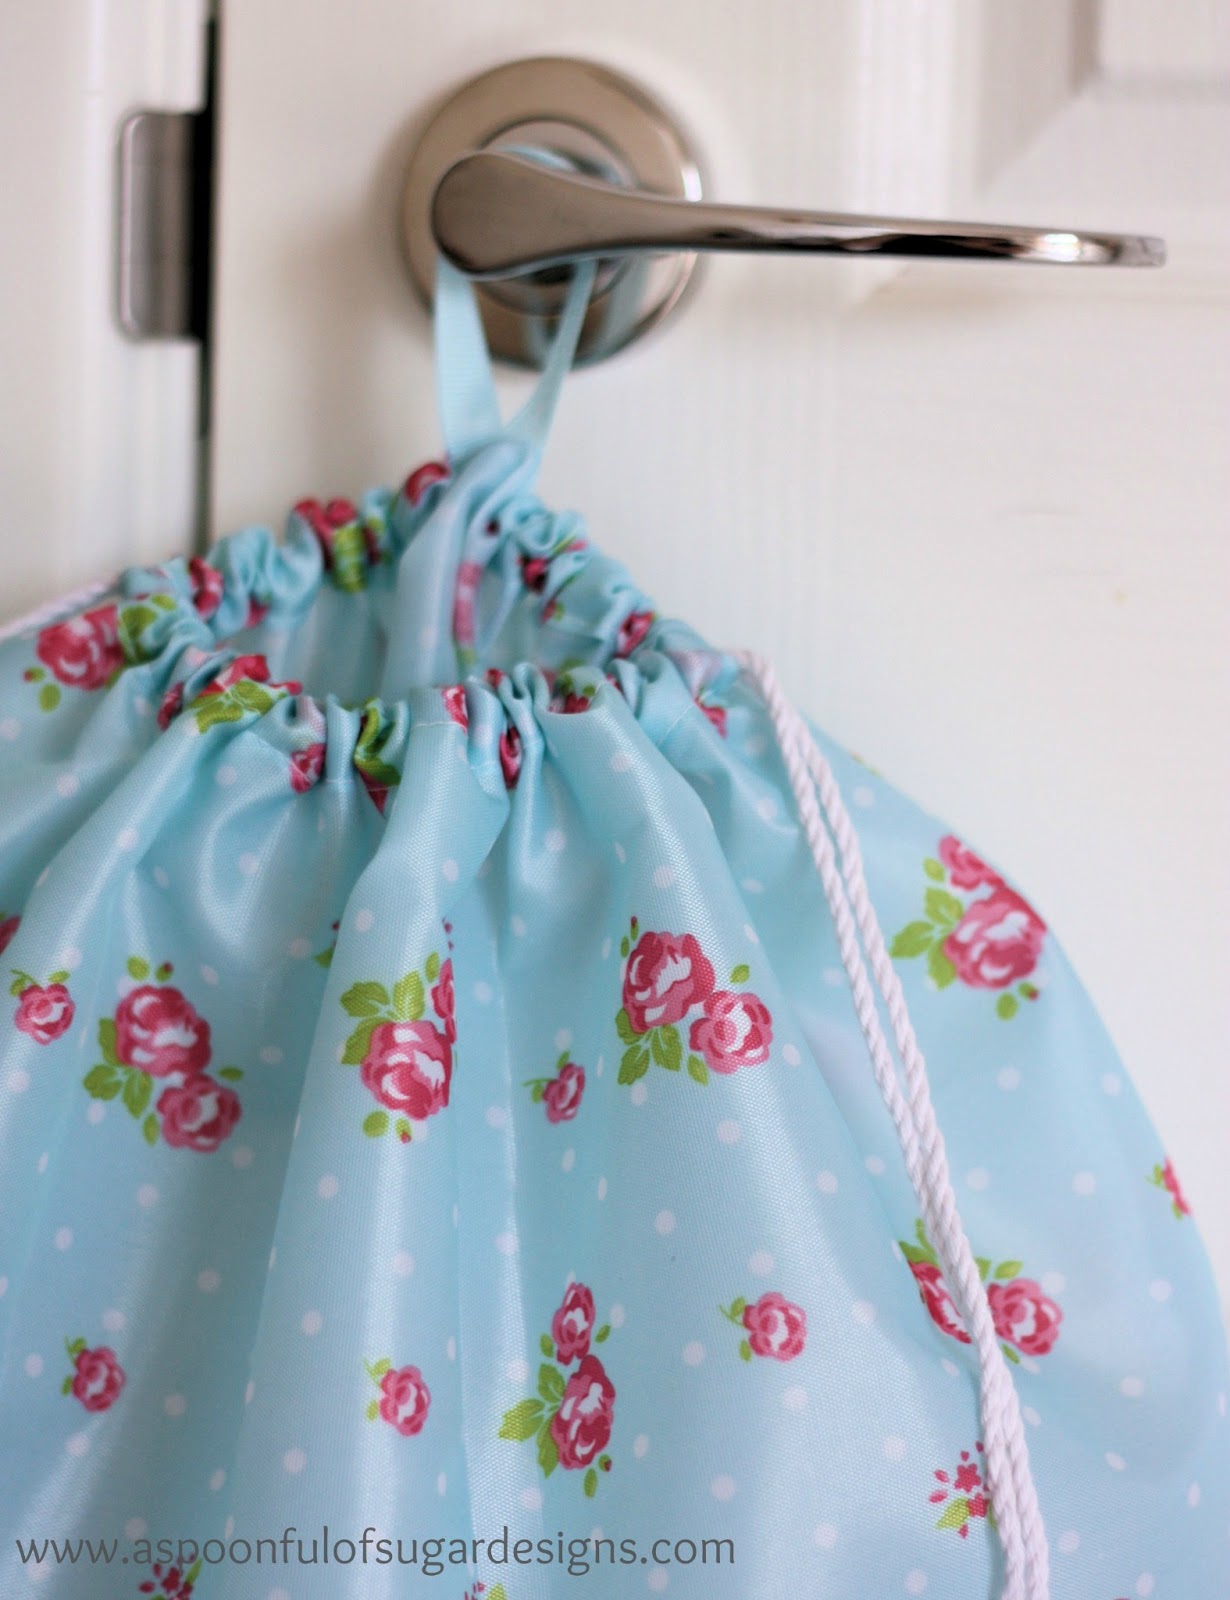
Ribbon – 5 inch length for the  hanging loop.
* We purchased the ripstop nylon from Daiso in Tokyo (100 Yen store). It is available in most fabric stores. Another option would be to use shower curtain fabric.
1. With the wrong sides of the fabric facing, clip the layers together. We used Clover Wonder Clips (purchased at Okadaya) which were perfect for holding the slippery nylon in place. Using a 1/8 inch seam allowance, stitch along the bottom edge, and the two long sides, stopping 1 1/2 inches from the top edge. Clip bottom corners, and turn inside out so that the wrong side is facing. Stitch along the sides (starting 1 1/2 inches from the top edge) and the bottom using a 1/4 seam allowance.
2. Fold over the top edge by 3/4 inch. Then fold over again. In the middle of one side of the top edge, position the ribbon as shown in photo below). Stitch along the top edge to secure the folded edge. Turn the laundry bag out the right way.
3. Thread the cord in through the left side through the channel and around the opening of the bag, exiting from the left side. Repeat with the other piece of cord on the right side. Tie the ends of the cord together.
Fold the laundry bag up and tie with an extra piece of ribbon or secure it with a hair elastic. The travel laundry bag is now ready to be popped into your suitcase.
You may also like these travel tutorials (click on the title under the photo to be taken to the tutorial):
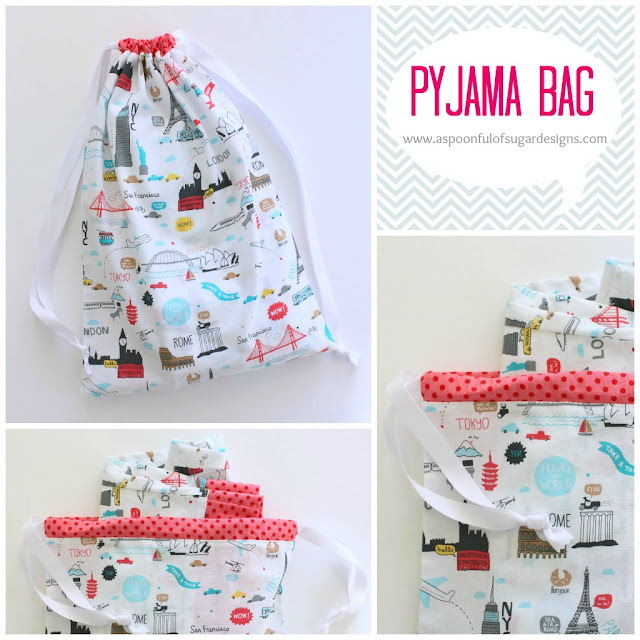
Pyjama Bag

Pyjama Bag

Travel Neck Pillow Cover

Travel neck Pillow Cover

Felt Luggage Tag
Felt Luggage Tag

Filed Under: Sewing, Sewing Tutorials Tagged With: bag, ripstop nylon, sewing tutorial, travel

« Apple Cake Recipe
Quick Cards Using Hama Beads »

Comments

  1. Laura says

    February 23, 2013 at 6:54 am

    Cutest ripstop nylon I have ever seen!

    Reply
  2. Marissa says

    February 23, 2013 at 2:37 pm

    Wow!! that is so,so cute!!! you are so talented!!

    Reply
  3. Monsterscircus says

    February 23, 2013 at 5:12 pm

    Pretty awsome laundry bags! And much more stylish than my old ones, tink I’m goin to get crafty:-) thnk for sharing,

    Reply
  4. janice15 says

    February 24, 2013 at 8:32 am

    Very pretty, I was recently thinking of this..but I got a sewing machine from a friend but I’m not sure how to adjust it so I’m trying to find a book on it. But I remember making these in sewing class back in the day and wanted to make some for my granddaughters…Great job…with love Janice

    Reply
  5. Sharon Dawn says

    February 24, 2013 at 10:45 pm

    I love your light-weight laundry bag! Do you know anyplace online to order the printed ripstop from? I can’t find it on the link and have searched online, but I haven’t had any luck so far. Thanks for the ideas!

    Reply
    • Lori P says

      July 22, 2016 at 8:17 am

      Here are some links for ripstop nylon: https://goodwinds.com/sail-supplies/ripstop-nylon-fabric-13/ripstop-nylon-fabric.html
      http://www.beaconfabric.com/vindex.html?cat54.htm

      I am going to make my laundry bag out of two pieces of cotton fabric. It can go in the washer along with my dirty laundry.
      Thank you so much for you pattern and idea.

      Reply
  6. Mallery says

    March 10, 2017 at 8:54 am

    Sorry – do you start with wrong sides together, stitch, turn out so right sides are together, then stitch? There are words missing from your instructions…

    Reply
    • A Spoonful of Sugar says

      March 10, 2017 at 9:14 am

      As it is made with nylon, a French seam is used. That is correct – you start with the wrong sides together (right side is facing outwards), stitch, then turn out so the wrong side is facing outwards. Sorry for any confusion. If you are not clear, google French seams for more instruction.

      Reply
      • Mallery says

        March 10, 2017 at 9:21 am

        Thanks! Never done a French seam so learning time 🙂

        Reply

Leave a Reply Cancel reply

Your email address will not be published. Required fields are marked *

  • Email
  • Facebook
  • Instagram
  • Pinterest
  • Threads
  • TikTok
SUBSCRIBE TO NEWSLETTER
×

Categories

Archives

PURCHASE PDF PATTERNS

We offer over 100 affordable PDF sewing patterns available for download from our store website or Etsy store. Each pattern includes detailed instructions, numerous photos, and templates.

WEB STORE ETSY STORE

Instagram

Pretty handmade gifts are always such a joy to sew Pretty handmade gifts are always such a joy to sew — and even more special to give. I’ve gathered 15 beginner‑friendly projects that are quick to make, scrap‑friendly, and lovely for the important women in your life. From cosy comforts to pretty pouches, there’s something here for every style and season.All patterns are available in my Pattern Store and Etsy shop — you’ll find both links in my profile.Save this guide for the next time you want to sew a thoughtful handmade gift. ✨#handmadegifts #sewingprojects #sewingpattern #giftideasforwomen #aspoonfulofsugardesigns
Turning hair accessories into sewing magic ✨ If yo Turning hair accessories into sewing magic ✨ If you’ve ever struggled to find bright or narrow elastic cord for pouch closures, this little trick will save the day. Hair ties make the perfect elastic loop for the Mini Treat Pouch — sturdy, colourful, and so easy to sew in. It’s one of my favourite shortcuts for quick gifts and scrap‑friendly makes.Comment TREAT and I’ll send the pattern link straight to you 💌Pattern Details: Mini Treat Pouch - available in our Pattern Store and Etsy Shop.#MiniTreatPouch #HairElasticHack #ScrapFriendlySewing #BeginnerSewingProjects #ASpoonfulOfSugarDesigns
Small enough to tuck in your tote, clever enough t Small enough to tuck in your tote, clever enough to hold all your essentials. The Travel Sewing Kit is beginner‑friendly, scrap‑friendly, practical for everyday use, and makes a sweet little gift.Want the pattern? Comment TRAVEL and I’ll send you the link 💌Pattern: Travel Sewing Kit PDF — available in my Pattern Store and Etsy Shop (links in profile).Fabric: Tilda Cotton Beach. Thanks to @tilda_australia✂️ Travel Tip: Most airlines allow small scissors in carry‑on luggage. Mine have a 1‑inch blade and fit perfectly inside the kit. Always check your airline’s guidelines before flying, especially internationally.#travelsewingkit #scrapfriendlysewing #beginnerfriendlysewing #giftsewingideas #tildafabric
A calm look inside the Makers Caddy ✨This projec A calm look inside the Makers Caddy ✨This project is one of those satisfying makes that feels doable for any skill level, uses small cuts of fabric you already have on hand, and comes together quickly. The little details make it such a joy to sew — and it’s the kind of piece you’ll use every day or happily gift to another maker.Comment CADDY and I’ll send you the pattern link 💛Pattern Details: Makers Caddy PDF Sewing Pattern - available in our Pattern Store and Etsy Shop.#makerscaddy #sewingprojectideas #sewingpatternlove #sewingroomorganisation #sewingcommunity
The Handy Drawstring Bag is one of my favourite qu The Handy Drawstring Bag is one of my favourite quick makes — simple, satisfying, and endlessly useful. It’s beginner‑friendly, scrap‑friendly, and stitches up in no time, which makes it perfect for last‑minute gifts or organising all the little things in your sewing space.This sweet version is sewn in Plum Garden and Tea Towel Basics from Tilda, and the small‑scale prints shine beautifully in a project like this. I love the flat base, the smooth drawstring closure, and how easily it folds flat when not in use. With three sizes included, you can sew a whole coordinating set from just a handful of scraps.If you enjoy quick, giftable projects, this one is such a joy to make.Comment HANDY and I’ll send you the pattern link.Pattern: Handy Drawstring Bag (3 Sizes) — available in our Pattern Store and Etsy Shop.Fabric: Tilda Plum Garden and Tea Towel Basics. Thanks to @tilda_australia#handydrawstringbag #sewingcommunity #scrapfriendlysewing #sewingpatterns #aspoonfulofsugardesigns
I designed the Makers Caddy because I wanted a pro I designed the Makers Caddy because I wanted a project that was as practical as it was pretty. Beginner friendly construction, quick to construct, and giftable.This version shows all my favourite details: structured shape, pockets, a wide base, and those little finishing touches like the leather patch and tag. It’s simple to sew, satisfying to use, and one of the most versatile organisers in my sewing room.Comment CADDY and I’ll send you the pattern link.Pattern: Makers Caddy — available in my Pattern Store and Etsy Shop.#makerscaddy #sewingcommunity #sewingpatterns #sewingroom #aspoonfulofsugardesigns
Follow on Instagram

Featured Pattern

Travel Sewing Kit Pattern

Featured Tutorial

Retro Drawstring Bag

Featured Recipe

Lemon Pound Cake

Connect

  • Email
  • Facebook
  • Instagram
  • Pinterest
  • Threads
  • TikTok
SUBSCRIBE TO NEWSLETTER
×

Popular Posts

  • Fabric Gift Pouch
  • Sewing and Quilting on a Budget
  • Sell What You Sew
  • Charm Square Fabric Tray
  • Triangle Pouch
  • Sewing with Liberty Fabric
  • Tutorial: Emergency Zippered Pouch

Copyright © 2026 Lisa. K. Cox - A Spoonful of Sugar