
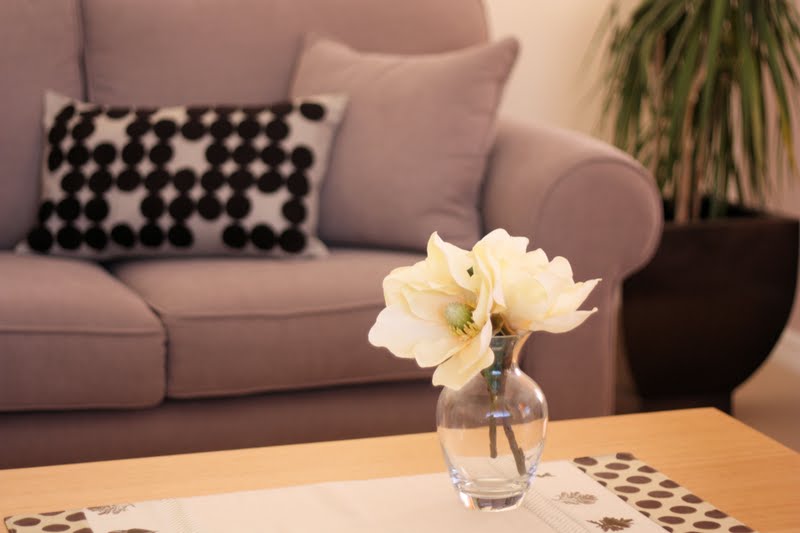
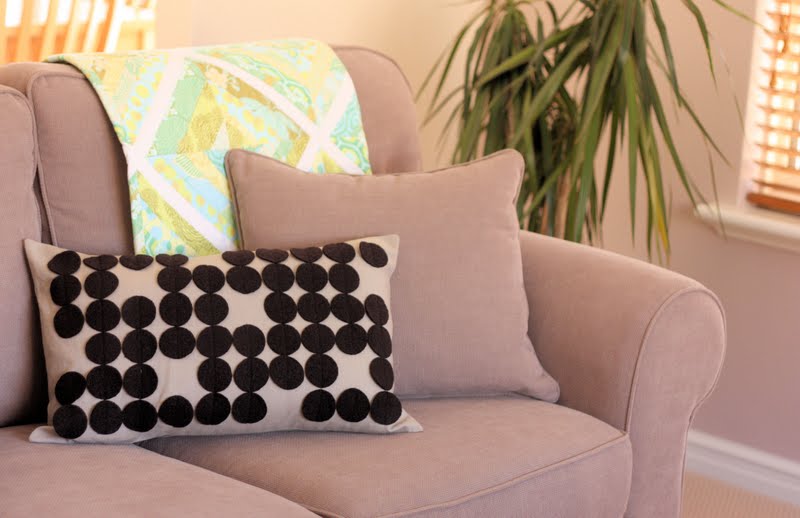
I have been wanting to make some modern pillow covers for our living room for ages. I have had this circle design in my head but the thought of cutting so many circles by hand put me off. As soon as we received our Go!Baby fabric cutter, I knew right away, what my first project would be.
Thanks for all the comments on my Go! Baby Cutter review post. Now that I have used the cutter more, I have a few additional points to raise.
- As I mentioned in my review, the cutting mats and dies are extra, and are not included with the machine. Different sized dies, require different sized cutting mats, so be aware that you may need to buy several sizes depending on the dies you are using.
- According to Accuquilt, you can extend the life of your cutting mats by rotating and flipping them periodically. This is what I did. However after cutting approx 70 circles, and cutting out 10 of the drunkards path template, the mat has cracked. It is still usable, but I will need a new mat before long. The mats are not that expensive, Accuquilt is selling a pack of two, 6 x 12 in mats for US$16.98. Once again you just need to be aware that the mats are a consumable.
- When I compare the Go!Baby mats to the Cuttlebug mats, they are softer and thinner which is probably why they are not as durable.
- You do need to pay attention to the grain of the fabric. When I was not paying attention, some of my circles ended up more “eggular” in shape.
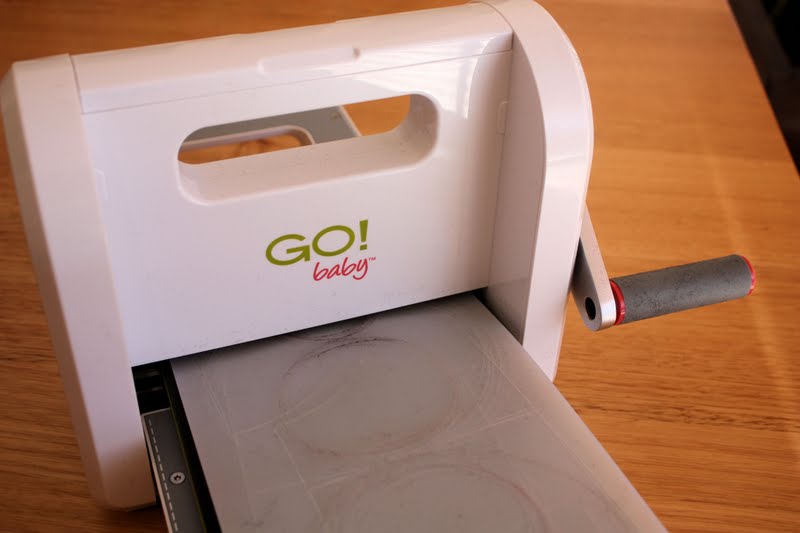
- I love how fast you can crank out the shapes. It really is a time saver, particularly on tricky shapes to cut like circles, which otherwise need to be cut by hand.
Now on to the tutorial.
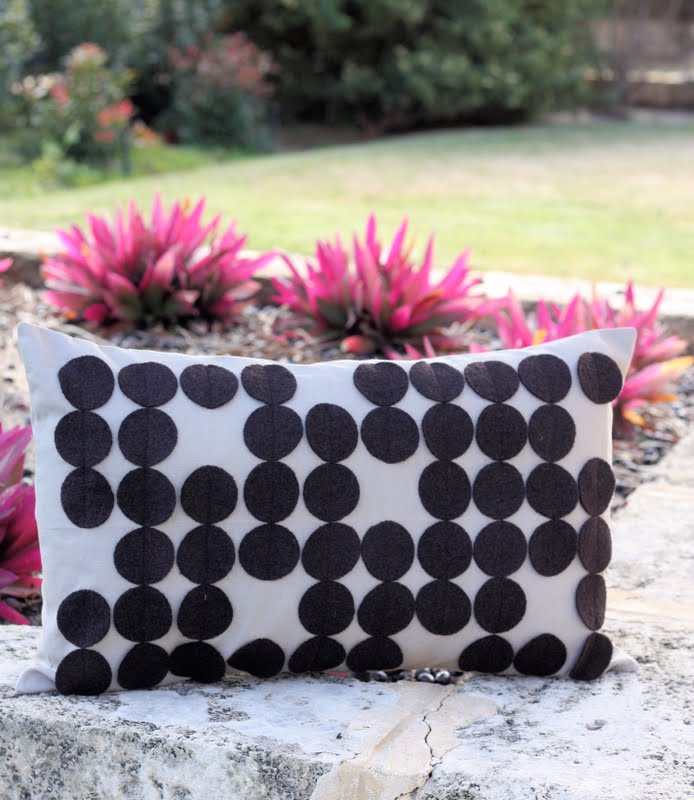
Modern Circle Pillow Cover
Materials:
1/2 yard (0.4 m) of linen
1/3 yard (0.25m) of boiled wool or wool felt
two strips of fusible interfacing measuring 1 1/2 in x 15 inch
3 buttons
1 pillow form, 14″ x 21 “
* I used boiled wool as I love it’s texture. It has been pre-shrunk so it did not fray.
Method:
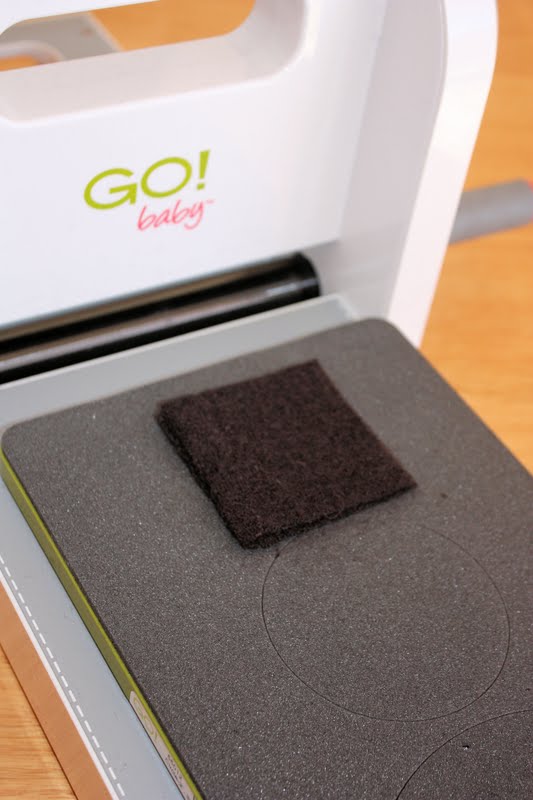
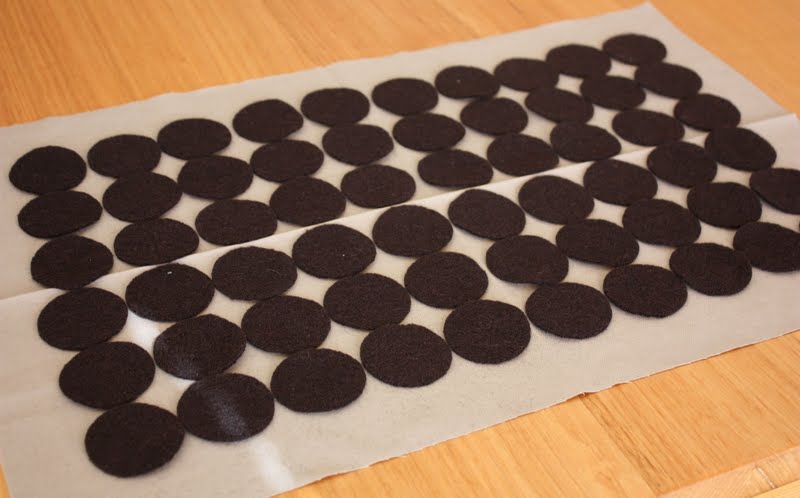
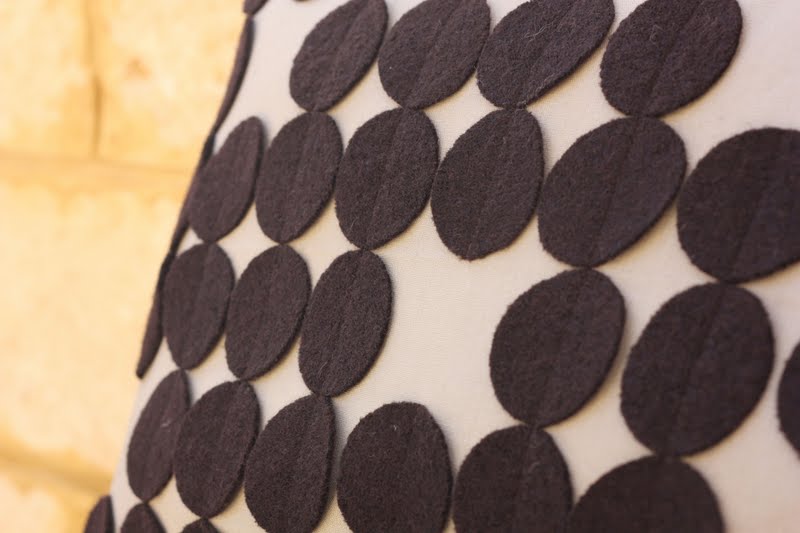
1. Cut out sixty 2″ circles out of the boiled wool using the 2″ circle die on the Go! Baby Cutter, or alternatively cut them out by hand.
To cut them out using the Go! Baby, I first cut the fabric into 2 1/2 inch squares and then ran them through the cutter in two layers.

2. Cut the linen for the pillow cover into:
- 23 x 15 in rectangle (58 x 38 cm) for the pillow front
- 15 x 8 inch rectangle (38 x 20 cm) for pillow back
- 15 x 19 1/2 inch rectangle (38 x 49.5 cm) for pillow back
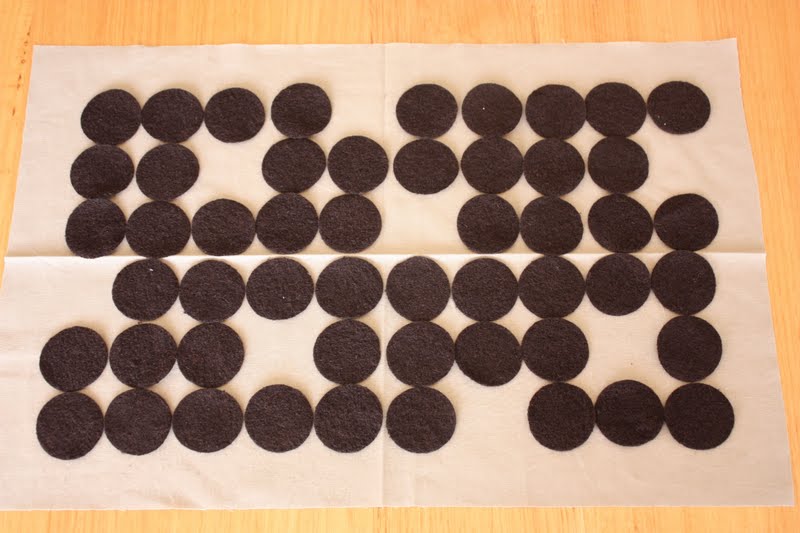
3. On the pillow front, lightly press it into four quarters to assist with placement of the circles. Lay out the circle in 6 rows x 10 columns. I then removed 8 circles to add more interest but this is up to you.
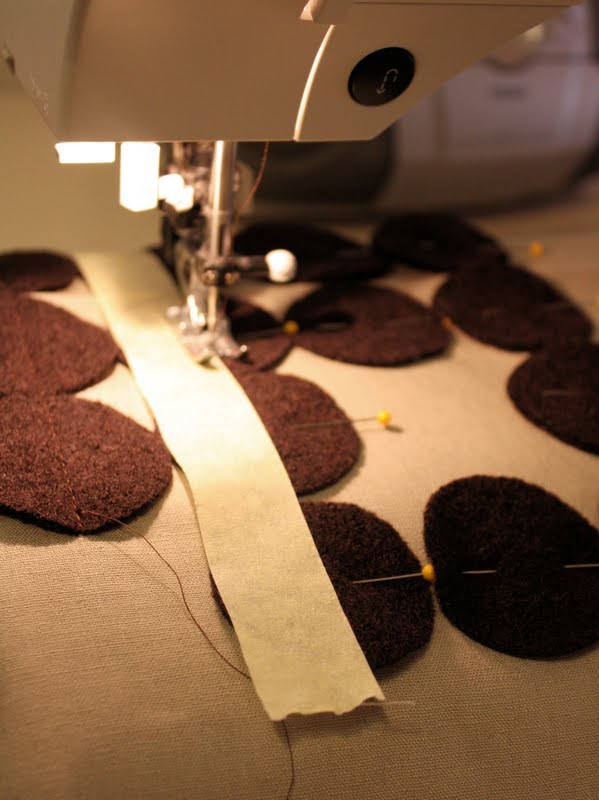
4. Pin the circles in place. Then stitch a line down the middle of each column of circles to secure. I used masking tape that is 1 inch thick to use as a stitching guide.


5. With the 15 x 19 1/2″ linen rectangle, iron the fusible interfacing strip to the wrong side on the linen along a 15″ edge. Press the edge that is interfaced under 1 1/2″. Mark the position of three equally spaced buttonholes along the folded edge, and stitch using your sewing machines buttonhole stitch. Cut the opening in the buttonholes.
6. With the 15 x 8″ piece of linen, iron the fusible interfacing strip to the wrong side along a 15 ” edge, fold under this long edge by 1 1/2″ and press.
7. 7. Position the larger backing piece on top of the pillow front with the right sides facing, and so that the edges are aligned.
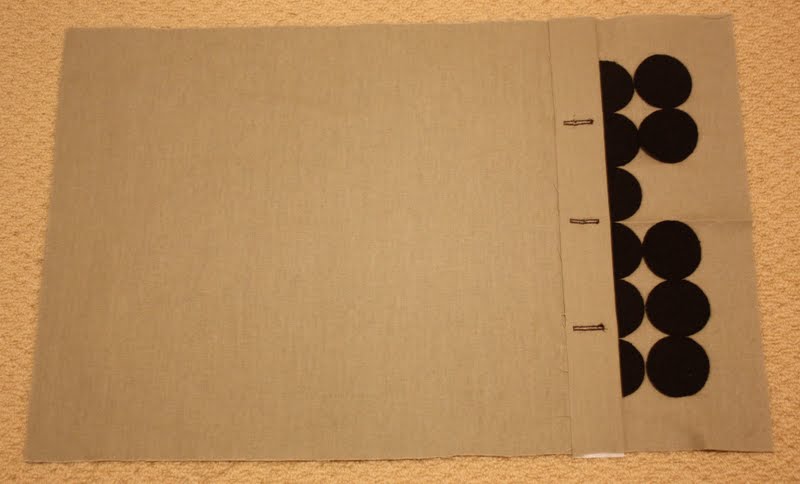
8. Then position the smaller backing piece so that the interfaced edges, overlap. Stitch the pieces together around the perimeter using a ½” seam allowance. Clip corners and turn the cushion cover out the right way, and press. Attach the buttons and then place the cushion insert inside the cushion cover.
For more free patterns, you can signup to Accuquilt’s newsletter here:

Hope to be back soon with news of a giveaway! Accuquilt will be giving away one free Go!Baby Fabric cutter and a choice of 3 dies to one lucky reader.


Lovely design – looks simple and stylish – thanks for the tutorial.
I would not want to try cutting those circles by hand!Thanks for the other observations, good to know what else you are up for when you make this sort of purchase. Tracee xx
Excellent review, project & tutorial 😉
I absolutely love it. But, I don’t have a cutter, so I don’t think I’ll be making it :o)
I’ve read that to stop the mis-shapes, put a sheet of paper on top of the fabric.
Love the pillow. I won an Accuquilt Go Cutter and had the same issues with cracking mat and distortion of shapes if you don’t lay the fabric out just so.
Oh, how I would love to win one of those machines! When I cut my circles, they never come out perfect.
thats adorable! what a lovely tutorial.
I think you have found the perfect project for your cutter! Circles are almost impossible to cut perfectly free hand! Well done your cushion looks great!
I love this! I will have to cut out the circles by hand…but the design is so great! Thanks for sharing:)
That is one super stunning cushion. Thanks for sharing.
I love your pillow. Great review. Thank you xxx
This is so neat! Love that cutter, hadn’t seen one like it before.
Would you be so kind to (& tell your friends) comment on my BLOG ONLY (emails don’t count), for the Miracle Makeover fund drive. Charlie, 8 yr. old, & his story are fabulous. Every comment brings us a $1 for the next person that will be sponsored.
Have a beautiful weekend.
Hugs,
TTFN ~
Marydon
blushingrosetoo.blogspot.com
What a stylish cushion, looks great.
I just bought a cushion with a similar circle design on a hemp background. Would love to try your tutorials out one day 🙂
Lovely pillow! How nice to have a machine to cut your circles for you!
Jill @ Creating my way to Success
http://www.jembellish.blogspot.com/
Looks so easy! And fun, too! Now, I think I need one. 🙂
Deborah
Homemaker Honey
homemakerhoney.com
AWESOME! Outstanding! So modern! This is the first Go baby tutorial I’ve seen (and I’ve seen many lately) that’s actually made me consider buying one. Absolutely love those wool circles! Great job!
This comment has been removed by the author.
I love the cushion, sounds like a great machine!
Dear Lisa, your tutorial is perfect!! Thanks for sharing it!
Much love to you all!!
Bela
woohoo so glad you did that tutorial as I have a go baby I got at christmas! i love it but you are so right on the grain! i had some wonky little squares that weren’t the right size! I got the charm square 5 inch cutter and can’t wait to get stuck into my cute fairy tales and make some charm square quilts with precious fabrics!
enjoy!
corrie;)
Very pretty! Circles are the best reason I’ve seen for having the GoBaby — they’re so hard to cut individually!
Some quilt shops let you rent their machine – so if you don’t have one, you can cut your felt or fabric at a shop. Cute pillow – I wonder if the circles will curl after a while…