A Spoonful of Sugar

Make. Bake. Create.

Menu
  • Home
  • About
    • About Us
    • Press
    • FAQ
    • Disclosure Policy
    • Contact Us
  • Crafts
    • Crochet
    • DIY
    • Embroidery/Cross stitch
    • Gift Wrapping
    • Knitting
    • Miscellaneous
    • Paper Crafts
  • Holidays
    • New Year’s
    • Australia Day
    • Back to School
    • Valentines Day
    • Easter
    • ANZAC Day
    • Mother’s Day
    • Father’s Day
    • Halloween
    • Christmas
  • Recipes
    • Appetizers
    • Bars & Slices
    • Bread & Pastries
    • Cakes
    • Cookies
    • Confectionery
    • Cupcakes & Muffins
    • Desserts
    • Drinks
    • Ice Cream
    • Jams/Preserves
    • Main Meals
  • Sewing
    • Sewing Tutorials
    • Quilting
    • Sewing & Quilting Patterns
  • Family
    • Back to School
    • Family Fun
    • Our Home
    • Parenting
    • Travel
  • Shop
    • Pattern Store
    • Etsy Store

New Years Eve Decorations

December 28, 2012 By Spoonful of Sugar - 10 Comments

For our New Years Eve dinner, we have made Confetti Baubles to put at each place setting. They are easily made by filling a plain glass bauble with confetti. We added a vinyl 2013 to the outside of the glass. To stop the baubles rolling around the table, we have positioned them on Chinese soup spoons.

You will need:
DIY Glass Baubles (usually available from craft stores – should be on sale at this time fo the year).
coloured paper/card
hole punch
ribbon
Optional: Cricut Digital Cutting Machine and white vinyl.

We went crazy punching out coloured circles with the hole punch, until we had a big pile of confetti. We then carefully filled each bauble with a couple of tablespoons on confetti. We cut the numbers for 2013 in white vinyl using our Cricut machine and positioned them in the middle of the bauble. We tied a small piece of ribbon around the hanging loop.

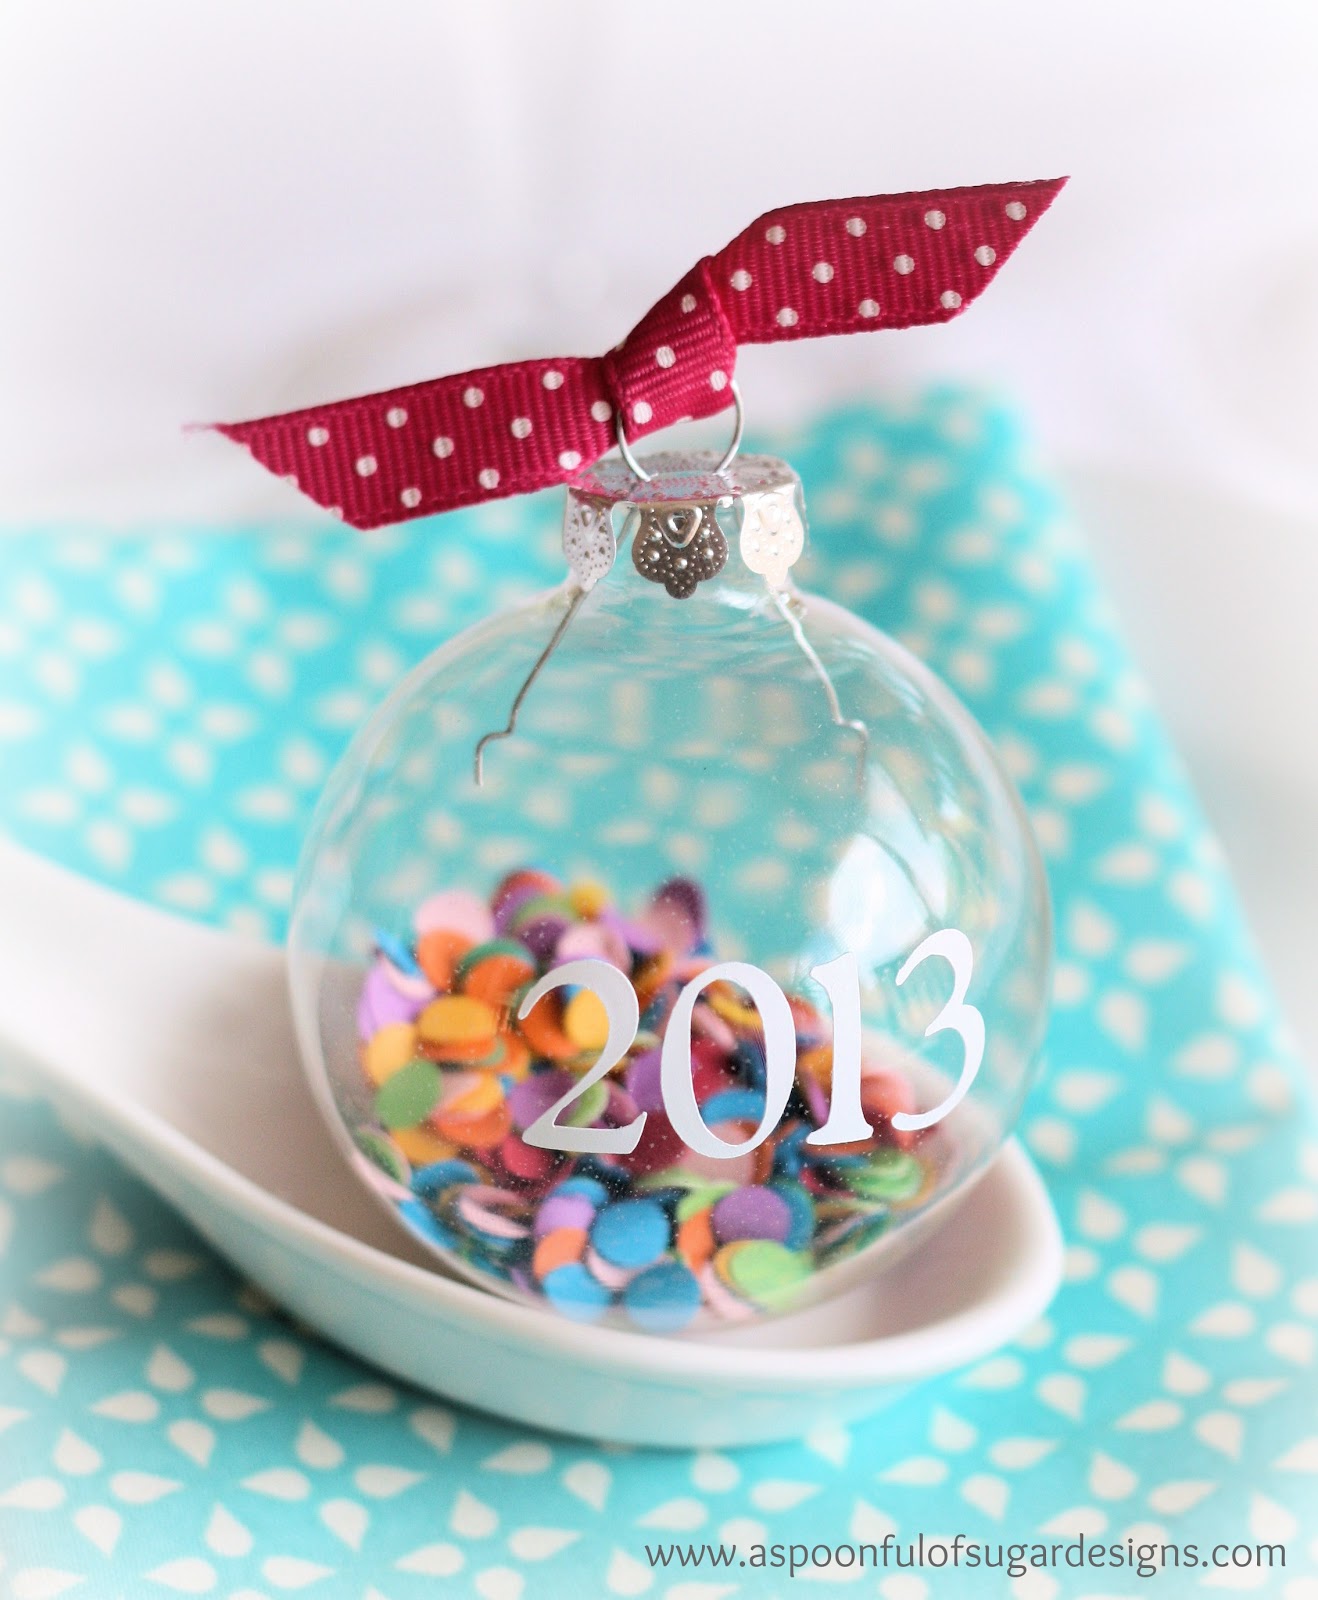
The Confetti Baubles look so colourful, fun and festive – perfect for New Years!

When I have decided on my One Little Word for 2013, I will write it on a slip of paper and place it in my bauble, which I will hang above my desk as a reminder of what I hope to achieve in 2013. My word for 2012 was update which proved to be a very powerful word and a good focus for some change.

For another project using DIY Glass Baubles, check out our Christmas Feather Baubles.

For your daily sugar fix you can subscribe or follow us on facebook, pinterest, twitter, and google plus.  

Filed Under: Miscellaneous, New Year's Tagged With: confetti

« Best of 2012
Banana Muffins »

Comments

  1. Nat @ dear little house says

    December 28, 2012 at 4:04 am

    How lovely! I will have to pick up some of those baubles tomorrow when I’m out shopping. There are so many possibilities! I love the one little word too…

    Reply
  2. Ruby Jean says

    December 28, 2012 at 8:33 am

    So Very simple and fun. It really adds a bit of color and excitement to the table 🙂
    Happy New Year!!
    Angelina

    Reply
  3. Katharina says

    December 28, 2012 at 2:03 pm

    Great idea. I love it.

    Have a nice night.
    Katharina

    Reply
  4. Celestial Charms says

    December 28, 2012 at 4:54 pm

    What a delightful and cute idea. Looking forward to the New Year!
    Maureen

    Reply
  5. Cheryl says

    December 28, 2012 at 6:17 pm

    Love the New Years decoraton!!! The best to you and your family in 2013.

    Reply
  6. Handmade in Israel says

    December 29, 2012 at 2:19 am

    Oh, I love these! Such a sweet idea.

    Reply
  7. thesnailgarden says

    December 29, 2012 at 2:30 am

    I love your bauble! I hope that you and yours are enjoying the festive season. wishing you all a Very Happy new Year, Pj x

    Reply
  8. Anonymous says

    January 1, 2013 at 9:22 pm

    Another great little celebration project. Cute, quick and easy, just what I like…. !! Happy New Year girls. Faye XX

    Reply
  9. K Coake says

    January 2, 2013 at 9:34 am

    What a cute idea! It look so cute on the table.
    KC

    Reply
  10. Fiona @ Dragonfly-Crafts says

    January 6, 2013 at 2:18 pm

    What a great idea 🙂 Happy New Year to you both 🙂

    Reply

Leave a Reply Cancel reply

Your email address will not be published. Required fields are marked *

  • Email
  • Facebook
  • Instagram
  • Pinterest
  • Threads
  • TikTok
SUBSCRIBE TO NEWSLETTER
×

Categories

Archives

PURCHASE PDF PATTERNS

We offer over 100 affordable PDF sewing patterns available for download from our store website or Etsy store. Each pattern includes detailed instructions, numerous photos, and templates.

WEB STORE ETSY STORE

Instagram

A tiny pyramid that does it all — a pattern weight A tiny pyramid that does it all — a pattern weight for your sewing table, a book weight for cosy reading, or a scented sachet for your drawers. Small, sweet, and so satisfying to sew. Comment PYRAMID for the free pattern.Fabric: Something Blue by Tilda
@tilda_australia#sewingproject #tildafabric #beginnersewing #scrapsewing #Tildasomethingblue
Meet the sweetest little project you can sew in mi Meet the sweetest little project you can sew in minutes — the Pyramid Weight. Use it as a pattern weight, scented sachet, or even a book weight… all from one triangle of fabric. Comment PYRAMID for the free pattern.Fabric is Something Blue by Tilda, releasing 1 June 2026 — with thanks to @tilda_australia.#tildasomethingblue #tildafabric #freepattern #sewingtutorial #sewinglove
The Scrappy Strips Pouch is one of my favourite wa The Scrappy Strips Pouch is one of my favourite ways to use up leftover fabric strings. Today’s version is made from patchwork strips — a fun, relaxing sew that turns scraps into something beautiful and practical.The Scrappy Strips Pouch pattern has two versions - patchwork strings and selvedges - and two sizes. Comment SELVEDGE (or SELVAGE) for a link to the pattern.Pattern Details: Scrappy Strips Pouch Sewing Pattern is in our Pattern Store and Etsy Shop.#ScrappyStripsPouch #ScrapBustingSewing #PatchworkPouch #StringQuilting #SewingProjects
If you’ve ever wanted to add eyelets or grommets t If you’ve ever wanted to add eyelets or grommets to your sewing projects, here’s a quick look at how I install them using my DK93 snap press. It’s the same tool I use for snaps — and it makes installing eyelets beautifully quick and consistent.Here’s how I install the eyelets:Punch out the four holes using a hole‑cutting die.Place the eyelet into the hole.Press it into place using the snap press.That’s it — simple, sturdy, and it gives the Ribbon Pouch such an elevated, professional finish. I love how clean and secure the result is.Fabric shown: Tilda Something Blue, releasing June 1 — thank you @tilda_australia for the beautiful fabric.✨ If you’d like the Ribbon Pouch pattern (3 sizes), comment RIBBON and I’ll send the link straight to you.Ribbon Pouch Sewing Pattern: available in my Pattern Store and Etsy Shop (links in profile).#tildasomethingblue #tildafabric #sewingtips #handmadeeveryday #sewingtools
The Ribbon Pouch is one of my favourite quick‑to‑s The Ribbon Pouch is one of my favourite quick‑to‑sew gift bags, and I couldn’t resist making a light and dark version using the new Tilda Something Blue collection. Both pouches use the same print in different colourways — such a pretty way to show how fabric choice changes the whole mood.They’re finished with satin ribbon threaded through grommets, and topped with a tiny star tag. The boxed base helps them stand beautifully, and the ribbon closure makes them perfect for birthdays, thank‑you gifts, treats, or little treasures.This is a beginner‑friendly, scrap‑friendly, quick project you’ll want to sew again and again. Pattern includes 3 sizes.If you’d like the pattern, comment RIBBON and I’ll send the link straight to you.Pattern Details: Ribbon Pouch (3 Sizes) available in my Pattern Store and Etsy Shop.Fabric Details: Tilda Something Blue - releasing on 1 June 2026. Thanks to @tilda_australia#TildaSomethingBlue #TildaFabric #SewingPattern #BeginnerSewingProject #QuickSewingProject   
Sewing with scraps is one of my favourite ways to Sewing with scraps is one of my favourite ways to get creative — small pieces, leftover corners, charm‑square offcuts… they all have so much potential.Here are 10 scrap‑friendly projects that use small pieces beautifully. They’re quick to sew, beginner‑friendly, and perfect for gifting ✂️✨Save this for the next time you want to turn your scraps into something pretty.Which one would you sew first?  Tell me in the comments — I love seeing what you’re making.Patterns are available in my pattern store (link in profile) or comment PATTERNS and I will send you the link. #scrapsewing #scrapbusting #scrapfriendly #sewinginspiration #sewingideas
Follow on Instagram

Featured Pattern

Travel Sewing Kit Pattern

Featured Tutorial

Retro Drawstring Bag

Featured Recipe

Lemon Pound Cake

Connect

  • Email
  • Facebook
  • Instagram
  • Pinterest
  • Threads
  • TikTok
SUBSCRIBE TO NEWSLETTER
×

Popular Posts

  • Cord Cosy
  • Tips for Threading a Needle
  • Travel Accessories to Sew
  • Liberty Tissue Cover
  • Charm Square Fabric Tray
  • Happy Scrappy Cards
  • Life Lessons from Sewing and Quilting

Copyright © 2026 Lisa. K. Cox - A Spoonful of Sugar