A Spoonful of Sugar

Make. Bake. Create.

Menu
  • Home
  • About
    • About Us
    • Press
    • FAQ
    • Disclosure Policy
    • Contact Us
  • Crafts
    • Crochet
    • DIY
    • Embroidery/Cross stitch
    • Gift Wrapping
    • Knitting
    • Miscellaneous
    • Paper Crafts
  • Holidays
    • New Year’s
    • Australia Day
    • Back to School
    • Valentines Day
    • Easter
    • ANZAC Day
    • Mother’s Day
    • Father’s Day
    • Halloween
    • Christmas
  • Recipes
    • Appetizers
    • Bars & Slices
    • Bread & Pastries
    • Cakes
    • Cookies
    • Confectionery
    • Cupcakes & Muffins
    • Desserts
    • Drinks
    • Ice Cream
    • Jams/Preserves
    • Main Meals
  • Sewing
    • Sewing Tutorials
    • Quilting
    • Sewing & Quilting Patterns
  • Family
    • Back to School
    • Family Fun
    • Our Home
    • Parenting
    • Travel
  • Shop
    • Pattern Store
    • Etsy Store

Flower Tape Measure

May 5, 2012 By Spoonful of Sugar - 15 Comments

If you are after a quick gift to make for a sewing friend, you can’t go past a covered tape measure – pretty and practical. I made this version using some die cut felt flowers that I purchased from Etsy or you could easily cut your own flowers from coloured felt.

The Covered Tape Measure Tutorial was one of my first free tutorials. Although my photography and styling has improved enormously since it was published on our blog in 2008, the instructions are still the same. Simply stitch the layered felt flowers onto one side of the cover before it is assembled. Use double sided fusible web to attach applique (such as Steam a Seam light; Vliesofix; etc).

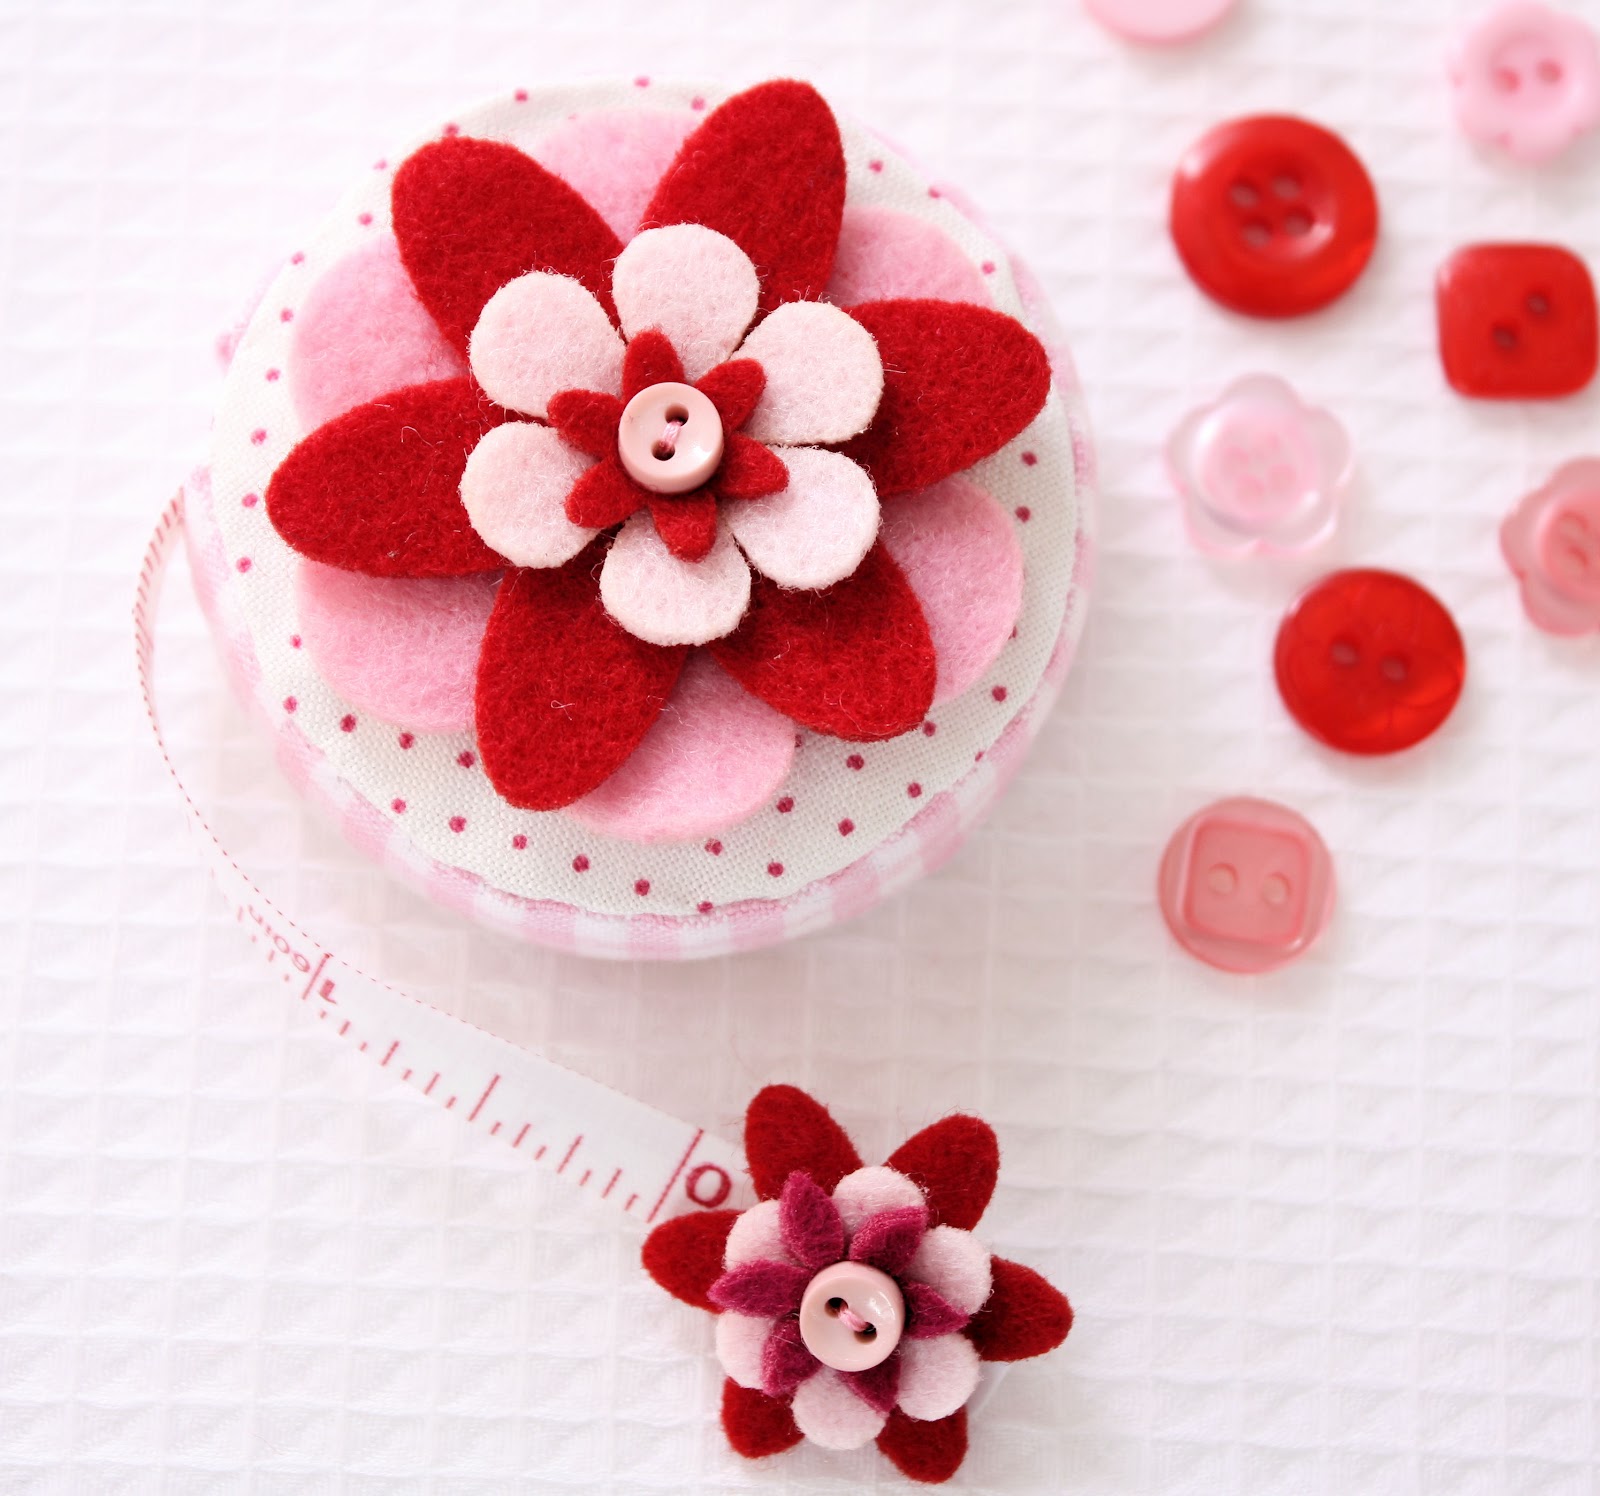
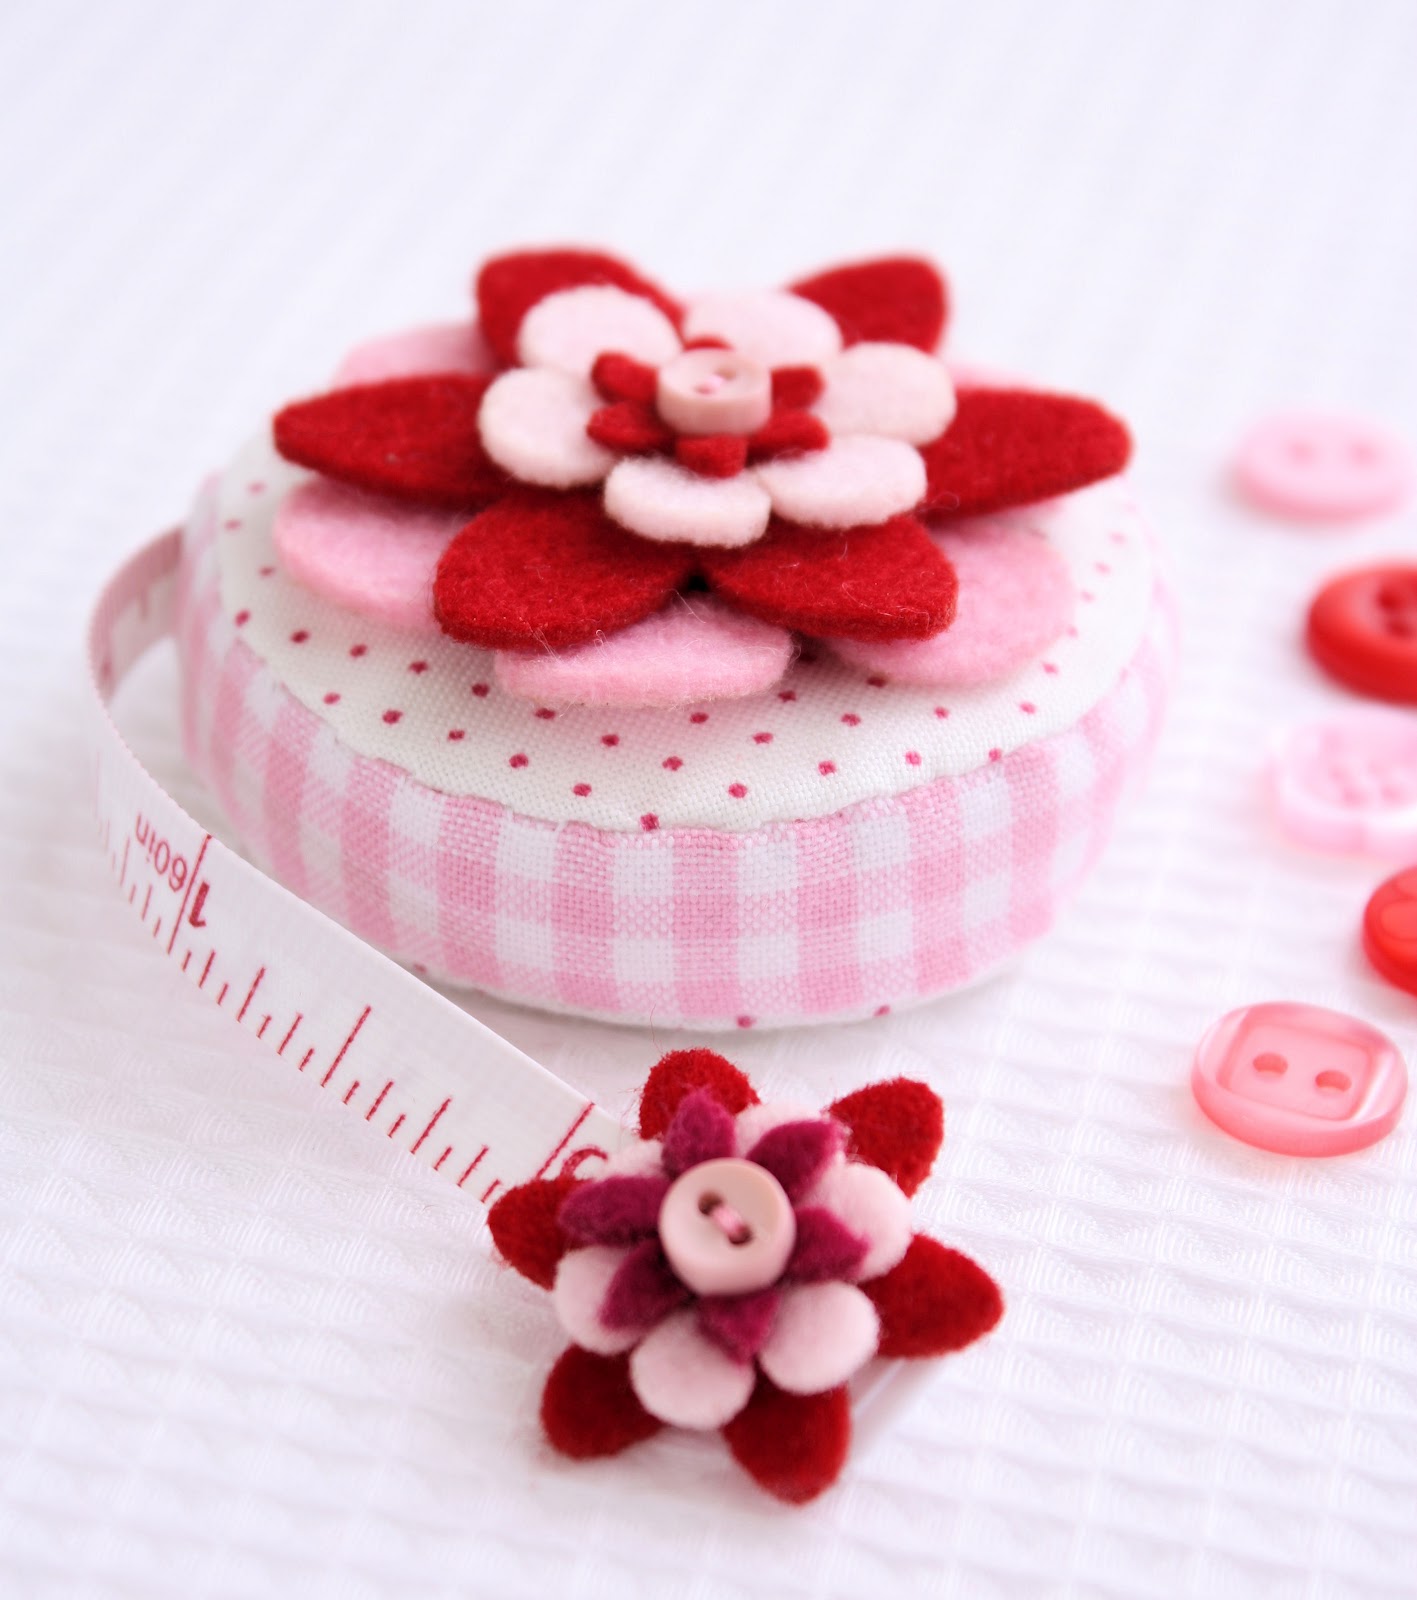
I also added a smaller flower to the end of the tape measure (you can stitch it through the plastic tape using a sharp needle) to finish it off.

 You can find the free tutorial here:  Covered Tape Measure

Hello! Are you new here? If so, be sure to sign up for our newsletter here and receive a bonus sewing pattern and welcome discount. Our newsletter includes free tutorials, articles, and new patterns. Welcome to the world of sewing enthusiasts.

Filed Under: Sewing Tutorials Tagged With: felt

« Book Review: Mad Men, Bad Girls, and the Guerilla Knitters Institute
Classic Vanilla Cupcakes »

Comments

  1. Patchwork and Play says

    May 5, 2012 at 8:04 pm

    Very sweet! Pink and red together are so pretty!

    Reply
  2. Asfina says

    May 6, 2012 at 3:59 am

    it’s so cute 🙂

    Reply
  3. VickiT says

    May 6, 2012 at 3:38 pm

    Ooh that’s very pretty.

    Reply
  4. Terriaw says

    May 6, 2012 at 6:19 pm

    Adorable! The little flower is a wonderful extra touch. I wish I had the time to make this.

    Reply
  5. Anina says

    May 7, 2012 at 8:25 am

    Love it!

    Reply
  6. Nanette Merrill says

    May 7, 2012 at 3:00 pm

    I can’t believe how cute that is. What a sweet idea.

    Reply
  7. Tatkis says

    May 7, 2012 at 6:12 pm

    Oh, it looks so lovely with felt flowers!
    Thanks a lot for the tutorial!

    Hugs,
    Tatyana

    Reply
  8. Making It Vintage says

    May 8, 2012 at 12:07 am

    Very pretty. x

    Reply
  9. Indigo Blue says

    May 8, 2012 at 11:22 am

    That is really cute. I really like the flower on the end of the tape.

    Reply
  10. Fiona @ Dragonfly-Crafts says

    May 10, 2012 at 2:41 am

    Awww that is SO cute 🙂

    Reply
  11. Talin's Corner says

    May 9, 2012 at 12:05 pm

    That is so pretty.

    Reply
  12. Claire says

    May 9, 2012 at 6:07 pm

    Love, love, love pink and red together, this is so sweet….

    What a wonderful, personal gift for a friend,

    Claire :]

    Reply
  13. SJ Scott says

    May 10, 2012 at 10:07 am

    What a lovely gift!

    Reply
  14. Nancy Bandzuch says

    January 18, 2013 at 2:35 pm

    Adorable–I am a felt-a-holic, so consider this pinned!
    Thanks for linking up to the oldies party this week–the new party will be live on Monday night.
    AND, I’m excited to be featuring this oldie, but definitely a goodie!
    Nancy

    Reply
  15. Zosia Samosia says

    April 18, 2013 at 11:37 pm

    Jeśli to jest centymetr schowany w to piękne wdzianko to jest boski pomysł! Zgłaszam, że odgapię z pewnością! 🙂
    Pozdrawiam!

    Reply

Leave a Reply Cancel reply

Your email address will not be published. Required fields are marked *

  • Email
  • Facebook
  • Instagram
  • Pinterest
  • Threads
  • TikTok
SUBSCRIBE TO NEWSLETTER
×

Categories

Archives

PURCHASE PDF PATTERNS

We offer over 100 affordable PDF sewing patterns available for download from our store website or Etsy store. Each pattern includes detailed instructions, numerous photos, and templates.

WEB STORE ETSY STORE

Instagram

If you love quick, practical sewing projects, the  If you love quick, practical sewing projects, the Baker’s Buddy Mitt is such a fun one to make. It’s scrap‑friendly, gift‑ready, and perfect for anyone who loves to bake.The Bakers Buddy Mitt is 25% off this week only. Comment BAKER and I’ll send you the link to the pattern.  #SewingProject #ScrapFriendlySewing #KitchenSewing #SewingGifts #SewingCommunity
Adding a handmade label is one of my favourite way Adding a handmade label is one of my favourite ways to personalise a project — and these little fabric + felt labels are so quick and satisfying to make.For this Ribbon Pouch, I used the Liberty Gifts from the Garden collection, which has the sweetest fruit motifs. They make perfect tiny labels for pouches, bags, and gifts.Here’s how to make your own:Press a piece of double‑sided fusible web to the back of your fabric.Cut around your chosen motif.Peel off the paper backing.Press the motif onto wool felt.Trim the felt with scalloped scissors.Sew the label onto the front of your pouch.Such a simple detail, but it adds so much charm. Fabric kindly gifted by @regent_street_fabrics — thank you!If you’d like to sew the Ribbon Pouch (3 sizes), comment RIBBON and I’ll send the pattern link straight to you.#SewingInspiration #FabricLabels #DIYLabels #LibertyFabric #LibertyGiftsFromTheGarden
A lot can change in 10 years ❤️ It’s been fun look A lot can change in 10 years ❤️ It’s been fun looking back at where I was in 2016 and how far life has come since then. Swipe for a little trip down memory lane.Back in 2016, my priorities were firmly centred around family. I was working full‑time, sewing in the guest room, sharing tutorials on my blog, and slowly dipping my toes into selling a handful of patterns on Etsy. It was a busy, full season — and creativity was something I fitted in around everything else.  Fast forward to 2026… I’m now retired and living the creative life I once dreamed of. My kids have grown up and are living in their own homes nearby. My husband and I are free to travel, explore, and enjoy this stage of life. And I get to spend my days designing, sewing, and connecting with this beautiful community.Life looks different now — in the best possible way.Were you following me back then, or what has changed for you over the past 10 years? I’d love to hear your story too.Tagging the lovely makers of my quilt: @arabesquescissors @ministryoffabric @belloquacity @alittlepatchwork @sameliasmum coleandtaffy @quiltymamaof4 @shequiltsalot @downgrapevinelane @lizzierosesews @lovethatfabric @sew_mimi.k #2026isthenew2016 #10yeartransformation #sewingjourney #sewingcommunity #aspoonfulofsugardesigns
Fall in love with sewing all over again ❤️I’ve Fall in love with sewing all over again ❤️I’ve rounded up 10 heart‑themed makes — from quick gifts to charming quilt blocks — perfect for weekend stitching or using up your favourite scraps. Whether you’re sewing for Valentine’s Day, birthdays, or just because, there’s something sweet for every maker.Comment HEART and I’ll send you a link to my Heart Pattern Collection.#sewingproject #heartsewing #quiltblock #scrapsewing #easytosew
Raw edge appliqué doesn’t have to feel fiddly or i Raw edge appliqué doesn’t have to feel fiddly or intimidating. With a few simple techniques, you can create neat, crisp shapes — even tiny details like penguin beaks and hearts.I’ve put together My Top 5 Secrets for Raw Edge Appliqué to help you feel confident, whether you’re brand new to appliqué or looking to refine your finish. Save this for your next sewing session.If you’d love a quick, beginner‑friendly project to practise these tips, my Penguin Love Mugrug is the sweetest Valentine’s make — scrap‑friendly, gift‑ready, and such fun to sew.Comment PENGUIN and I’ll send you the link to the pattern. Available now in our Pattern Store and Etsy shop.  #rawedgeapplique #appliquetips #sewingtipsandtricks #mugrugpattern #penguinlove
If you’ve ever wanted to add eyelets or grommets t If you’ve ever wanted to add eyelets or grommets to your sewing projects, here’s a quick look at how I install them using my DK93 snap press. It’s the same tool I use for snaps — and it makes installing eyelets beautifully quick and consistent.For this Ribbon Pouch, I used the Liberty Gifts from the Garden collection (printed on Lasenby cotton and released in January 2026). The colours and motifs pair so well with the little ribbon tie detail.Here’s how to install the eyelets:Punch out the four holes using a hole‑cutting die.Place the eyelet into the hole.Press it into place using the snap press.That’s it — easy peasy, and it gives the pouch such an elevated, professional finish. I love how clean and sturdy the result is.Fabric is Gifts from the Garden by Liberty - kindly provided by @regent_street_fabrics — thank you!If you’d like the Ribbon Pouch pattern (it comes in 3 sizes), comment RIBBON and I’ll send the link straight to you.Ribbon Pouch Sewing Pattern: available in our Pattern Store and Etsy shop ( links in profile).#SewingInspiration #SewingProjects #Eyelets #Grommets #SnapPress
Follow on Instagram

Featured Pattern

Travel Sewing Kit Pattern

Featured Tutorial

Retro Drawstring Bag

Featured Recipe

Lemon Pound Cake

Connect

  • Email
  • Facebook
  • Instagram
  • Pinterest
  • Threads
  • TikTok
SUBSCRIBE TO NEWSLETTER
×

Popular Posts

  • Charm Square Fabric Tray
  • Merry Little Christmas Sewing Projects
  • {Back to School} Tissue Cover
  • Hexagon Fabric Tray
  • Raw Edge Applique Tips
  • Sewing Gifts 101: Easy and Affordable Ideas for Your Crafty Friends
  • Finding More Time to Sew

Copyright © 2026 Lisa. K. Cox - A Spoonful of Sugar