A Spoonful of Sugar

Make. Bake. Create.

Menu
  • Home
  • About
    • About Us
    • Press
    • FAQ
    • Disclosure Policy
    • Contact Us
  • Crafts
    • Crochet
    • DIY
    • Embroidery/Cross stitch
    • Gift Wrapping
    • Knitting
    • Miscellaneous
    • Paper Crafts
  • Holidays
    • New Year’s
    • Australia Day
    • Back to School
    • Valentines Day
    • Easter
    • ANZAC Day
    • Mother’s Day
    • Father’s Day
    • Halloween
    • Christmas
  • Recipes
    • Appetizers
    • Bars & Slices
    • Bread & Pastries
    • Cakes
    • Cookies
    • Confectionery
    • Cupcakes & Muffins
    • Desserts
    • Drinks
    • Ice Cream
    • Jams/Preserves
    • Main Meals
  • Sewing
    • Sewing Tutorials
    • Quilting
    • Sewing & Quilting Patterns
  • Family
    • Back to School
    • Family Fun
    • Our Home
    • Parenting
    • Travel
  • Shop
    • Pattern Store
    • Etsy Store

Chocolate Truffles

July 20, 2013 By A Spoonful of Sugar - 6 Comments

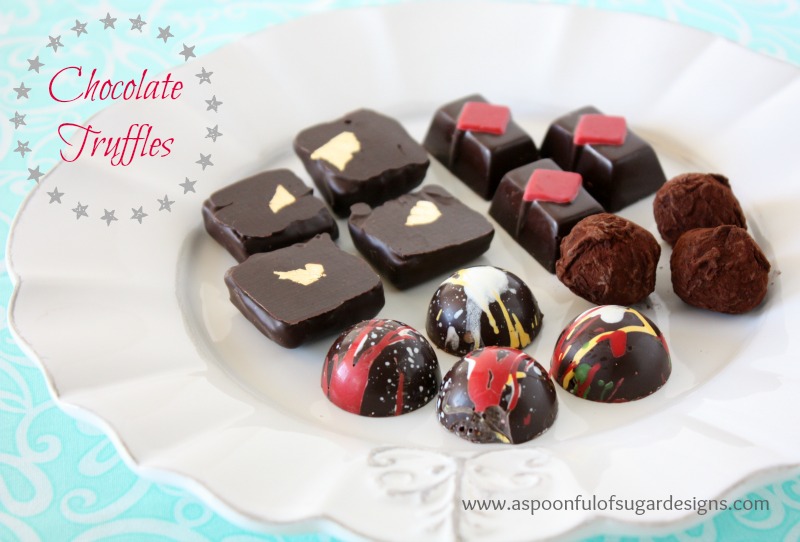
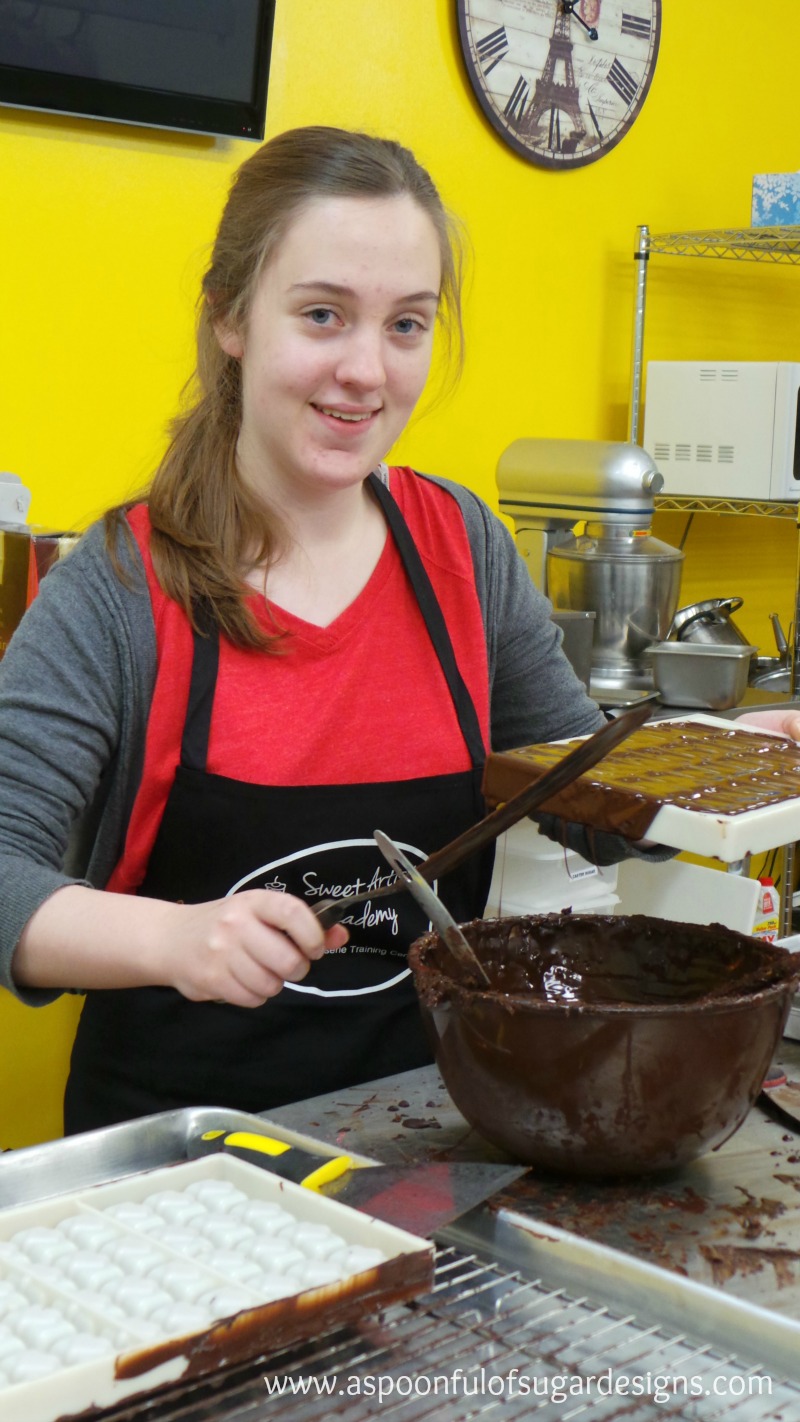
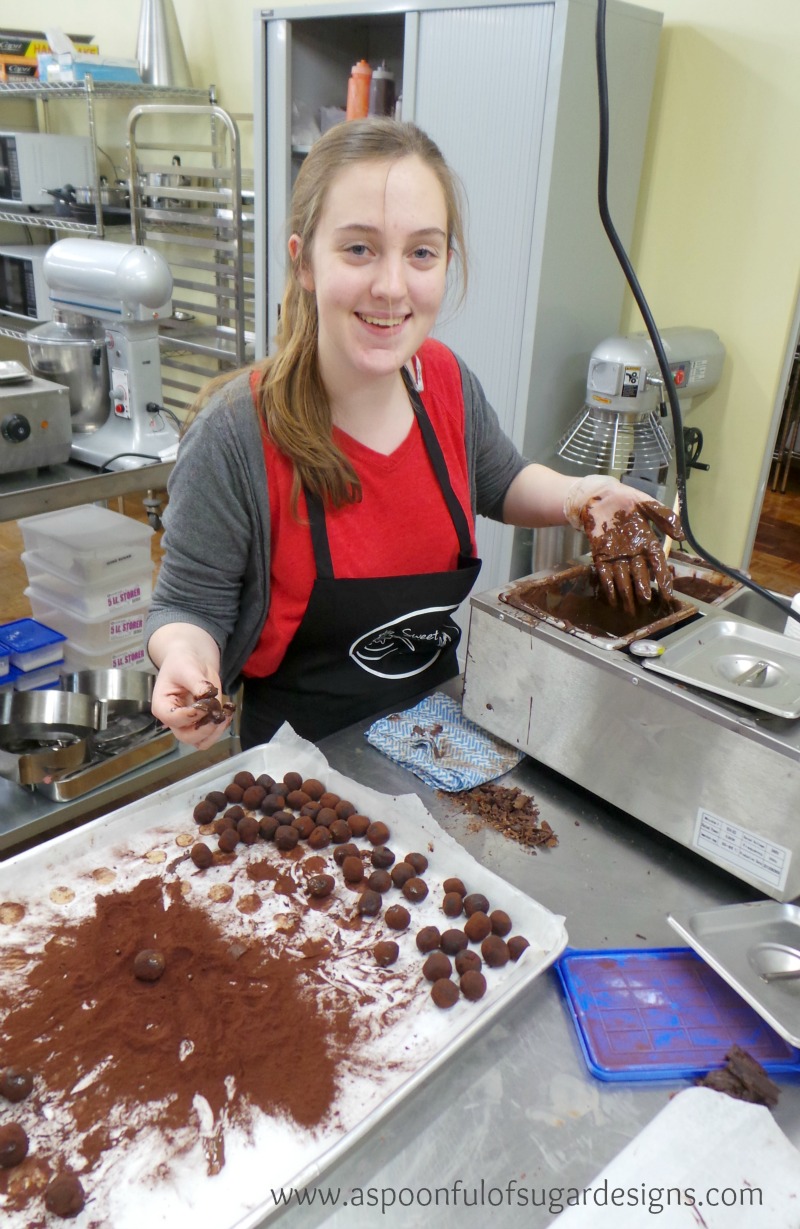
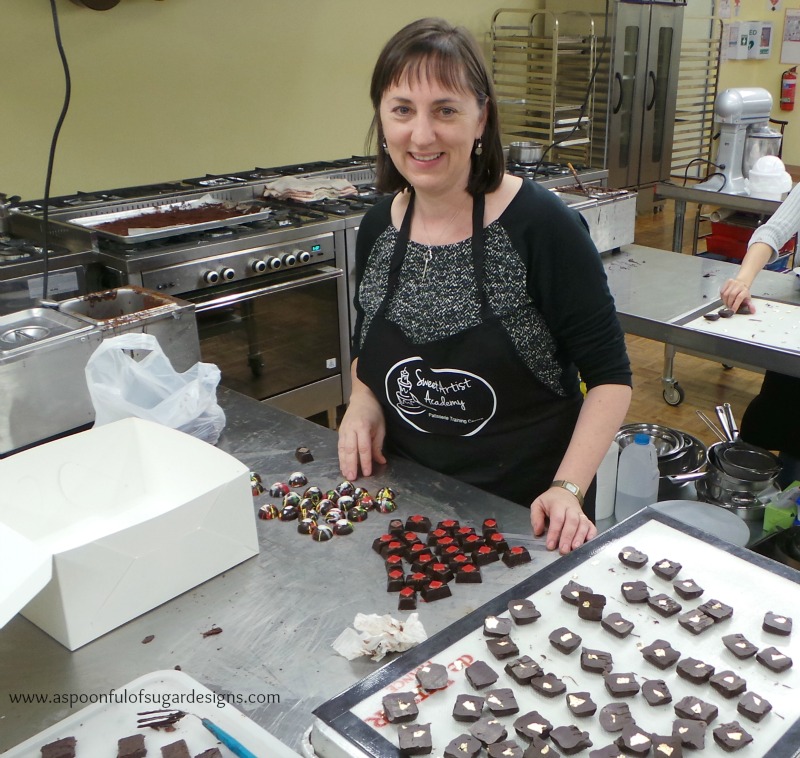
Sarah and I love to create in the kitchen. We are largely self taught, but occasionally attend classes to learn new techniques. Last week we attended a Chocolate Truffle course to learn how to mould, pipe, cut and temper chocolate. The class was at Sweet Artist Academy in Joondalup and was run by French Pastry Chef, Patrick Vuaillat. As you can see from the plate of chocolates and truffles, we managed to plate up some wonderful chocolate confections. We were very popular when we arrived home.

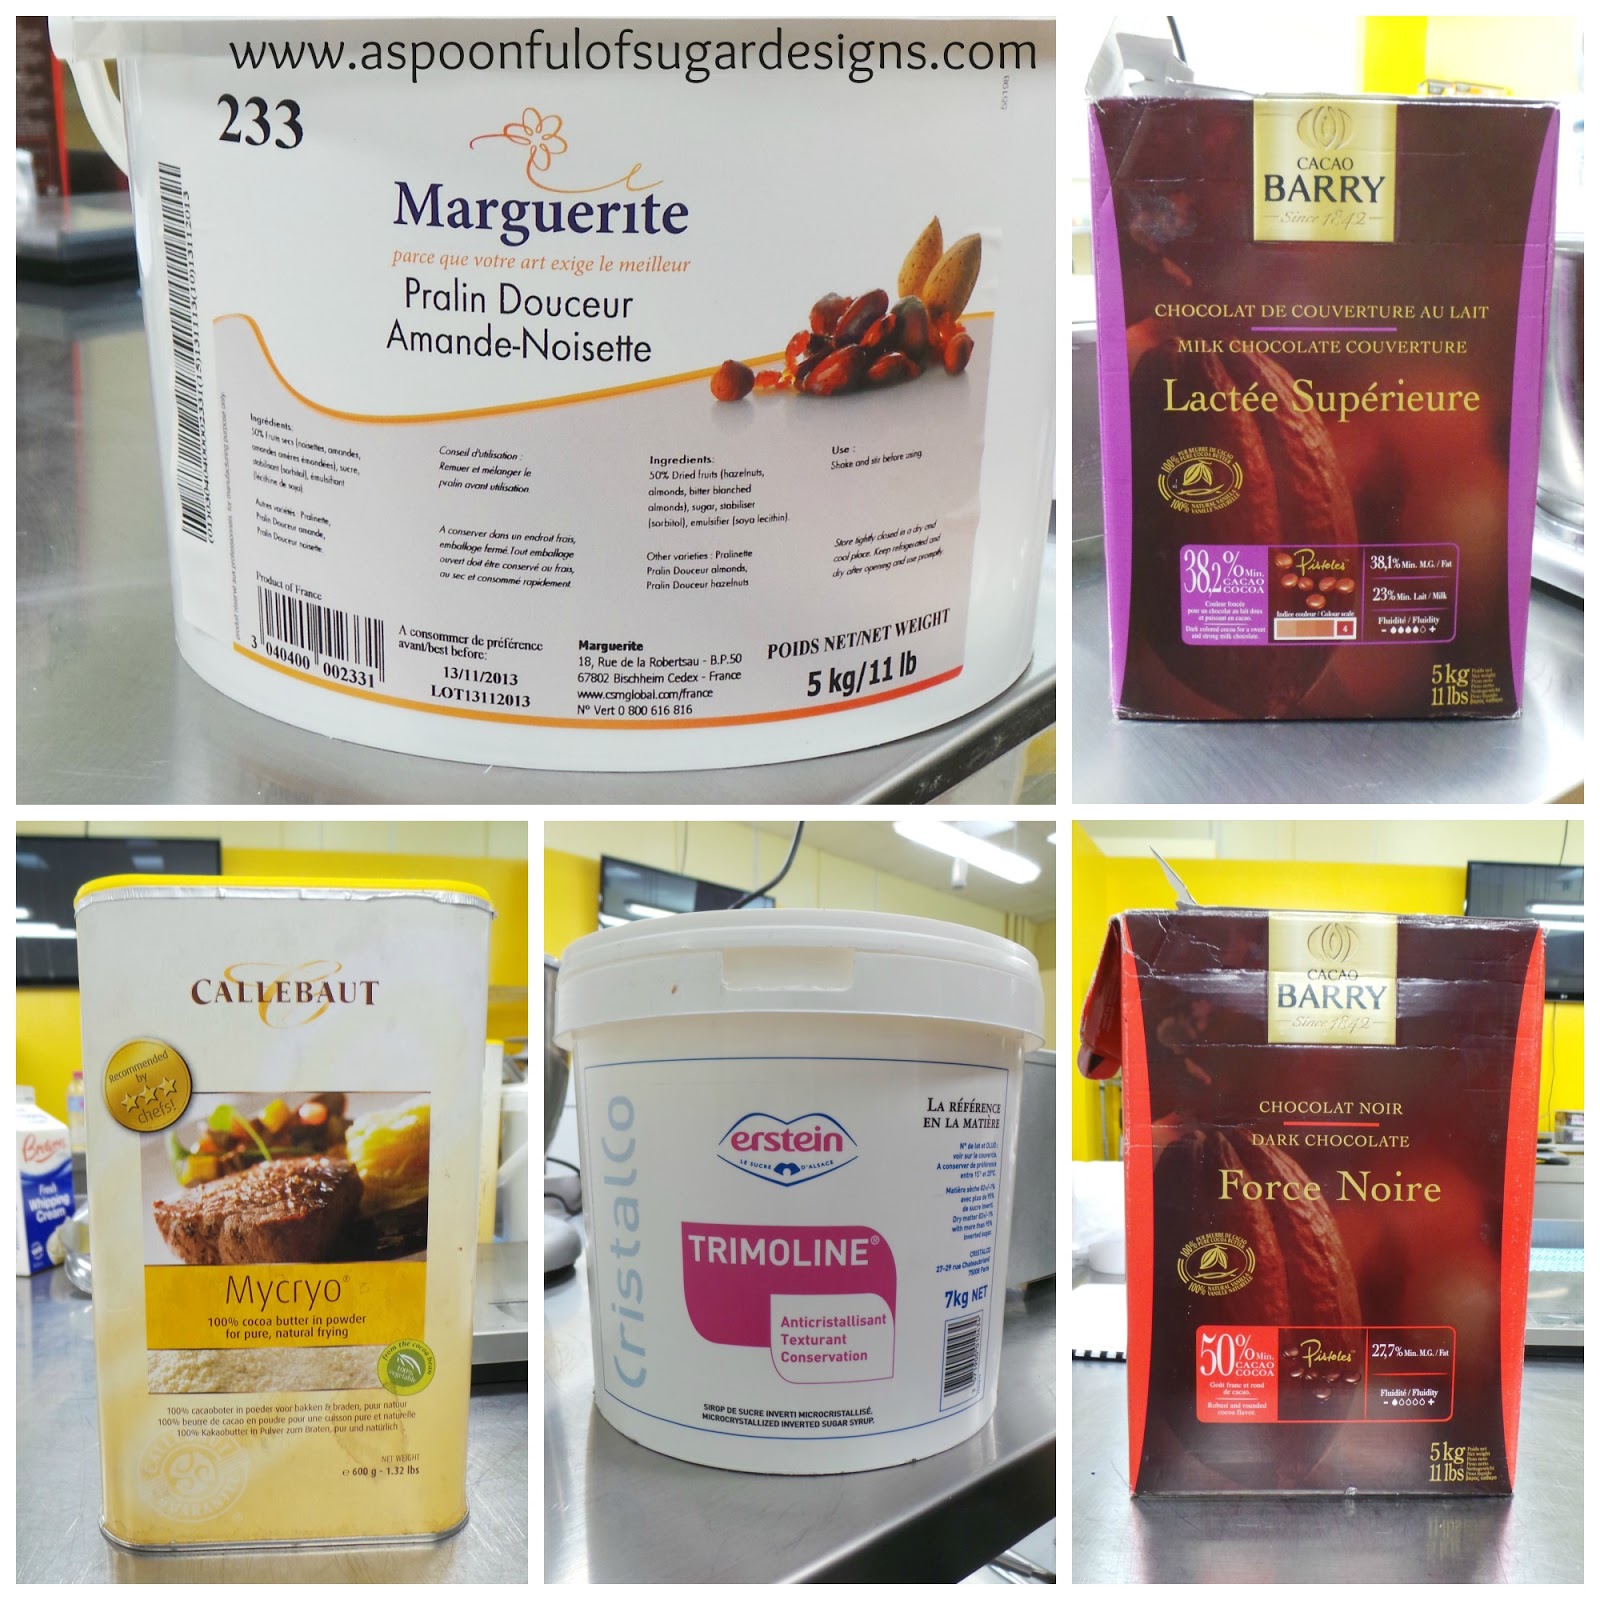
The course was well run and organised in a purpose built professional kitchen. With only four participants, it was like having our own master class. We got to work with the finest French ingredients, which helped us to achieve wonderful results. Of course we had to sample the ingredients during the day – so we could tell the difference between the different grades of chocolate.

Ingredients

During the 7 1/2 hour course, we made

  • Palet d’or – vanilla chocolate ganache dipped in chocolate and topped with gold leaf.
  • rum truffles
  • two types of moulded chocolates with hazelnut praline

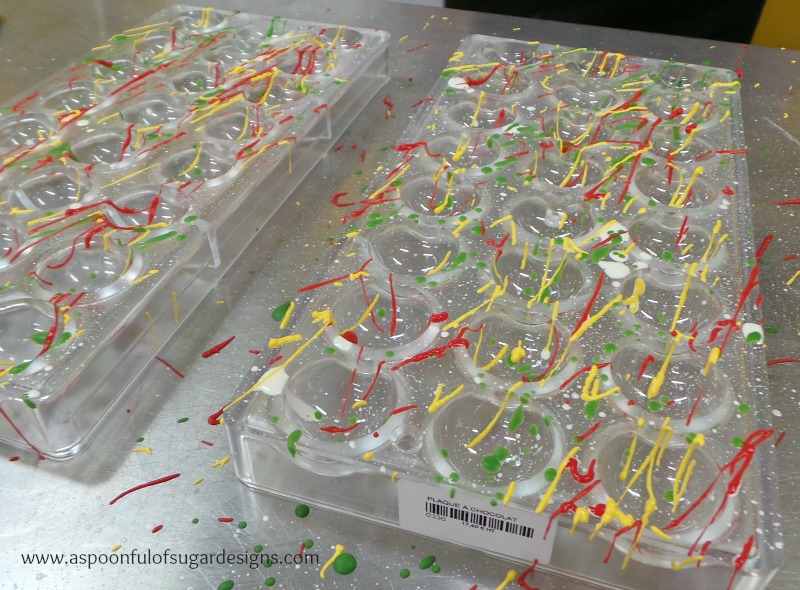
We used coloured milk chocolate to decorate our round moulds.

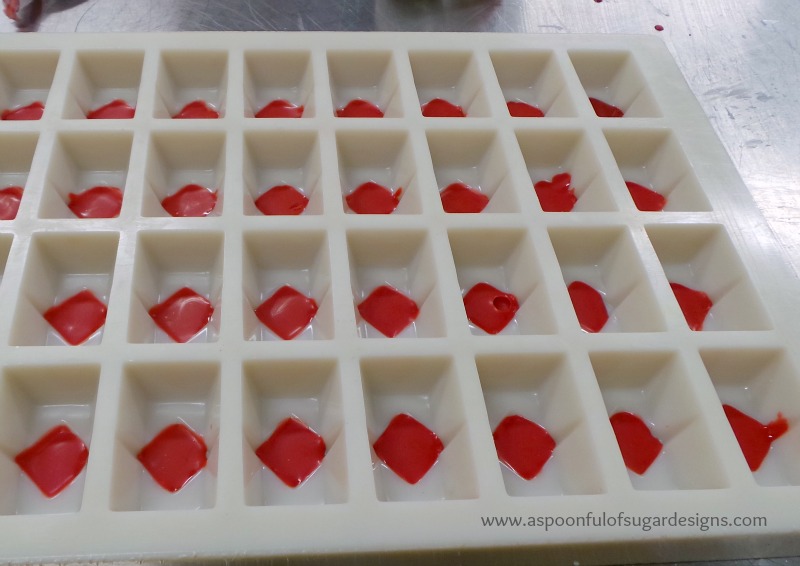
We piped coloured chocolate into our rectangular moulds

Then coated both moulds with a thin layer of tempered chocolate before filling them with a delicious hazelnut praline.

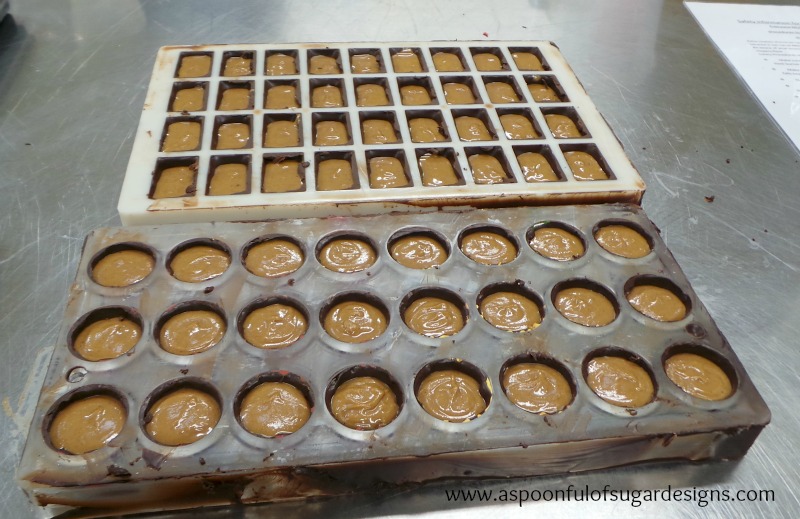
We finished them off with a bottom layer of  tempered chocolate.

We piped rum truffles onto a baking sheet. When they had set, we rolled them in cocoa powder before dipping them in melted chocolate. A messy but fun task.

We learnt so many techniques and tips for working with chocolate.

Packing up our chocolates to take home at the end of the class.
We enjoy candy making and plan to raise the bar on our gifts from the kitchen this Christmas. Best of all we got to hang out together doing something we love.
For more details on courses run by Sweet Artist Academy, check out their website and facebook page.
Disclaimer: This is not a sponsored post. We really enjoyed our Chocolate Truffle course and wanted to share details with you.

Filed Under: Confectionery, Uncategorized Tagged With: candy, Chocolate

« {Book Reviews} Playing with Paper, & The Ultimate Handbook for Paper Crafters
Washi Tape Project »

Comments

  1. shez says

    July 20, 2013 at 6:07 pm

    what a lot of fun and those truffles look so yummy.xx

    Reply
  2. suzitee says

    July 20, 2013 at 7:10 pm

    I have been so tempted by these courses…but so far haven’t made it to one 🙁 Looks like you had lots of fun!

    Reply
  3. Amy @ chick chick sewing says

    July 20, 2013 at 10:46 pm

    Yum! Those chocolates look so tempting! What a wonderful way to spend quality mother-daughter time together, at French pastry chef’s kitchen… Thanks so much for sharing!

    Reply
  4. Studio ZIva says

    July 21, 2013 at 2:31 am

    Ooo they look so yummie!

    Reply
  5. Melody says

    July 22, 2013 at 3:38 am

    Oh yum.

    Reply
  6. Carmen says

    July 23, 2013 at 4:23 am

    Que delícia de curso!!

    Reply

Leave a Reply Cancel reply

Your email address will not be published. Required fields are marked *

  • Email
  • Facebook
  • Instagram
  • Pinterest
  • Threads
  • TikTok
SUBSCRIBE TO NEWSLETTER
×

Categories

Archives

PURCHASE PDF PATTERNS

We offer over 100 affordable PDF sewing patterns available for download from our store website or Etsy store. Each pattern includes detailed instructions, numerous photos, and templates.

WEB STORE ETSY STORE

Instagram

The Scrappy Strips Pouch is one of my favourite wa The Scrappy Strips Pouch is one of my favourite ways to use up leftover fabric strings. Today’s version is made from patchwork strips — a fun, relaxing sew that turns scraps into something beautiful and practical.The Scrappy Strips Pouch pattern has two versions - patchwork strings and selvedges - and two sizes. Comment SELVEDGE (or SELVAGE) for a link to the pattern.Pattern Details: Scrappy Strips Pouch Sewing Pattern is in our Pattern Store and Etsy Shop.#ScrappyStripsPouch #ScrapBustingSewing #PatchworkPouch #StringQuilting #SewingProjects
If you’ve ever wanted to add eyelets or grommets t If you’ve ever wanted to add eyelets or grommets to your sewing projects, here’s a quick look at how I install them using my DK93 snap press. It’s the same tool I use for snaps — and it makes installing eyelets beautifully quick and consistent.Here’s how I install the eyelets:Punch out the four holes using a hole‑cutting die.Place the eyelet into the hole.Press it into place using the snap press.That’s it — simple, sturdy, and it gives the Ribbon Pouch such an elevated, professional finish. I love how clean and secure the result is.Fabric shown: Tilda Something Blue, releasing June 1 — thank you @tilda_australia for the beautiful fabric.✨ If you’d like the Ribbon Pouch pattern (3 sizes), comment RIBBON and I’ll send the link straight to you.Ribbon Pouch Sewing Pattern: available in my Pattern Store and Etsy Shop (links in profile).#tildasomethingblue #tildafabric #sewingtips #handmadeeveryday #sewingtools
The Ribbon Pouch is one of my favourite quick‑to‑s The Ribbon Pouch is one of my favourite quick‑to‑sew gift bags, and I couldn’t resist making a light and dark version using the new Tilda Something Blue collection. Both pouches use the same print in different colourways — such a pretty way to show how fabric choice changes the whole mood.They’re finished with satin ribbon threaded through grommets, and topped with a tiny star tag. The boxed base helps them stand beautifully, and the ribbon closure makes them perfect for birthdays, thank‑you gifts, treats, or little treasures.This is a beginner‑friendly, scrap‑friendly, quick project you’ll want to sew again and again. Pattern includes 3 sizes.If you’d like the pattern, comment RIBBON and I’ll send the link straight to you.Pattern Details: Ribbon Pouch (3 Sizes) available in my Pattern Store and Etsy Shop.Fabric Details: Tilda Something Blue - releasing on 1 June 2026. Thanks to @tilda_australia#TildaSomethingBlue #TildaFabric #SewingPattern #BeginnerSewingProject #QuickSewingProject   
Sewing with scraps is one of my favourite ways to Sewing with scraps is one of my favourite ways to get creative — small pieces, leftover corners, charm‑square offcuts… they all have so much potential.Here are 10 scrap‑friendly projects that use small pieces beautifully. They’re quick to sew, beginner‑friendly, and perfect for gifting ✂️✨Save this for the next time you want to turn your scraps into something pretty.Which one would you sew first?  Tell me in the comments — I love seeing what you’re making.Patterns are available in my pattern store (link in profile) or comment PATTERNS and I will send you the link. #scrapsewing #scrapbusting #scrapfriendly #sewinginspiration #sewingideas
I save every selvedge (or selvage) — the colour do I save every selvedge (or selvage) — the colour dots, the tiny prints, the designer names… they’re too pretty to throw away.Here’s how I turn them into something useful:
• lay them diagonally on a square of fusible interfacing
• overlap slightly
• stitch close to the printed edge
• keep building until you have a panelIt’s such a fun way to use scraps and create something totally unique ✂️✨If you’d like the Scrappy Strips Pouch pattern, comment SELVEDGE or SELVAGE and I’ll send you the link.Pattern Details: Scrappy Strips Pouch Pattern is available in my Pattern Store and Etsy Shop.#scrappystripspouch #selvage #scrapbuster #sewingcommunity #sewingtip
A little Something Blue for tonight’s sewing sessi A little Something Blue for tonight’s sewing session 💙I’m packing my Makers Caddy with supplies for my next project — fabric, thread, tassels, lavender… I can’t wait to share it with you soon.There’s something so calming about soft blues, tidy supplies, and a project all ready to go — it makes the whole sewing process feel extra special.Hope this brings a little mid‑week inspiration to your feed ✂️✨If you’d like the link to the Makers Caddy, comment CADDY and I’ll send it to you.Fabric: Tilda Something Blue with thanks to @tilda_australiaPattern Details: Makers Caddy Sewing Pattern - available in our Pattern Store and Etsy Shop.#tildasomethingblue #ilovetilda #sewingcommunity #tildaaustralia #sewingpattern
Follow on Instagram

Featured Pattern

Travel Sewing Kit Pattern

Featured Tutorial

Retro Drawstring Bag

Featured Recipe

Lemon Pound Cake

Connect

  • Email
  • Facebook
  • Instagram
  • Pinterest
  • Threads
  • TikTok
SUBSCRIBE TO NEWSLETTER
×

Popular Posts

  • Tips for Threading a Needle
  • Cord Cosy
  • Travel Accessories to Sew
  • Liberty Tissue Cover
  • Charm Square Fabric Tray
  • Happy Scrappy Cards
  • Crocheted Scarf {Free Pattern}

Copyright © 2026 Lisa. K. Cox - A Spoonful of Sugar