A Spoonful of Sugar

Make. Bake. Create.

Menu
  • Home
  • About
    • About Us
    • Press
    • FAQ
    • Disclosure Policy
    • Contact Us
  • Crafts
    • Crochet
    • DIY
    • Embroidery/Cross stitch
    • Gift Wrapping
    • Knitting
    • Miscellaneous
    • Paper Crafts
  • Holidays
    • New Year’s
    • Australia Day
    • Back to School
    • Valentines Day
    • Easter
    • ANZAC Day
    • Mother’s Day
    • Father’s Day
    • Halloween
    • Christmas
  • Recipes
    • Appetizers
    • Bars & Slices
    • Bread & Pastries
    • Cakes
    • Cookies
    • Confectionery
    • Cupcakes & Muffins
    • Desserts
    • Drinks
    • Ice Cream
    • Jams/Preserves
    • Main Meals
  • Sewing
    • Sewing Tutorials
    • Quilting
    • Sewing & Quilting Patterns
  • Family
    • Back to School
    • Family Fun
    • Our Home
    • Parenting
    • Travel
  • Shop
    • Pattern Store
    • Etsy Store

Chocolate Chip Slice

April 5, 2013 By A Spoonful of Sugar - 7 Comments

Life has been busy here lately. It was lovely to find a some free time yesterday on my day off to bake a treat for after school snacking.

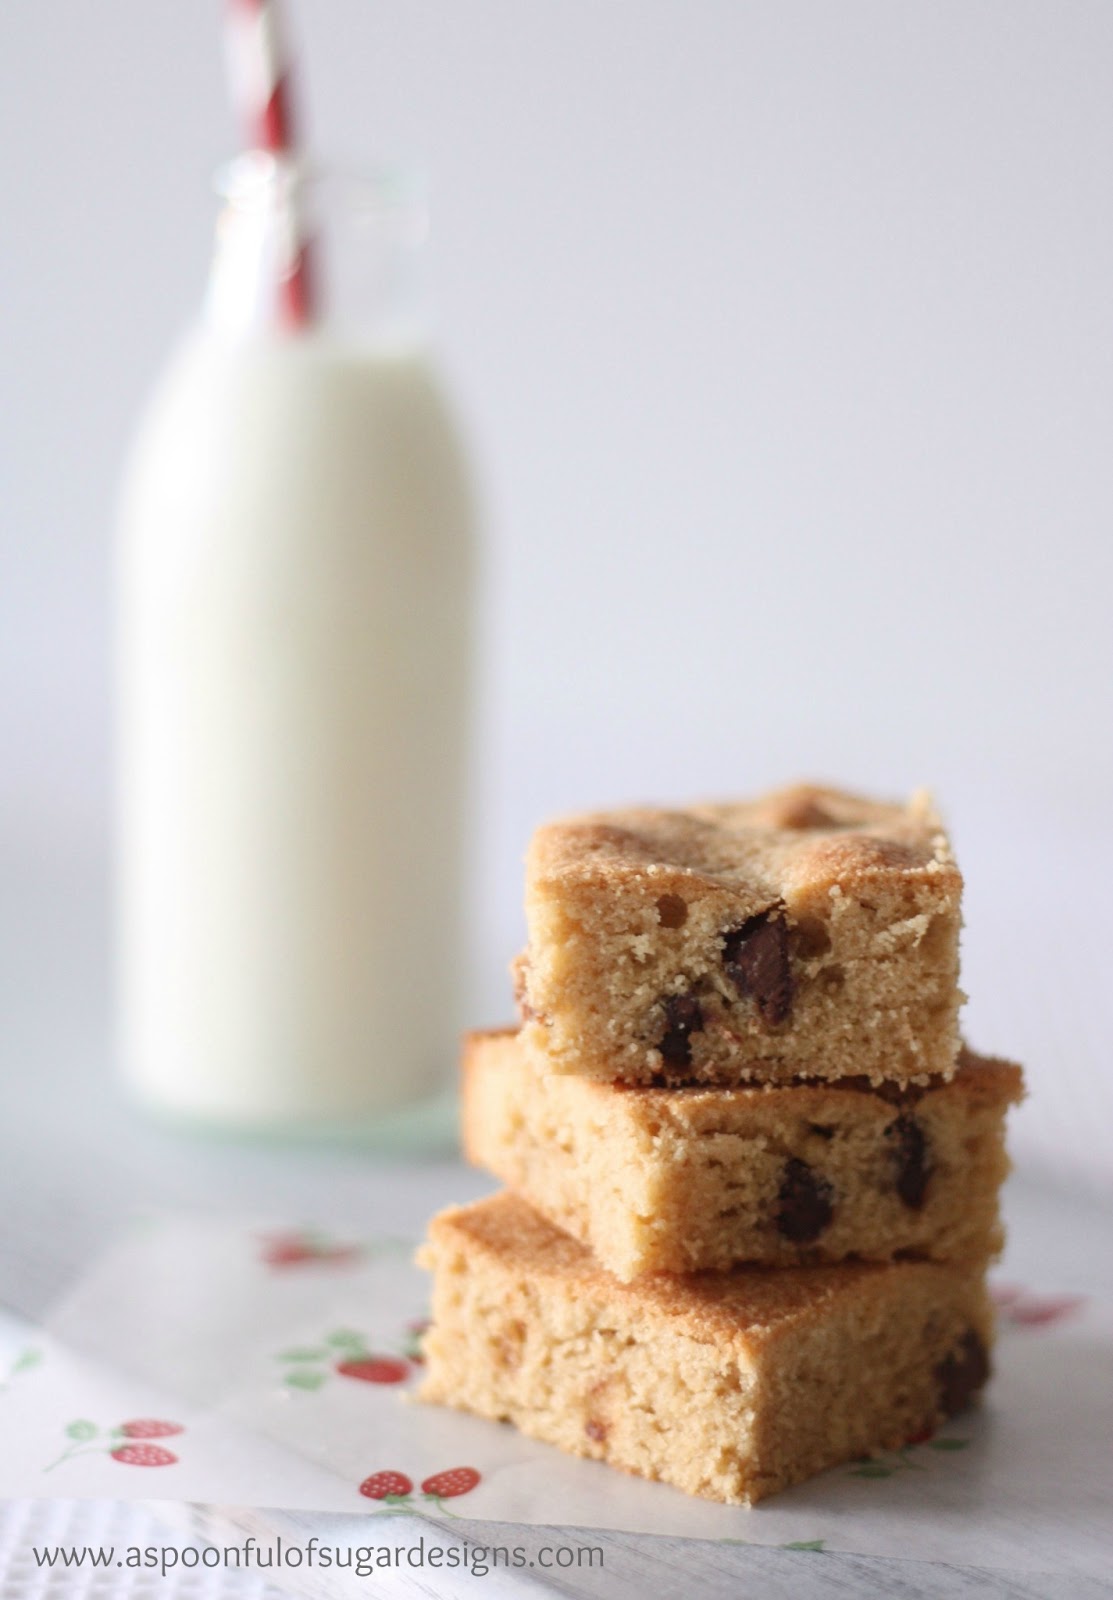
Chocolate Chip slice has been a family favourite for many years, and is super quick to prepare. In fact it was in the oven in under 10 minutes, and only takes around 25 minutes to cook. It is basically like a chocolate chip cookie mix that has been baked as a slice in a brownie pan.

It is a great “go to” recipe when time is short but you want to make something from scratch.

Chocolate Chip Slice


Ingredients
  • 125 g (1 stick) butter, at room temperature, cubed
  • 110 g (1/2 cup) brown sugar
  • 75 g (1/3 cup) caster (superfine) sugar
  • 2 eggs
  • 150 g (1 cup) plain (all purpose) flour
  • 125 g (1/2 cup) chocolate chips
Preheat oven to 180 deg C (350 deg F). Line the base of a brownie pan measuring 18 x 28 cm (base) with baking paper. Use electric beaters to beat butter and sugars until light and creamy. Beat in eggs one at a time. Fold in the flour and mix until just combined. Stir in the chocolate chips. Spoon the mixture into the prepared pan. Bake for 25 minutes until firm to the touch. Cool on wire rack in pan. Cut into squares.
Some of our other favourite Chocolate Chip recipes include:
  • Brown Butter Chocolate Chip Cookies
  • Chocolate Chip and Vanilla Cake
  • Brown Sugar and Chocolate Chip Pound Cake with Maple Glaze
  • Oaty Chocolate Chip Cookies

Filed Under: Bars & Slices, Recipes, Uncategorized Tagged With: Chocolate

« Clam Shell Accessories Case
Un café au lait, s’il vous plaît »

Comments

  1. Mrs. Smith says

    April 5, 2013 at 6:01 pm

    Yum! I wish I had a slice right now! I love to have those kind of go to recipes to satisfy my afternoon sweet cravings. Thank you so much for sharing this!

    P.S.
    The pictures are so good!

    Reply
  2. cindypindyxo says

    April 6, 2013 at 2:25 am

    Thanks so much for sharing this, I couldn’t resist and just baked it and YUMMMMMMMM it is so good!!!

    Reply
  3. ~ko says

    April 6, 2013 at 6:10 am

    I have everything on hand! uh oh! 😉 thanks for sharing!

    Reply
  4. Elena Mandalena says

    April 6, 2013 at 9:06 am

    Yummm I have to try those!!!

    Reply
  5. M. E. Stephens says

    April 6, 2013 at 11:56 am

    Oh yum! This was timely. We have family coming to visit soon and this looks like a quick and easy treat. I’ll have to keep the recipe handy in case we want to whip something up. 🙂 I really like that strawberry paper too! I have a weakness for strawberry motifs. I’m (slowly) decorating my kitchen with strawberries.

    Reply
  6. Anne Marie says

    April 6, 2013 at 12:14 pm

    Sounds yummy!

    Reply
  7. Erin says

    April 6, 2013 at 8:36 pm

    That looks like a GREAT after school snack! Delicious!

    Reply

Leave a Reply Cancel reply

Your email address will not be published. Required fields are marked *

  • Email
  • Facebook
  • Instagram
  • Pinterest
  • Threads
  • TikTok
SUBSCRIBE TO NEWSLETTER
×

Categories

Archives

PURCHASE PDF PATTERNS

We offer over 100 affordable PDF sewing patterns available for download from our store website or Etsy store. Each pattern includes detailed instructions, numerous photos, and templates.

WEB STORE ETSY STORE

Instagram

If you love quick, practical sewing projects, the  If you love quick, practical sewing projects, the Baker’s Buddy Mitt is such a fun one to make. It’s scrap‑friendly, gift‑ready, and perfect for anyone who loves to bake.The Bakers Buddy Mitt is 25% off this week only. Comment BAKER and I’ll send you the link to the pattern.  #SewingProject #ScrapFriendlySewing #KitchenSewing #SewingGifts #SewingCommunity
Adding a handmade label is one of my favourite way Adding a handmade label is one of my favourite ways to personalise a project — and these little fabric + felt labels are so quick and satisfying to make.For this Ribbon Pouch, I used the Liberty Gifts from the Garden collection, which has the sweetest fruit motifs. They make perfect tiny labels for pouches, bags, and gifts.Here’s how to make your own:Press a piece of double‑sided fusible web to the back of your fabric.Cut around your chosen motif.Peel off the paper backing.Press the motif onto wool felt.Trim the felt with scalloped scissors.Sew the label onto the front of your pouch.Such a simple detail, but it adds so much charm. Fabric kindly gifted by @regent_street_fabrics — thank you!If you’d like to sew the Ribbon Pouch (3 sizes), comment RIBBON and I’ll send the pattern link straight to you.#SewingInspiration #FabricLabels #DIYLabels #LibertyFabric #LibertyGiftsFromTheGarden
A lot can change in 10 years ❤️ It’s been fun look A lot can change in 10 years ❤️ It’s been fun looking back at where I was in 2016 and how far life has come since then. Swipe for a little trip down memory lane.Back in 2016, my priorities were firmly centred around family. I was working full‑time, sewing in the guest room, sharing tutorials on my blog, and slowly dipping my toes into selling a handful of patterns on Etsy. It was a busy, full season — and creativity was something I fitted in around everything else.  Fast forward to 2026… I’m now retired and living the creative life I once dreamed of. My kids have grown up and are living in their own homes nearby. My husband and I are free to travel, explore, and enjoy this stage of life. And I get to spend my days designing, sewing, and connecting with this beautiful community.Life looks different now — in the best possible way.Were you following me back then, or what has changed for you over the past 10 years? I’d love to hear your story too.Tagging the lovely makers of my quilt: @arabesquescissors @ministryoffabric @belloquacity @alittlepatchwork @sameliasmum coleandtaffy @quiltymamaof4 @shequiltsalot @downgrapevinelane @lizzierosesews @lovethatfabric @sew_mimi.k #2026isthenew2016 #10yeartransformation #sewingjourney #sewingcommunity #aspoonfulofsugardesigns
Fall in love with sewing all over again ❤️I’ve Fall in love with sewing all over again ❤️I’ve rounded up 10 heart‑themed makes — from quick gifts to charming quilt blocks — perfect for weekend stitching or using up your favourite scraps. Whether you’re sewing for Valentine’s Day, birthdays, or just because, there’s something sweet for every maker.Comment HEART and I’ll send you a link to my Heart Pattern Collection.#sewingproject #heartsewing #quiltblock #scrapsewing #easytosew
Raw edge appliqué doesn’t have to feel fiddly or i Raw edge appliqué doesn’t have to feel fiddly or intimidating. With a few simple techniques, you can create neat, crisp shapes — even tiny details like penguin beaks and hearts.I’ve put together My Top 5 Secrets for Raw Edge Appliqué to help you feel confident, whether you’re brand new to appliqué or looking to refine your finish. Save this for your next sewing session.If you’d love a quick, beginner‑friendly project to practise these tips, my Penguin Love Mugrug is the sweetest Valentine’s make — scrap‑friendly, gift‑ready, and such fun to sew.Comment PENGUIN and I’ll send you the link to the pattern. Available now in our Pattern Store and Etsy shop.  #rawedgeapplique #appliquetips #sewingtipsandtricks #mugrugpattern #penguinlove
If you’ve ever wanted to add eyelets or grommets t If you’ve ever wanted to add eyelets or grommets to your sewing projects, here’s a quick look at how I install them using my DK93 snap press. It’s the same tool I use for snaps — and it makes installing eyelets beautifully quick and consistent.For this Ribbon Pouch, I used the Liberty Gifts from the Garden collection (printed on Lasenby cotton and released in January 2026). The colours and motifs pair so well with the little ribbon tie detail.Here’s how to install the eyelets:Punch out the four holes using a hole‑cutting die.Place the eyelet into the hole.Press it into place using the snap press.That’s it — easy peasy, and it gives the pouch such an elevated, professional finish. I love how clean and sturdy the result is.Fabric is Gifts from the Garden by Liberty - kindly provided by @regent_street_fabrics — thank you!If you’d like the Ribbon Pouch pattern (it comes in 3 sizes), comment RIBBON and I’ll send the link straight to you.Ribbon Pouch Sewing Pattern: available in our Pattern Store and Etsy shop ( links in profile).#SewingInspiration #SewingProjects #Eyelets #Grommets #SnapPress
Follow on Instagram

Featured Pattern

Travel Sewing Kit Pattern

Featured Tutorial

Retro Drawstring Bag

Featured Recipe

Lemon Pound Cake

Connect

  • Email
  • Facebook
  • Instagram
  • Pinterest
  • Threads
  • TikTok
SUBSCRIBE TO NEWSLETTER
×

Popular Posts

  • Charm Square Fabric Tray
  • Merry Little Christmas Sewing Projects
  • {Back to School} Tissue Cover
  • Hexagon Fabric Tray
  • Raw Edge Applique Tips
  • Sewing Gifts 101: Easy and Affordable Ideas for Your Crafty Friends
  • Finding More Time to Sew

Copyright © 2026 Lisa. K. Cox - A Spoonful of Sugar