A Spoonful of Sugar

Make. Bake. Create.

Menu
  • Home
  • About
    • About Us
    • Press
    • FAQ
    • Disclosure Policy
    • Contact Us
  • Crafts
    • Crochet
    • DIY
    • Embroidery/Cross stitch
    • Gift Wrapping
    • Knitting
    • Miscellaneous
    • Paper Crafts
  • Holidays
    • New Year’s
    • Australia Day
    • Back to School
    • Valentines Day
    • Easter
    • ANZAC Day
    • Mother’s Day
    • Father’s Day
    • Halloween
    • Christmas
  • Recipes
    • Appetizers
    • Bars & Slices
    • Bread & Pastries
    • Cakes
    • Cookies
    • Confectionery
    • Cupcakes & Muffins
    • Desserts
    • Drinks
    • Ice Cream
    • Jams/Preserves
    • Main Meals
  • Sewing
    • Sewing Tutorials
    • Quilting
    • Sewing & Quilting Patterns
  • Family
    • Back to School
    • Family Fun
    • Our Home
    • Parenting
    • Travel
  • Shop
    • Pattern Store
    • Etsy Store

Browned Butter Chocolate Chip Cookies

March 16, 2013 By A Spoonful of Sugar - 4 Comments

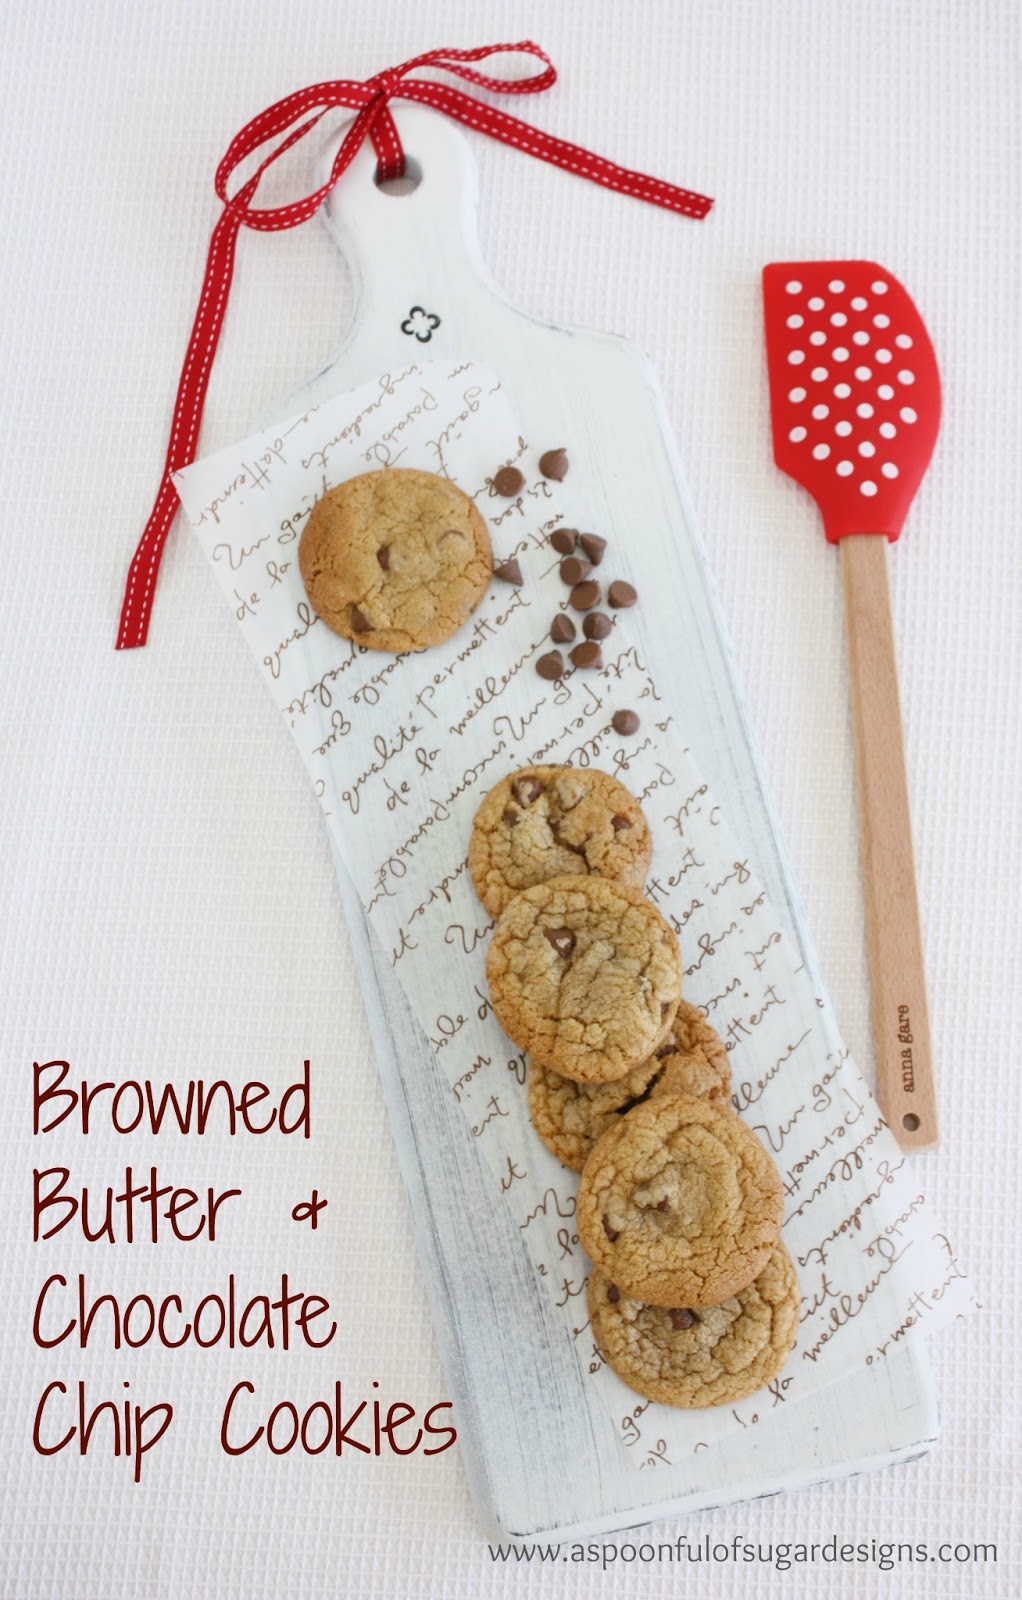
Sarah is continuing in her quest to find the ultimate chocolate chip cookie recipe, and is always baking new variations. This weeks offering combines browned butter with dark brown sugar and milk chocolate chips to create a delicious cookie that is soft and chewy.

The lovely feature of chocolate chip cookies is that they are universally popular. I am yet to meet someone who does not enjoy them. The difficulty is stopping at one (especially when they are served warm from the oven)!

Browned Butter and Chocolate Chip Cookies

Ingredients:

¾ cup butter (1 ½ sticks), chopped

2 ½ cups plain (all purpose ) flour

2 tsp corn flour (cornstarch)

1 tsp baking powder

½ tsp bicarb soda (baking soda)

1 ¼ cups dark brown sugar

1/3 cup sugar (granulated)

1 tsp vanilla extract

2 eggs

1 cup milk chocolate chips

Directions:

Brown butter in a medium saucepan. Remove from heat and pour into a heatproof bowl. Cover and place in freezer for 30 minutes to cool.

In a mixing bowl, whisk together flour, corn flour, baking powder, bicarb soda until combined.

Remove butter from freezer and pour into bowl of electric stand mixer. Add sugars, and vanilla. Beat until pale and fluffy. Add eggs one at a time, beating well after each addition. On low speed, slowly add in dry ingredients and mix until just combined. Stir in chocolate chips. Cover bowl and refrigerate for 1 hour. Preheat oven to 175 deg C (350 deg F).

Scoop balls of dough onto baking sheet and bake in oven for 10-12 minutes. Allow cookies to cool on cookie sheet for a few minutes before transferring to a wire rack to cool.

Based on a recipe from Cooking Classy.

For your daily sugar fix you can subscribe or follow us on facebook, twitter, google plus and pinterest.

Filed Under: Cookies

« Easy Baby Blanket
12 Easter Craft Projects »

Comments

  1. Erica at Sew So Crafty says

    March 16, 2013 at 4:02 am

    MMMMMMM … thanks for the delish recipe!

    Reply
  2. Simplesmente Doroteia says

    March 16, 2013 at 5:35 am

    QUE DELICIA , HUMMMMMMMMMMMMMM

    Reply
  3. That Brunette One says

    March 16, 2013 at 6:10 pm

    These look so delish!! x

    Reply
  4. Mariela Quiroga says

    March 18, 2013 at 1:53 am

    Felicidades por el blog!!! me quedo como seguidora para no perderme nada de los maravillosos trabajos que tenéis.
    Las invito a mi blog para que vean lo que tanto me gusta hacer con amor, las espero.
    http://www.dulcescreacionesmq.com
    Mariela
    Besitos

    Reply

Leave a Reply Cancel reply

Your email address will not be published. Required fields are marked *

  • Email
  • Facebook
  • Instagram
  • Pinterest
  • Threads
  • TikTok
SUBSCRIBE TO NEWSLETTER
×

Categories

Archives

PURCHASE PDF PATTERNS

We offer over 100 affordable PDF sewing patterns available for download from our store website or Etsy store. Each pattern includes detailed instructions, numerous photos, and templates.

WEB STORE ETSY STORE

Instagram

If you love foundation paper piecing, you’re going If you love foundation paper piecing, you’re going to enjoy this one — a bundle of four woven‑style FPP quilt blocks, each with its own beautiful twist. These blocks look intricate, but the FPP method makes them wonderfully achievable, even if you’re still building your skills.They’re perfect for using up scraps, experimenting with colour, or creating striking mini quilts, cushions, bags, or table decor. Each block has that satisfying “woven” illusion that always gets a second look.Whether you prefer bold brights, soft pastels, or a monochromatic palette, these designs shine in every colourway. And the best part? You get all four blocks together in one bundle.If you’d like the pattern set, comment WOVEN and I’ll send the link straight to you. Woven bundle is available in our Pattern Store.#SewingInspiration #FPP #FoundationPaperPiecing #QuiltBlocks #WovenQuiltBlock
If you love quick, practical sewing projects, the  If you love quick, practical sewing projects, the Baker’s Buddy Mitt is such a fun one to make. It’s scrap‑friendly, gift‑ready, and perfect for anyone who loves to bake.The Bakers Buddy Mitt is 25% off this week only. Comment BAKER and I’ll send you the link to the pattern.  #SewingProject #ScrapFriendlySewing #KitchenSewing #SewingGifts #SewingCommunity
Adding a handmade label is one of my favourite way Adding a handmade label is one of my favourite ways to personalise a project — and these little fabric + felt labels are so quick and satisfying to make.For this Ribbon Pouch, I used the Liberty Gifts from the Garden collection, which has the sweetest fruit motifs. They make perfect tiny labels for pouches, bags, and gifts.Here’s how to make your own:Press a piece of double‑sided fusible web to the back of your fabric.Cut around your chosen motif.Peel off the paper backing.Press the motif onto wool felt.Trim the felt with scalloped scissors.Sew the label onto the front of your pouch.Such a simple detail, but it adds so much charm. Fabric kindly gifted by @regent_street_fabrics — thank you!If you’d like to sew the Ribbon Pouch (3 sizes), comment RIBBON and I’ll send the pattern link straight to you.#SewingInspiration #FabricLabels #DIYLabels #LibertyFabric #LibertyGiftsFromTheGarden
A lot can change in 10 years ❤️ It’s been fun look A lot can change in 10 years ❤️ It’s been fun looking back at where I was in 2016 and how far life has come since then. Swipe for a little trip down memory lane.Back in 2016, my priorities were firmly centred around family. I was working full‑time, sewing in the guest room, sharing tutorials on my blog, and slowly dipping my toes into selling a handful of patterns on Etsy. It was a busy, full season — and creativity was something I fitted in around everything else.  Fast forward to 2026… I’m now retired and living the creative life I once dreamed of. My kids have grown up and are living in their own homes nearby. My husband and I are free to travel, explore, and enjoy this stage of life. And I get to spend my days designing, sewing, and connecting with this beautiful community.Life looks different now — in the best possible way.Were you following me back then, or what has changed for you over the past 10 years? I’d love to hear your story too.Tagging the lovely makers of my quilt: @arabesquescissors @ministryoffabric @belloquacity @alittlepatchwork @sameliasmum coleandtaffy @quiltymamaof4 @shequiltsalot @downgrapevinelane @lizzierosesews @lovethatfabric @sew_mimi.k #2026isthenew2016 #10yeartransformation #sewingjourney #sewingcommunity #aspoonfulofsugardesigns
Fall in love with sewing all over again ❤️I’ve Fall in love with sewing all over again ❤️I’ve rounded up 10 heart‑themed makes — from quick gifts to charming quilt blocks — perfect for weekend stitching or using up your favourite scraps. Whether you’re sewing for Valentine’s Day, birthdays, or just because, there’s something sweet for every maker.Comment HEART and I’ll send you a link to my Heart Pattern Collection.#sewingproject #heartsewing #quiltblock #scrapsewing #easytosew
Raw edge appliqué doesn’t have to feel fiddly or i Raw edge appliqué doesn’t have to feel fiddly or intimidating. With a few simple techniques, you can create neat, crisp shapes — even tiny details like penguin beaks and hearts.I’ve put together My Top 5 Secrets for Raw Edge Appliqué to help you feel confident, whether you’re brand new to appliqué or looking to refine your finish. Save this for your next sewing session.If you’d love a quick, beginner‑friendly project to practise these tips, my Penguin Love Mugrug is the sweetest Valentine’s make — scrap‑friendly, gift‑ready, and such fun to sew.Comment PENGUIN and I’ll send you the link to the pattern. Available now in our Pattern Store and Etsy shop.  #rawedgeapplique #appliquetips #sewingtipsandtricks #mugrugpattern #penguinlove
Follow on Instagram

Featured Pattern

Travel Sewing Kit Pattern

Featured Tutorial

Retro Drawstring Bag

Featured Recipe

Lemon Pound Cake

Connect

  • Email
  • Facebook
  • Instagram
  • Pinterest
  • Threads
  • TikTok
SUBSCRIBE TO NEWSLETTER
×

Popular Posts

  • Charm Square Fabric Tray
  • Merry Little Christmas Sewing Projects
  • {Back to School} Tissue Cover
  • Hexagon Fabric Tray
  • Raw Edge Applique Tips
  • Sewing Gifts 101: Easy and Affordable Ideas for Your Crafty Friends
  • Finding More Time to Sew

Copyright © 2026 Lisa. K. Cox - A Spoonful of Sugar