A Spoonful of Sugar

Make. Bake. Create.

Menu
  • Home
  • About
    • About Us
    • Press
    • FAQ
    • Disclosure Policy
    • Contact Us
  • Crafts
    • Crochet
    • DIY
    • Embroidery/Cross stitch
    • Gift Wrapping
    • Knitting
    • Miscellaneous
    • Paper Crafts
  • Holidays
    • New Year’s
    • Australia Day
    • Back to School
    • Valentines Day
    • Easter
    • ANZAC Day
    • Mother’s Day
    • Father’s Day
    • Halloween
    • Christmas
  • Recipes
    • Appetizers
    • Bars & Slices
    • Bread & Pastries
    • Cakes
    • Cookies
    • Confectionery
    • Cupcakes & Muffins
    • Desserts
    • Drinks
    • Ice Cream
    • Jams/Preserves
    • Main Meals
  • Sewing
    • Sewing Tutorials
    • Quilting
    • Sewing & Quilting Patterns
  • Family
    • Back to School
    • Family Fun
    • Our Home
    • Parenting
    • Travel
  • Shop
    • Pattern Store
    • Etsy Store

Fabric Covered Box

March 9, 2013 By Spoonful of Sugar - 12 Comments

 Fabric Covered Box 5
Giving a gift in a pretty box, is almost like giving two gifts. A gift box can be used to store all manner of things – jewellery, craft supplies, and other treasures. We love the effect from using a white box with a patterned, fabric lid. A fabric covered, padded lid is quick to make, and you can customise the fabric to suit the recipient.
Fabric Covered Box    4
 In this gift box, we have used some Old New 30’s fabric by Lecien that we bought on our recent trip to Japan. It is a pretty print with a nice weight and texture. The white gift box was purchased at a craft store.
 Fabric Covered Box 7

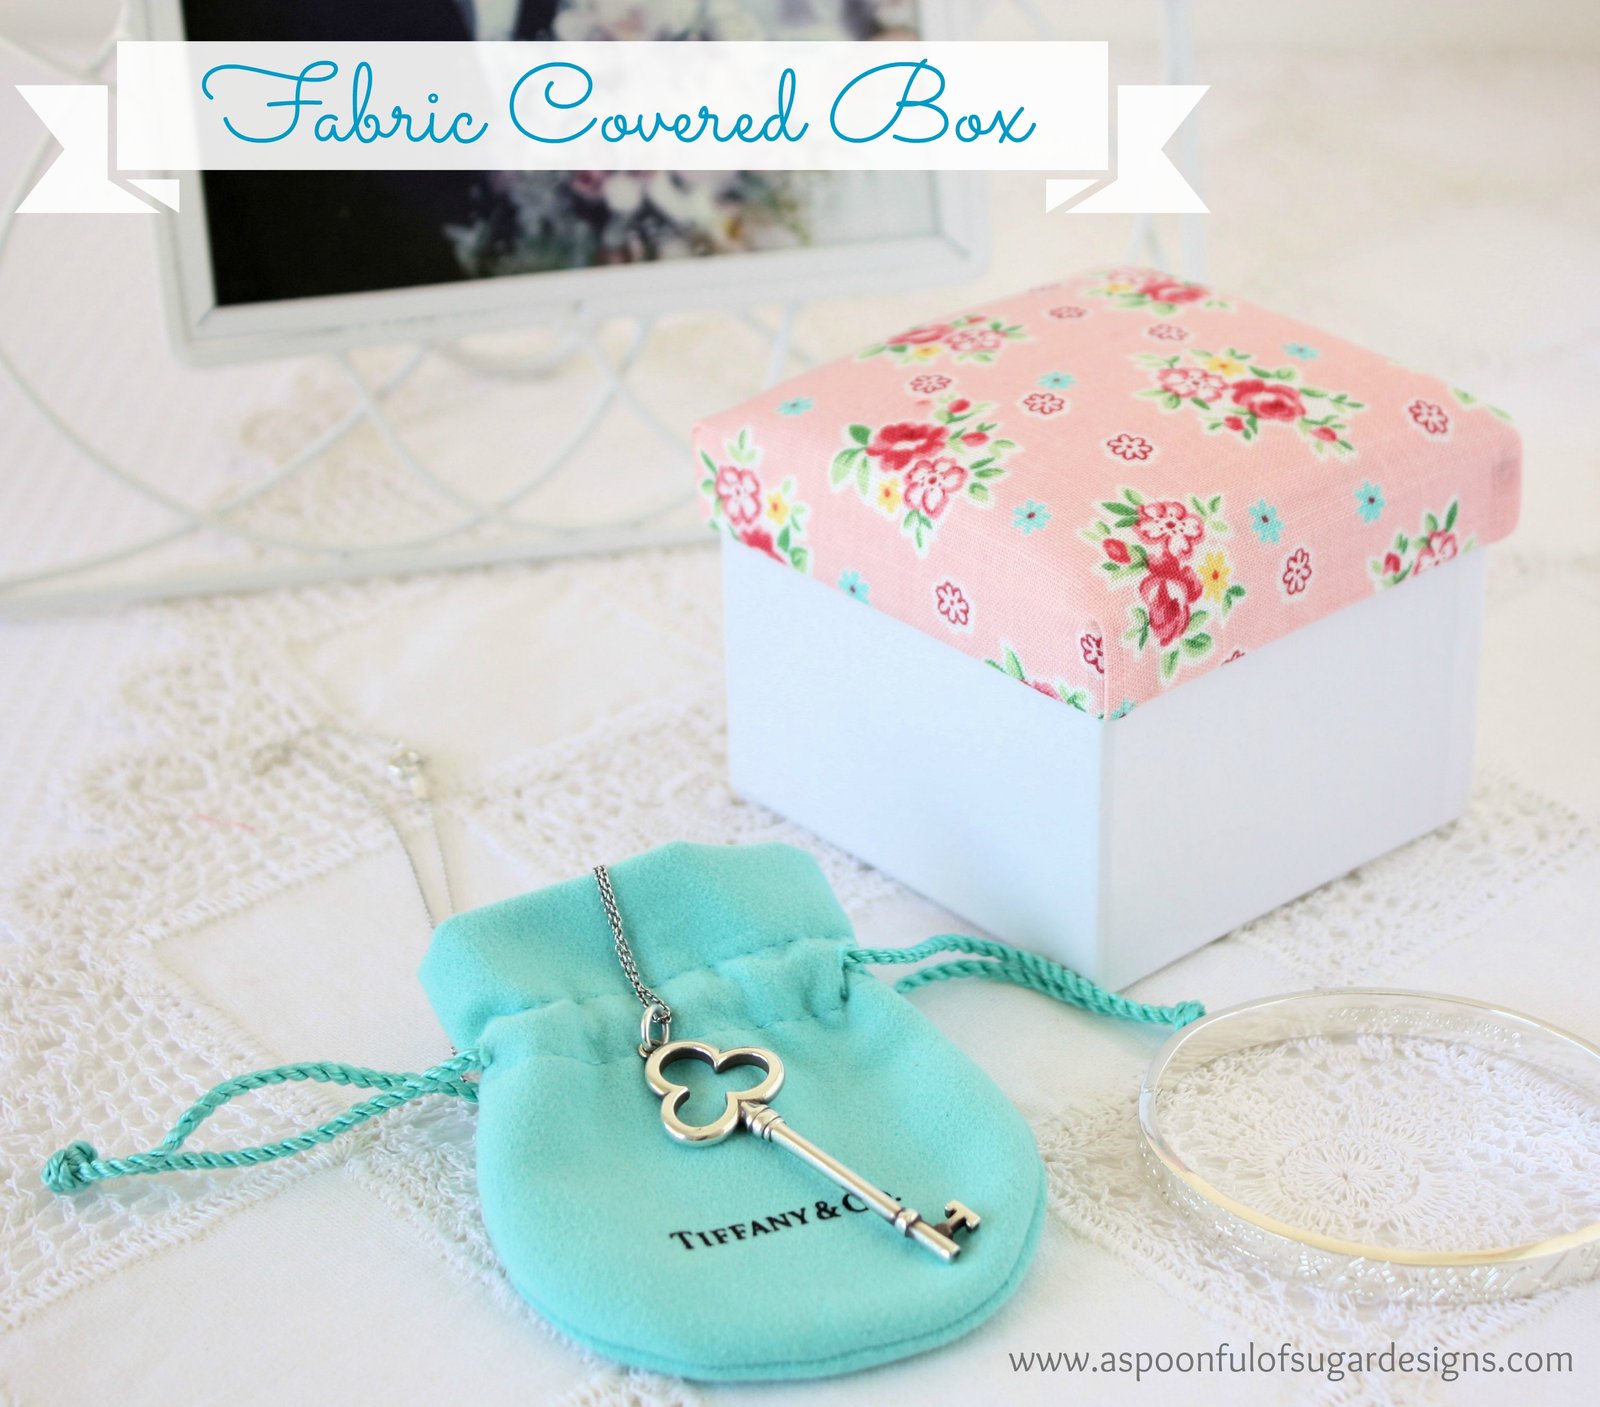
If you would like to make your own, you will need:

  • Gift box (ours measured 3 x 3 inches)
  • fat quarter of printed fabric
  • quilt batting
  • small piece of interfacing, (measuring 2 7/8 x 2 7/8)

1. Cut quilt batting so that it measures the same dimensions as the box, 3 x 3 inches. We used two layers of quilt batting for the padded lid. Cut a piece of quilting cotton, measuring 6 1/2 x 6 1/2 inches. Cut 1 1/2 inch squares from each of the corners.
If you are using a box of a different size, you want the fabric to cover the top, sides, and inside sides of the lid, with it extending onto the underside of the top of the lid. (as shown in photo 2)

2. Glue the quilt batting to the top of the lid. If you are using two layers, glue the layers together first. Apply glue to the inside of the box lid. Adhere the fabric and clip in place while the glue dries.

3.There will be a little bit of fabric (1/4 inch) that will protrude from the lid corners. Glue this fabric around onto the opposing side and allow to dry. Fold approx 1/4 inch in on the remaining two sides so that you get a nice neat corner. Glue the sides of fabric in place on the inside of the box lid. Allow to dry.

4. Cut a piece of heavy fusible interfacing that is slightly smaller than the box lid. (2 7/8 x 2 7/8). Cut a square of fabric that is 3 1/2 x 3 1/2. Centre the interfacing on the wrong side of the fabric square and fuse in place with an iron. Press the remaining fabric down as shown in photo 4. Glue the fabric square to the underside of the lid to hide all the raw edges and make the underside of the box neat.(as shown in photo above).

You could make a Fabric Covered Gift Box for any holiday or occasion – Easter, Christmas, Birthday, Mother’s Day etc. Just use fabric to suit.
Fabric Covered Box    4

Filed Under: Gift Wrapping, Sewing, Sewing Tutorials Tagged With: gifts

« Easter Scavenger Hunt
Pot of Gold »

Comments

  1. Patchwork and Play says

    March 9, 2013 at 5:58 pm

    Beautiful! Now, I just need to get my husband to shop at Tiffany’s for me!

    Reply
  2. Montse says

    March 10, 2013 at 4:58 am

    Preciosa ,me gusta ,un saludo.

    Reply
  3. April Grinaway says

    March 10, 2013 at 7:10 am

    So cute!

    Reply
  4. Angelina- JoJo & Eloise says

    March 10, 2013 at 11:58 am

    It’s is like giving a gift inside a gift 🙂 I love this!! The fabric is adorable!!
    xo
    Angelina

    Reply
  5. Angelina- JoJo & Eloise says

    March 10, 2013 at 11:58 am

    It’s is like giving a gift inside a gift 🙂 I love this!! The fabric is adorable!!
    xo
    Angelina

    Reply
  6. CityGirl says

    March 11, 2013 at 3:50 pm

    Very cute box idea! It would make an adorable jewelry box for my girls and nieces.

    Reply
  7. Amy DeCesare says

    March 13, 2013 at 10:35 am

    So super cute! I would keep that box on a dresser or table. Thanks for the tutorial!

    Reply
  8. Karen Marie Kedzuch says

    May 3, 2014 at 9:43 am

    Lisa & Sarah,
    I love your creativity together with being a mother and daughter team. I am a fabric freak and you make beautiful items.
    Sending some blog hugs & Love,
    Karen Marie

    Reply
    • A Spoonful of Sugar says

      May 3, 2014 at 10:26 am

      Thanks so much Karen for your sweet message 🙂 Have a wonderful weekend – with plenty of sewing time!

      Reply
  9. Pauline Grawey says

    November 17, 2015 at 10:34 pm

    Hi, I’m trying to get the same material. Can you help me? I don’t have the fabric number. I’ve been looking thru lecien and can’t find the same one. Anything you could do would be greatly appreciated. Thank you! Pauline I want the same one as on your fabric covered box.

    Reply
    • A Spoonful of Sugar says

      November 18, 2015 at 6:03 am

      Hi Pauline I bought that fabric a few years ago when I was in Japan and it was out of print at that time. I have done a search but can’t find any for you. It was Old New 30’s by Atsuko Matsuyama for Lecien Fabrics. If you keep checking on Etsy some may turn up. Otherwise there are other Old new 30’s fabrics that are equally sweet.

      Reply
      • Pauline Grawey says

        November 18, 2015 at 9:44 am

        Thank you . Pauline The box is adorable.

        Reply

Leave a Reply Cancel reply

Your email address will not be published. Required fields are marked *

  • Email
  • Facebook
  • Instagram
  • Pinterest
  • Threads
  • TikTok
SUBSCRIBE TO NEWSLETTER
×

Categories

Archives

PURCHASE PDF PATTERNS

We offer over 100 affordable PDF sewing patterns available for download from our store website or Etsy store. Each pattern includes detailed instructions, numerous photos, and templates.

WEB STORE ETSY STORE

Instagram

🍀 Feeling lucky? 🌈 Or just craving a pop of colour 🍀 Feeling lucky? 🌈 Or just craving a pop of colour? Here are some bright, happy projects to sew — perfect for St Patrick’s Day or any day you want a rainbow moment. Save this for later ✨ All patterns are available in my shop.  #sewingprojects #sewinginspiration #rainbowsewing #stpatricksdaycrafts #sewingpatterns
A tiny detail that makes the whole pouch feel more A tiny detail that makes the whole pouch feel more polished. These little end caps keep the cords neat, tidy, and just that bit more elevated — such a sweet upgrade for the Flower Power Pouch.Comment FLOWER and I’ll send you the pattern link. Save this if you love small sewing hacks. ✂️🌸Pattern: Flower Power Pouch Sewing Pattern (available in our Pattern Store and Etsy Shop).#sewingproject #sewingpattern #beginnersewing #sewistsofinstagram #sewinglove
A tiny gift bag that always gets a big reaction ✨ A tiny gift bag that always gets a big reaction ✨ The Mini Drawstring Gift Bag is one of our most loved patterns — quick to sew, beginner friendly, scrap friendly, and perfect for gifting. This sweet version is sewn in Tilda Songbird and is such a fun little make. Comment MINI for the pattern link.Pattern: Mini Drawstring Gift Bag Sewing Pattern ( available in our Pattern Srore and Etsy Shop).Fabric: Tilda Songbird. Thanks to @tilda_australia#sewingpattern #drawstringbag #scrapsewing #beginnersewing #tildasongbird
Free Pattern: Cord CosyA sweet little cord cosy Free Pattern: Cord CosyA sweet little cord cosy you can sew in under an hour — beginner‑friendly, scrap‑friendly, and so handy for keeping chargers tidy. I stitched this one in Tilda fabrics from my stash, and it’s the perfect weekend make. Comment CORD for the free pattern.#tildafabric #scrapfriendlysewing #beginnersewingproject #sewingtutorial #sewingreels
Flower Power Pouch in Tilda Old Rose — a sweet lit Flower Power Pouch in Tilda Old Rose — a sweet little make that’s beginner‑friendly, scrap‑friendly, gift‑ready, and quick to sew.The tiny hexie detail adds such a charming touch. Comment FLOWER for a link to the pattern. It’s our Pattern of the Week, so you can save 25% right now.Pattern Details: Flower Power Pouch Sewing Pattern ( available in our Pattern Store and Etsy Shop)#tildafabric #sewingpattern #beginnersewingproject #scrapfriendlysewing #giftablemakes
A tiny spring project that always brings a smile. A tiny spring project that always brings a smile. Perfect for your morning cuppa, gifting, or adding a little handmade joy to the table.Comment CHICK for a link to the pattern 🐣Pattern Details: Chick Coaster Sewing Pattern. Available in our Pattern Store and Etsy Shop.#sewingproject #scrapbusting #quicksew #easypattern #springsewing
Follow on Instagram

Featured Pattern

Travel Sewing Kit Pattern

Featured Tutorial

Retro Drawstring Bag

Featured Recipe

Lemon Pound Cake

Connect

  • Email
  • Facebook
  • Instagram
  • Pinterest
  • Threads
  • TikTok
SUBSCRIBE TO NEWSLETTER
×

Popular Posts

  • Gathered Round Basket – 3 Sizes
  • The Ultimate Resource for Vintage Haberdashery Lovers
  • Hexie Pincushion {Free Sewing Tutorial}
  • Easter Projects to Sew
  • The Ultimate Guide to Drawstrings
  • Merry Little Christmas Sewing Projects
  • Tutorial: Gathered Round Basket

Copyright © 2026 Lisa. K. Cox - A Spoonful of Sugar