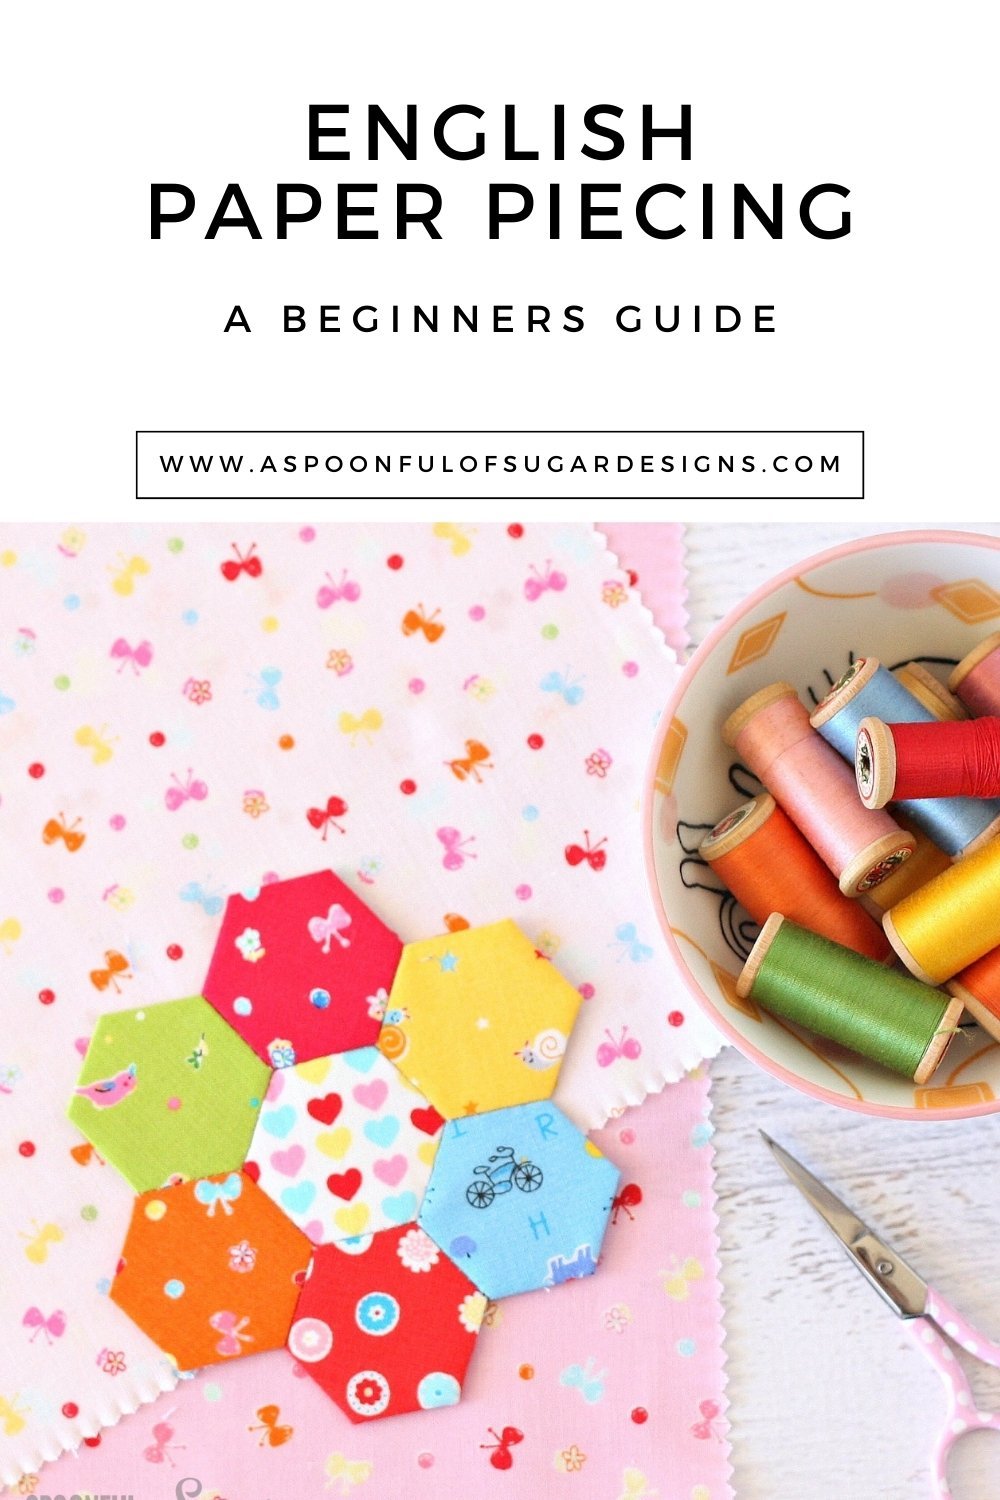
One of my favorite techniques is English Paper Piecing. If you are not familiar with it, English Paper Piecing (or EPP for short) is a method of hand sewing patchwork pieces together using paper templates. It’s a great way to create intricate designs and use up your scraps. It’s also very relaxing and portable, so you can take it with you anywhere!
In this blog post, I will share with you some top tips for beginners who want to try EPP, talk about supplies you will need, and then show you some projects that are perfect for beginners who want to try a small English Paper Piecing project without tackling a whole quilt.

Supplies and Equipment
If you are new to EPP, you might be wondering what supplies you need to get started. Don’t worry, I’ve got you covered! Here is a list of the essential items you will need for your EPP projects:
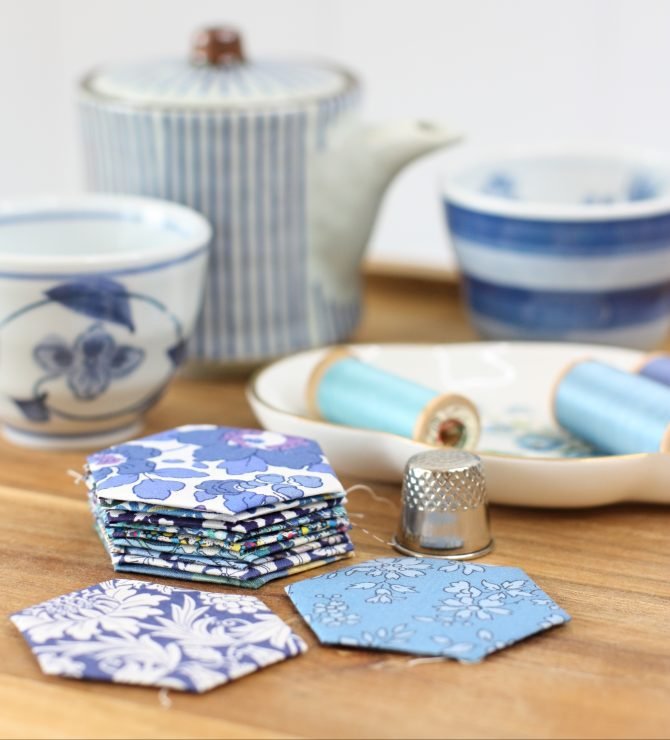
- Fabric or Scraps in various colors and prints. You can use any light-weight cotton fabric for EPP, and it’s a great way to use up your stash or scraps. You can also buy pre-cut fabric packs or charm squares for convenience.
- Paper Templates in the shape and size of your choice. You can make your own templates by cutting out cardstock or paper, or you can buy pre-made templates from online shops and quilt stores. Popular shapes include: hexagons, diamonds, triangles, stars, and more!
- Quilting Thread in a color that matches or blends with your fabric. I like to use Aurifil 50wt cotton thread, which is strong and smooth. You can also use polyester or silk thread if you prefer.
- Sewing Needle that is thin and sharp. I recommend using a milliners needle size 9, which has a small eye and a long shaft. This makes it easier to stitch through the paper and fabric without leaving large holes.
- Thimble to protect your finger from the needle. You can use any type of thimble that fits comfortably on your finger, such as metal, leather, or silicone.
- Glue to baste your fabric to the paper templates. This is optional, but some quilters find it faster and easier than using pins or thread basting. You can use any craft glue that dries clear and washes out easily, such as Bostik or Roxanne.
- Scissors to cut your fabric and thread.
- Rotary Cutter, Ruler, and Cutting Mat to cut your fabric into shapes. This is optional, but some quilters find it more accurate and efficient than using scissors. You can use any rotary cutter that has a sharp blade and a safety lock, a clear ruler that has markings for different angles and measurements, and a cutting mat that has grid lines and self-healing properties.
- Storage Bag to keep your EPP supplies organized and portable. You can use any bag that has enough space and pockets for your items, such as a ziplock bag, a pouch, or a tote bag.
- Lamp to provide enough light for your stitching. You can use any lamp that has an adjustable neck and a bright bulb, such as a desk lamp or a floor lamp.
- Seam Ripper to undo any mistakes or remove the paper templates after stitching. You can use any seam ripper that has a sharp tip and a comfortable handle, such as this one.
- Clips to hold your pieces together while stitching. You can use any clips that are small and sturdy, such as Clover clips or binder clips.
That’s it! These are the basic supplies you need for EPP. Of course, you can always add more items to your list as you go along, such as books, patterns, acrylic templates, or embellishments. But for now, these are enough to get you started on your EPP journey.

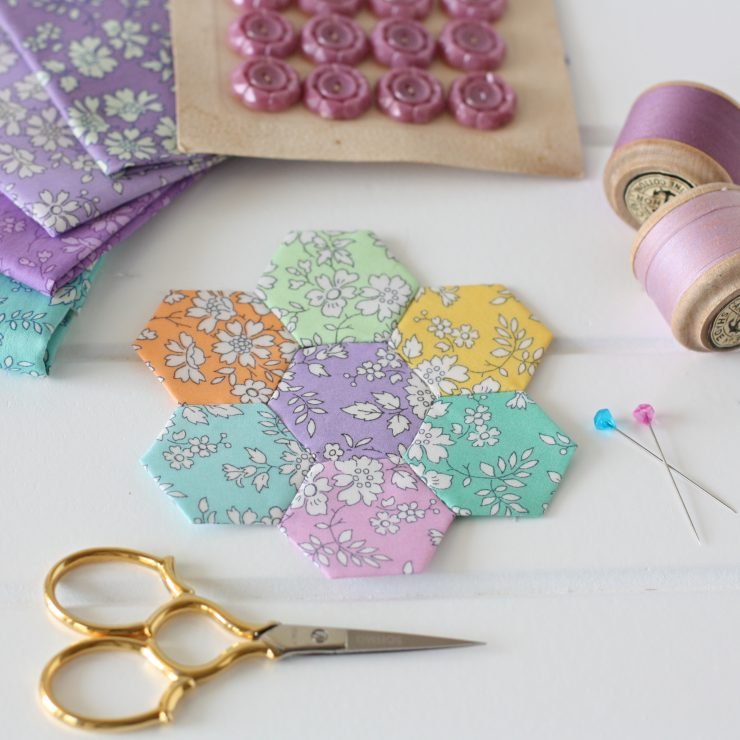
How to Make a Hexagon Flower
✻✻ English paper piecing is the technique of hand piecing fabric over paper templates to create a variety of shapes, most commonly hexagons and diamonds. They are quick to baste and fit together perfectly. English paper piecing is a great portable project to sew on the go.
✻✻ Print and cut 7 hexagons templates onto thick paper or lightweight card stock, or use pre-cut templates (available from quilt stores).
✻✻ Place the templates on the wrong side of the fabric and cut around each, leaving a 1⁄4″ (6mm) seam allowance on all sides.
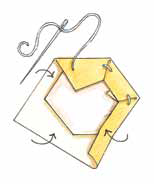
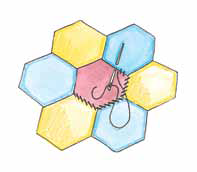
✻✻ Fold the seam allowance on one side over the edge of the template and press in place using a finger presser, hera marker or your fingers. Secure it in place using a paper clip or wonder clip. Beginning at the corner to the left of the paper clip, fold down the seam allowance on the next side and take a small stitch (picking up only one or two threads of the fabric) across the fold to secure. Continue working your way counter clockwise around the hexagon, folding down the seam allowance on each corner and securing the fold in place with a couple of stitches at each fold. Try to keep as close as possible to the folded edge. Continue until you have the required number of hexagons prepared. Do not stitch or pin through the paper. Carefully remove the paper clip. Press well on the back for a crisp edge. (Figure A)
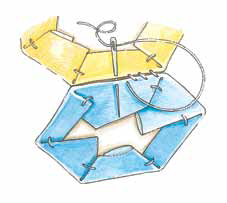
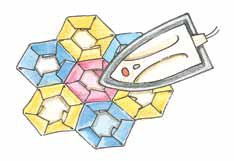
✻✻ Leave the papers in place when you are joining seven hexagons to form a flower. Start by joining the six outer hexagons into a ring. Place two hexagons together with the right sides facing. Join them together along on edge with a whipstitch, being careful to pick up only a few threads of the fabric and to avoid stitching through the paper. Continue attaching one hexagon at a time until six hexagons form a ring. Hand-stitch the remaining hexagon into the center of the flower using the same technique. Carefully remove the papers and press them for reuse. Press the back of the hexagon flower (Figure B – D).
Top tips for beginners:
- Choose a simple shape to start with, such as hexagons, diamonds, or squares. These are easy to cut out and sew together, and you can find many free templates online or in books.
- Use good quality paper for your templates. You can use regular printer paper, but I prefer to use cardstock or freezer paper, as they are sturdier and easier to remove later.
- Baste your fabric to the paper templates using either thread or glue. Thread basting is more traditional and secure, but glue basting is faster and less messy. You can use a glue pen or a regular glue stick for this.
- Sew your pieces together using a whip stitch or a ladder stitch. A whip stitch is more visible but stronger, while a ladder stitch is more invisible but weaker. You can use matching or contrasting thread for this, depending on the look you want.
- Press your seams as you go, using a mini iron or a finger presser. This will help your pieces lie flat and make them easier to join together.
- Remove the paper templates once you have sewn all the pieces together. You can use a seam ripper or tweezers for this, but be careful not to damage the fabric or the stitches.
English Paper Piecing Projects for Beginners
Here are some of my favourite English Paper Piecing projects. They all include a small element of EPP and are a great way to practice the basics before commencing a larger project.

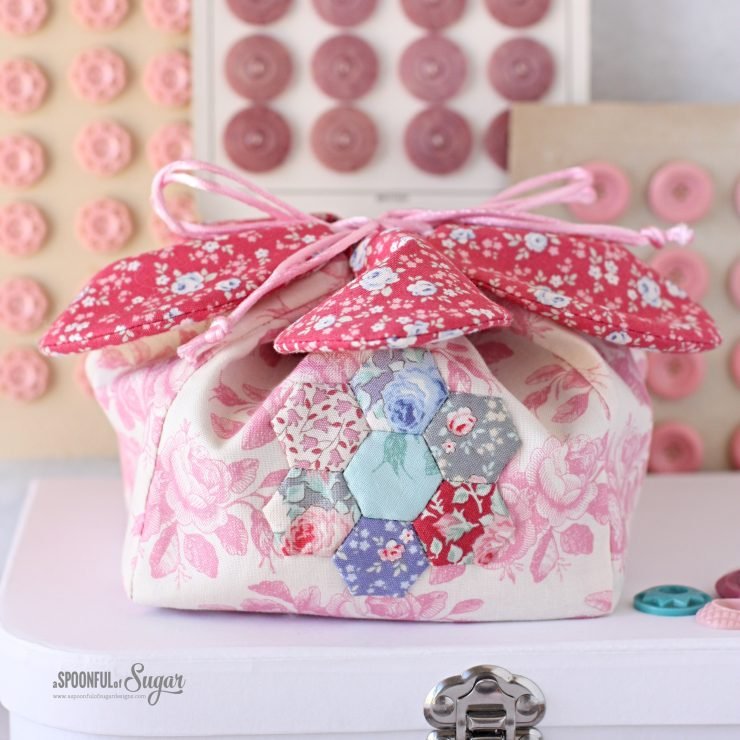
Hexie Garden Pouch – Features a sweet hexagon flower on the front of the bag and is a fun project to showcase some of your favourite small scale florals.

Sleepy Cat Coaster: Make snack time fun with this sleepy cat coaster snuggled under a sweet quilt– perfect for cat lovers everywhere!

Bloom Mini Pillow – This is a great project to build skills – you will learn the basics of patchwork, EPP and applique. It makes a sweet pincushion for your sewing room.
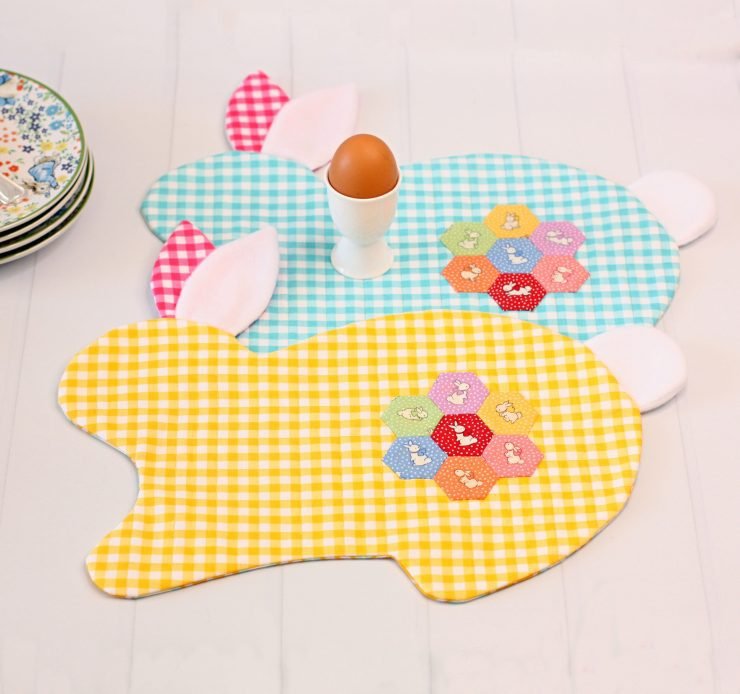
Bunny Placemat – Featuring a gingham bunny complete with fluffy ears and tail, and an English Paper Pieced hexagon flower motif. This adorable Bunny Placemat is perfect for Easter,

Hexie Sewing Kit – The Hexie Sewing Kit sewing pattern will show you how to make a handy zakka style sewing accessory for crafters on the go

Classic Wreath Ornaments: Add a touch of warmth and traditional elegance to your holiday decor with Classic Wreath Ornaments, crafted from linen and wool felt, featuring an English Paper Pieced wreath. Available in four distinct styles—tree, bell, heart, and star—these versatile ornaments are perfect for your Christmas tree, festive table settings, or as a thoughtful embellishment for your gift-wrapping.
Flower Power Pouch – Add a small hexie flower to your pouch for added interest.

Hexie Pincushion – Check out our free tutorial to create a Hexie Pincushion.

Halloween Drawstring Bag – Make a cute drawstring bag for the Halloween or any occasion using our free tutorial.
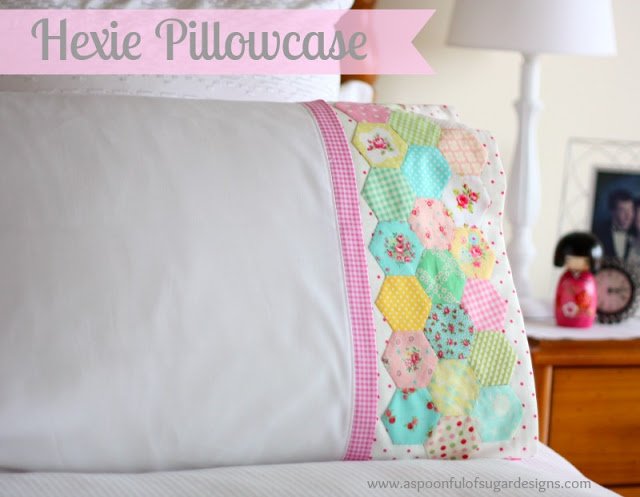
Hexie Pillowcase – decorate a pillowcase with a hexie pieced border.
I hope you enjoyed this blog post and learned something new about EPP. If you have any questions or comments, feel free to leave them below. Happy sewing!
Hello! Are you new here? If so, be sure to sign up for our newsletter here and receive a bonus sewing pattern and welcome discount. Our newsletter includes free tutorials, articles, and new patterns. Welcome to the world of sewing enthusiasts.


Thank you. I love EPP as I love hand sewing at night and in the car. My hubby is driving!
I wish I could sew in the car. I love EPP is super portable. Happy sewing!
Thank you so much. So many wonderful tips. I appreciate your time. My favorite thing about EPP is its portability.
You sure make it sound easy. I make quilts and really need a new project. Enjoy your site and thinking seriously about trying this. I have a 2 piece plastic ruler for hexagon from Missouri star, but not sure it’s for paper piecing use. Also not many craft stores near me so will have to do some research.