I had a few requests for the instructions for making your own Charming Ornaments. You can make up a batch fairly quickly.
Supplies for each ornament:
- small piece of quilters cotton (I used red, lime, and pink)
- fusible webbing such as vliesofix
- white felt (I used the polyester variety although they would be nicer made up in wool felt)
- 10 inch length of narrow white ribbon
- one button (I used red, white, and lime)
- fibrefill stuffing
Trace your shape onto a piece of fusible webbing (I used hearts and stars) and iron it onto the reverse side of your cotton fabric.

Cut out the shape, peel off the paper backing, and iron it onto a piece of felt that is at least 1 inch larger than the outside of the fabric shape. Cut another piece of felt that is the same size for the backing.

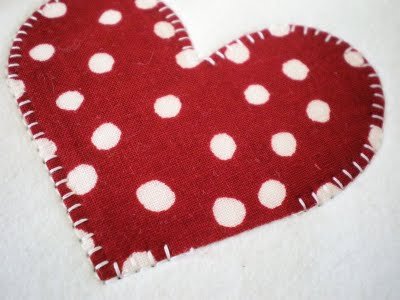
Position the top layer of felt with the fabric shape, on top of the backing felt and pin together. Sew around the fabric shape using a machine buttonhole stitch or zigzag stitch, leaving a gap of approx 1 inch. You will be sewing through two layers of felt.
Lightly stuff the shape through gap in between the two layers of felt.
- Stitch up the gap in the buttonhole stitching so the stuffing is secure.
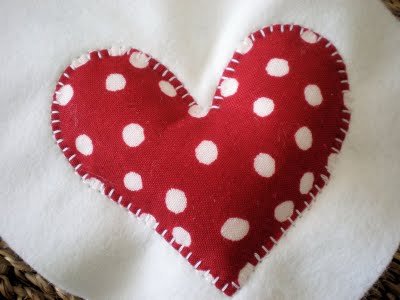
- Cut out the shape, leaving approx 1/2 inch of felt around the fabric shape, using pinking shears.

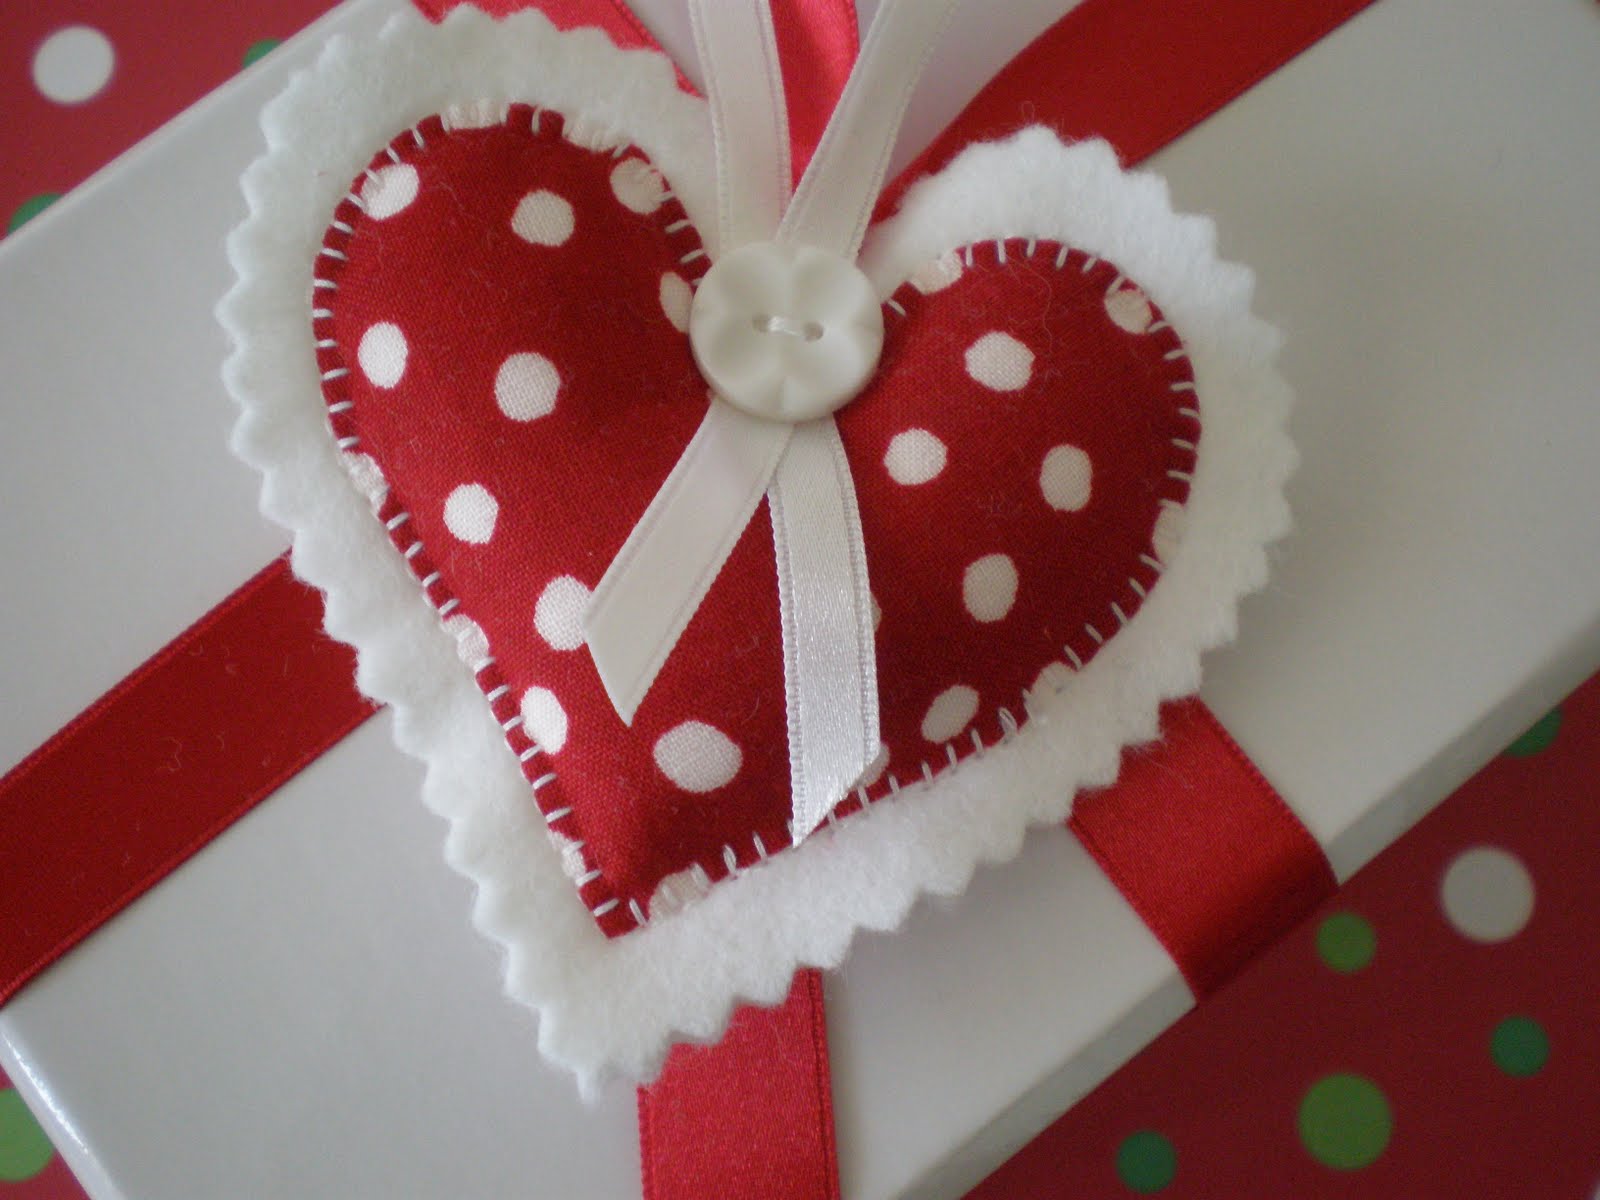
Overlap the ends of the ribbon as shown in the picture and secure to the top of the shape. Sew a button over the stitching to secure the ribbon.

Hang the completed ornament on the tree; or attach to a Christmas present.

Edit: November 2014 – You can find an updated version of this tutorial here.
For your daily sugar fix you can subscribe or follow us on facebook, twitter, google plus and pinterest.
Posted by Lisa


Great tutorial, for some lovely decorations!
Thanks for sharing the instructions, I might have to make some for my matching tree 🙂
Thanks for the tutorial. The hearts are adorable!
these are lovely, not too difficult but so effective. thanks for the fab idea x
Great idea, excellent tutorial. Might have to file this one away for next year. My dance card is full this year already!
Love this use for the Prints Charming scraps too – fantastic!
Love,love,love them.Will have to get my skates on and try and make a few up for this year if I can.Thanks for another brilliant idea and another brilliant tutorial 🙂 Barb.
These are beautiful Lisa, thank you so much for the tutorial xo
Oh I love the heart! Thanks for sharing the instructions. I’ve been looking in magazines for some simple but sweet patterns to make as gifts and now I have some. Kind regards, Anita
Those hearts are really cute. I can imagine they look lovely hanging in your house or tree!
Thanks so much for sharing this tutorial. This ornament is sooo sweet and something I could do!
Lisa, I love the elegance of all you do! Beautiful!
so cute. I am going to get stuff for them today.
http://www.themudpuddleproject.blogspot.com
so cute. I am going to get stuff for them today.
http://www.themudpuddleproject.blogspot.com
so cute. I am going to get stuff for them today.
http://www.themudpuddleproject.blogspot.com
so cute. I am going to get stuff for them today.
http://www.themudpuddleproject.blogspot.com
so cute. I am going to get stuff for them today.
http://www.themudpuddleproject.blogspot.com
Those are awfully cute! Thanks for the tutorial!
Thanks for the tutorial. Those are adorable and will make great last minute gifts.
These are darling. Thanks for the tutorial.
I love this idea. I think it looks gorgeous and have plans to make my own.
Jude, Perth WA
Thank you for the tutorial! When I read your first post about the ornaments I was hoping you’d share with us how to make them. They are adorable and look easy enough for even me to make :o)
They are so gorgeous Lisa…and of course, I LOVE those colours! Hope your Christmas preparations are going well 🙂
These are ever so charming! Thanks!
Brenda
Thanks Lisa. No way will i get the chance to make these this christmas but when i feel like playing with fabric later on i will have to make them and then they will be ready for next christmas.
xx Linda
so many good ideas. i loved the card tags too! i think some christmas crafts are going to be the order of the day here.
These ornaments are wonderfully fun, Lisa… Thank for sharing how to make these beauties with us for this Christmas holiday season! :o) Happy Weekend to you all there ((HUGS))
Thank you so much for this tutorial. You explained the steps very clearly and that is appreciated. Now to get myself to sit down and do it, is another issue in itself! 😉
Maureen
Thank you so much, Lisa! And the way you make your pictures makes the ornament even more beautiful!
Thanks, thanks for the pattern and directions! I really love the button embellishment!
love it! you come up with such lovely ideas!
These are lovely – so pretty. Your presents are going to look wonderful this year!
That small white button on the white ribbon changes this red heart from trivial to unique!
Hello Lisa, love the ornaments you have made, you certainly have a wonderful gift…Warm Regards Lyn
Just lovely-thanks for sharing:)
Oh these are gonna be so ca-ute on my tree! Thanks for sharing such a cute idea!
So pretty!! I linked to your tutorial on Craft Gossip Sewing:
http://sewing.craftgossip.com/tutorial-felt-scrap-fabric-christmas-ornaments/2009/11/29/
–Anne
Pretty! Thanks for sharing, Lisa!
Oh Lisa! Your little ornaments are adorable! Thanks for the tutorial.
Oh, Sweet! I love all the different colors. Thanks for sharing the instructions.
oh Thank you Thank you I have a show in L.A. and all these little bits of day of the dead fabric, now I totally know what to do with them!!!
Brittany
http://www.papermoonies.blogspot.com
Lindos!!!
Hiya! Thank you so much for the tutorial, the ornaments are so pretty. I like the white flower button you used too.
This heart is so lovely – thanks so much for this great tutorial Lisa. Fabulous for Christmas
too cute! I can definitely try this one before christmas!
Corrie:)
Hearts are my favor, I saved this to my pc, thanks for sharing.
Your stars and hearts are so pretty! Thanks for this great tutorial!
Thanks for sharing the instructions! The hearts look too cute!
Charming indeed – thanks for sharing!
Aww, I love your hearts! Thanks so much for this, I’ll be linking.
Thanks for the tute. These are adorable.
Lovely, quick and clever, thanks for sharing.
I am having a blog giveaway at the moment, my new fabric collection samples. Maybe you might like to join in?
Those are darling! Are you photos are super! Thanks for sharing!
Absolutely loving these. Thanks so much for the tute.
So very cute! Just another thing to add to my huge list of craft things to make before Christmas.
Charming is right, these are awesome!
Thanks for the how-tos. You have the best ideas!
Thank you thank you, you saved me this year with this great idea. I’ve just made some, they turned out wonderfully.
Oh, I absolutely love these! Do you mind if I make some with my youth group at Church? For fun-not money.Your blog is gorgeous…glad I found you.
Love, Amanda x
Hey Lisa and Sarah, long time no write, sorry! Been reading through your recent posts and it looks like you’ve been really busy making lots of lovely things. I love these decorations! Wishing you both a wonderful Christmas and a happy, healthy 2010 x
Muy bonito. muchas gracias por el tutorial.
saludos
Thank you for this lovely ornament pattern,I love it!
That is awesome and cute! Even I can make that. Maybe I should start making some now, it takes me that long to get organized 😉 Love your work!
Cada coisa maravilhosa no seu site! Parabéns pelo talento!