A Spoonful of Sugar

Make. Bake. Create.

Menu
  • Home
  • About
    • About Us
    • Press
    • FAQ
    • Disclosure Policy
    • Contact Us
  • Crafts
    • Crochet
    • DIY
    • Embroidery/Cross stitch
    • Gift Wrapping
    • Knitting
    • Miscellaneous
    • Paper Crafts
  • Holidays
    • New Year’s
    • Australia Day
    • Back to School
    • Valentines Day
    • Easter
    • ANZAC Day
    • Mother’s Day
    • Father’s Day
    • Halloween
    • Christmas
  • Recipes
    • Appetizers
    • Bars & Slices
    • Bread & Pastries
    • Cakes
    • Cookies
    • Confectionery
    • Cupcakes & Muffins
    • Desserts
    • Drinks
    • Ice Cream
    • Jams/Preserves
    • Main Meals
  • Sewing
    • Sewing Tutorials
    • Quilting
    • Sewing & Quilting Patterns
  • Family
    • Back to School
    • Family Fun
    • Our Home
    • Parenting
    • Travel
  • Shop
    • Pattern Store
    • Etsy Store

Pot Holder Pattern

February 7, 2013 By Spoonful of Sugar - 79 Comments


Update: Due to popular demand, this old tutorial has been revised and is now available as a pattern in our Store:

Heart Pot Holder Pattern now includes professionally drawn templates and loads of step by step instructions for a small charge to reflect the extra work in formatting the pattern. You can find it HERE.


We have had heaps of requests over the past couple of years for the Pot Holder Pattern (in a tutorial format) for our Heart Pot Holder. We finally got around to it, just in time for this years Valentines Day. We have modified the pot holder pattern slightly and have made it using some pretty Pirouette Fabrics from XO Gigi Fabrics. It will be perfect when baking some Valentine treats and throughout the year. The pattern features a little felt appliquéd heart.
 

Materials:

  • 4 fat quarters of quilting cotton
  • quilt batting such as warm and natural
  • Insul-Bright batting
  • pink felt
  • Pot Holder template.


1. Cut the fabrics as follows:
 
Using the  heart template   .cut
 
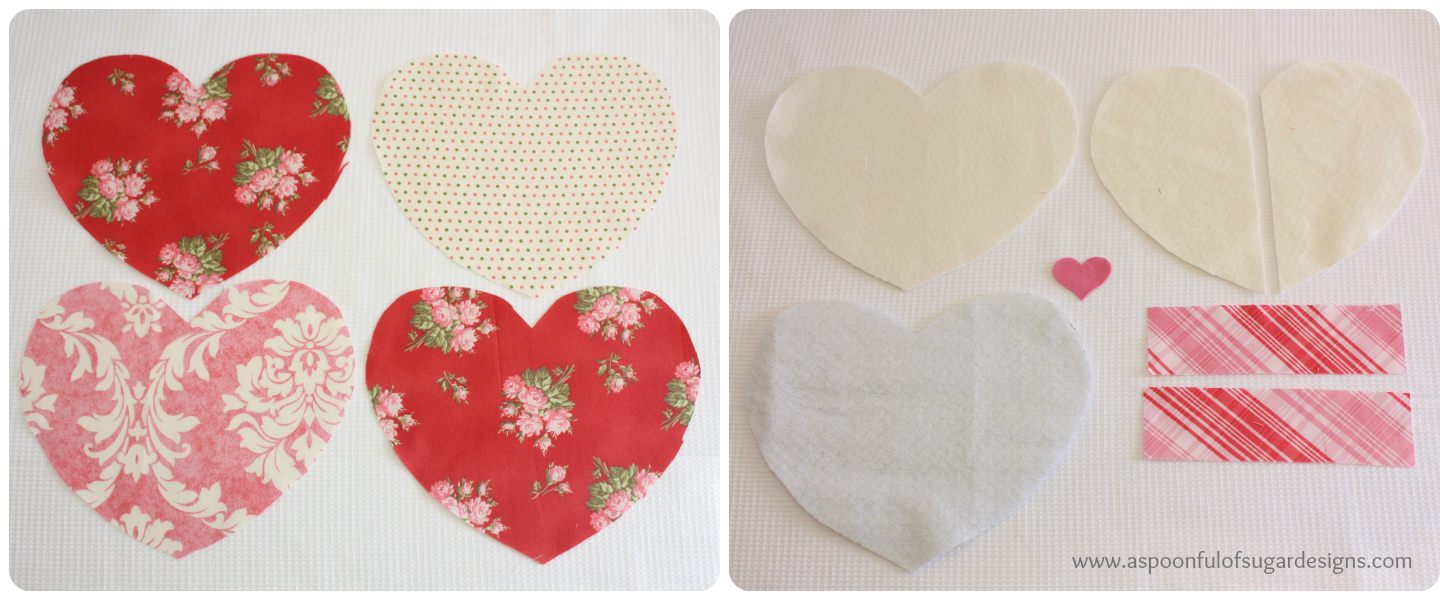
  • 2 hearts in Fabric 1 (red floral) for the front of the pot holder
  • 1 heart in Fabric 2 (pink damask) for the lining of the pot holder
  • 1 heart in Fabric 3 (polka dot) for the back of the pot holder
  • 2 heart in quilt batting. Cut one of these hearts in half as pictured below.
  • 1 heart in Insul-Bright batting
Using the small heart template cut
  • 1 heart in pink wool felt
Cut two rectangles, measuring 2 1/4 x 8 inches) from Fabric 4 for the binding on the front of the pot holder.
 

2. Press the two red hearts in half with the wrong sides facing. Place a piece of batting inside each red heart (using the batting heart that has been cut in half).

To create a binding strip, press the fabric rectangles in half lengthwise. Unfold, and fold the edges into the centre, and press. Fold in half so that you have a binding strip that measures 8 inches x 9/16 inch.

Pin the binding strip to the inside edges of the red hearts and stitch in place. Trim the ends of the binding strip.

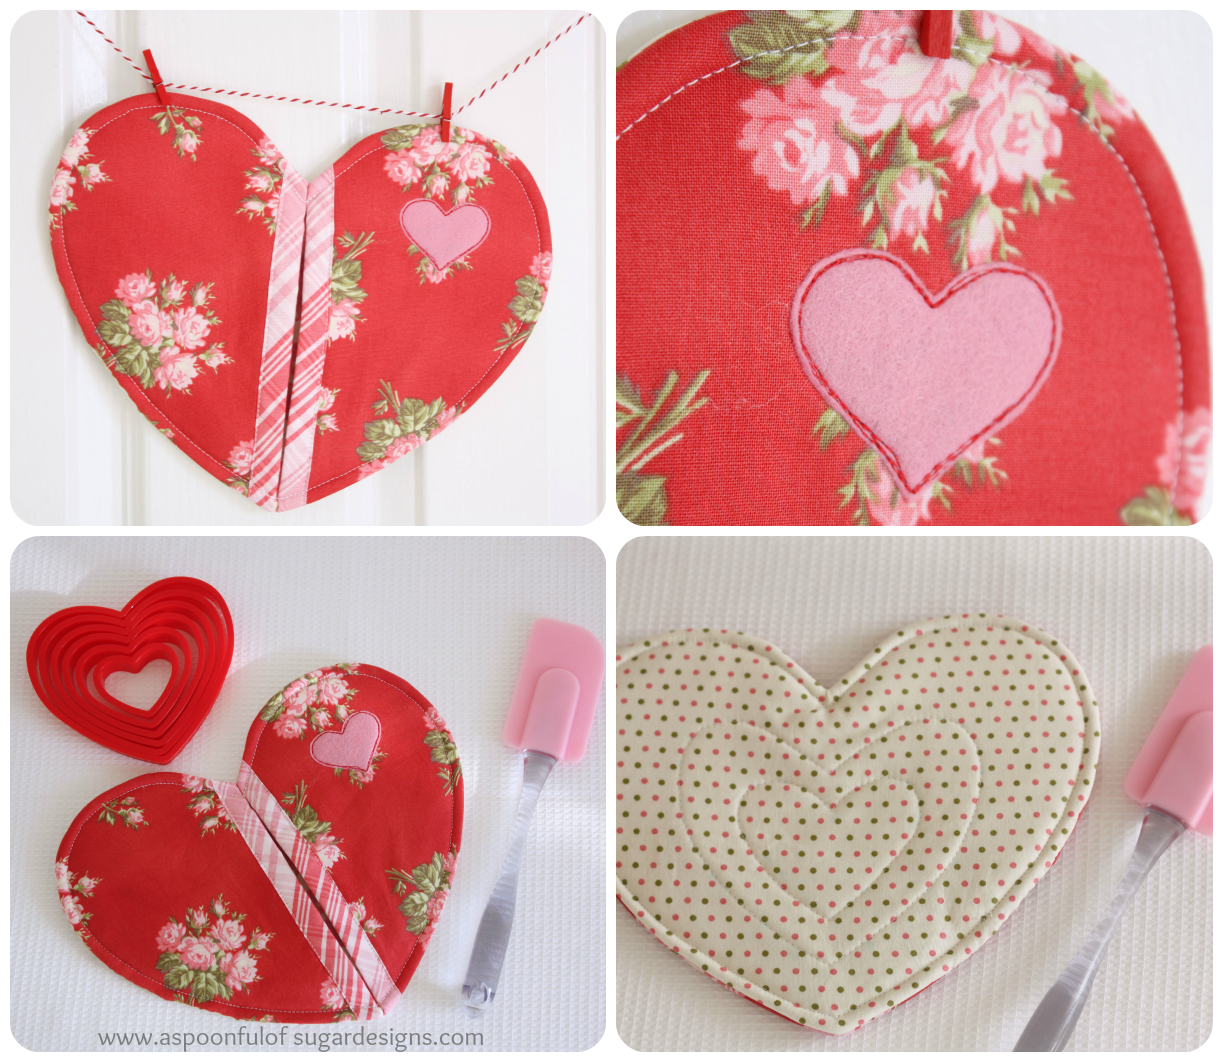
Pin the felt heart in position. Stitch around the outside of the heart, 3 times in red cotton. Pull loose threads to the underside and tie off.

 
3. Position the red hearts on top of the pot holder lining, and pin in place. Stitch around the outside of the pot holder using a basting stitch and a scant seam allowance. Press.
 

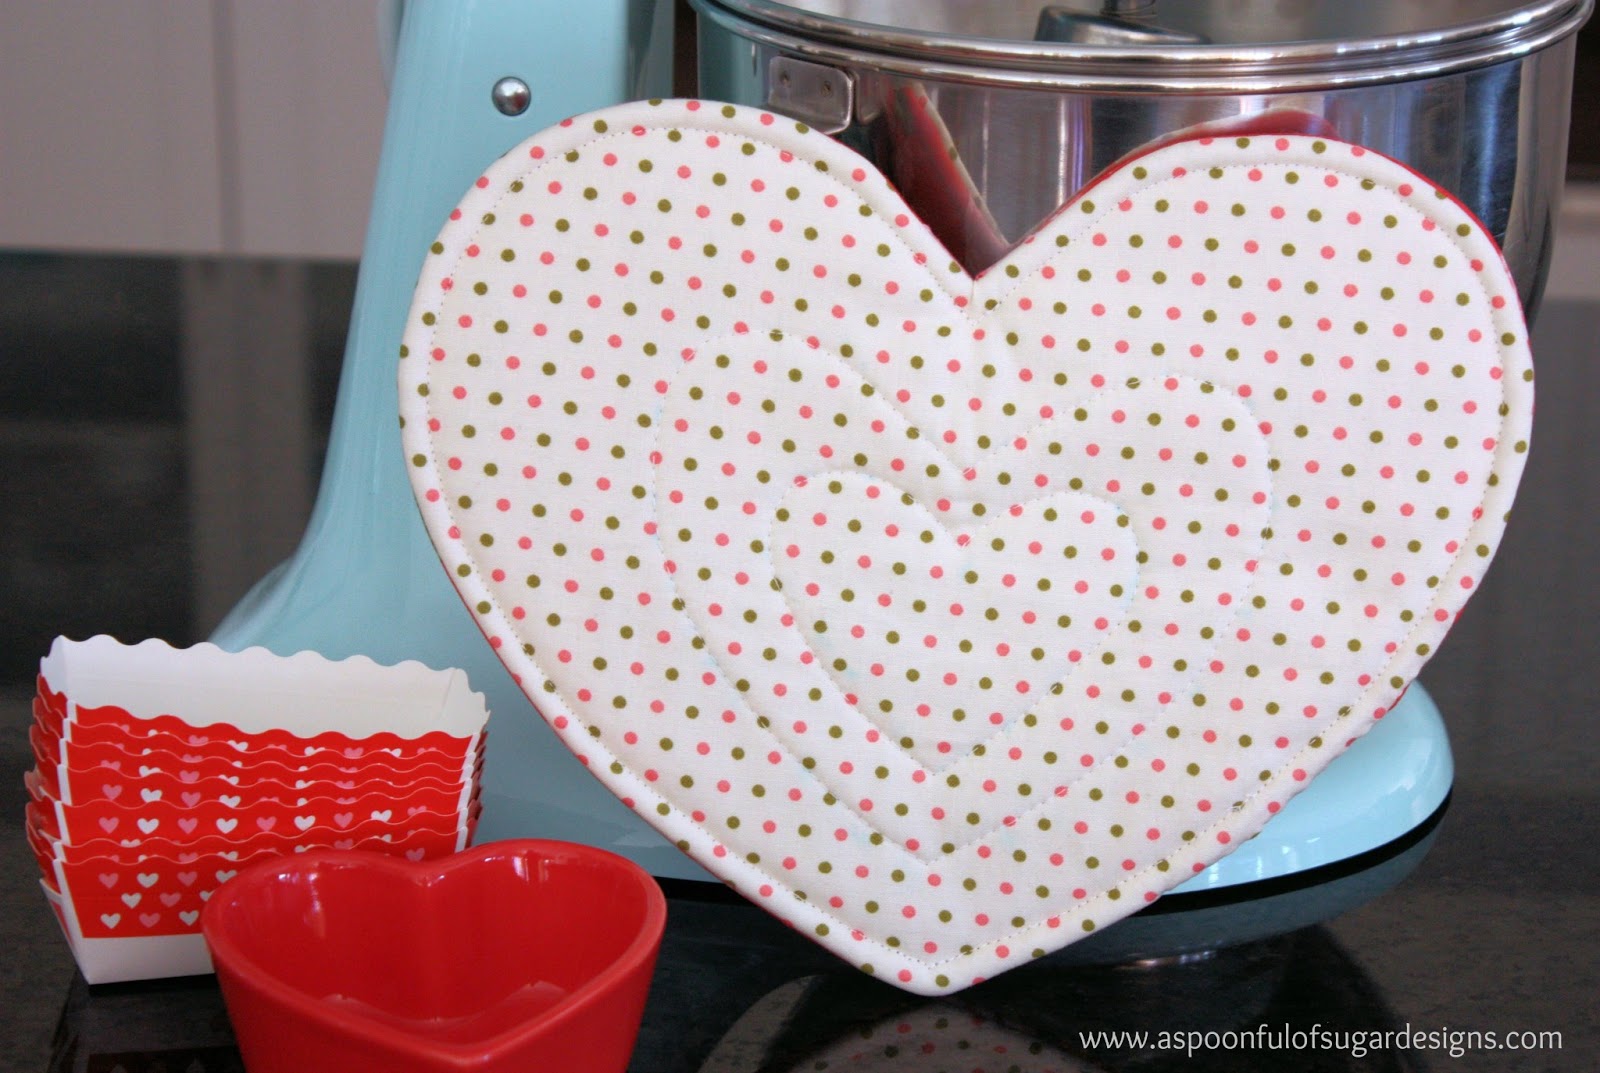
4. Trace the quilting pattern onto the back of the pot holder using a water soluble pen. Pin the back of the pot holder to the insul bright and batting hearts.

Quilt the heart design on the pot holder back. Remove the water soluble pen markings.

5. Pin the pot holder back and front together with the right sides facing. Stitch around the outside of the pot holder leaving a 3 inch gap on on side for turning. Clip curves.

Turn the pot holder out the right way through the opening. Hand stitch the opening closed using a ladder stitch. Press.

 
6. Top stitch around the outside of the pot holder using a 1/4 inch seam allowance. Press.
 

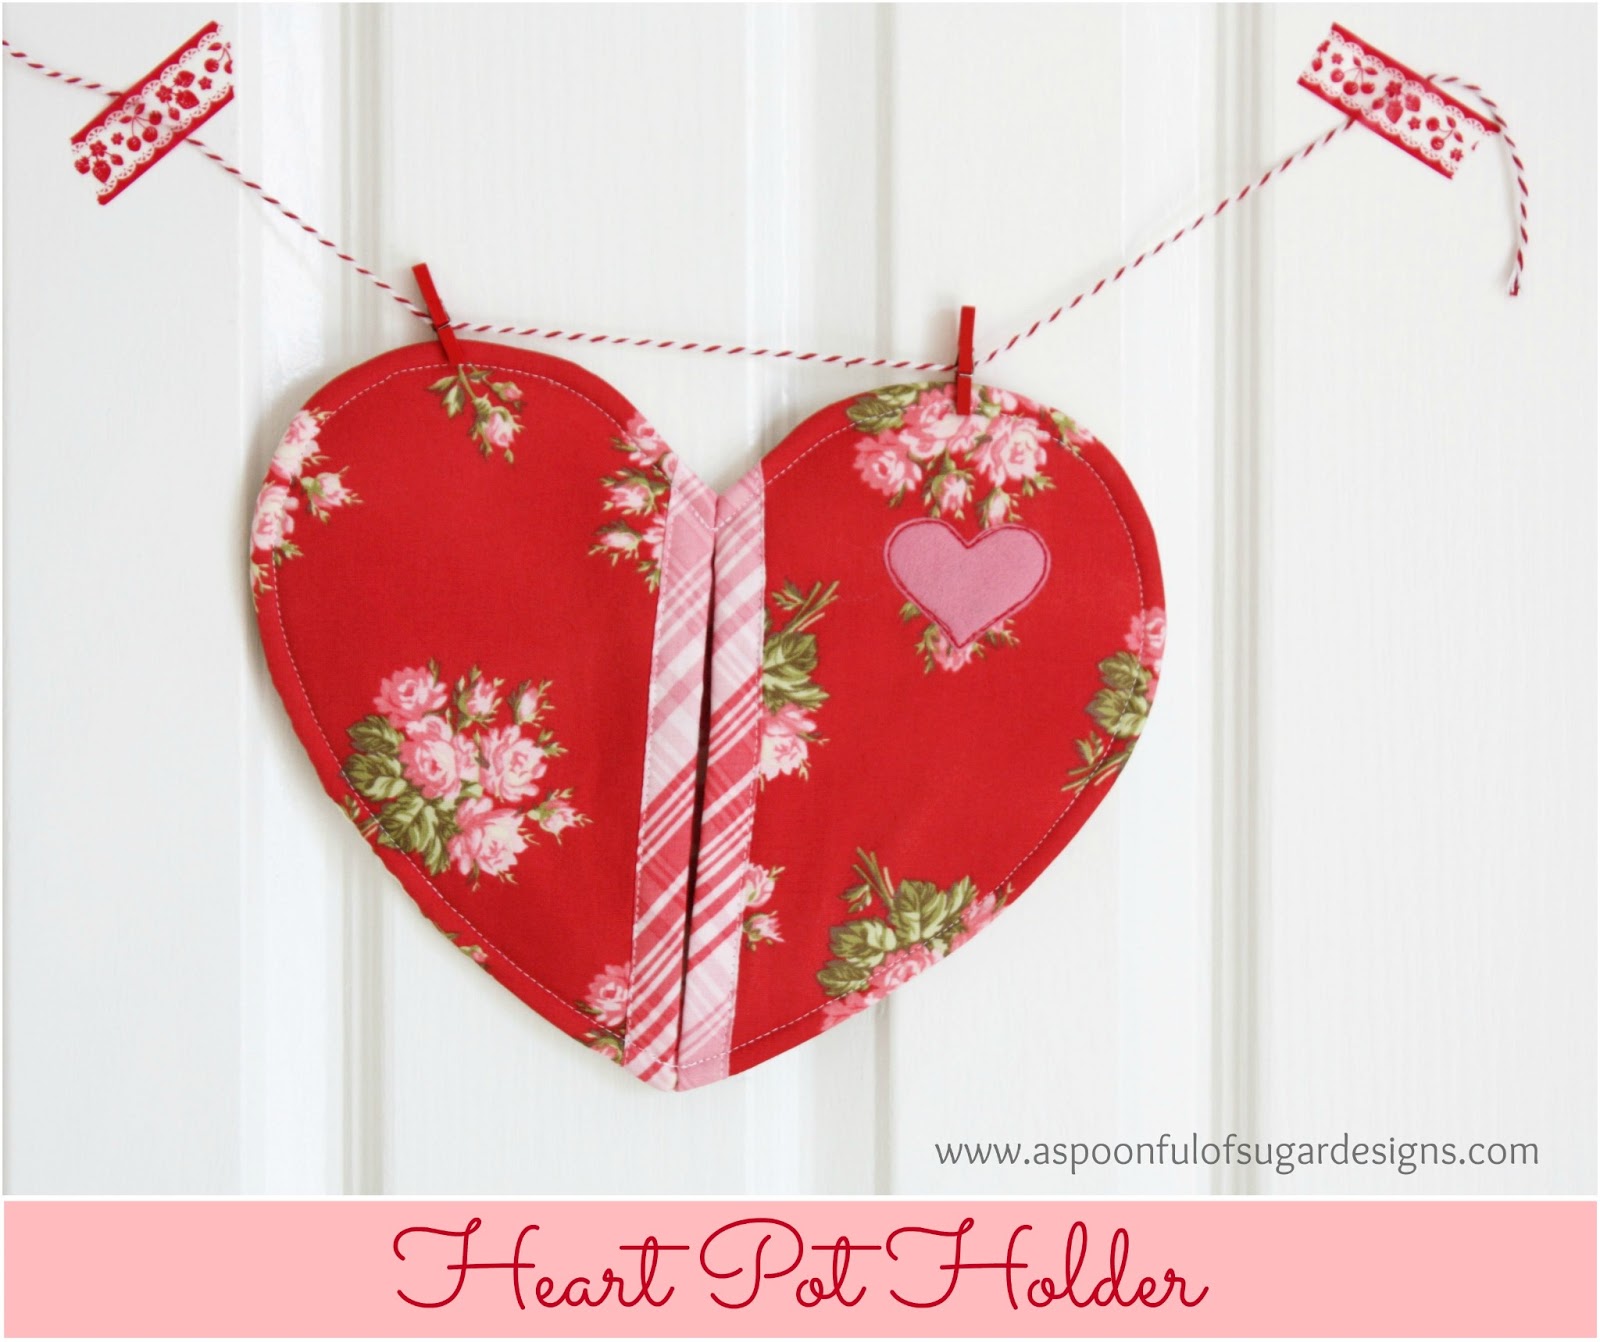
The heart pot holder pattern is suitable for beginner sewers and can be made in approximately 2 hours.


Update: Due to popular demand, this old tutorial has been revised and is now available as a pattern in our Store:

Heart Pot Holder Pattern now includes professionally drawn templates and loads of step by step instructions for a small charge to reflect the extra work in formatting the pattern. You can find it HERE.

Filed Under: Mother's Day, Sewing, Sewing Tutorials, Valentines Day Tagged With: gifts

« Spice Cupcakes with Brown Sugar Icing
Valentines Breakfast Tray »

Comments

  1. Quinn says

    February 7, 2013 at 11:14 pm

    That is really lovely!

    Reply
    • Mary says

      January 21, 2019 at 1:51 pm

      I love that heart it’s easy to make Thanks again .

      Reply
  2. sarah says

    February 8, 2013 at 12:12 am

    This I really love. And am in need of a few in the kitchen and for my woodburner. Mite get round doing that after I did the girls dresses, with there leftovers 😀

    Reply
  3. Craft and Decorate says

    February 8, 2013 at 1:37 am

    I’m gonna try this for sure!! Great idea, thanks for sharing ^_^

    Reply
  4. knusperzwergundfeenstaub.ch says

    February 8, 2013 at 2:53 am

    Great tutorial und thank you so much for those lovelys pot holder pattern!
    Lovely greetings from zurich
    Melanie

    Reply
  5. The Thimblemouse of Country Crossroads says

    February 8, 2013 at 3:48 am

    Thanks so MUCH! I’ve been wanting to make a heart potholder for some time – with your great tutorial, I think the time has come! Will share this for sure!

    Reply
  6. Melody says

    February 8, 2013 at 4:47 am

    Thank you again for a fabulous project

    Reply
  7. Maria says

    February 8, 2013 at 4:54 am

    Thanks for this tutorial. I’ve wanted to make heart potholders for ages but could only find ones with binding around the heart. I’m not keen on binding small fiddly objects so this one is a winner for me.

    Reply
  8. mommychic says

    February 8, 2013 at 5:31 am

    Tqvm for this comprehensive tutorial. I’l make this lovely pot holder for my craft gift exchange this chinese New Year. Warmest regard from Malaysia. I love your blog a lot. tqvm for being a great inspiration.

    Reply
  9. @photorecipe says

    February 8, 2013 at 5:34 am

    What a lovely idea for valentine´s day (and very nice photos), thanks for sharing.

    Regards,

    Photorecipe

    Reply
  10. Maddie Kertay- The Domestic Anarchist says

    February 8, 2013 at 7:04 am

    Adorable!.. and I have shared it with all 1,234 members of the BadAss Quilters Society! http://www.facebook.com/BadAssQuiltersSociety

    Reply
  11. PeggySue says

    February 8, 2013 at 7:50 am

    Thank you! What a well done tutorial! I found your blog through BadAss Quilters Society on Facebook. Now to see if I can beat the estimated time for completion!

    Reply
  12. Live Laugh Rowe says

    February 8, 2013 at 8:36 am

    ADORABLE-ness! Love it, ladies… Sharing via pinterest and stumbling! xo

    Reply
  13. Angelina- JoJo & Eloise says

    February 8, 2013 at 9:45 am

    Oh, this is ADORABLE!!! I love it 🙂 Thank you so much for joining in on the fun! I am downloading the template for these. 🙂
    xo
    Angelna

    Reply
  14. Angelina- JoJo & Eloise says

    February 8, 2013 at 9:45 am

    Oh, this is ADORABLE!!! I love it 🙂 Thank you so much for joining in on the fun! I am downloading the template for these. 🙂
    xo
    Angelna

    Reply
  15. Laurie @ Simply Creating Home says

    February 8, 2013 at 10:25 am

    I just love this! What a sweet potholder and wonderful tutorial. I’ll be pinning and sharing this!

    Reply
  16. janice15 says

    February 8, 2013 at 12:27 pm

    Very pretty….

    Reply
  17. Jeran McConnel says

    February 8, 2013 at 6:33 pm

    Sooooo dang cute!!! I wanna make one tonight. Thanks for sharing.

    Reply
  18. The Polka Dot Closet says

    February 8, 2013 at 7:13 pm

    OMG, I have never seen anything like this ADORABLE! Thank you for the tutorial!

    Carol

    Reply
  19. Beertje Zonn says

    February 8, 2013 at 10:34 pm

    Great idea, thanks for sharing!

    Beertje Zonn & Sonnja

    Reply
  20. Samelias Mum says

    February 9, 2013 at 6:02 pm

    Such a fun pattern. Thanks for sharing with us 🙂

    Reply
  21. Christopher Falls says

    February 9, 2013 at 10:30 pm

    I love this and in particular the bias on front. thx

    Reply
  22. Elsa says

    February 10, 2013 at 6:59 am

    Thanks so much for the pattern and tutorial! I’m making some today!

    Reply
  23. Meliskatish says

    February 10, 2013 at 1:02 pm

    Thank you so much!! Love the way it comes together! Made one today, and it is very sweet – almost too pretty to use 🙂 only problem I had was what seam allowance to use in step 5? I used 1/4 inch but it was possibly a little small given all the layers. Thanks for a quick satisfying project just in time for Valentine’s day. I found this through craftgossip.

    Reply
  24. Kristin @ My Uncommon Slice of Suburbia says

    February 10, 2013 at 6:28 pm

    Oh this is adorable!!!
    XO
    Kristin

    Reply
  25. Eva says

    February 11, 2013 at 5:37 am

    Hola….
    Gracias por el tutorial
    Saludos

    Reply
  26. Little Busy Bee says

    February 11, 2013 at 6:26 am

    Thank you very much! That’s a lovely and quick project.

    Reply
  27. Thimbleanna says

    February 11, 2013 at 6:46 am

    Very, very cute Lisa. Thanks for the tutorial!

    Reply
  28. findmydream says

    February 11, 2013 at 6:49 am

    I love this project. Unfortunately your links for the patterns are not working. Could you re-post the links? I really want to make these cute pot holders!

    Reply
  29. sew.darn.quilt says

    February 11, 2013 at 6:51 am

    Perfect for Valentine’s Day, Thank you for this tutorial 🙂

    Reply
  30. Greve Gang Does Italy says

    February 11, 2013 at 8:51 am

    I want to make this but the template is not coming up for me. Any suggestions?

    Reply
  31. harleywife57 says

    February 11, 2013 at 11:22 am

    thanks for this tute ! just what I was looking for ; I need potholders and this is adorable ! does it matter which way the insul brite goes ? I have some but not the paper that came with it ! thanks again !

    Reply
  32. findmydream says

    February 11, 2013 at 1:45 pm

    The link works now. Thanks!!

    Reply
  33. A Spoonful Of Sugar says

    February 12, 2013 at 4:17 am

    Not sure why the links weren’t working – we did experience high traffic last night. Glad to hear it is back to normal 🙂

    Reply
  34. Chrissy says

    February 12, 2013 at 4:25 am

    Thanks for the tutorial! I followed along and made a similar pot holder. http://www.elainescrafts.com/sewing/heart-pot-holder/

    Reply
  35. Monika says

    February 12, 2013 at 5:23 am

    Thanks you. It´s very nice sewing. I have to try it like small gift for my mother and mother-in-law….:-D

    Reply
  36. Kim Walus says

    February 12, 2013 at 7:36 am

    Thanks for your amazing blog and this fun pattern. I love it and have made one and have 9 more in the process. I plan on giving them to a few of the teachers I work with and to a few of my dear friends. I wish I had time to make one for everyone I know. They are going to LOVE them. Thanks again! You have such wonderful posts and I enjoy following you!

    Reply
    • Susan says

      March 26, 2022 at 9:02 pm

      I can’t wait to try this. New sewing person here.

      Reply
  37. Grandmasewnsew says

    February 12, 2013 at 8:48 pm

    Thank you for sharing this great tutorial. I made one with just two fabrics and it turned out very nice. If you plan it a little differently, you can end up with the opening on the inside I think and then your slip stitching won’t be noticeable. I say this because that’s usually the low point of any project I do. I’ll give mine to my daughter for Valentine’s Day. Thank you again!

    Reply
  38. Emma Wilkinson says

    February 13, 2013 at 5:21 pm

    very sweet!

    Reply
  39. Annaleis Topham says

    February 13, 2013 at 7:17 pm

    Love this! Now to find the perfect material.

    Reply
  40. Annaleis Topham says

    February 13, 2013 at 7:18 pm

    and I forgot to say popping over from Blogs and PR for #TUST. Thanks for linking up.

    Reply
  41. Holly Lefevre (504 Main) says

    February 13, 2013 at 11:22 pm

    This is FANTASTIC! So darn cute! I want to make them even though Valentines day will be over before I get to it! Pinned, stumbled and working on some of my own hearts!

    Reply
  42. Sew Sister says

    February 14, 2013 at 11:36 pm

    I love this thank you for sharing this pot holder 🙂

    Reply
  43. CraftyMummy says

    February 15, 2013 at 12:02 am

    Another gorgeous project! You guys are so clever!

    Reply
  44. Filomena Crochet says

    February 15, 2013 at 3:41 am

    Lisa and Sarah,
    beatiful….wonderfulll!!!!

    hugs,
    Maria Filomena,
    to Portugal

    Reply
  45. chillin with Quillin says

    February 15, 2013 at 8:58 am

    adorable,thanks for the tutorial !!1
    Paula

    Reply
  46. Tina Pippo says

    February 24, 2013 at 10:56 am

    Wonderful tutorial! I loved the outcome!
    Great post!! I included it in my post Βόλτα στη Γειτονιά #23 🙂
    Have a great week!!

    Reply
  47. Khristina aka Khris says

    March 17, 2013 at 2:55 am

    Thanks for sharing. I have posted about your tutorial on Freebies for Crafters.
    Hugs Khris

    Reply
  48. Linda says

    February 5, 2014 at 3:57 am

    Love the potholder, but having problems downloading the pattern. Have you had anyone else having problems with this?

    Reply
    • A Spoonful of Sugar says

      February 5, 2014 at 6:59 am

      Linda – we recently upgraded out site so I checked the link to the pattern but it is still working for me. You should be able to find it by clicking on this link:
      https://docs.google.com/file/d/0B-gukZ_qXxX7cDc3bHVKeGVCaU0/edit

      Reply
      • Linda says

        February 6, 2014 at 3:08 am

        I will try again. Thank you & appreciate you taking the time to respond!

        Reply
  49. larriclairequilty says

    February 10, 2014 at 7:17 am

    My kids wanted more of these heart potholders like I made years ago. Thank goodness I don’t have to fight the binding this time. Thanks for this “recipe”.

    Reply
    • A Spoonful of Sugar says

      February 10, 2014 at 7:28 am

      This pattern is so much easier that the type with binding!

      Reply
  50. Linda says

    February 10, 2014 at 7:45 am

    Hi..love the potholder, but can’t get the template to open so I can print it..just a blank! I don’t know what I am doing wrong!

    Reply
    • A Spoonful of Sugar says

      February 10, 2014 at 5:13 pm

      Not sure why it isn’t working for you – it is working this end. I’ll email it to you.

      Reply
  51. Brenda says

    February 11, 2014 at 8:18 am

    I love this, too, but cannot open the template. When I try on iPad, it is blank and the title line says (Template 2.pdf) with a padlock symbol. I also tried to open it windows on my laptop, I signed into google, but the page was so large, it only showed 1/2 of the heart when i clicked on print preview. i could not get it to show the entire template even when i put it at 100% or even 50%. Sorry.

    Reply
    • A Spoonful of Sugar says

      February 11, 2014 at 4:04 pm

      Sorry to hear about that Brenda – it works well from our end and we have tried it on a few different computers and it works well/ I will email it to you.

      Reply
  52. Sharon Coyle says

    February 19, 2014 at 12:50 pm

    Could you email me the template. Iam planning on doing this for a homeschool project on Friday and don’t want to run into problems printing it. I read some of the post where others had problems. Also I am not familiar with the insul bright. Is it the Mylar poly or the needle punch? Thanks for your time and for the great idea. I think the girls will love it!!

    Reply
    • A Spoonful of Sugar says

      February 19, 2014 at 2:11 pm

      Hi Sharon.

      How fun that you are teaching this to your homeschool children. The link is working perfectly well. I have also added the pdf file directly into the post (under the materials list) in case anyone is having trouble with the link to google docs.
      You can find more details on Insul Brite here:
      http://www.warmcompany.com/ibpage.html

      Lisa

      Reply
  53. Ronja Lotte says

    July 17, 2014 at 10:16 pm

    Thanks for your work! I linked your Tutorial in my blog here: http://nur-noch.blogspot.de/2014/07/wenn-ein-ofenhandschuh-und-ein.html#more (in german). I wrote a post about sewing pot holders and told everyone about this tutorial+pattern.
    I hope that`s okay. Have a nice day,
    Ronja Lotte

    Reply
    • A Spoonful of Sugar says

      July 19, 2014 at 10:09 pm

      Thanks so much Ronja! Have a wonderful weekend.

      Reply
  54. Brittany says

    January 21, 2015 at 5:00 am

    Hi,

    We would love to use this fabulous tutorial on our blog – can we have your permission? All attributes and links go to a spoon full of sugar!

    Britt

    Reply
    • A Spoonful of Sugar says

      January 21, 2015 at 6:42 am

      Hi Brittany – You are welcome to use one image from the post with a link to our site.

      regards Lisa

      Reply
  55. Darlene Hanchett says

    February 10, 2015 at 1:17 am

    This tutorial is great! I made one for myself and am planning on making them for my mom and mom-in-law for Mother’s Day. I linked to the tutorial on my blog here: http://www.momtomen.com/first-completed-sewing-project

    So many great projects and ideas here….LOVE IT!

    ~ Darlene

    Reply
  56. Lyn says

    June 7, 2016 at 11:41 pm

    Hi. I love this pot holder and the tutorial is great only i don’t understand where the pink felt goes? It says pin into place but I’m not sure what to pin it to. I feel like i must be missing something because nobody else has asked about it. Am i just not getting it or is there something elusive about the pink felt?
    Thanks, lyn.

    Reply
    • A Spoonful of Sugar says

      June 12, 2016 at 2:02 pm

      Hi Lyn – Sorry only just spotted your message. The pink felt heart is optional. If you look at the photo of the completed pot holder, you will see where to place it on the front. It is pinned tot he front of the pot holder, and then stitched in place. Hope that has clarified it for you! Happy sewing, Lisa

      Reply

Leave a Reply Cancel reply

Your email address will not be published. Required fields are marked *

  • Email
  • Facebook
  • Instagram
  • Pinterest
  • Threads
  • TikTok
SUBSCRIBE TO NEWSLETTER
×

Categories

Archives

PURCHASE PDF PATTERNS

We offer over 100 affordable PDF sewing patterns available for download from our store website or Etsy store. Each pattern includes detailed instructions, numerous photos, and templates.

WEB STORE ETSY STORE

Instagram

A lot can change in 10 years ❤️ It’s been fun look A lot can change in 10 years ❤️ It’s been fun looking back at where I was in 2016 and how far life has come since then. Swipe for a little trip down memory lane.Back in 2016, my priorities were firmly centred around family. I was working full‑time, sewing in the guest room, sharing tutorials on my blog, and slowly dipping my toes into selling a handful of patterns on Etsy. It was a busy, full season — and creativity was something I fitted in around everything else.  Fast forward to 2026… I’m now retired and living the creative life I once dreamed of. My kids have grown up and are living in their own homes nearby. My husband and I are free to travel, explore, and enjoy this stage of life. And I get to spend my days designing, sewing, and connecting with this beautiful community.Life looks different now — in the best possible way.Were you following me back then, or what has changed for you over the past 10 years? I’d love to hear your story too.Tagging the lovely makers of my quilt: @arabesquescissors @ministryoffabric @belloquacity @alittlepatchwork @sameliasmum coleandtaffy @quiltymamaof4 @shequiltsalot @downgrapevinelane @lizzierosesews @lovethatfabric @sew_mimi.k #2026isthenew2016 #10yeartransformation #sewingjourney #sewingcommunity #aspoonfulofsugardesigns
Fall in love with sewing all over again ❤️I’ve Fall in love with sewing all over again ❤️I’ve rounded up 10 heart‑themed makes — from quick gifts to charming quilt blocks — perfect for weekend stitching or using up your favourite scraps. Whether you’re sewing for Valentine’s Day, birthdays, or just because, there’s something sweet for every maker.Comment HEART and I’ll send you a link to my Heart Pattern Collection.#sewingproject #heartsewing #quiltblock #scrapsewing #easytosew
Raw edge appliqué doesn’t have to feel fiddly or i Raw edge appliqué doesn’t have to feel fiddly or intimidating. With a few simple techniques, you can create neat, crisp shapes — even tiny details like penguin beaks and hearts.I’ve put together My Top 5 Secrets for Raw Edge Appliqué to help you feel confident, whether you’re brand new to appliqué or looking to refine your finish. Save this for your next sewing session.If you’d love a quick, beginner‑friendly project to practise these tips, my Penguin Love Mugrug is the sweetest Valentine’s make — scrap‑friendly, gift‑ready, and such fun to sew.Comment PENGUIN and I’ll send you the link to the pattern. Available now in our Pattern Store and Etsy shop.  #rawedgeapplique #appliquetips #sewingtipsandtricks #mugrugpattern #penguinlove
If you’ve ever wanted to add eyelets or grommets t If you’ve ever wanted to add eyelets or grommets to your sewing projects, here’s a quick look at how I install them using my DK93 snap press. It’s the same tool I use for snaps — and it makes installing eyelets beautifully quick and consistent.For this Ribbon Pouch, I used the Liberty Gifts from the Garden collection (printed on Lasenby cotton and released in January 2026). The colours and motifs pair so well with the little ribbon tie detail.Here’s how to install the eyelets:Punch out the four holes using a hole‑cutting die.Place the eyelet into the hole.Press it into place using the snap press.That’s it — easy peasy, and it gives the pouch such an elevated, professional finish. I love how clean and sturdy the result is.Fabric is Gifts from the Garden by Liberty - kindly provided by @regent_street_fabrics — thank you!If you’d like the Ribbon Pouch pattern (it comes in 3 sizes), comment RIBBON and I’ll send the link straight to you.Ribbon Pouch Sewing Pattern: available in our Pattern Store and Etsy shop ( links in profile).#SewingInspiration #SewingProjects #Eyelets #Grommets #SnapPress
The Twirling Treasures Hot Pad & Placemat Set show The Twirling Treasures Hot Pad & Placemat Set showcases one of my favourite FPP designs — a stunning kaleidoscope‑style block that always turns out beautifully. Kaleidoscope blocks are some of my most popular FPP patterns, and this set is such a fun way to use them.  This set includes six sizes, making it incredibly versatile: use them as hot pads, trivets, placemats, or simply as a way to add a pop of colour to your kitchen.For these samples, I went with a monochromatic scrap‑busting approach, pairing fabrics from the same colour family with a low‑volume background. The black‑and‑white striped binding adds such a crisp, modern finish. It’s a wonderful project for building your FPP confidence — and a fantastic way to use up those treasured scraps.The Twirling Treasures Hot Pad set is our Pattern of the Week. It is currently 25% off this week in our Pattern Store and Etsy Shop.If you’d like to sew your own set, comment TWIRL and I’ll send the pattern link straight to you.Happy sewing! Lisa 🌸#FoundationPaperPiecing #Quilting #HotPads #ScrapBuster #KitchenSewing
The Ribbon Pouch is one of those little makes that The Ribbon Pouch is one of those little makes that feels special from the very first stitch. I made this sweet trio in the Liberty Gifts from the Garden collection, and the colours couldn’t be more perfect for gifting, organising, or adding a little beauty to your everyday.Each pouch features: 🌼 A simple ribbon tie closure 🎀 Optional sew‑in tags or DIY felt/fabric labels 🧵 Three practical sizes — perfect for notions, treats, or small gifts ✨ A quick, beginner‑friendly sewIf you’d like to make your own, comment RIBBON and I’ll send the pattern link straight to your inbox. Save this for your next weekend project — it’s such a satisfying little sew. Pattern is available in our Pattern Store.Thanks to @regent_street_fabric for the Gifts from the Garden fabric collection. (released Jan 2026)#SewingInspiration #SewingProjects #LibertyFabric #SewingPatterns #BeginnerSewing
Follow on Instagram

Featured Pattern

Travel Sewing Kit Pattern

Featured Tutorial

Retro Drawstring Bag

Featured Recipe

Lemon Pound Cake

Connect

  • Email
  • Facebook
  • Instagram
  • Pinterest
  • Threads
  • TikTok
SUBSCRIBE TO NEWSLETTER
×

Popular Posts

  • Charm Square Fabric Tray
  • Merry Little Christmas Sewing Projects
  • {Back to School} Tissue Cover
  • Raw Edge Applique Tips
  • Sewing Gifts 101: Easy and Affordable Ideas for Your Crafty Friends
  • Fabric Gift Pouch
  • Free Holiday Sewing Tutorials

Copyright © 2026 Lisa. K. Cox - A Spoonful of Sugar