A Spoonful of Sugar

Make. Bake. Create.

Menu
  • Home
  • About
    • About Us
    • Press
    • FAQ
    • Disclosure Policy
    • Contact Us
  • Crafts
    • Crochet
    • DIY
    • Embroidery/Cross stitch
    • Gift Wrapping
    • Knitting
    • Miscellaneous
    • Paper Crafts
  • Holidays
    • New Year’s
    • Australia Day
    • Back to School
    • Valentines Day
    • Easter
    • ANZAC Day
    • Mother’s Day
    • Father’s Day
    • Halloween
    • Christmas
  • Recipes
    • Appetizers
    • Bars & Slices
    • Bread & Pastries
    • Cakes
    • Cookies
    • Confectionery
    • Cupcakes & Muffins
    • Desserts
    • Drinks
    • Ice Cream
    • Jams/Preserves
    • Main Meals
  • Sewing
    • Sewing Tutorials
    • Quilting
    • Sewing & Quilting Patterns
  • Family
    • Back to School
    • Family Fun
    • Our Home
    • Parenting
    • Travel
  • Shop
    • Pattern Store
    • Etsy Store

French Inspired Christmas: Gift Tags and Fabric Tape

October 7, 2012 By Spoonful of Sugar - 15 Comments

We love Christmas here at A Spoonful of Sugar – it is the most wonderful time of the year and it really brings out our creative energy. Each year we have a colour theme that we work around. This year we will be decorating in white with touches of red and white gingham, and will adopt a French Country style to our Christmas projects. Sarah and I are currently planning a wonderful holiday to Paris next year with some of our extended family, so celebrating Christmas French style will be perfect! It is currently 77 days until Christmas, so over the next couple of months, we will be sharing some of our ideas and projects for Christmas decorating, gift wrapping, gifts, food and more.

French Inspired Gift Tags     1.jpg

We haven’t started our Christmas shopping yet, but we do like to have a gift wrapping station set up so that items can be wrapped as we go. First up with our preparations this year are Christmas gift tags.
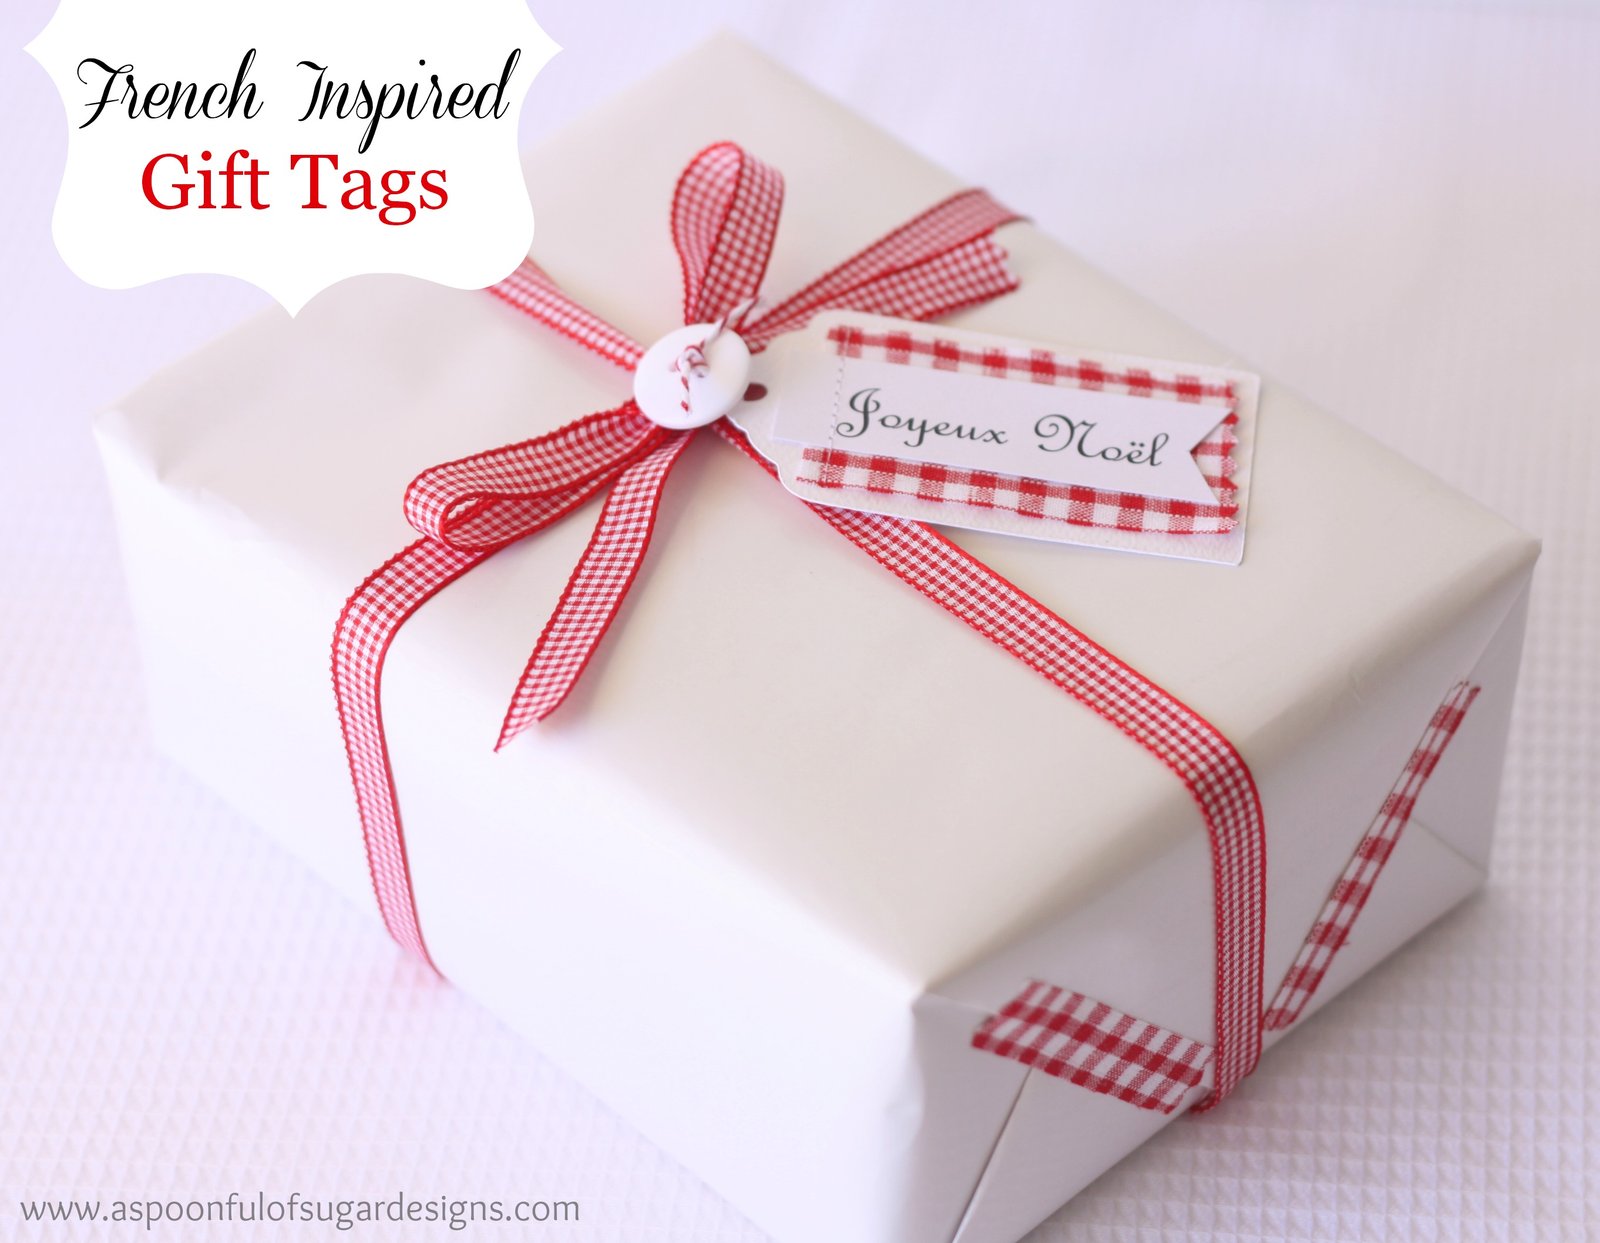
Joyeux Noel Gift Tags
Materials:
  • plain white tags – either cut your own on a die cutting machine or buy plain white shipping tags
  • red gingham fabric
  • printed  Christmas greeting
  • gingham ribbon
  • bakers twine
Method:
Using French Script font, we printed Joyeux Noel onto white cardstock, and cut them into strips. Next we cut a piece of red gingham, slightly smaller than our tag. Using the sewing machine we stitched the fabric and the greeting to the tag. Thread the tag with gingham ribbon or bakers twine.
Gingham Fabric Tape:
Materials:
  • Gingham fabric
  • JAC double sided adhesive paper
Method:
Iron the gingham fabric so that it is nice and flat. Cut a piece of fabric, the same size as the JAC paper. Peel off the backing paper on one side of the JAC paper, and stick it to the wrong side of the fabric. Cut the fabric into 1/2 inch strips. When ready to use, cut the strips into short lengths, and peel of the remaining backing paper, and use it to tape your gifts.
Hope you enjoyed the first of our Christmas posts – we hope to have more ideas to share over the coming weeks.

Filed Under: Christmas, Gift Wrapping, Paper Crafts Tagged With: French

« Travel Neck Pillow Cover
Vanilla Macarons »

Comments

  1. Rubyred says

    October 7, 2012 at 11:18 pm

    These are lovely! Thanks for another great tutorial!
    Rachel x

    Reply
  2. Annabellouise says

    October 8, 2012 at 1:18 am

    These are very pretty and not too complicated to do. Love them.

    Reply
  3. Chocolate Cat says

    October 8, 2012 at 1:46 am

    That is not very long until Christmas!! Love the white and red. Your trip sounds amazing, something special to look forward to!

    Reply
  4. Anna says

    October 8, 2012 at 2:02 am

    I love that the Christmas posts have started, and started with such a corker of an idea! Thanks 🙂

    Reply
  5. sewtakeahike says

    October 8, 2012 at 5:08 am

    Wow Lisa and Sarah! This is so beautiful! Thank you for sharing your process!

    Reply
  6. Cindy says

    October 8, 2012 at 5:39 am

    Thank you for sharing this pretty idea. I love the red and white theme.

    Reply
  7. Thimbleanna says

    October 8, 2012 at 10:29 am

    Your tags are beautiful. I’m really looking forward to all the fun Christmas posts you have planned!

    Reply
  8. Linda says

    October 9, 2012 at 1:46 am

    Paris!!! I’m jealous.

    Reply
  9. Lorrie Orr says

    October 9, 2012 at 7:45 am

    So pretty and simple. It’s a great idea to start making tags now. Thanks for the inspiration.

    Reply
  10. Peggy~PJH Designs says

    October 9, 2012 at 7:59 am

    So pretty! I love them and inspiring me to get started on my Christmas early. I always wait to the last minute. 🙂 Won’t you come by and share at Totally Transformed Tuesday? We’d love to have you. Hugs, Peggy

    Reply
  11. Suzie says

    October 9, 2012 at 8:10 am

    Beautiful as everything you do!

    Reply
  12. Directional Drilling says

    October 9, 2012 at 7:32 pm

    so amazing blog……….

    Reply
  13. Ritz says

    October 10, 2012 at 5:55 am

    This looks lovely.

    Reply
  14. Cappuccino frío says

    October 10, 2012 at 8:48 am

    so cute!

    Reply
  15. Sharon says

    December 16, 2024 at 1:54 am

    Thank you so much. I love the Christmas Cards!

    Reply

Leave a Reply Cancel reply

Your email address will not be published. Required fields are marked *

  • Email
  • Facebook
  • Instagram
  • Pinterest
  • Threads
  • TikTok
SUBSCRIBE TO NEWSLETTER
×

Categories

Archives

PURCHASE PDF PATTERNS

We offer over 100 affordable PDF sewing patterns available for download from our store website or Etsy store. Each pattern includes detailed instructions, numerous photos, and templates.

WEB STORE ETSY STORE

Instagram

If you love quick, practical sewing projects, the  If you love quick, practical sewing projects, the Baker’s Buddy Mitt is such a fun one to make. It’s scrap‑friendly, gift‑ready, and perfect for anyone who loves to bake.The Bakers Buddy Mitt is 25% off this week only. Comment BAKER and I’ll send you the link to the pattern.  #SewingProject #ScrapFriendlySewing #KitchenSewing #SewingGifts #SewingCommunity
Adding a handmade label is one of my favourite way Adding a handmade label is one of my favourite ways to personalise a project — and these little fabric + felt labels are so quick and satisfying to make.For this Ribbon Pouch, I used the Liberty Gifts from the Garden collection, which has the sweetest fruit motifs. They make perfect tiny labels for pouches, bags, and gifts.Here’s how to make your own:Press a piece of double‑sided fusible web to the back of your fabric.Cut around your chosen motif.Peel off the paper backing.Press the motif onto wool felt.Trim the felt with scalloped scissors.Sew the label onto the front of your pouch.Such a simple detail, but it adds so much charm. Fabric kindly gifted by @regent_street_fabrics — thank you!If you’d like to sew the Ribbon Pouch (3 sizes), comment RIBBON and I’ll send the pattern link straight to you.#SewingInspiration #FabricLabels #DIYLabels #LibertyFabric #LibertyGiftsFromTheGarden
A lot can change in 10 years ❤️ It’s been fun look A lot can change in 10 years ❤️ It’s been fun looking back at where I was in 2016 and how far life has come since then. Swipe for a little trip down memory lane.Back in 2016, my priorities were firmly centred around family. I was working full‑time, sewing in the guest room, sharing tutorials on my blog, and slowly dipping my toes into selling a handful of patterns on Etsy. It was a busy, full season — and creativity was something I fitted in around everything else.  Fast forward to 2026… I’m now retired and living the creative life I once dreamed of. My kids have grown up and are living in their own homes nearby. My husband and I are free to travel, explore, and enjoy this stage of life. And I get to spend my days designing, sewing, and connecting with this beautiful community.Life looks different now — in the best possible way.Were you following me back then, or what has changed for you over the past 10 years? I’d love to hear your story too.Tagging the lovely makers of my quilt: @arabesquescissors @ministryoffabric @belloquacity @alittlepatchwork @sameliasmum coleandtaffy @quiltymamaof4 @shequiltsalot @downgrapevinelane @lizzierosesews @lovethatfabric @sew_mimi.k #2026isthenew2016 #10yeartransformation #sewingjourney #sewingcommunity #aspoonfulofsugardesigns
Fall in love with sewing all over again ❤️I’ve Fall in love with sewing all over again ❤️I’ve rounded up 10 heart‑themed makes — from quick gifts to charming quilt blocks — perfect for weekend stitching or using up your favourite scraps. Whether you’re sewing for Valentine’s Day, birthdays, or just because, there’s something sweet for every maker.Comment HEART and I’ll send you a link to my Heart Pattern Collection.#sewingproject #heartsewing #quiltblock #scrapsewing #easytosew
Raw edge appliqué doesn’t have to feel fiddly or i Raw edge appliqué doesn’t have to feel fiddly or intimidating. With a few simple techniques, you can create neat, crisp shapes — even tiny details like penguin beaks and hearts.I’ve put together My Top 5 Secrets for Raw Edge Appliqué to help you feel confident, whether you’re brand new to appliqué or looking to refine your finish. Save this for your next sewing session.If you’d love a quick, beginner‑friendly project to practise these tips, my Penguin Love Mugrug is the sweetest Valentine’s make — scrap‑friendly, gift‑ready, and such fun to sew.Comment PENGUIN and I’ll send you the link to the pattern. Available now in our Pattern Store and Etsy shop.  #rawedgeapplique #appliquetips #sewingtipsandtricks #mugrugpattern #penguinlove
If you’ve ever wanted to add eyelets or grommets t If you’ve ever wanted to add eyelets or grommets to your sewing projects, here’s a quick look at how I install them using my DK93 snap press. It’s the same tool I use for snaps — and it makes installing eyelets beautifully quick and consistent.For this Ribbon Pouch, I used the Liberty Gifts from the Garden collection (printed on Lasenby cotton and released in January 2026). The colours and motifs pair so well with the little ribbon tie detail.Here’s how to install the eyelets:Punch out the four holes using a hole‑cutting die.Place the eyelet into the hole.Press it into place using the snap press.That’s it — easy peasy, and it gives the pouch such an elevated, professional finish. I love how clean and sturdy the result is.Fabric is Gifts from the Garden by Liberty - kindly provided by @regent_street_fabrics — thank you!If you’d like the Ribbon Pouch pattern (it comes in 3 sizes), comment RIBBON and I’ll send the link straight to you.Ribbon Pouch Sewing Pattern: available in our Pattern Store and Etsy shop ( links in profile).#SewingInspiration #SewingProjects #Eyelets #Grommets #SnapPress
Follow on Instagram

Featured Pattern

Travel Sewing Kit Pattern

Featured Tutorial

Retro Drawstring Bag

Featured Recipe

Lemon Pound Cake

Connect

  • Email
  • Facebook
  • Instagram
  • Pinterest
  • Threads
  • TikTok
SUBSCRIBE TO NEWSLETTER
×

Popular Posts

  • Charm Square Fabric Tray
  • Merry Little Christmas Sewing Projects
  • {Back to School} Tissue Cover
  • Hexagon Fabric Tray
  • Raw Edge Applique Tips
  • Sewing Gifts 101: Easy and Affordable Ideas for Your Crafty Friends
  • Finding More Time to Sew

Copyright © 2026 Lisa. K. Cox - A Spoonful of Sugar