A Spoonful of Sugar

Make. Bake. Create.

Menu
  • Home
  • About
    • About Us
    • Press
    • FAQ
    • Disclosure Policy
    • Contact Us
  • Crafts
    • Crochet
    • DIY
    • Embroidery/Cross stitch
    • Gift Wrapping
    • Knitting
    • Miscellaneous
    • Paper Crafts
  • Holidays
    • New Year’s
    • Australia Day
    • Back to School
    • Valentines Day
    • Easter
    • ANZAC Day
    • Mother’s Day
    • Father’s Day
    • Halloween
    • Christmas
  • Recipes
    • Appetizers
    • Bars & Slices
    • Bread & Pastries
    • Cakes
    • Cookies
    • Confectionery
    • Cupcakes & Muffins
    • Desserts
    • Drinks
    • Ice Cream
    • Jams/Preserves
    • Main Meals
  • Sewing
    • Sewing Tutorials
    • Quilting
    • Sewing & Quilting Patterns
  • Family
    • Back to School
    • Family Fun
    • Our Home
    • Parenting
    • Travel
  • Shop
    • Pattern Store
    • Etsy Store

Chocolate Whoopie Pies

September 20, 2012 By A Spoonful of Sugar - 10 Comments

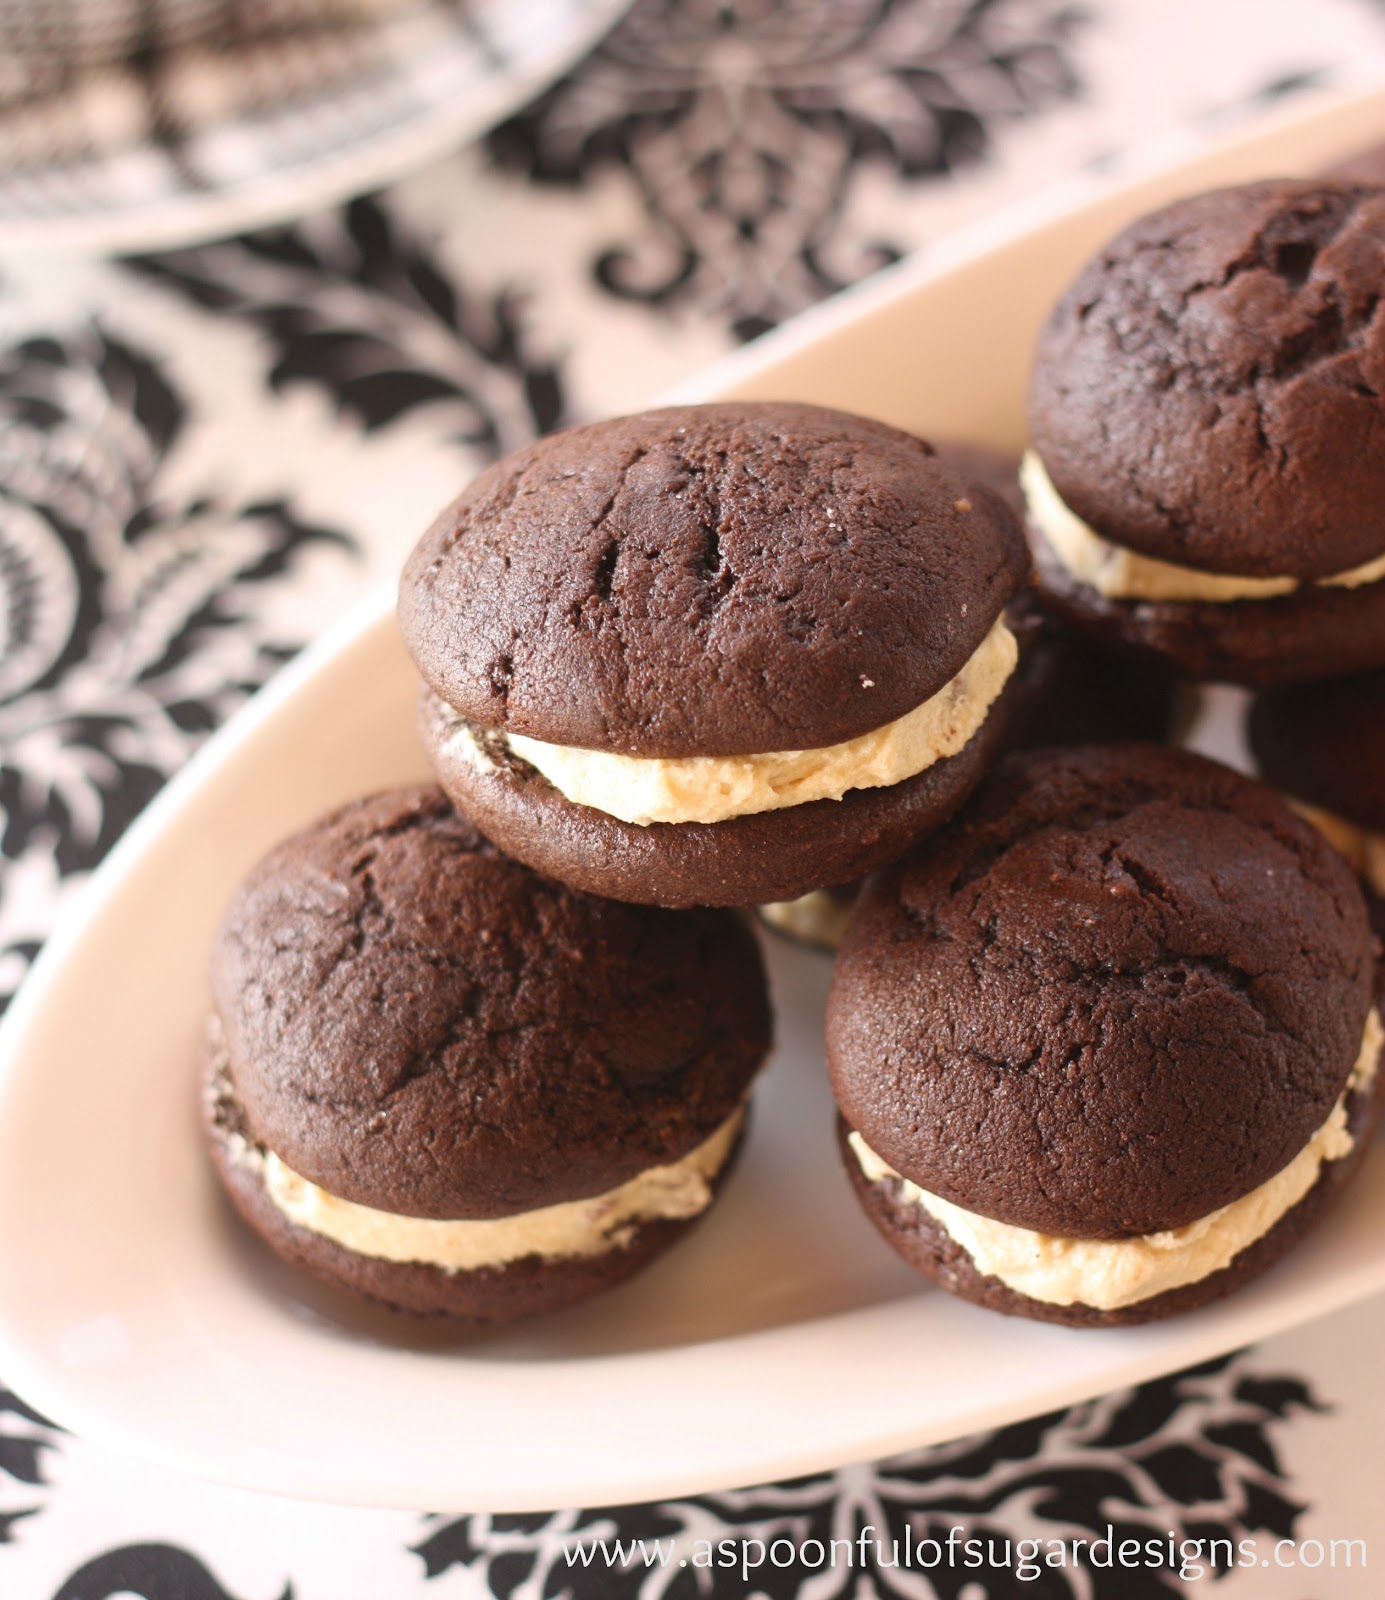
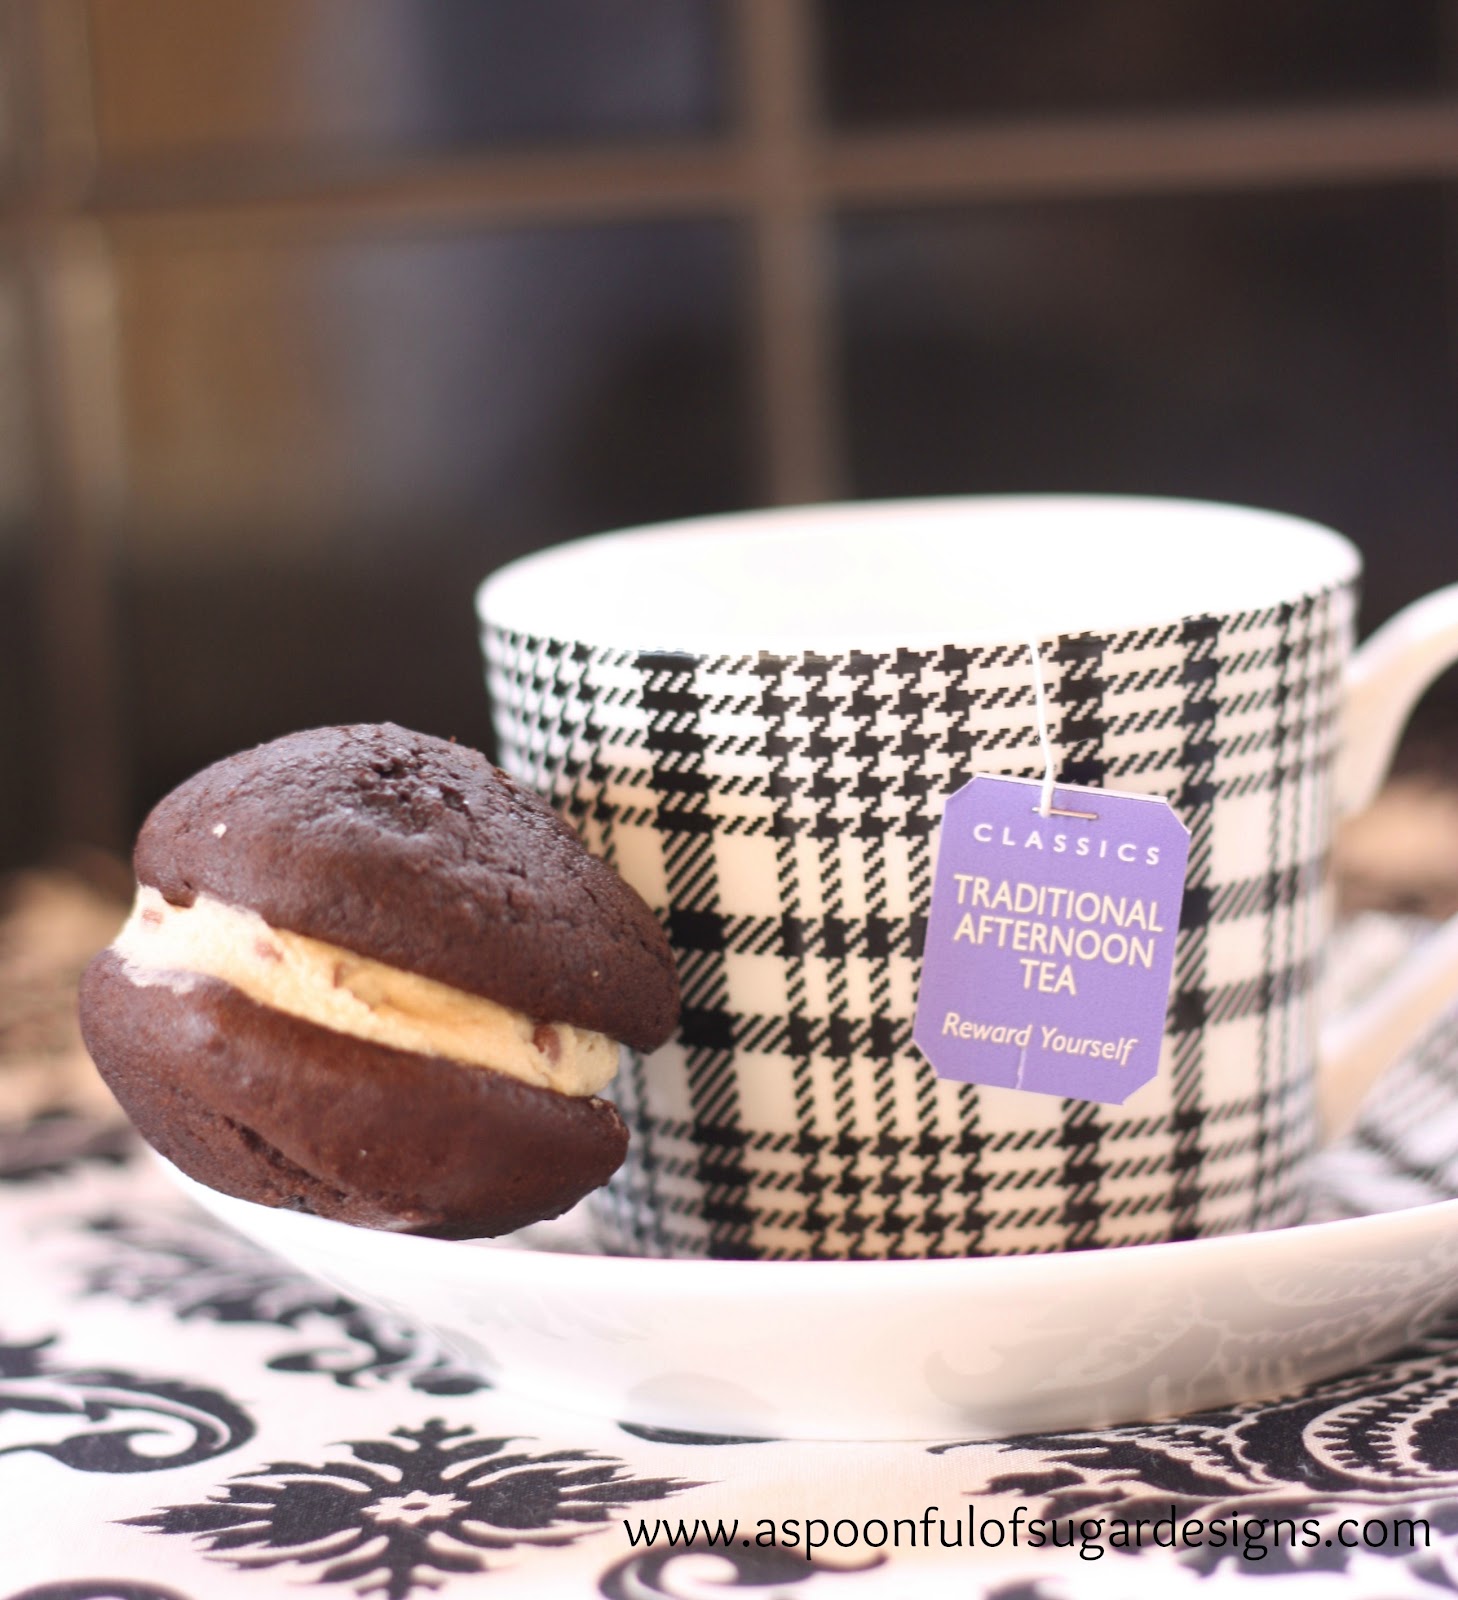
Chocolate Whoopie Pies are the perfect treat – two little fluffly chocolate cakes, sandwiched together with a delicious chocolate chip buttercream filling. They freeze well and when popped into your lunchbox frozen, are ready to eat for morning tea/recess.
Sarah has been experimenting with different whoppie pies and fillings, and these ones are definitely our favourite so far. She has a whoppie cake tin, but these smaller sized ones made with an ice-cream scoop are the perfect sized treat. They use the new Nestle mini chocolate bits which we only recently discovered.

Chocolate Whoopie Pies 

(Makes  15-25 pies depending on size)

Ingredients:

1 3/4 cup plain (all-purpose) flour

2/3 cup dutch cocoa powder 

1 1/2 tsp baking soda

dash of salt

125 g (1 Stick) butter, softened

3/4 cup packed brown sugar

1 egg, room temperature

2 tsp vanilla

1 cup milk 

Preheat oven to 190 deg C (375 F)  and line baking sheets with baking paper. Sift together flour, cocoa, baking soda and salt. Cream butter and sugar until fluffy. Add in egg and vanilla and mix thoroughly. Add half the milk and mix. Add half the flour and mix. Add remaining milk and mix. Add remaining flour and mix lightly until combined. Using a small ice-cream scoop, place a scoop (tablespoon or two) of batter evenly spaced 2 inches apart on the baking trays. Bake for 10 minutes or until they spring back.  Cool for 5 minutes and move to a wire rack. Cool completely and frost with desired filling. 

Chocolate Chip Buttercream

Ingredients:
125 g butter (1 stick), softened

1/2 cup of brown sugar
1 tsp vanilla
2 tablespoons plain (all purpose) flour
1 1/2 cup icing (confectioners) sugar
1 – 2 tablespoons milk 
1/2 cup mini chocolate bits


Beat butter and sugar together until creamy. Add vanilla, flour and half the milk and beat until creamy. Add in the additional milk until the buttercream is a spreadable consistency. Fold in the chocolate chips. Using a palette knife, spread the buttercream on a cake, and sandwich two together to make a Whoopie Pie.

Sarah was inspired by the Classic Whoopie Pies from My Fair Baking.

For your daily sugar fix you can subscribe or follow us on facebook, twitter, google plus and pinterest.   

Filed Under: Cookies, Recipes Tagged With: Chocolate, whoopie pies

« Honey Castella Cake
Sew Can She »

Comments

  1. calicodaisy says

    September 20, 2012 at 7:11 pm

    Yum! A favorite of mine!

    Reply
  2. Sandi says

    September 20, 2012 at 9:01 pm

    They do look rather delish! Thanks for sharing the recipe! 🙂

    Reply
  3. Lenna Green of Stitching Cow says

    September 20, 2012 at 11:00 pm

    Girls, these look divine, I must give them a try

    Reply
  4. suzitee says

    September 21, 2012 at 1:17 am

    What a very cute cup and saucer you have 😉
    I really must keep you better updated with new Nestle baking products…how slack of me! Have you tried the Caramel bits yet…they are extra yummy! I’ve never made Whoopie Pies, but these look delicious!

    Reply
  5. Patchwork and Play says

    September 21, 2012 at 2:18 am

    As we say in our house “Yummo!!!” Must give these a try!

    Reply
  6. KaHolly says

    September 21, 2012 at 3:41 am

    I make a lot of whoopie pies during the winter months! I look forward to trying this recipe. My favorite flavor so far are lemon whoopie pies!

    Reply
  7. Celestial Charms says

    September 21, 2012 at 11:56 am

    Oh my, these look so very delicious. Love that pretty tea cup and saucer, too!
    Maureen

    Reply
  8. Terriaw says

    September 21, 2012 at 2:54 pm

    Wow, these look so delicious! I would love to try making these for a holiday party with my family.

    Reply
  9. Deb says

    September 23, 2012 at 4:16 am

    I made these today. They are divine….so much so that I made a second batch straight after as the first lot disappeared in a flash!

    Reply
  10. Fiona @ Dragonfly-Crafts says

    September 26, 2012 at 4:29 am

    Looking very fattening :)) but yummy

    Reply

Leave a Reply Cancel reply

Your email address will not be published. Required fields are marked *

  • Email
  • Facebook
  • Instagram
  • Pinterest
  • Threads
  • TikTok
SUBSCRIBE TO NEWSLETTER
×

Categories

Archives

PURCHASE PDF PATTERNS

We offer over 100 affordable PDF sewing patterns available for download from our store website or Etsy store. Each pattern includes detailed instructions, numerous photos, and templates.

WEB STORE ETSY STORE

Instagram

Sharing a closer look at the Handy Drawstring Pouc Sharing a closer look at the Handy Drawstring Pouch today — a sweet little project that’s as practical as it is pretty. I stitched this one in the blue and gold colourway of the Tilda Songbird collection and love how the soft watercolour florals shine in a small make. The pouch features cleverly shaped panels (with no boxed corners), stands tall when in use, and folds completely flat for storage. It’s also reversible, which makes it such a fun and versatile sew.   These little pouches are perfect for organising your sewing room, gifting to a friend, or popping into a project bag.The pattern includes three sizes, and you can find it in both my Pattern Store and Etsy shop. Comment HANDY and I’ll send the link straight to your inbox.A big thank you to @tilda_australia for gifting the beautiful fabric.#tildasongbird #drawstringbagpattern #aspoonfulofsugardesigns #tildafabrics #sewingproject
Why sewists love the Baker’s Buddy… Smooth curves, Why sewists love the Baker’s Buddy… Smooth curves, no fiddly binding, and a beginner‑friendly construction that comes together fast. It’s practical, gift‑friendly, and one of my most popular patterns because it actually gets used in the kitchen.If you’re looking for a quick win that looks impressive and is useful, this is the one. Comment BAKER and I’ll send you the link to the pattern (available in our Pattern Store and Etsy shop).#sewinggifts #beginnerfriendlysewing #smallquiltedgift #quicksewing #sewingcommunity
I’ve had so much fun sewing with the beautiful new I’ve had so much fun sewing with the beautiful new Tilda Songbird collection — soft pastels, tiny motifs, and so many sweet details. Here’s a look at the beginner‑friendly projects I’ve made so far, perfect for gifting or using up your favourite scraps.You’ll find the paid patterns in my shop, and both free patterns (Love Tag + Threaded Tokens) are linked in my profile. What project is your favourite?Thanks for following along with my Songbird projects this month. I can’t wait to share more. Thanks to @Tilda_Australia for the fabric.#tildasongbird #iloveTilda #smallsewingprojects #makersgonnamake #sewingpatterns
A tiny basket that’s endlessly useful and so much A tiny basket that’s endlessly useful and so much fun to sew. This Bitsy Basket is made in the beautiful Tilda Songbird collection and filled with a few sewing favourites — the perfect way to turn small scraps into something sweet and giftable.It comes together quickly, uses very little fabric, and looks adorable with a Threaded Token atrached (the Threaded Token pattern is free — you’ll find the link in my profile).Comment BASKET and I’ll send you the link to the Bitsy Basket pattern in my shop.Shown in the gorgeous Tilda Songbird range. Thanks to @tilda_australia . Styled with a few sewing goodies from @sohmo_au  
#sewingproject #sewinglove #quicksewingproject #scrapsewing #tildasongbird
A little Valentine’s stitching, penguin‑style. The A little Valentine’s stitching, penguin‑style. These sweet penguins always make people smile — which one would you sew first?Comment PENGUIN for the pattern link (available in our pattern store and Etsy shop).Pattern: Penguin Love Mugrug#penguinlove #valentinesewing #sewingproject #scrapfriendlysewing #makersgonnamake
A tiny sewing moment for today — threading the cor A tiny sewing moment for today — threading the cord through the Pocketful of Sunshine Bag using a bodkin. It’s such a simple step, but it gives the sweetest finish to this little drawstring bag. I’ve been loving making these in the Tilda Songbird range lately… the colours, the tiny motifs, the soft palette — everything works beautifully together.If you’d like to sew your own, comment SUNSHINE and I’ll send the pattern link straight to you. You’ll also find it in our pattern store and Etsy shop — links are in our profile.Shown in the gorgeous Tilda Songbird collection with thanks to @tilda_australia#ilovetilda #tildasongbird #beginnersewist #sewingtips #drawstringbag
Follow on Instagram

Featured Pattern

Travel Sewing Kit Pattern

Featured Tutorial

Retro Drawstring Bag

Featured Recipe

Lemon Pound Cake

Connect

  • Email
  • Facebook
  • Instagram
  • Pinterest
  • Threads
  • TikTok
SUBSCRIBE TO NEWSLETTER
×

Popular Posts

  • Charm Square Fabric Tray
  • Merry Little Christmas Sewing Projects
  • Hexagon Fabric Tray
  • Sew-In Tags: Your Complete Guide
  • Retro Drawstring Bag
  • Valentines Matchbook Needle Holder
  • Raw Edge Applique Tips

Copyright © 2026 Lisa. K. Cox - A Spoonful of Sugar