A Spoonful of Sugar

Make. Bake. Create.

Menu
  • Home
  • About
    • About Us
    • Press
    • FAQ
    • Disclosure Policy
    • Contact Us
  • Crafts
    • Crochet
    • DIY
    • Embroidery/Cross stitch
    • Gift Wrapping
    • Knitting
    • Miscellaneous
    • Paper Crafts
  • Holidays
    • New Year’s
    • Australia Day
    • Back to School
    • Valentines Day
    • Easter
    • ANZAC Day
    • Mother’s Day
    • Father’s Day
    • Halloween
    • Christmas
  • Recipes
    • Appetizers
    • Bars & Slices
    • Bread & Pastries
    • Cakes
    • Cookies
    • Confectionery
    • Cupcakes & Muffins
    • Desserts
    • Drinks
    • Ice Cream
    • Jams/Preserves
    • Main Meals
  • Sewing
    • Sewing Tutorials
    • Quilting
    • Sewing & Quilting Patterns
  • Family
    • Back to School
    • Family Fun
    • Our Home
    • Parenting
    • Travel
  • Shop
    • Pattern Store
    • Etsy Store

Recycled Denim Wine Tote {Australia Day Project}

January 15, 2014 By A Spoonful of Sugar - Leave a Comment

Australia Day for us always involves having a picnic or BBQ and watching the fantastic fireworks display over the Swan River. We love how people come together to celebrate Australia Day, often wearing the Aussie flag on their clothing. It really is a day that celebrates national pride.
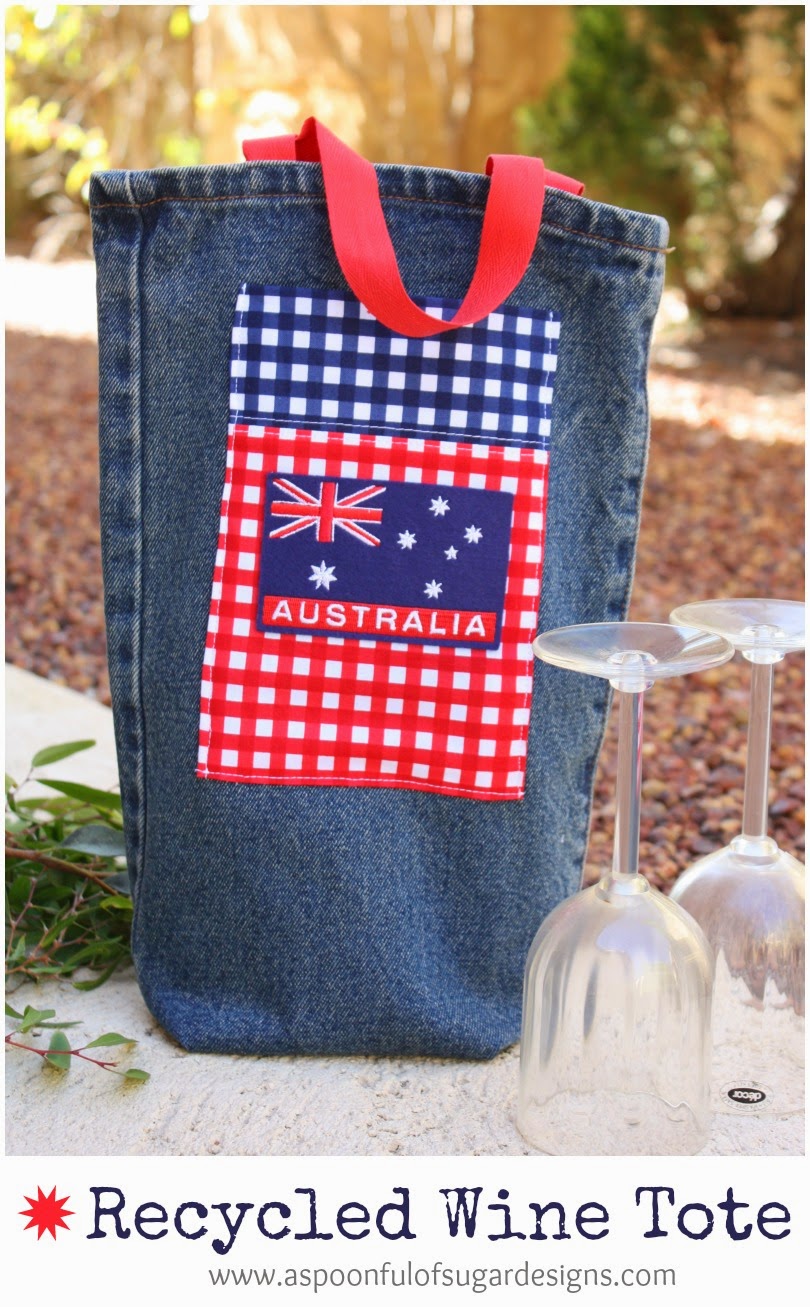
We have made a wine tote using a recycled leg from an old pair of denim jeans to take to our Australia Day picnic. This is a quick upcycle project that involves adding a bright pocket, an Aussie flag, and some handles to a denim jean leg. Cheap and practical – it is sure to add some good ol’ Australian spirit to your Australian Day event.

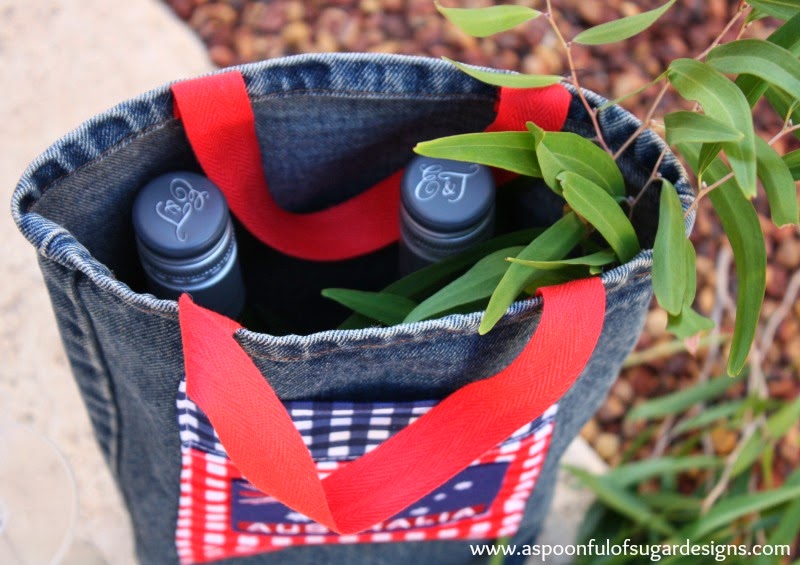
It is perfectly sized to hold two bottles of wine (or soft drink), with room to stow some eucalyptus leaves for swotting the flies that usually make an appearance. The handy pocket is perfect for holding a bottle opener or other supplies.

Finished Size: 9 x 14 inches
Materials ( See Photo 1):
  • One Jean leg (from adult pair of jeans),  measuring approx 16 inches in length and 9 inches wide.
  • 2 fat quarters of quilting cotton (we used red and navy gingham print from Riley Blake)
  • Australian Flag, iron on patch
  • 1 yard (1 metre) red twill tape
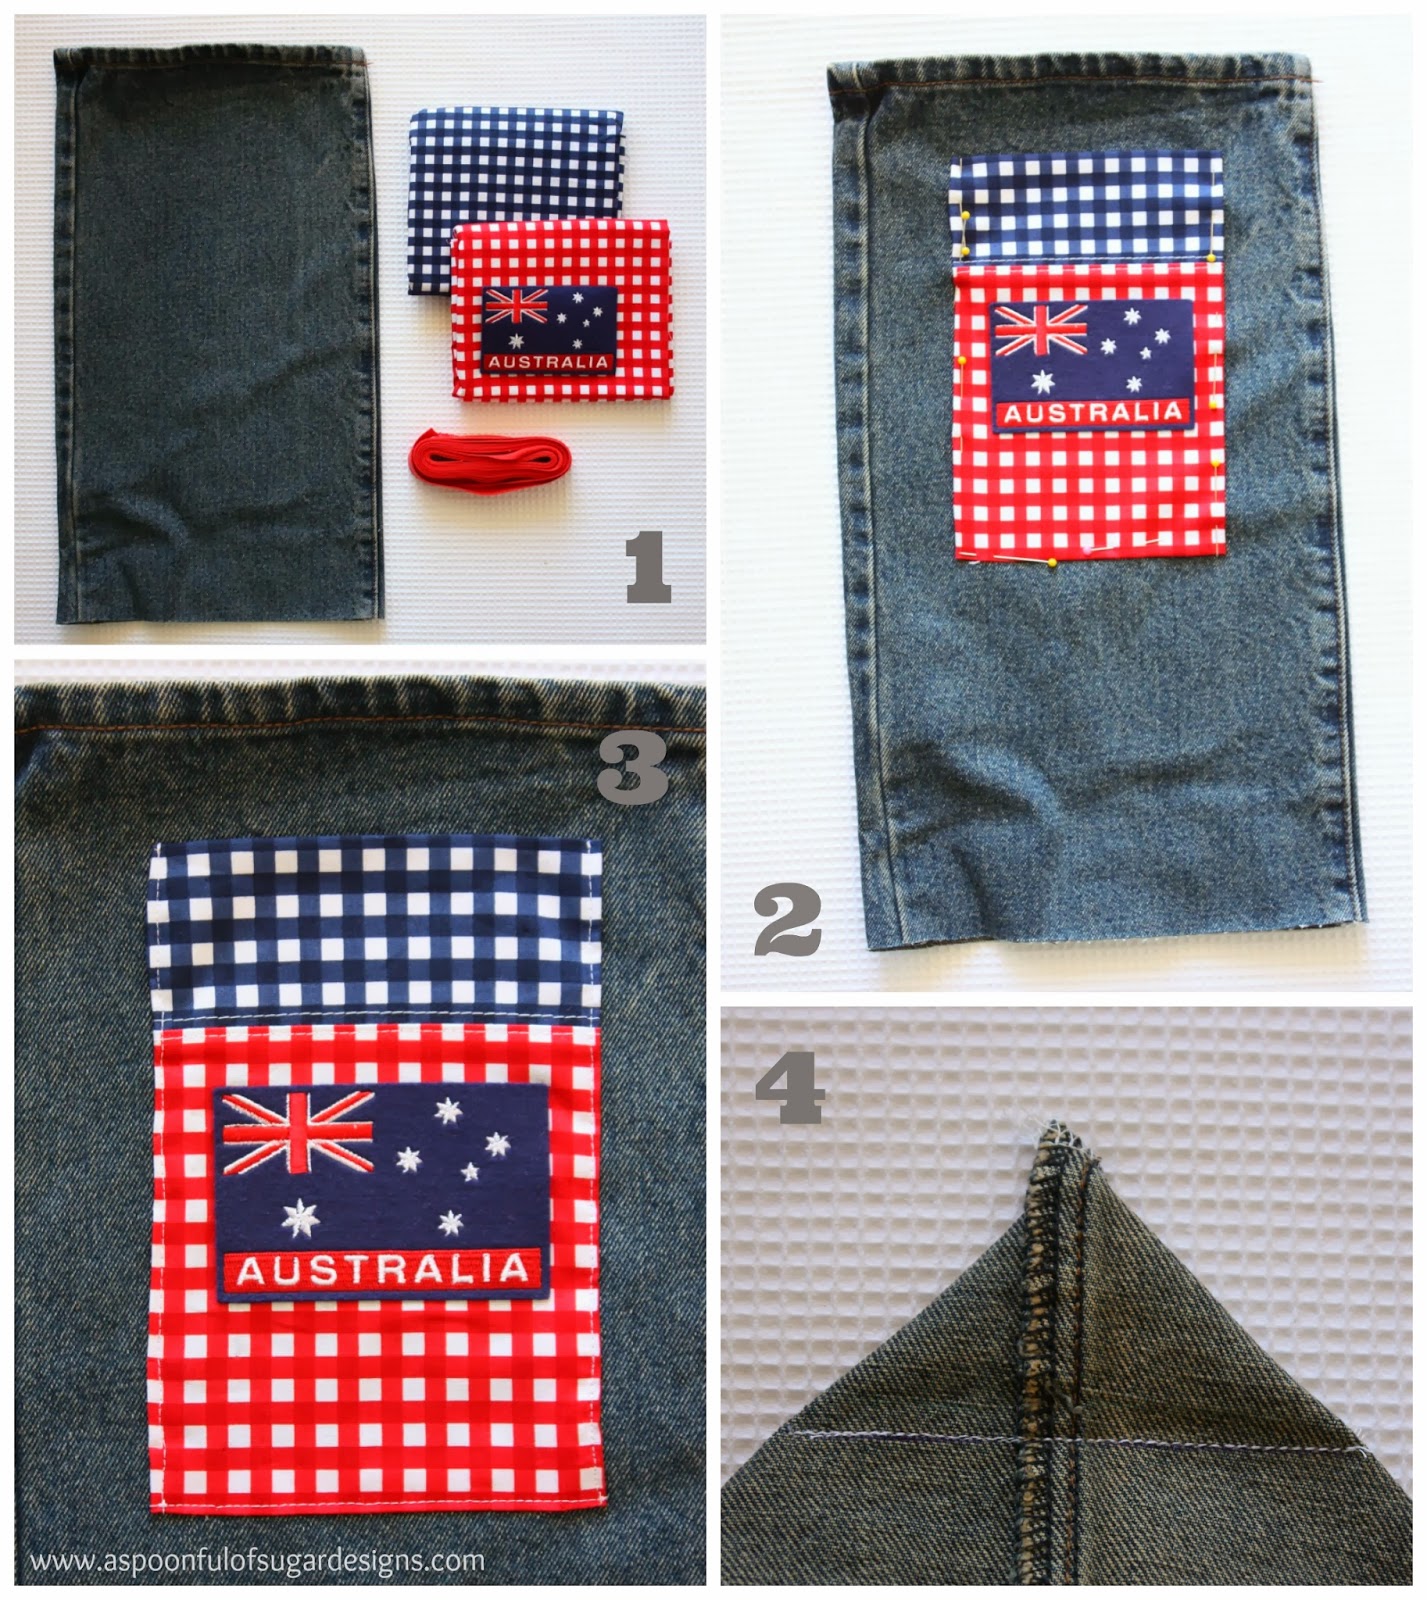
1. To make the pocket, cut the blue gingham into a rectangle measuring 6 x 4 1/2 inches, and the red gingham into a square measuring 6 x 6 inches. Fold the blue gingham in half so that it measures 6 x 2 1/4 inches. Stitch to the top of rthe ed gingham square using 1/4 inch seam. Serge/overlock seam. Press. Top stitch 1/8 inch on either side of seam. Press under 1/2 inch on both sides and the  bottom of pocket. Using an iron, adhere the Australian flag patch to the middle of pocket. Pin the pocket onto the Jeans leg and stitch in place. (You will need to sew slowly and carefully to ensure that you don’t sew through both layers of the denim leg). Alternatively you can hand sew the pocket in place.(Photo 2 and 3)
2. Create the base – Turn the denim leg inside out. Stitch the bottom of the tote together and overlock raw edges. To give the tote structure, box the bottom corners. Fold the tote so that the bottom seam is aligned with one of the side folds or seams, creating a triangular point. Draw a line perpendicular to the seam and 2 inches from the corner. This line will be around 4 inches long. (Photo 4) Machine stitch through both layers along the line. Repeat with the other corner. To strengthen the tote, leave the excess fabric in place and press the triangles toward the bottom of the tote. Turn the tote right side out and press. Measure the base of the tote and cut a piece of recycled plastic or template plastic the same size as the tote base and position it in the bottom of the tote.
3. Make the handles – cut two handles from the twill tape each measuring 12 inches. Fold under the raw edge and stitch to the inside of the top of the opening, approximately 3 inches apart.
Fill your tote with picnic supplies and you are good to go!
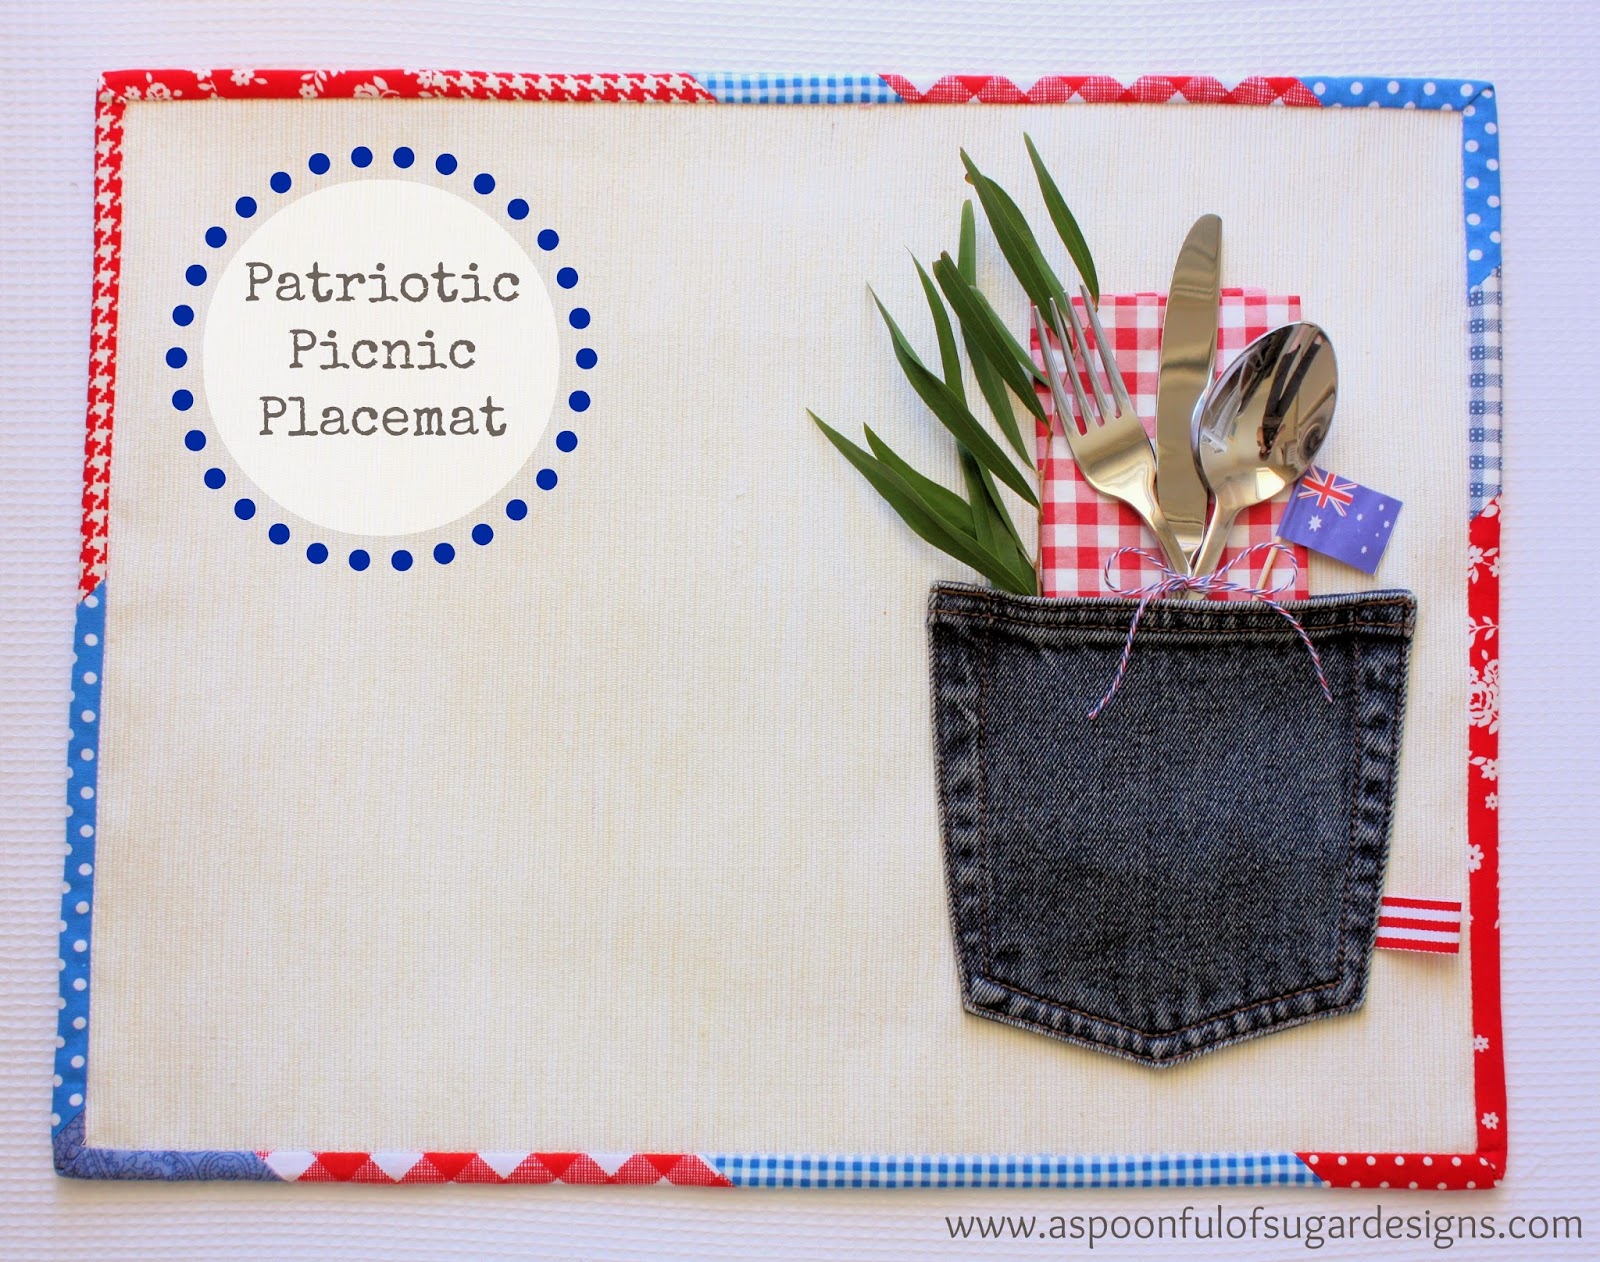
For more Australia Day sewing, check out our Australia Day Placemat Tutorial.
For a hostess gift with an Australian flavour, check out our hostess gift ideas.

Filed Under: Australia Day, Sewing, Sewing Tutorials Tagged With: bag, denim, recycle

« Patchwork Pot Holder – Part 2
Koala Cupcakes »

Leave a Reply Cancel reply

Your email address will not be published. Required fields are marked *

  • Email
  • Facebook
  • Instagram
  • Pinterest
  • Threads
  • TikTok
SUBSCRIBE TO NEWSLETTER
×

Categories

Archives

PURCHASE PDF PATTERNS

We offer over 100 affordable PDF sewing patterns available for download from our store website or Etsy store. Each pattern includes detailed instructions, numerous photos, and templates.

WEB STORE ETSY STORE

Instagram

The Scrappy Strips Pouch is one of my favourite wa The Scrappy Strips Pouch is one of my favourite ways to use up leftover fabric strings. Today’s version is made from patchwork strips — a fun, relaxing sew that turns scraps into something beautiful and practical.The Scrappy Strips Pouch pattern has two versions - patchwork strings and selvedges - and two sizes. Comment SELVEDGE (or SELVAGE) for a link to the pattern.Pattern Details: Scrappy Strips Pouch Sewing Pattern is in our Pattern Store and Etsy Shop.#ScrappyStripsPouch #ScrapBustingSewing #PatchworkPouch #StringQuilting #SewingProjects
If you’ve ever wanted to add eyelets or grommets t If you’ve ever wanted to add eyelets or grommets to your sewing projects, here’s a quick look at how I install them using my DK93 snap press. It’s the same tool I use for snaps — and it makes installing eyelets beautifully quick and consistent.Here’s how I install the eyelets:Punch out the four holes using a hole‑cutting die.Place the eyelet into the hole.Press it into place using the snap press.That’s it — simple, sturdy, and it gives the Ribbon Pouch such an elevated, professional finish. I love how clean and secure the result is.Fabric shown: Tilda Something Blue, releasing June 1 — thank you @tilda_australia for the beautiful fabric.✨ If you’d like the Ribbon Pouch pattern (3 sizes), comment RIBBON and I’ll send the link straight to you.Ribbon Pouch Sewing Pattern: available in my Pattern Store and Etsy Shop (links in profile).#tildasomethingblue #tildafabric #sewingtips #handmadeeveryday #sewingtools
The Ribbon Pouch is one of my favourite quick‑to‑s The Ribbon Pouch is one of my favourite quick‑to‑sew gift bags, and I couldn’t resist making a light and dark version using the new Tilda Something Blue collection. Both pouches use the same print in different colourways — such a pretty way to show how fabric choice changes the whole mood.They’re finished with satin ribbon threaded through grommets, and topped with a tiny star tag. The boxed base helps them stand beautifully, and the ribbon closure makes them perfect for birthdays, thank‑you gifts, treats, or little treasures.This is a beginner‑friendly, scrap‑friendly, quick project you’ll want to sew again and again. Pattern includes 3 sizes.If you’d like the pattern, comment RIBBON and I’ll send the link straight to you.Pattern Details: Ribbon Pouch (3 Sizes) available in my Pattern Store and Etsy Shop.Fabric Details: Tilda Something Blue - releasing on 1 June 2026. Thanks to @tilda_australia#TildaSomethingBlue #TildaFabric #SewingPattern #BeginnerSewingProject #QuickSewingProject   
Sewing with scraps is one of my favourite ways to Sewing with scraps is one of my favourite ways to get creative — small pieces, leftover corners, charm‑square offcuts… they all have so much potential.Here are 10 scrap‑friendly projects that use small pieces beautifully. They’re quick to sew, beginner‑friendly, and perfect for gifting ✂️✨Save this for the next time you want to turn your scraps into something pretty.Which one would you sew first?  Tell me in the comments — I love seeing what you’re making.Patterns are available in my pattern store (link in profile) or comment PATTERNS and I will send you the link. #scrapsewing #scrapbusting #scrapfriendly #sewinginspiration #sewingideas
I save every selvedge (or selvage) — the colour do I save every selvedge (or selvage) — the colour dots, the tiny prints, the designer names… they’re too pretty to throw away.Here’s how I turn them into something useful:
• lay them diagonally on a square of fusible interfacing
• overlap slightly
• stitch close to the printed edge
• keep building until you have a panelIt’s such a fun way to use scraps and create something totally unique ✂️✨If you’d like the Scrappy Strips Pouch pattern, comment SELVEDGE or SELVAGE and I’ll send you the link.Pattern Details: Scrappy Strips Pouch Pattern is available in my Pattern Store and Etsy Shop.#scrappystripspouch #selvage #scrapbuster #sewingcommunity #sewingtip
A little Something Blue for tonight’s sewing sessi A little Something Blue for tonight’s sewing session 💙I’m packing my Makers Caddy with supplies for my next project — fabric, thread, tassels, lavender… I can’t wait to share it with you soon.There’s something so calming about soft blues, tidy supplies, and a project all ready to go — it makes the whole sewing process feel extra special.Hope this brings a little mid‑week inspiration to your feed ✂️✨If you’d like the link to the Makers Caddy, comment CADDY and I’ll send it to you.Fabric: Tilda Something Blue with thanks to @tilda_australiaPattern Details: Makers Caddy Sewing Pattern - available in our Pattern Store and Etsy Shop.#tildasomethingblue #ilovetilda #sewingcommunity #tildaaustralia #sewingpattern
Follow on Instagram

Featured Pattern

Travel Sewing Kit Pattern

Featured Tutorial

Retro Drawstring Bag

Featured Recipe

Lemon Pound Cake

Connect

  • Email
  • Facebook
  • Instagram
  • Pinterest
  • Threads
  • TikTok
SUBSCRIBE TO NEWSLETTER
×

Popular Posts

  • Cord Cosy
  • Tips for Threading a Needle
  • Travel Accessories to Sew
  • Liberty Tissue Cover
  • Charm Square Fabric Tray
  • Happy Scrappy Cards
  • Life Lessons from Sewing and Quilting

Copyright © 2026 Lisa. K. Cox - A Spoonful of Sugar