A Spoonful of Sugar

Make. Bake. Create.

Menu
  • Home
  • About
    • About Us
    • Press
    • FAQ
    • Disclosure Policy
    • Contact Us
  • Crafts
    • Crochet
    • DIY
    • Embroidery/Cross stitch
    • Gift Wrapping
    • Knitting
    • Miscellaneous
    • Paper Crafts
  • Holidays
    • New Year’s
    • Australia Day
    • Back to School
    • Valentines Day
    • Easter
    • ANZAC Day
    • Mother’s Day
    • Father’s Day
    • Halloween
    • Christmas
  • Recipes
    • Appetizers
    • Bars & Slices
    • Bread & Pastries
    • Cakes
    • Cookies
    • Confectionery
    • Cupcakes & Muffins
    • Desserts
    • Drinks
    • Ice Cream
    • Jams/Preserves
    • Main Meals
  • Sewing
    • Sewing Tutorials
    • Quilting
    • Sewing & Quilting Patterns
  • Family
    • Back to School
    • Family Fun
    • Our Home
    • Parenting
    • Travel
  • Shop
    • Pattern Store
    • Etsy Store

La Laverie

June 5, 2011 By Spoonful of Sugar - 17 Comments

I have spent more time than I would have liked in the laundry this weekend. Sarah’s winter school uniform includes tights and the wash bag for delicates had a hole in it so a replacement was urgently required.  (It is no fun having tights get tangled around the rest of the wash!)

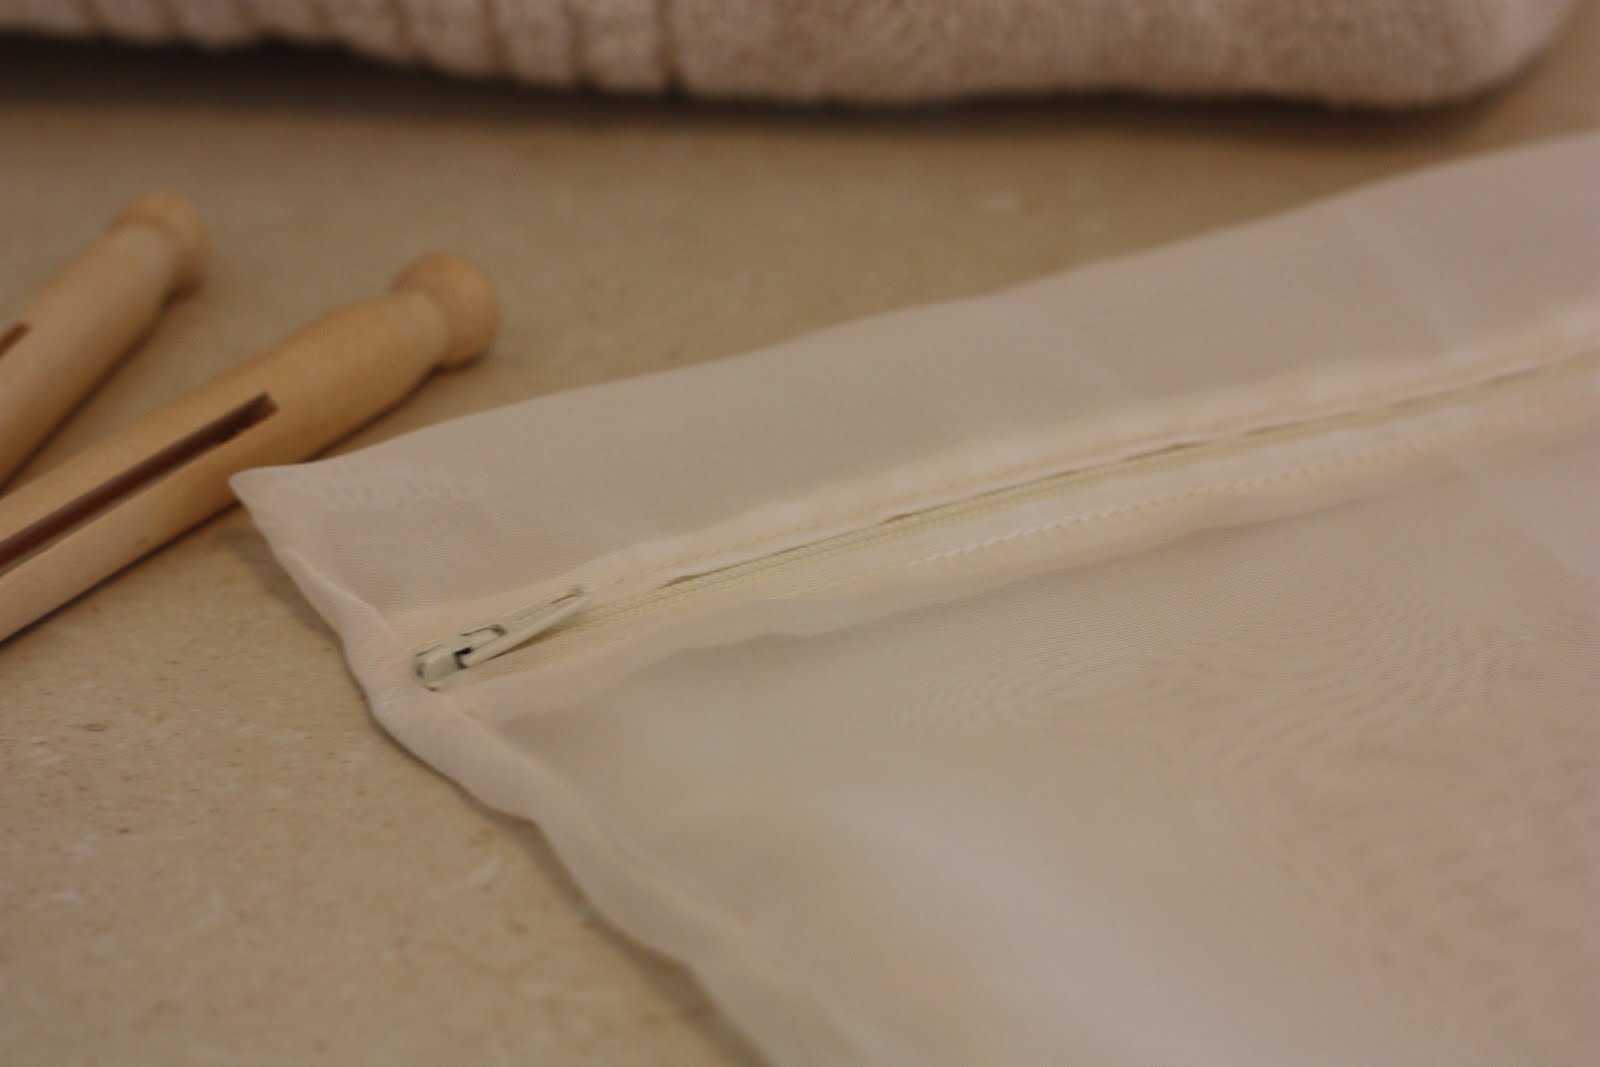
I had a look through my stash for suitable material, and found an offcut of sheer curtain fabric which was perfect – it is easy to see what is in inside and it dries quickly. The wash bag was made using a rectangle of curtain fabric measuring 15″ x 36″ and a 15″ zip. The zip was sewn onto the short ends first, and then the sides were sewn up using an overlocker/serger as the curtain fabric frays easily.

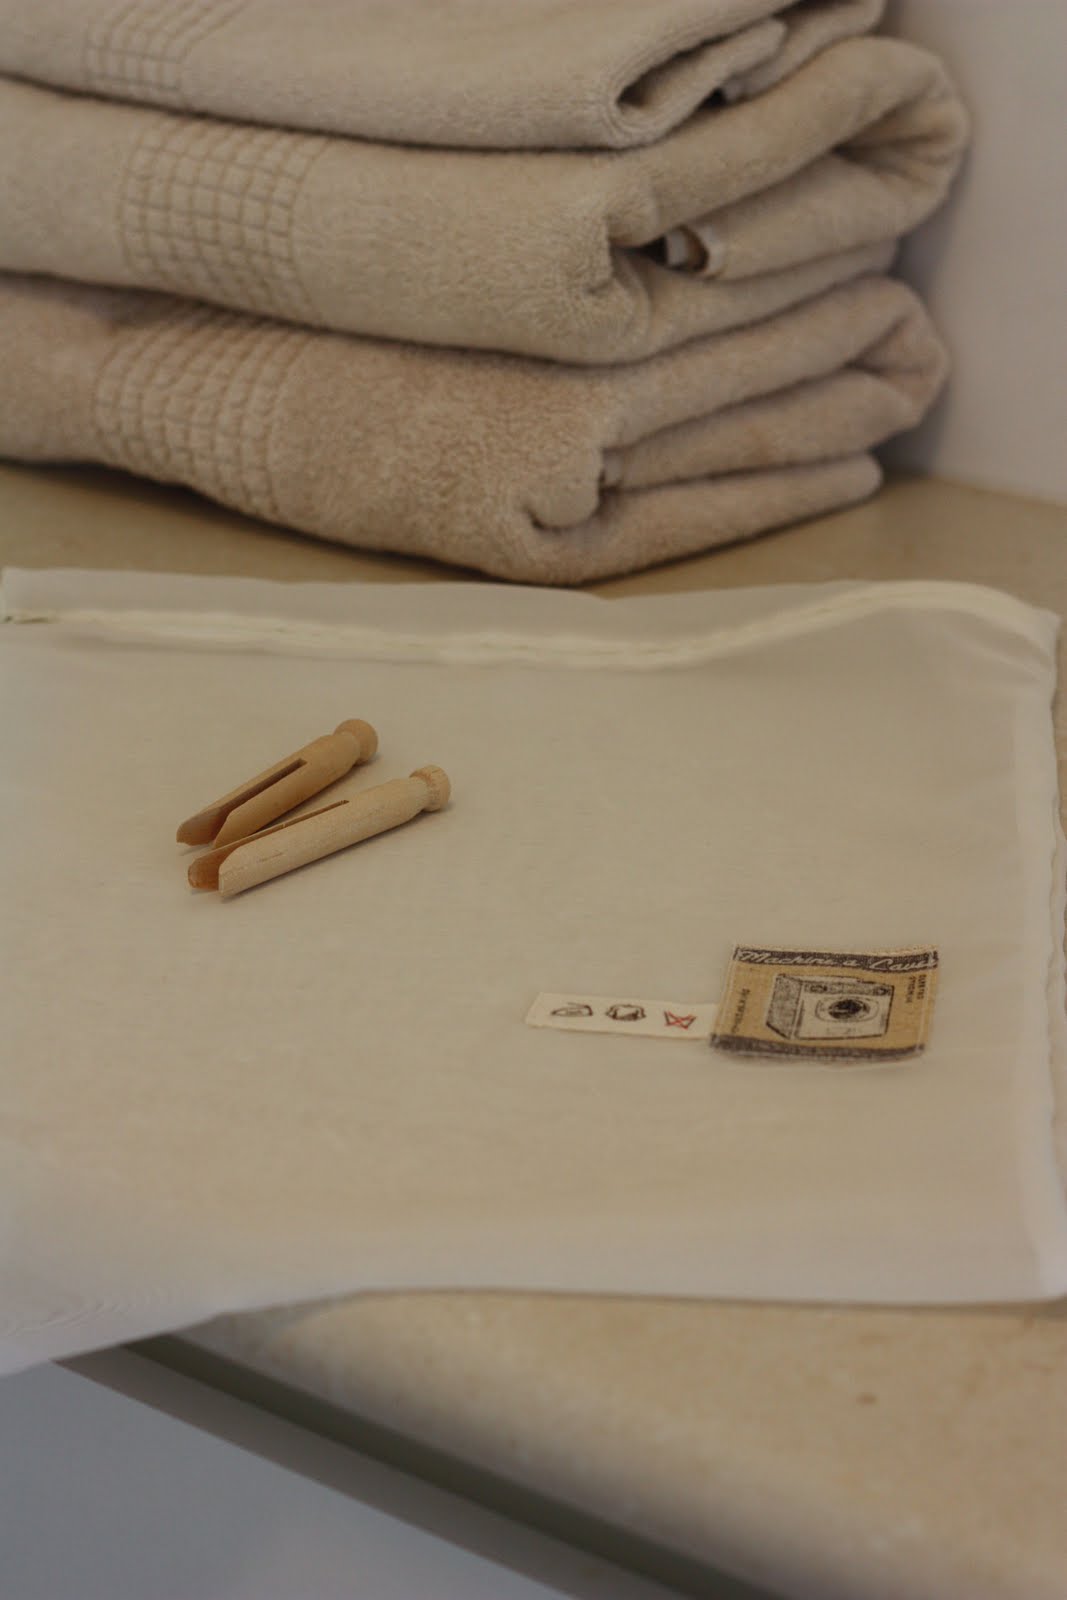
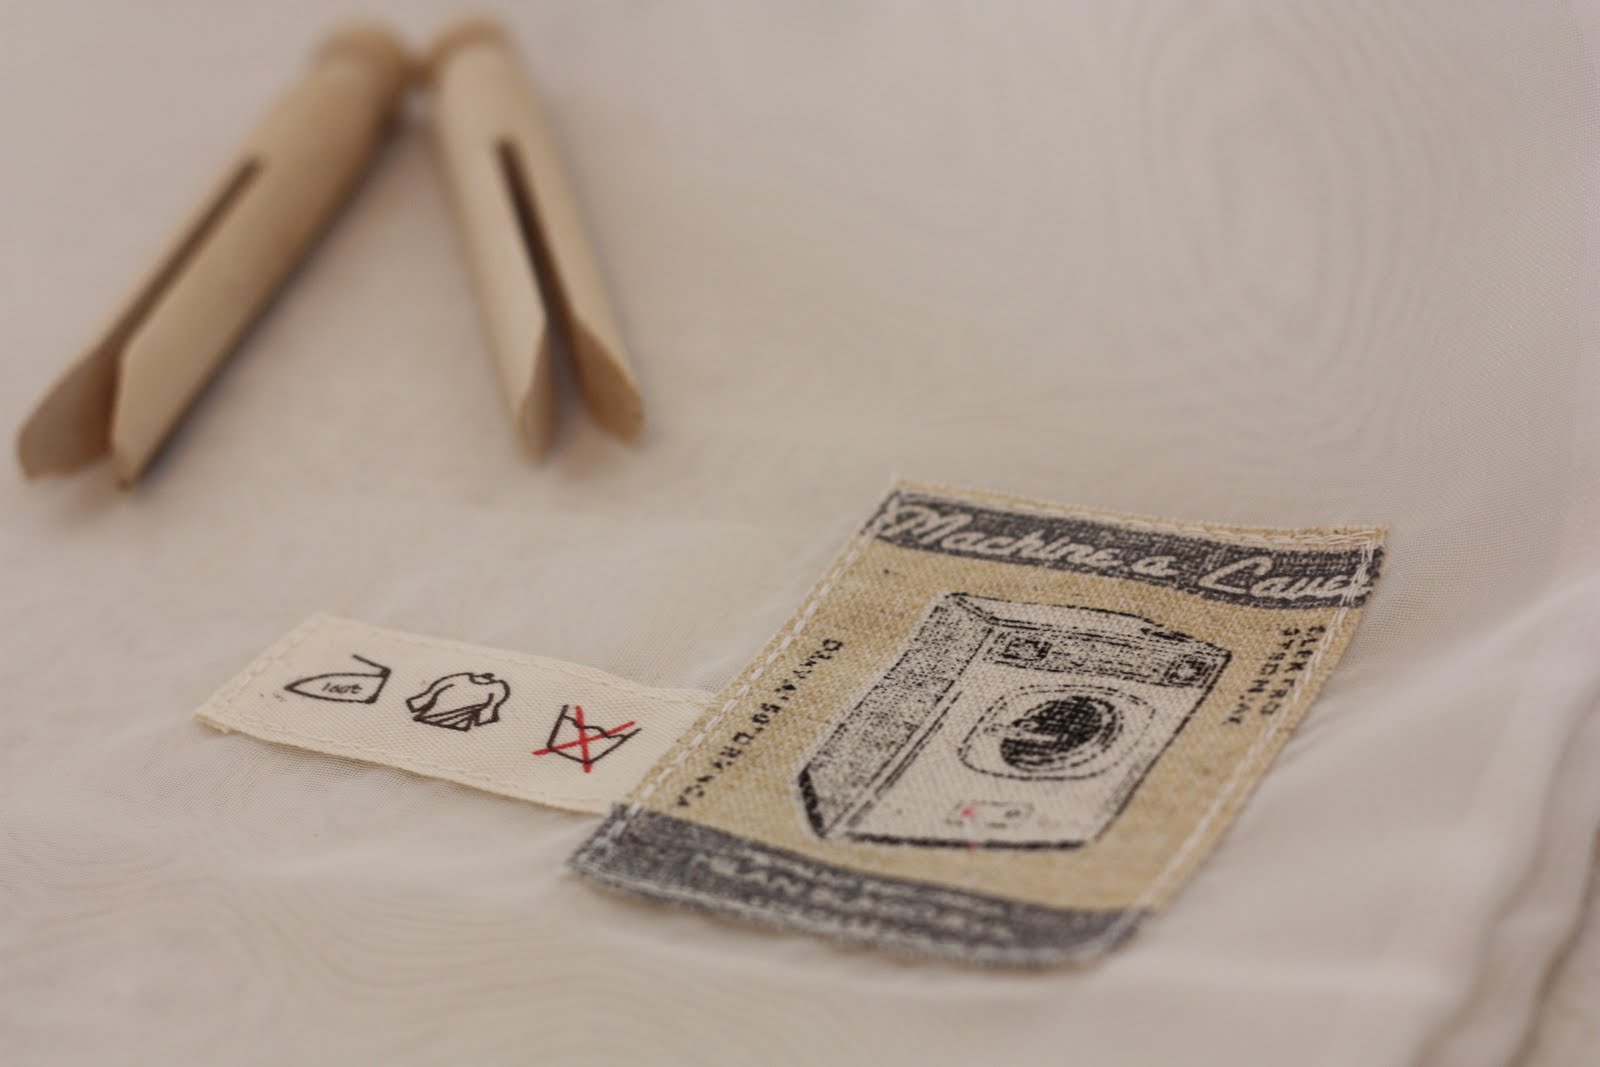
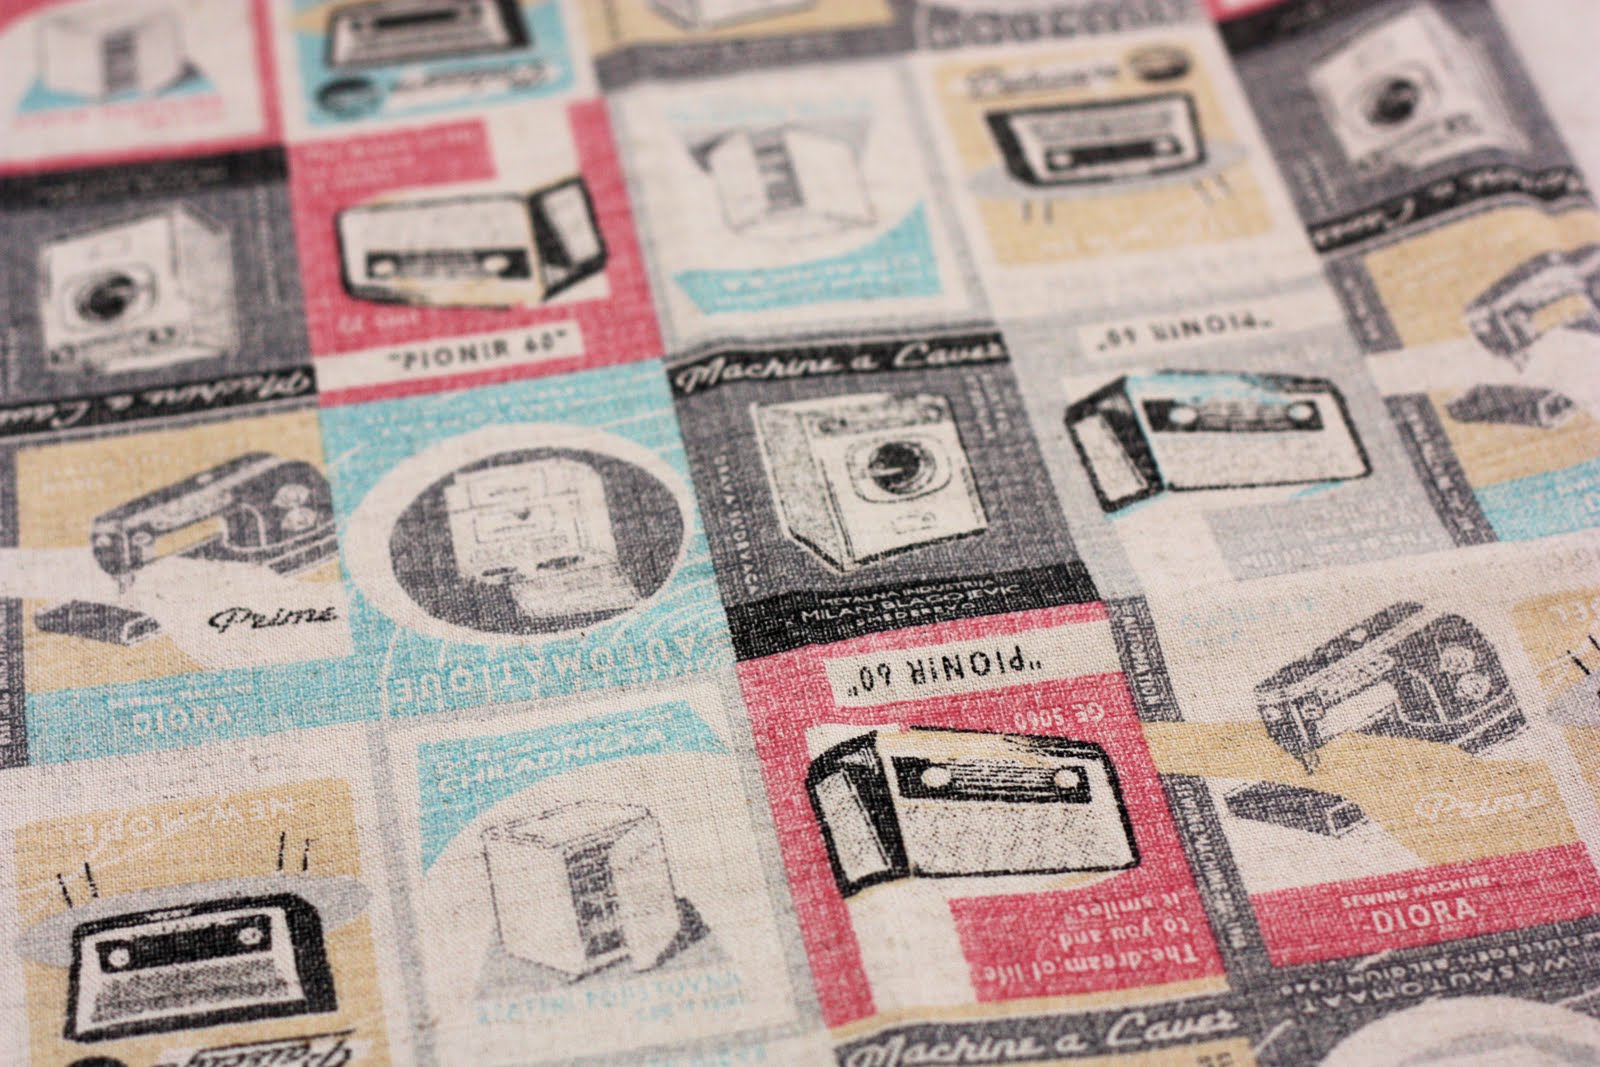
Of course it needed a bit of embellishment so I added an appliquéd patch of a washing machine and a tag with washing symbols. Unfortunately the linen  had the selvedge missing so I can’t identify it but it was a piece I picked up in Japan in 2010. I love the retro appliances.

The laundry is now all done, and the school uniforms ironed for the week ahead. It is a long weekend here, so hope to spend the next few hours in the sewing room (a lot more fun that laundry!)

Filed Under: Sewing Tagged With: laundry. bag

« Almond Cream Slice
Carrot Cupcakes with Cream Cheese Icing »

Comments

  1. Janellybelly says

    June 5, 2011 at 10:21 pm

    Our washing is happily drying on the line today, thank goodness for a long weekend. Love the retro appliances fabric 😉

    Reply
  2. Sandrine says

    June 5, 2011 at 10:56 pm

    tres stylish kind of wash bag!Good to bright up those many washing days:)
    Bonne semaine xx

    Reply
  3. suzitee says

    June 5, 2011 at 11:25 pm

    Thank goodness for sunny days 🙂 My last load is out now, but it feels that I have spent most of my weekend in the laundry! Time for some sewing now too, I think! Love the wash bag 🙂

    Reply
  4. crafts@home says

    June 6, 2011 at 1:27 am

    What a beautiful way to cheer up the mundane job of washing! Have a lovely extra days holiday, with plenty of sewing 🙂
    Sue Xx

    Reply
  5. Patchwork and Play says

    June 6, 2011 at 3:31 am

    Great laundry bag! I have a similar Leicen fabric which has sewing machines and toasters on it, which I blogged about a little while ago! It’s wonderful fabric!

    Reply
  6. Stephanie says

    June 6, 2011 at 4:00 am

    Love the addition of the little tag.

    Reply
  7. Thimbleanna says

    June 6, 2011 at 5:43 am

    Oh, that’s just too cute! The little washing machine tag is just perfect — as always, you’re soooo very clever!

    Reply
  8. Betty Lou says

    June 6, 2011 at 6:30 am

    At least when you do laundry the new bag will give you a little laugh. I have a cross stitch sampler that says

    Happiness is not doing what we like to do but———

    Liking what we have to do.

    Reply
  9. Terriaw says

    June 6, 2011 at 6:43 am

    What a great little sewing project and wash bag! I love the fabric you used and the way you attached the zipper to the sides first to make the zipper on the front instead of on the top. Love the addition of that patch too – just the perfect touch!

    Reply
  10. danemi1 says

    June 6, 2011 at 9:50 am

    what a fabulous idea and how much more fun doing the laundry will be with pretties to admire

    Reply
  11. Chocolate Cat says

    June 6, 2011 at 3:31 pm

    Perfect! Luckily Maddy has long socks rather than stockings with her winter uniform now, don’t get quite so tangled!

    Reply
  12. Sewjournal says

    June 6, 2011 at 4:28 pm

    Embellishing a laundry bag! You get my award for Domestic Goddess of the Year!

    Reply
  13. Linda says

    June 7, 2011 at 4:52 am

    Oh Lisa that looks wondeerful, you are so clever.

    Reply
  14. Handmade in Israel says

    June 7, 2011 at 7:21 am

    How cute! Much prettier than my laundry delicates bag 🙂

    Reply
  15. Celestial Charms says

    June 7, 2011 at 8:07 am

    Love those retro linen prints. Adorable.
    Maureen

    Reply
  16. Bumpkin Bears says

    June 9, 2011 at 5:27 am

    that would make laundry a bit more fun wouldn’t it! Love it. I’m having a giveaway over on my blog if you fancy hopping along, Catherine xx

    Reply
  17. Dogwood says

    June 9, 2011 at 6:26 pm

    Don’t you just love it when all the dirty clothes/towels/etc are all washed and put away. Great feeling!
    Have a nice evening.

    Reply

Leave a Reply Cancel reply

Your email address will not be published. Required fields are marked *

  • Email
  • Facebook
  • Instagram
  • Pinterest
  • Threads
  • TikTok
SUBSCRIBE TO NEWSLETTER
×

Categories

Archives

PURCHASE PDF PATTERNS

We offer over 100 affordable PDF sewing patterns available for download from our store website or Etsy store. Each pattern includes detailed instructions, numerous photos, and templates.

WEB STORE ETSY STORE

Instagram

If you love quick, practical sewing projects, the  If you love quick, practical sewing projects, the Baker’s Buddy Mitt is such a fun one to make. It’s scrap‑friendly, gift‑ready, and perfect for anyone who loves to bake.The Bakers Buddy Mitt is 25% off this week only. Comment BAKER and I’ll send you the link to the pattern.  #SewingProject #ScrapFriendlySewing #KitchenSewing #SewingGifts #SewingCommunity
Adding a handmade label is one of my favourite way Adding a handmade label is one of my favourite ways to personalise a project — and these little fabric + felt labels are so quick and satisfying to make.For this Ribbon Pouch, I used the Liberty Gifts from the Garden collection, which has the sweetest fruit motifs. They make perfect tiny labels for pouches, bags, and gifts.Here’s how to make your own:Press a piece of double‑sided fusible web to the back of your fabric.Cut around your chosen motif.Peel off the paper backing.Press the motif onto wool felt.Trim the felt with scalloped scissors.Sew the label onto the front of your pouch.Such a simple detail, but it adds so much charm. Fabric kindly gifted by @regent_street_fabrics — thank you!If you’d like to sew the Ribbon Pouch (3 sizes), comment RIBBON and I’ll send the pattern link straight to you.#SewingInspiration #FabricLabels #DIYLabels #LibertyFabric #LibertyGiftsFromTheGarden
A lot can change in 10 years ❤️ It’s been fun look A lot can change in 10 years ❤️ It’s been fun looking back at where I was in 2016 and how far life has come since then. Swipe for a little trip down memory lane.Back in 2016, my priorities were firmly centred around family. I was working full‑time, sewing in the guest room, sharing tutorials on my blog, and slowly dipping my toes into selling a handful of patterns on Etsy. It was a busy, full season — and creativity was something I fitted in around everything else.  Fast forward to 2026… I’m now retired and living the creative life I once dreamed of. My kids have grown up and are living in their own homes nearby. My husband and I are free to travel, explore, and enjoy this stage of life. And I get to spend my days designing, sewing, and connecting with this beautiful community.Life looks different now — in the best possible way.Were you following me back then, or what has changed for you over the past 10 years? I’d love to hear your story too.Tagging the lovely makers of my quilt: @arabesquescissors @ministryoffabric @belloquacity @alittlepatchwork @sameliasmum coleandtaffy @quiltymamaof4 @shequiltsalot @downgrapevinelane @lizzierosesews @lovethatfabric @sew_mimi.k #2026isthenew2016 #10yeartransformation #sewingjourney #sewingcommunity #aspoonfulofsugardesigns
Fall in love with sewing all over again ❤️I’ve Fall in love with sewing all over again ❤️I’ve rounded up 10 heart‑themed makes — from quick gifts to charming quilt blocks — perfect for weekend stitching or using up your favourite scraps. Whether you’re sewing for Valentine’s Day, birthdays, or just because, there’s something sweet for every maker.Comment HEART and I’ll send you a link to my Heart Pattern Collection.#sewingproject #heartsewing #quiltblock #scrapsewing #easytosew
Raw edge appliqué doesn’t have to feel fiddly or i Raw edge appliqué doesn’t have to feel fiddly or intimidating. With a few simple techniques, you can create neat, crisp shapes — even tiny details like penguin beaks and hearts.I’ve put together My Top 5 Secrets for Raw Edge Appliqué to help you feel confident, whether you’re brand new to appliqué or looking to refine your finish. Save this for your next sewing session.If you’d love a quick, beginner‑friendly project to practise these tips, my Penguin Love Mugrug is the sweetest Valentine’s make — scrap‑friendly, gift‑ready, and such fun to sew.Comment PENGUIN and I’ll send you the link to the pattern. Available now in our Pattern Store and Etsy shop.  #rawedgeapplique #appliquetips #sewingtipsandtricks #mugrugpattern #penguinlove
If you’ve ever wanted to add eyelets or grommets t If you’ve ever wanted to add eyelets or grommets to your sewing projects, here’s a quick look at how I install them using my DK93 snap press. It’s the same tool I use for snaps — and it makes installing eyelets beautifully quick and consistent.For this Ribbon Pouch, I used the Liberty Gifts from the Garden collection (printed on Lasenby cotton and released in January 2026). The colours and motifs pair so well with the little ribbon tie detail.Here’s how to install the eyelets:Punch out the four holes using a hole‑cutting die.Place the eyelet into the hole.Press it into place using the snap press.That’s it — easy peasy, and it gives the pouch such an elevated, professional finish. I love how clean and sturdy the result is.Fabric is Gifts from the Garden by Liberty - kindly provided by @regent_street_fabrics — thank you!If you’d like the Ribbon Pouch pattern (it comes in 3 sizes), comment RIBBON and I’ll send the link straight to you.Ribbon Pouch Sewing Pattern: available in our Pattern Store and Etsy shop ( links in profile).#SewingInspiration #SewingProjects #Eyelets #Grommets #SnapPress
Follow on Instagram

Featured Pattern

Travel Sewing Kit Pattern

Featured Tutorial

Retro Drawstring Bag

Featured Recipe

Lemon Pound Cake

Connect

  • Email
  • Facebook
  • Instagram
  • Pinterest
  • Threads
  • TikTok
SUBSCRIBE TO NEWSLETTER
×

Popular Posts

  • Charm Square Fabric Tray
  • Merry Little Christmas Sewing Projects
  • {Back to School} Tissue Cover
  • Hexagon Fabric Tray
  • Raw Edge Applique Tips
  • Sewing Gifts 101: Easy and Affordable Ideas for Your Crafty Friends
  • Finding More Time to Sew

Copyright © 2026 Lisa. K. Cox - A Spoonful of Sugar