A Spoonful of Sugar

Make. Bake. Create.

Menu
  • Home
  • About
    • About Us
    • Press
    • FAQ
    • Disclosure Policy
    • Contact Us
  • Crafts
    • Crochet
    • DIY
    • Embroidery/Cross stitch
    • Gift Wrapping
    • Knitting
    • Miscellaneous
    • Paper Crafts
  • Holidays
    • New Year’s
    • Australia Day
    • Back to School
    • Valentines Day
    • Easter
    • ANZAC Day
    • Mother’s Day
    • Father’s Day
    • Halloween
    • Christmas
  • Recipes
    • Appetizers
    • Bars & Slices
    • Bread & Pastries
    • Cakes
    • Cookies
    • Confectionery
    • Cupcakes & Muffins
    • Desserts
    • Drinks
    • Ice Cream
    • Jams/Preserves
    • Main Meals
  • Sewing
    • Sewing Tutorials
    • Quilting
    • Sewing & Quilting Patterns
  • Family
    • Back to School
    • Family Fun
    • Our Home
    • Parenting
    • Travel
  • Shop
    • Pattern Store
    • Etsy Store

Easy Table Runner

June 13, 2012 By A Spoonful of Sugar - 5 Comments

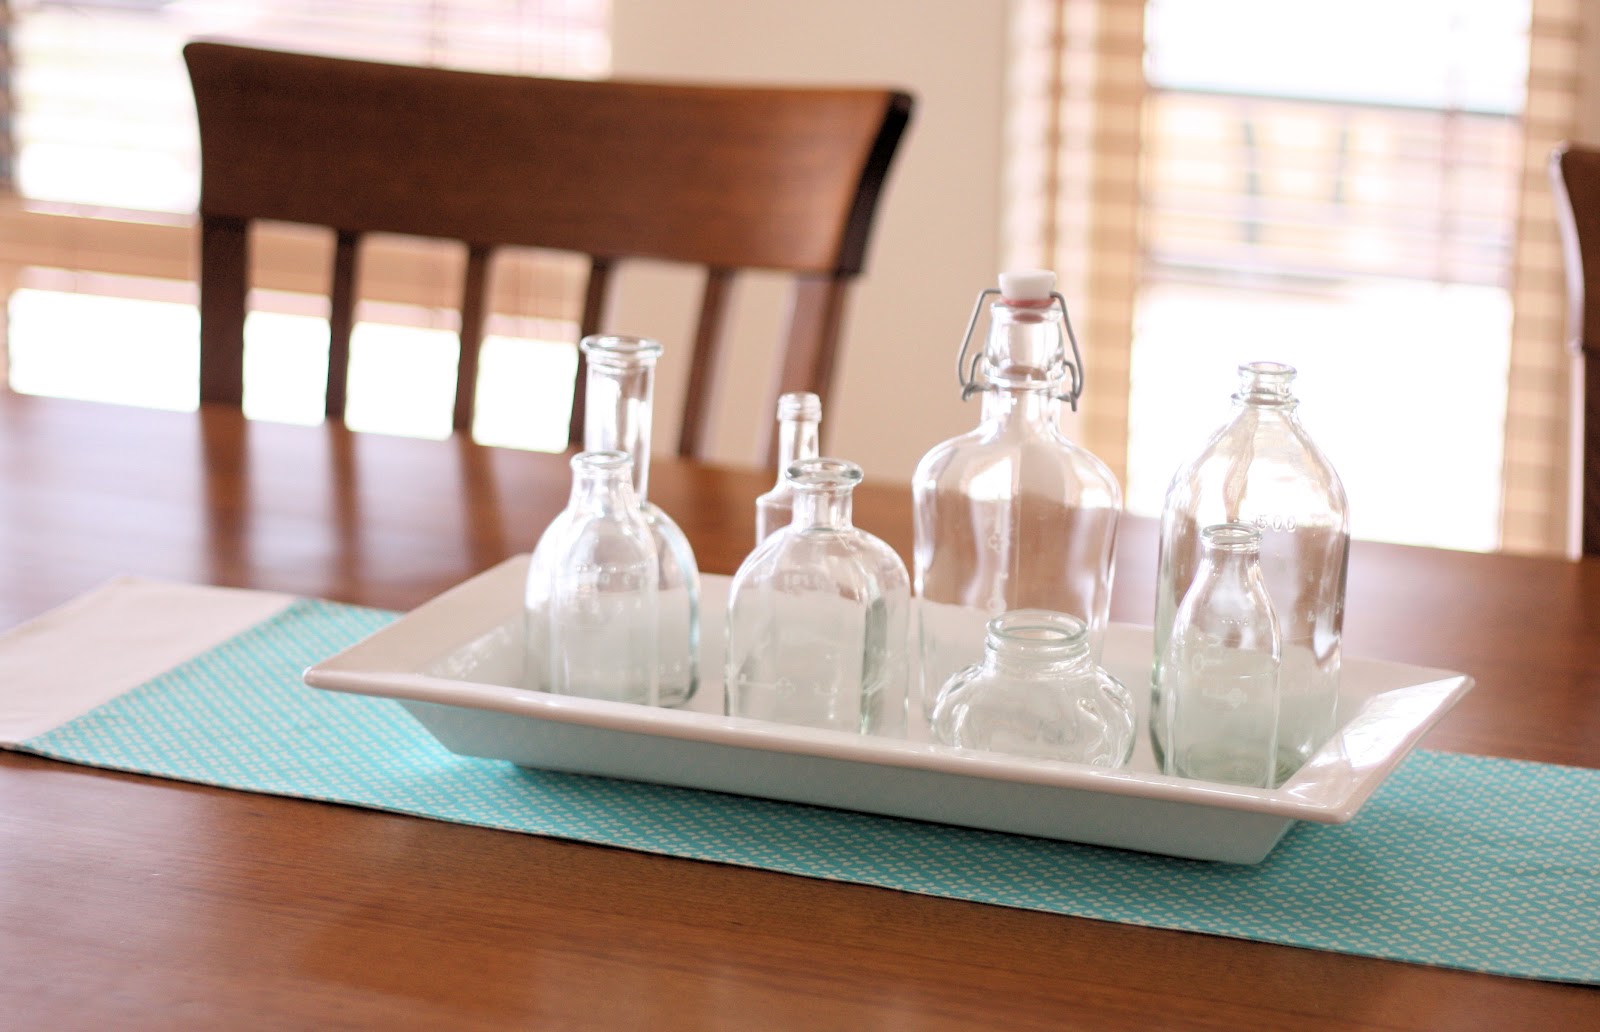
Life has been pretty hectic here lately and time in front of the sewing machine has been in short supply. This morning, I managed to find a spare hour and make up a reversible table runner for our meals table. It was surprisingly quick to make but has given our meals area a big lift.

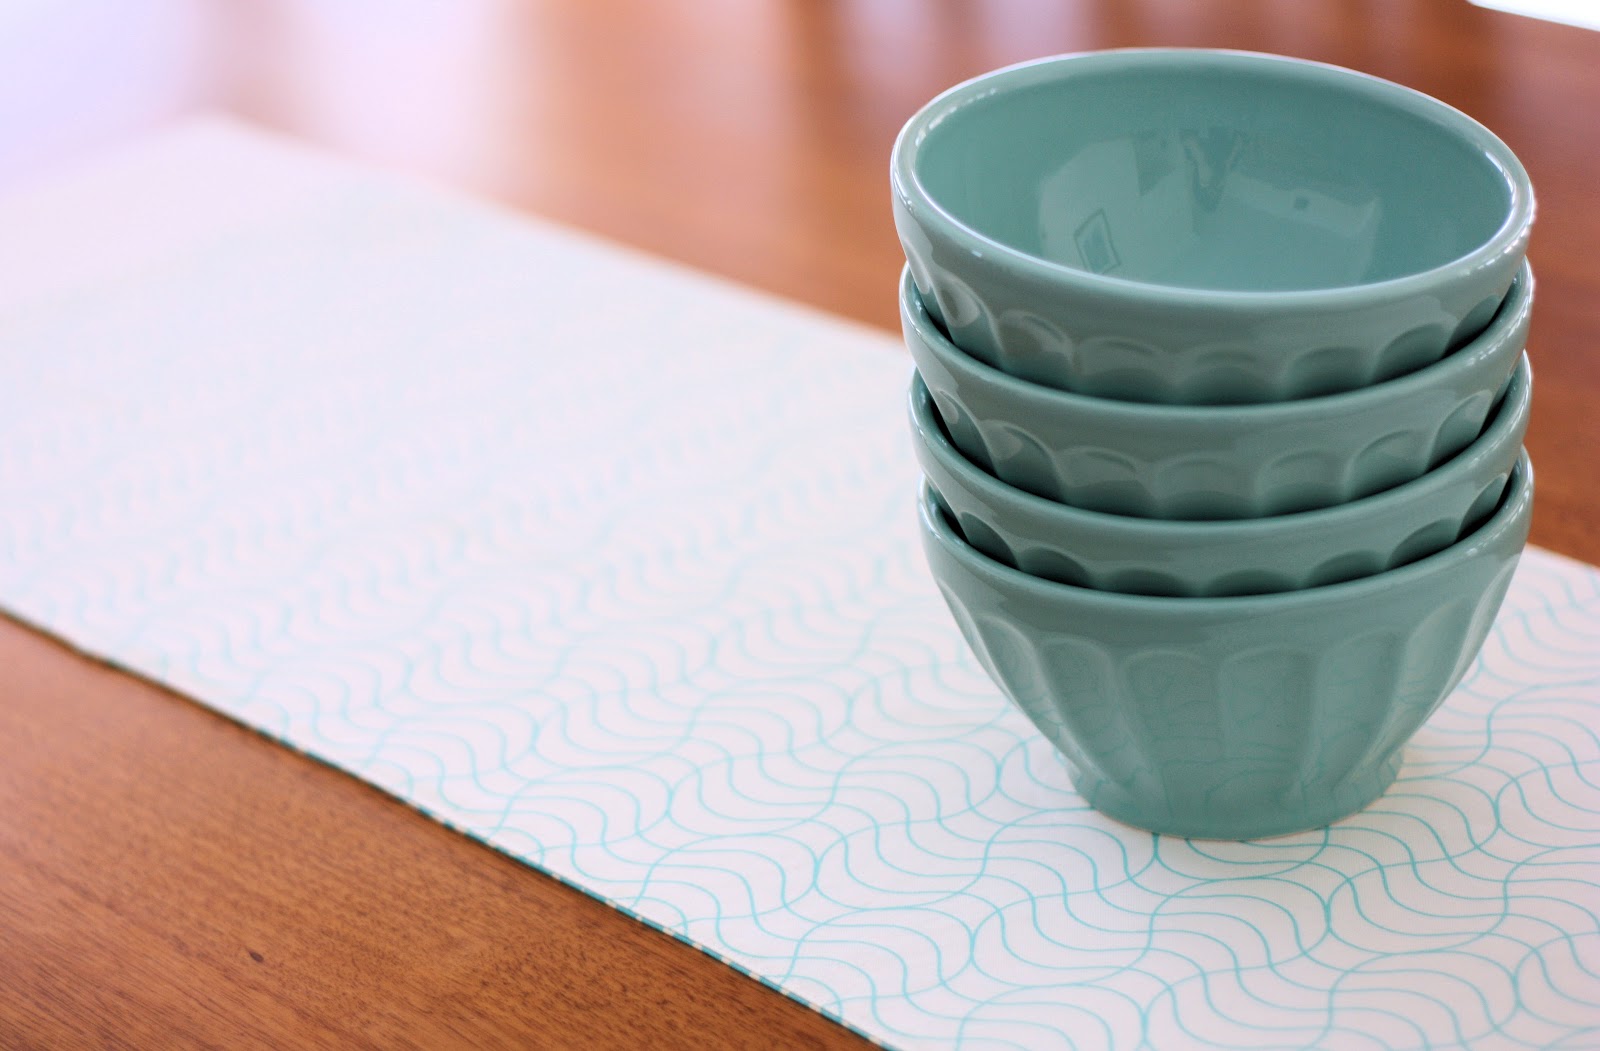
Best of all it is reversible so that I can easily change the look and freshen things up a bit.

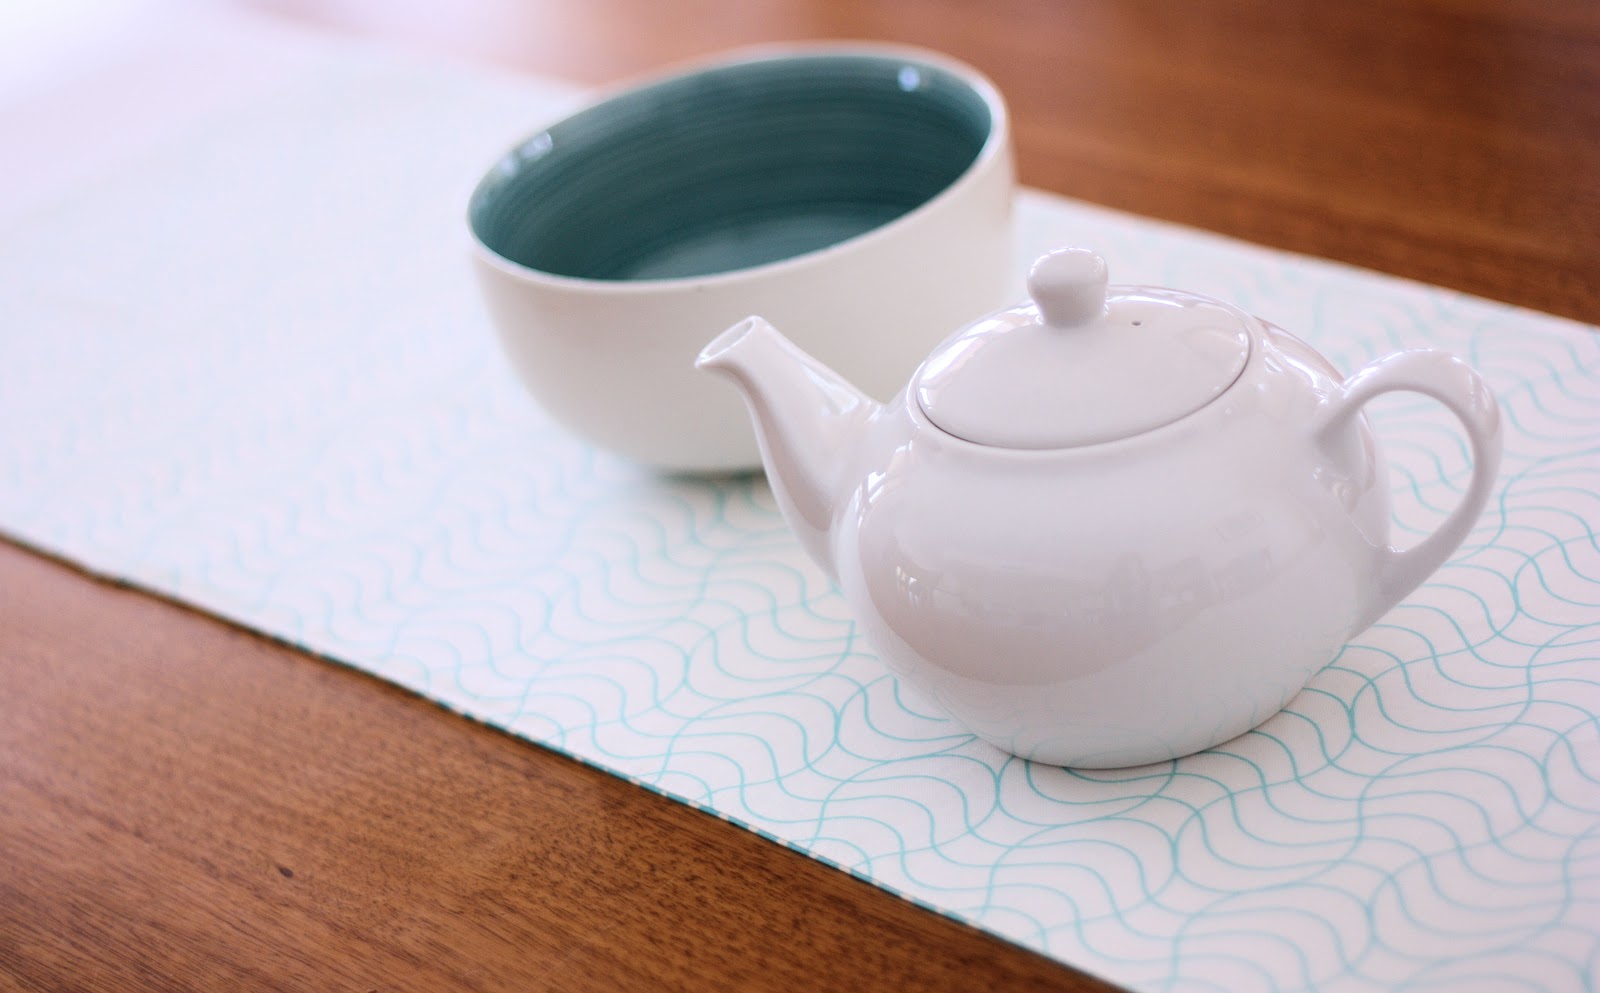
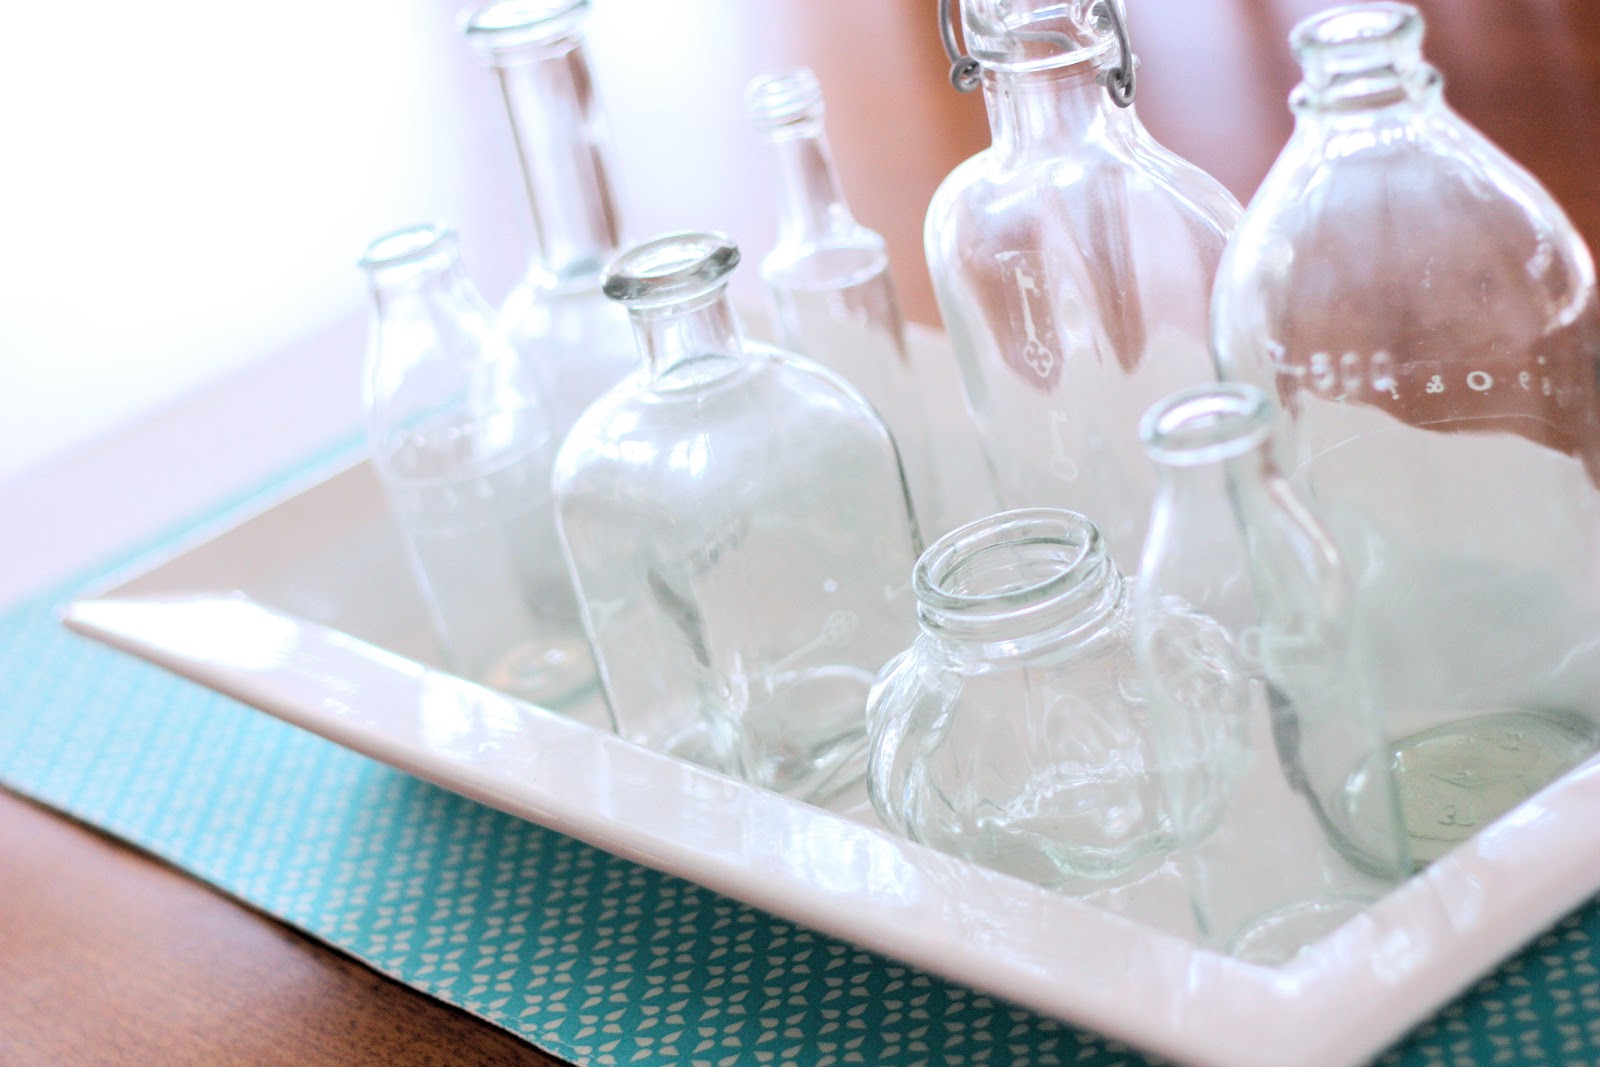
When it comes to home furnishings, I like items to be sleek and modern. I teamed two Aqua Prints from the Washi Collection by Timeless Treasures with some Robert Kaufman Essex Linen for the table runner, which measures 12″ x 36 “.

If you would like to make your own you will need:

Materials:
0.5 yard (0.4 m) of Fabric 1 (Rashida Coleman-Hale Washi Squiggle Aqua)
0.5 yard (0.4 m) Fabric 2 (Rashida Coleman-Hale Washi Foulard Aqua)
0.5 m (0.4 m) Linen (Essex Linen – White)
0.5 yard (0.4m) Heavy Fusible Interfacing
Co-ordinating Thread

Note: all seam allowances are 1/4 inch.

1. Cut Fabrics

  • Fabric 1 – Cut rectangle measuring 28 1/2 x 12 1/2 ” (72.5 cm x 32cm)
  • Fabric 2 –  Cut rectangle measuring 28 1/2 x 12 1/2 ” (72.5 cm x 32cm)
  • Linen – Cut 4 rectangles measuring 4 1/2 x 12 1/2 ” (11.5 cm x 32 cm)
  • Interfacing – Cut rectangle measuring 36 x 12″ (91.5 x 30.5 cm)
2. Sew a white strip to each end of the Fabric 1 (side A). Press seams open. Sew a white strip to each end of the Fabric 2 (side B). Press seams open. Topstitch on each side of all seams using a scant seam allowance. 
3. Centre the interfacing on the back of Fabric 1. Fuse in place with the iron. Position Side A on top of Side B with the right sides facing, and matching seams. Pin in place. Stitch around the outside of the table runner, leaving a 5 inch gap for turning. Clip corners. Turn right side out. Press. Top stitch around the perimeter of the table runner, approx 1/4 inch from the edge, closing the turning gap as you go. Press.

You can see a similar table runner that I made here.

Filed Under: Sewing Tagged With: home décor

« Lemon and Coconut Slice
M & M Cookies »

Comments

  1. Ea Senga says

    June 13, 2012 at 4:06 am

    i love the colors of your reversible table runner. it gives a fresh loook to your table. 🙂

    Reply
  2. Wanda says

    June 13, 2012 at 9:46 am

    I love the concept of the runner being reversible! You could just turn it over and it is a whole new thing. You could use any colors that go with your color schemes and voila! Thanks for sharing the idea.

    Reply
  3. Katherine says

    June 20, 2012 at 8:43 am

    Sleek, elegant and in my favourite colours. Gorgeous!

    Reply
  4. K-Sue says

    June 22, 2012 at 4:49 am

    I really like the simplicity of this project that features the pretty fabric. I may whip one up for our blanket chest/coffee table.

    Reply
  5. Fiona @ Dragonfly-Crafts says

    June 24, 2012 at 4:34 am

    Just beautiful girls.

    Reply

Leave a Reply Cancel reply

Your email address will not be published. Required fields are marked *

  • Email
  • Facebook
  • Instagram
  • Pinterest
  • Threads
  • TikTok
SUBSCRIBE TO NEWSLETTER
×

Categories

Archives

PURCHASE PDF PATTERNS

We offer over 100 affordable PDF sewing patterns available for download from our store website or Etsy store. Each pattern includes detailed instructions, numerous photos, and templates.

WEB STORE ETSY STORE

Instagram

A tiny pyramid that does it all — a pattern weight A tiny pyramid that does it all — a pattern weight for your sewing table, a book weight for cosy reading, or a scented sachet for your drawers. Small, sweet, and so satisfying to sew. Comment PYRAMID for the free pattern.Fabric: Something Blue by Tilda
@tilda_australia#sewingproject #tildafabric #beginnersewing #scrapsewing #Tildasomethingblue
Meet the sweetest little project you can sew in mi Meet the sweetest little project you can sew in minutes — the Pyramid Weight. Use it as a pattern weight, scented sachet, or even a book weight… all from one triangle of fabric. Comment PYRAMID for the free pattern.Fabric is Something Blue by Tilda, releasing 1 June 2026 — with thanks to @tilda_australia.#tildasomethingblue #tildafabric #freepattern #sewingtutorial #sewinglove
The Scrappy Strips Pouch is one of my favourite wa The Scrappy Strips Pouch is one of my favourite ways to use up leftover fabric strings. Today’s version is made from patchwork strips — a fun, relaxing sew that turns scraps into something beautiful and practical.The Scrappy Strips Pouch pattern has two versions - patchwork strings and selvedges - and two sizes. Comment SELVEDGE (or SELVAGE) for a link to the pattern.Pattern Details: Scrappy Strips Pouch Sewing Pattern is in our Pattern Store and Etsy Shop.#ScrappyStripsPouch #ScrapBustingSewing #PatchworkPouch #StringQuilting #SewingProjects
If you’ve ever wanted to add eyelets or grommets t If you’ve ever wanted to add eyelets or grommets to your sewing projects, here’s a quick look at how I install them using my DK93 snap press. It’s the same tool I use for snaps — and it makes installing eyelets beautifully quick and consistent.Here’s how I install the eyelets:Punch out the four holes using a hole‑cutting die.Place the eyelet into the hole.Press it into place using the snap press.That’s it — simple, sturdy, and it gives the Ribbon Pouch such an elevated, professional finish. I love how clean and secure the result is.Fabric shown: Tilda Something Blue, releasing June 1 — thank you @tilda_australia for the beautiful fabric.✨ If you’d like the Ribbon Pouch pattern (3 sizes), comment RIBBON and I’ll send the link straight to you.Ribbon Pouch Sewing Pattern: available in my Pattern Store and Etsy Shop (links in profile).#tildasomethingblue #tildafabric #sewingtips #handmadeeveryday #sewingtools
The Ribbon Pouch is one of my favourite quick‑to‑s The Ribbon Pouch is one of my favourite quick‑to‑sew gift bags, and I couldn’t resist making a light and dark version using the new Tilda Something Blue collection. Both pouches use the same print in different colourways — such a pretty way to show how fabric choice changes the whole mood.They’re finished with satin ribbon threaded through grommets, and topped with a tiny star tag. The boxed base helps them stand beautifully, and the ribbon closure makes them perfect for birthdays, thank‑you gifts, treats, or little treasures.This is a beginner‑friendly, scrap‑friendly, quick project you’ll want to sew again and again. Pattern includes 3 sizes.If you’d like the pattern, comment RIBBON and I’ll send the link straight to you.Pattern Details: Ribbon Pouch (3 Sizes) available in my Pattern Store and Etsy Shop.Fabric Details: Tilda Something Blue - releasing on 1 June 2026. Thanks to @tilda_australia#TildaSomethingBlue #TildaFabric #SewingPattern #BeginnerSewingProject #QuickSewingProject   
Sewing with scraps is one of my favourite ways to Sewing with scraps is one of my favourite ways to get creative — small pieces, leftover corners, charm‑square offcuts… they all have so much potential.Here are 10 scrap‑friendly projects that use small pieces beautifully. They’re quick to sew, beginner‑friendly, and perfect for gifting ✂️✨Save this for the next time you want to turn your scraps into something pretty.Which one would you sew first?  Tell me in the comments — I love seeing what you’re making.Patterns are available in my pattern store (link in profile) or comment PATTERNS and I will send you the link. #scrapsewing #scrapbusting #scrapfriendly #sewinginspiration #sewingideas
Follow on Instagram

Featured Pattern

Travel Sewing Kit Pattern

Featured Tutorial

Retro Drawstring Bag

Featured Recipe

Lemon Pound Cake

Connect

  • Email
  • Facebook
  • Instagram
  • Pinterest
  • Threads
  • TikTok
SUBSCRIBE TO NEWSLETTER
×

Popular Posts

  • Cord Cosy
  • Tips for Threading a Needle
  • Travel Accessories to Sew
  • Liberty Tissue Cover
  • Charm Square Fabric Tray
  • Happy Scrappy Cards
  • Life Lessons from Sewing and Quilting

Copyright © 2026 Lisa. K. Cox - A Spoonful of Sugar