A Spoonful of Sugar

Make. Bake. Create.

Menu
  • Home
  • About
    • About Us
    • Press
    • FAQ
    • Disclosure Policy
    • Contact Us
  • Crafts
    • Crochet
    • DIY
    • Embroidery/Cross stitch
    • Gift Wrapping
    • Knitting
    • Miscellaneous
    • Paper Crafts
  • Holidays
    • New Year’s
    • Australia Day
    • Back to School
    • Valentines Day
    • Easter
    • ANZAC Day
    • Mother’s Day
    • Father’s Day
    • Halloween
    • Christmas
  • Recipes
    • Appetizers
    • Bars & Slices
    • Bread & Pastries
    • Cakes
    • Cookies
    • Confectionery
    • Cupcakes & Muffins
    • Desserts
    • Drinks
    • Ice Cream
    • Jams/Preserves
    • Main Meals
  • Sewing
    • Sewing Tutorials
    • Quilting
    • Sewing & Quilting Patterns
  • Family
    • Back to School
    • Family Fun
    • Our Home
    • Parenting
    • Travel
  • Shop
    • Pattern Store
    • Etsy Store

Easy Felt Garland

August 18, 2011 By A Spoonful of Sugar - 14 Comments

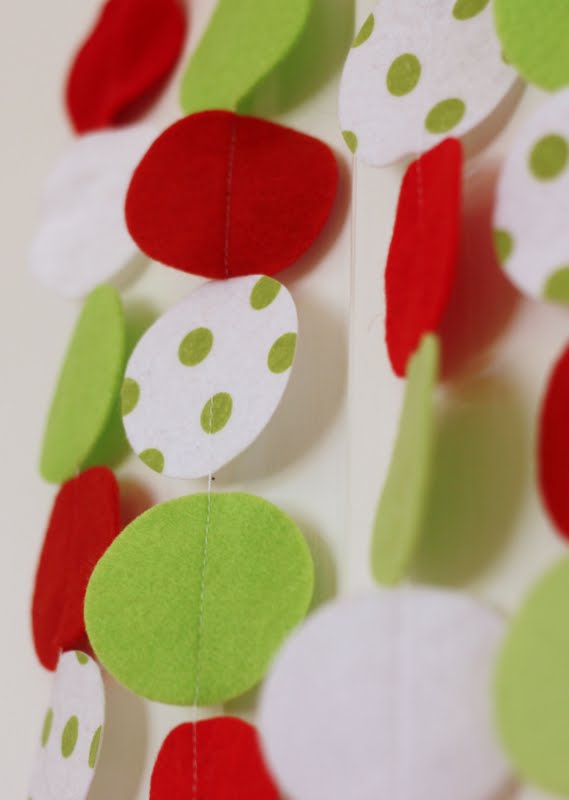
Since making the Modern Circle Pillow last week, I have had circles on the brain. I cranked out a bunch of felt circles using the Go! Baby. Then I stitched them together and had a garland in under an hour. I am full of the flu at the moment and this was about all the crafting I have the energy for.

Thoughts on the project:

  • I used up felt scraps in lime, green,  red and white that I had in my stash. I found that the cheap acrylic felt is stiffer and works better for this project as the circles hold their shape better.
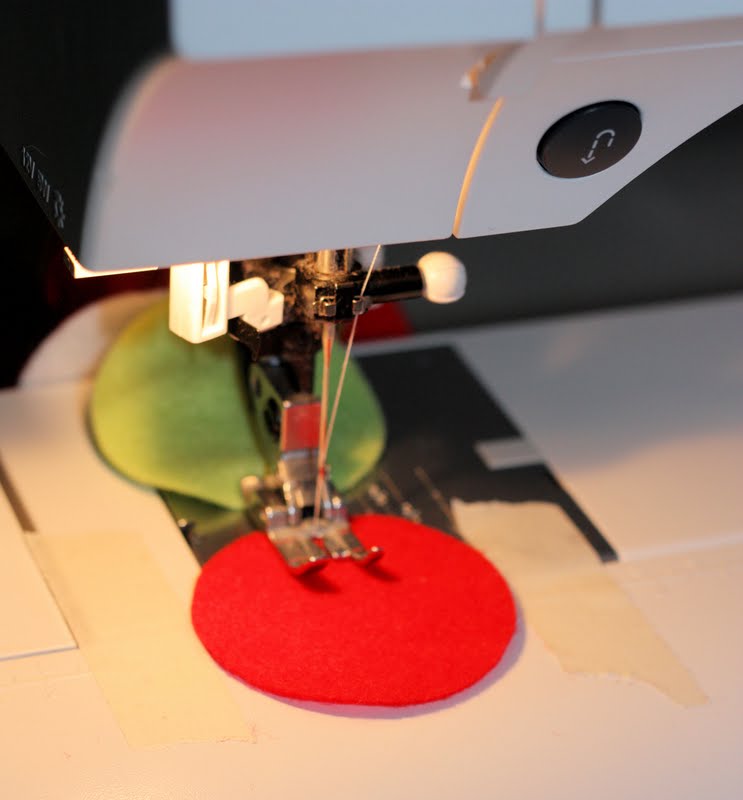
  • Using  masking tape, I marked 1 inch on either side of the needle on the sewing machine. This made it really fast to line up the circles and feed them through. (See image below)
  • This would be a fun project for a child who is learning to sew. It comes together quickly and garlands can be made for any occasion or to add some colour to a bedroom.
  • You could cut the circles out of scrapbooking paper for a different look. Accuquilt recommend not to use the Go!Baby to cut large amounts of paper, and to treat the dies as you would your fabric cutting scissors. Paper punches in a 2 inch circle size are readily available and would also make for a quick project. It would look great in double sided paper.
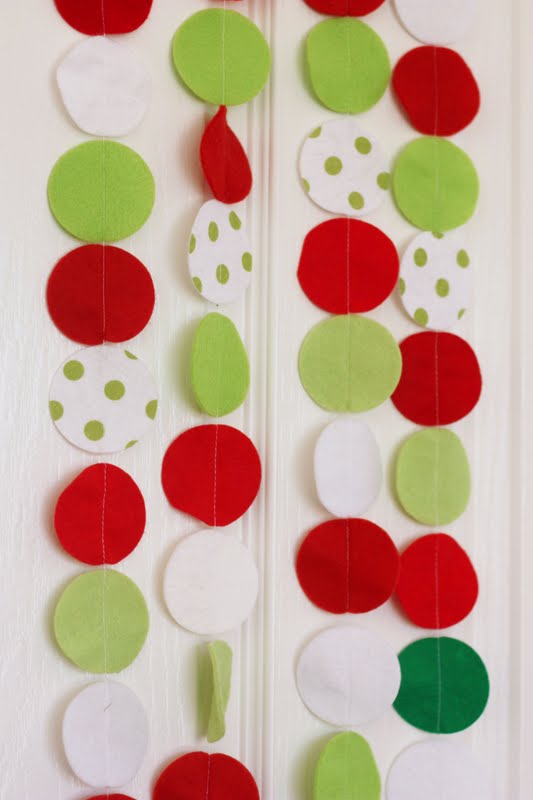
  • It is tricky to photograph garlands!
Don’t forget to enter our giveaway to win a Go!Baby Fabric Cutter and three dies from Accuquilt. You can enter over here. Entries close Monday August 22 at midnight WST  (Perth Time).
You can sign up here to receive 22 Free Quilt Patterns.
22 Free Patterns - Download Now

Filed Under: Christmas, Sewing Tagged With: bunting, felt, garland

« Kokeshi Projects
Scrap Buster Gift Tags »

Comments

  1. K @ Aurora Blythe says

    August 18, 2011 at 8:14 pm

    What an intriguingly simple idea! Great results to a very gratifying project. Thanks for the idea!

    Reply
  2. Luisa says

    August 18, 2011 at 8:33 pm

    This is so cute. We have tons of felt scraps what a nice simple project for adult or kids.

    Reply
  3. Rocio says

    August 19, 2011 at 12:04 am

    So cute! I need to try it, with or without the Go! Baby 😉

    Reply
  4. Simone de Klerk says

    August 19, 2011 at 2:03 am

    Oh yummie, what a great and easy idea. I think I really need that Go!Baby!

    Reply
  5. Posie Patchwork says

    August 19, 2011 at 3:02 am

    So adorable, gorgeous Christmas idea, love Posie

    Reply
  6. Terriaw says

    August 19, 2011 at 5:29 am

    Such a great project, especially when you might be short on time. This is one reason I can see wanting a cutting machine, since cutting circles can be a pain. Lovely mix of felt colors!

    Reply
  7. em's scrapbag says

    August 19, 2011 at 5:45 am

    Your garland is fun. Hope you are feeling better.

    Reply
  8. Handmade in Israel says

    August 19, 2011 at 10:31 am

    Very sweet. I love the colours.

    Reply
  9. Bela says

    August 19, 2011 at 12:26 pm

    Simply beautiful, Lisa!!! I love the colors!
    Much love to you!!!
    Bela

    Reply
  10. Chocolate Cat says

    August 19, 2011 at 1:44 pm

    What a fun and seemingly simple project, will keep it in mind for when we redecorate a teen’s bedroom later this year. Hope your flu is improving.

    Reply
  11. Tania McCartney says

    August 20, 2011 at 1:44 am

    Love! I usually make mine out of luscious papers, but love the felt… would last so much longer, too.

    Reply
  12. Thimbleanna says

    August 21, 2011 at 7:23 pm

    You’re REALLY making me want one of those go babies! That polka dot isn’t a felt is it??? Super Cute Girls!!!

    Reply
  13. 4you-withlove says

    December 4, 2011 at 12:12 pm

    I love this garland idea. I posted it on my blog with a link to here!

    Reply

Leave a Reply Cancel reply

Your email address will not be published. Required fields are marked *

  • Email
  • Facebook
  • Instagram
  • Pinterest
  • Threads
  • TikTok
SUBSCRIBE TO NEWSLETTER
×

Categories

Archives

PURCHASE PDF PATTERNS

We offer over 100 affordable PDF sewing patterns available for download from our store website or Etsy store. Each pattern includes detailed instructions, numerous photos, and templates.

WEB STORE ETSY STORE

Instagram

Adding a handmade label is one of my favourite way Adding a handmade label is one of my favourite ways to personalise a project — and these little fabric + felt labels are so quick and satisfying to make.For this Ribbon Pouch, I used the Liberty Gifts from the Garden collection, which has the sweetest fruit motifs. They make perfect tiny labels for pouches, bags, and gifts.Here’s how to make your own:Press a piece of double‑sided fusible web to the back of your fabric.Cut around your chosen motif.Peel off the paper backing.Press the motif onto wool felt.Trim the felt with scalloped scissors.Sew the label onto the front of your pouch.Such a simple detail, but it adds so much charm. Fabric kindly gifted by @regent_street_fabrics — thank you!If you’d like to sew the Ribbon Pouch (3 sizes), comment RIBBON and I’ll send the pattern link straight to you.#SewingInspiration #FabricLabels #DIYLabels #LibertyFabric #LibertyGiftsFromTheGarden
A lot can change in 10 years ❤️ It’s been fun look A lot can change in 10 years ❤️ It’s been fun looking back at where I was in 2016 and how far life has come since then. Swipe for a little trip down memory lane.Back in 2016, my priorities were firmly centred around family. I was working full‑time, sewing in the guest room, sharing tutorials on my blog, and slowly dipping my toes into selling a handful of patterns on Etsy. It was a busy, full season — and creativity was something I fitted in around everything else.  Fast forward to 2026… I’m now retired and living the creative life I once dreamed of. My kids have grown up and are living in their own homes nearby. My husband and I are free to travel, explore, and enjoy this stage of life. And I get to spend my days designing, sewing, and connecting with this beautiful community.Life looks different now — in the best possible way.Were you following me back then, or what has changed for you over the past 10 years? I’d love to hear your story too.Tagging the lovely makers of my quilt: @arabesquescissors @ministryoffabric @belloquacity @alittlepatchwork @sameliasmum coleandtaffy @quiltymamaof4 @shequiltsalot @downgrapevinelane @lizzierosesews @lovethatfabric @sew_mimi.k #2026isthenew2016 #10yeartransformation #sewingjourney #sewingcommunity #aspoonfulofsugardesigns
Fall in love with sewing all over again ❤️I’ve Fall in love with sewing all over again ❤️I’ve rounded up 10 heart‑themed makes — from quick gifts to charming quilt blocks — perfect for weekend stitching or using up your favourite scraps. Whether you’re sewing for Valentine’s Day, birthdays, or just because, there’s something sweet for every maker.Comment HEART and I’ll send you a link to my Heart Pattern Collection.#sewingproject #heartsewing #quiltblock #scrapsewing #easytosew
Raw edge appliqué doesn’t have to feel fiddly or i Raw edge appliqué doesn’t have to feel fiddly or intimidating. With a few simple techniques, you can create neat, crisp shapes — even tiny details like penguin beaks and hearts.I’ve put together My Top 5 Secrets for Raw Edge Appliqué to help you feel confident, whether you’re brand new to appliqué or looking to refine your finish. Save this for your next sewing session.If you’d love a quick, beginner‑friendly project to practise these tips, my Penguin Love Mugrug is the sweetest Valentine’s make — scrap‑friendly, gift‑ready, and such fun to sew.Comment PENGUIN and I’ll send you the link to the pattern. Available now in our Pattern Store and Etsy shop.  #rawedgeapplique #appliquetips #sewingtipsandtricks #mugrugpattern #penguinlove
If you’ve ever wanted to add eyelets or grommets t If you’ve ever wanted to add eyelets or grommets to your sewing projects, here’s a quick look at how I install them using my DK93 snap press. It’s the same tool I use for snaps — and it makes installing eyelets beautifully quick and consistent.For this Ribbon Pouch, I used the Liberty Gifts from the Garden collection (printed on Lasenby cotton and released in January 2026). The colours and motifs pair so well with the little ribbon tie detail.Here’s how to install the eyelets:Punch out the four holes using a hole‑cutting die.Place the eyelet into the hole.Press it into place using the snap press.That’s it — easy peasy, and it gives the pouch such an elevated, professional finish. I love how clean and sturdy the result is.Fabric is Gifts from the Garden by Liberty - kindly provided by @regent_street_fabrics — thank you!If you’d like the Ribbon Pouch pattern (it comes in 3 sizes), comment RIBBON and I’ll send the link straight to you.Ribbon Pouch Sewing Pattern: available in our Pattern Store and Etsy shop ( links in profile).#SewingInspiration #SewingProjects #Eyelets #Grommets #SnapPress
The Twirling Treasures Hot Pad & Placemat Set show The Twirling Treasures Hot Pad & Placemat Set showcases one of my favourite FPP designs — a stunning kaleidoscope‑style block that always turns out beautifully. Kaleidoscope blocks are some of my most popular FPP patterns, and this set is such a fun way to use them.  This set includes six sizes, making it incredibly versatile: use them as hot pads, trivets, placemats, or simply as a way to add a pop of colour to your kitchen.For these samples, I went with a monochromatic scrap‑busting approach, pairing fabrics from the same colour family with a low‑volume background. The black‑and‑white striped binding adds such a crisp, modern finish. It’s a wonderful project for building your FPP confidence — and a fantastic way to use up those treasured scraps.The Twirling Treasures Hot Pad set is our Pattern of the Week. It is currently 25% off this week in our Pattern Store and Etsy Shop.If you’d like to sew your own set, comment TWIRL and I’ll send the pattern link straight to you.Happy sewing! Lisa 🌸#FoundationPaperPiecing #Quilting #HotPads #ScrapBuster #KitchenSewing
Follow on Instagram

Featured Pattern

Travel Sewing Kit Pattern

Featured Tutorial

Retro Drawstring Bag

Featured Recipe

Lemon Pound Cake

Connect

  • Email
  • Facebook
  • Instagram
  • Pinterest
  • Threads
  • TikTok
SUBSCRIBE TO NEWSLETTER
×

Popular Posts

  • Charm Square Fabric Tray
  • Merry Little Christmas Sewing Projects
  • {Back to School} Tissue Cover
  • Hexagon Fabric Tray
  • Raw Edge Applique Tips
  • Sewing Gifts 101: Easy and Affordable Ideas for Your Crafty Friends
  • Fabric Gift Pouch

Copyright © 2026 Lisa. K. Cox - A Spoonful of Sugar