A Spoonful of Sugar

Make. Bake. Create.

Menu
  • Home
  • About
    • About Us
    • Press
    • FAQ
    • Disclosure Policy
    • Contact Us
  • Crafts
    • Crochet
    • DIY
    • Embroidery/Cross stitch
    • Gift Wrapping
    • Knitting
    • Miscellaneous
    • Paper Crafts
  • Holidays
    • New Year’s
    • Australia Day
    • Back to School
    • Valentines Day
    • Easter
    • ANZAC Day
    • Mother’s Day
    • Father’s Day
    • Halloween
    • Christmas
  • Recipes
    • Appetizers
    • Bars & Slices
    • Bread & Pastries
    • Cakes
    • Cookies
    • Confectionery
    • Cupcakes & Muffins
    • Desserts
    • Drinks
    • Ice Cream
    • Jams/Preserves
    • Main Meals
  • Sewing
    • Sewing Tutorials
    • Quilting
    • Sewing & Quilting Patterns
  • Family
    • Back to School
    • Family Fun
    • Our Home
    • Parenting
    • Travel
  • Shop
    • Pattern Store
    • Etsy Store

Charm Square Fabric Tray

May 9, 2015 By A Spoonful of Sugar - 82 Comments

Charm Square Fabric Tray Sewing Tutorial by A Spoonful of Sugar

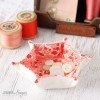
If you are like us and have some orphan charm squares in your sewing stash, you can put them to good use by whipping up some Charm Square Fabric Trays. These fabric trays are a quick beginner project. I shared photos of some that I made last week on instagram and was asked to put together some directions. These zakka style fabric trays have been in Japanese sewing magazines over the years and can be made in a variety of sizes. They are not my original design but this is my way of constructing them.

Charm Square Fabric Tray Sewing Tutorial by A Spoonful of Sugar

They can be made in around 10 minutes and are handy for storing all sorts of items in your sewing room or around your home. I have been using them to store wonder clips, buttons, jewellery, tea bags and more.

Charm Square Fabric Tray Sewing Tutorial by A Spoonful of Sugar

I used a white linen on the outside and a cotton lawn on the inside but you could use any cotton or linen fabrics.

Charm Square Fabric Tray Sewing Tutorial by A Spoonful of Sugar

Charm Square Fabric Tray Sewing Tutorial by A Spoonful of Sugar

If you would like to make one, you will need

  • 5 inch square of white linen
  • 5 inch square of cotton lawn (such as Liberty Tana Lawn)
  • 5 inch square of cotton batting
  • embroidery floss

Charm Square Fabric Tray Sewing Tutorial by A Spoonful of Sugar

Directions:

1. Place the batting down on a flat surface. Place the linen square on top with the right side facing upwards, then place the lawn square on top of that with the wrong side facing upwards. Make sure all straight edges are aligned and pin together. Stitch around the outside of the square using a 1/4 inch seam and leave a 1.5 inch gap on one side for turning.

Charm Square Fabric Tray Sewing Tutorial by A Spoonful of Sugar

2. Clip the corners and then turn out the right way through the gap. Poke out the corners and press.

Charm Square Fabric Tray Sewing Tutorial by A Spoonful of Sugar

3. Topstitch around the outside using a 1/8 inch seam allowance and enclosing the gap in the lining as you sew. Press. Using a hera marker, mark a 2 1/2 inch square in the middle of the tray. Stitch along the marked square to form the base. Press.

Charm Square Fabric Tray Sewing Tutorial by A Spoonful of Sugar

4. Fold the corners as shown in the photo below. Using two strands of embroidery thread, make a couple of stitches 1/2 inch in from each corner.

Charm Square Fabric Tray Sewing Tutorial by A Spoonful of Sugar

That is all there is to it. Such a simple project and would be a fun item to include in swap packages. You could also fill them with small gift items like chocolates and wrap in cellophane for a fun and useful gift item.
Charm Square Fabric Tray Sewing Tutorial by A Spoonful of Sugar


You can find our tutorial for a Hexagon Fabric Tray here. 

Filed Under: Sewing Tutorials Tagged With: charm square, gift, gift wrapping, Liberty, sewing

« {Book Review and Giveaway} Margaret Fulton’s Baking Classics
10 Essential Sewing Tools »

Comments

  1. Kate says

    May 9, 2015 at 8:09 pm

    Absolutely adorable and thank you for sharing!!

    Reply
    • A Spoonful of Sugar says

      May 10, 2015 at 11:45 am

      Thanks Kate – they are a fun project to make 🙂

      Reply
  2. Jeannie says

    May 9, 2015 at 10:49 pm

    Those are so adorable and I’ll be making me a few!

    Reply
    • A Spoonful of Sugar says

      May 10, 2015 at 11:46 am

      Happy sewing Jeannie! Thanks for stopping by.

      Reply
  3. Gretchen says

    May 10, 2015 at 1:37 am

    So sweet. Love these easy little sewing projects. Thanks.

    Reply
    • A Spoonful of Sugar says

      May 10, 2015 at 11:46 am

      Thanks Gretchen – they are super quick and easy to make. Glad you enjoy our tutorials.

      Reply
  4. Jackie says

    May 10, 2015 at 2:46 am

    These are cute and so useful! Thank you…

    Reply
    • A Spoonful of Sugar says

      May 10, 2015 at 11:47 am

      Thanks Jackie! I am making more – so many uses for them 🙂

      Reply
  5. Thecraftingcactus says

    May 10, 2015 at 4:51 am

    Cute idea!

    Reply
    • A Spoonful of Sugar says

      May 10, 2015 at 11:47 am

      Thanks heaps 🙂

      Reply
  6. Christine M says

    May 10, 2015 at 8:13 am

    What a lovely idea.

    Reply
    • A Spoonful of Sugar says

      May 10, 2015 at 11:47 am

      Thanks Christine! Hope you have a lovely weekend.

      Reply
  7. Tonya says

    May 10, 2015 at 1:42 pm

    Love these! Such a quick project but so many things I could use them for…

    Reply
    • A Spoonful of Sugar says

      May 10, 2015 at 5:18 pm

      Thanks Tonya – they are useful for some many items. Hope you have had a wonderful Mother’s Day.

      Reply
  8. rose victorien says

    May 10, 2015 at 11:53 pm

    une bien jolie idée, c’est ravissant
    rose

    Reply
    • A Spoonful of Sugar says

      May 11, 2015 at 6:40 am

      Merci Rose 🙂

      Reply
  9. Bela says

    May 11, 2015 at 6:55 am

    Hello dear Lisa!!

    Your work always inspires me!!!!
    So lovely!!
    Thank you!!!!

    Bela

    Reply
    • A Spoonful of Sugar says

      May 14, 2015 at 9:16 pm

      Thanks so much Bela for your kind words! It really made my day, Lisa

      Reply
  10. Linda says

    May 11, 2015 at 10:03 pm

    So sweet! Thanks for the easy tutorial, but I’m drooling over your Liberty Tana Lawn fabric, so beautiful!!

    Reply
    • A Spoonful of Sugar says

      May 14, 2015 at 9:17 pm

      Thanks Linda. I only recently started collecting some Liberty fabric – it is so lovely to work with.

      Reply
  11. Denise says

    May 13, 2015 at 11:44 pm

    Love using your website! Is there a sub-listing of tutes with pics and the subject? Or just an alphabetical list I can search for particular ones? Thank you!

    Reply
    • A Spoonful of Sugar says

      May 14, 2015 at 9:24 pm

      Hi Denise – If you go to the sewing tab at the top and pull down the menu there is one called sewing tutorials. That will bring up a photo menu of all the sewing tutorials we have done. We have completed 110+ so far.

      Reply
  12. Joan says

    May 14, 2015 at 7:11 am

    So cute! This would be a great little project for my granddaughters who have just starting sewing. Thanks for sharing.

    Reply
    • A Spoonful of Sugar says

      May 14, 2015 at 9:25 pm

      Thanks Joan – it is the perfect beginner project. How lovely that your grand daughters are following in your footsteps.

      Reply
  13. Darlene Driedger says

    May 14, 2015 at 8:44 am

    In making a couple of these, are u sure it is a 2 1/2 ” square in the middle of the square?? I am sure that is incorrect. Looks like a 3 1/2 or 4″ square in the middle would be better. I did mine and mine looks small at 2 1/2″. I will correct this now.
    Thanks for the great idea for those leftover pieces of fabric.

    Reply
    • A Spoonful of Sugar says

      May 14, 2015 at 9:27 pm

      Hi Darlene – Yes it is 2 1/2 inches in the middle on the ones I have shown. Once the charm squares have been sewn together, they measure 4 1/2 inches. By sewing 2 1/2 inches in the middle, you have a 1 inch border around the outside which forms the sides.

      Reply
  14. Linda says

    May 14, 2015 at 9:11 pm

    Who can’t use one of these bowls they are great for any sewing room.

    Reply
    • A Spoonful of Sugar says

      May 14, 2015 at 9:29 pm

      Thanks Linda – they certainly are handy for so many items.

      Reply
  15. Elizabeth says

    May 17, 2015 at 7:21 am

    If I were to make this with 10″ squares would I have a 5″ sq in the middle. Just a thought as I have some felt from a project.

    Reply
    • A Spoonful of Sugar says

      May 17, 2015 at 9:07 am

      It depends on the height you would like for the sides, as the square forms the base. I would suggest that a 6 1/2 inch square would work quite well for that size tray (that would give you sides of 1.5 inches in height) but you may wish to trial it and see what works best for you.

      Reply
  16. Elizabeth says

    May 17, 2015 at 11:38 am

    Thank you so much for this. I just made one and will put some mints in it to take to my sister. Now will make one for me. Such a neat idea and so quick.

    Reply
  17. Anne says

    May 17, 2015 at 9:53 pm

    pretty trays! I have a Craft Gossip post scheduled for later this morning that links to your tutorial:
    http://sewing.craftgossip.com/?p=82521
    –Anne

    Reply
    • A Spoonful of Sugar says

      May 17, 2015 at 10:07 pm

      Thanks so much Anne! We always appreciate being featured on Craft Gossip 🙂 Enjoy your weekend, Lisa

      Reply
  18. Michelle H says

    May 18, 2015 at 7:42 am

    This is so cute! It was just the item I needed for a swap extra—now I need to make some for my own use!!!! Thank you so much!!!

    Reply
    • A Spoonful of Sugar says

      May 18, 2015 at 7:47 am

      You’re welcome Michelle! Glad you had fun making them. Lisa

      Reply
  19. Vicky B says

    May 19, 2015 at 11:27 am

    I can’t remember the website, but I saw a version of this, with a snap or velcro to attach the sides together. Then you could flatten it for travelling. When staying at a hotel, etc. you can keep personal items like keys, phone (depending on size of box), whatever, so you know where to find them.

    Reply
    • A Spoonful of Sugar says

      May 19, 2015 at 7:05 pm

      Sounds like a great idea for travelling! Must give that idea a try next time I am going on holiday.

      Reply
  20. Robin says

    June 3, 2015 at 5:26 am

    I was wondering if you could ModPodge these to give them a little stiffness and slickness for easy retrieval of small items.

    Reply
    • A Spoonful of Sugar says

      June 3, 2015 at 6:30 am

      Hi Robin – If you want to make them stronger I would suggest using a stiff interfacing int he construction. Not sure how mod Podge would work but I guess you could give it a try 🙂 Lisa

      Reply
  21. Tammy says

    June 16, 2015 at 2:15 pm

    These are such a simple little make, just wondering if it’s okay to make them to fill and sell at our school market, I was thinking they’d be great to fill with hair clips for little girls!

    Reply
    • A Spoonful of Sugar says

      June 18, 2015 at 6:18 am

      Our tutorial are for personal use only. As you would like to make them for a school fundraiser, you are able to make some to sell but they need to be clearly labeled that they were made from a design by A Spoonful of Sugar.Thanks for your understanding.

      Reply
      • Tammy says

        June 18, 2015 at 2:07 pm

        Excellent, thank you so very much. More than happy to spread the love on this one. They really are so easy and quick to make, but look so darn cute!

        Reply
  22. saucy chick sherry says

    July 2, 2015 at 7:47 am

    I have made larger fabric trays that are similar. Thank you for sharing these charming charm square tiny trays. Uber Adorable…

    Reply
    • A Spoonful of Sugar says

      July 2, 2015 at 9:23 pm

      Thanks Sherry – they are great in any size.

      Reply
  23. Roben says

    July 8, 2015 at 2:31 am

    I just had to make one of these this morning – they are so cute! I posted a link on my blog. Thanks so much!

    Reply
    • A Spoonful of Sugar says

      July 8, 2015 at 7:59 am

      Thanks Roben – Your charm square tray looks great! Thanks heaps for linking.

      Reply
  24. Claire says

    July 9, 2015 at 3:33 am

    I should have stopped by here last night to say thank you for your tutorial ^^
    So thank you!
    I was looking for something quick to give to a crafting friend I was due to meet for the first time today and your “only 10 minutes” project was perfect. So much so that, as you saw, I got slightly carried away ^^ My friend loved her little tray and I will be giving the others as little gifts to other crafting friends.

    Reply
    • A Spoonful of Sugar says

      July 9, 2015 at 5:50 pm

      Your sweet comment has left a smile on my face 🙂 So glad the tray was a perfect project! I always like to come up with ways to use up those extra charm squares.

      Reply
  25. Anne Gray says

    July 15, 2015 at 11:04 am

    Fell in love with the trays and have made a dozen, plan to make more. Perfect gifts and I find more uses for them every day. Great for loose coins. I am so pleased that I found your site.

    Anne

    Reply
    • A Spoonful of Sugar says

      July 16, 2015 at 8:52 pm

      We are so glad you found us too Anne! They are so useful for all sorts if items.

      Reply
  26. Debbie M says

    September 2, 2015 at 1:41 pm

    Love these little trays. Was at a retreat this weekend and the sponsors made these for each of us. I’m going on a retreat later this month and will make them for the others going.
    I also love the yard stick boxes. Where did you get those?

    Reply
    • A Spoonful of Sugar says

      September 3, 2015 at 6:21 am

      Thanks Debbie – retreats are so much fun! The boxes are from Temecula Quilt Company and are available in several sizes.

      Reply
      • Debbie M says

        September 3, 2015 at 10:58 am

        Thank you!

        Reply
  27. Sue says

    November 8, 2015 at 7:29 am

    Thanks ever so much for posting this! What a super cute idea. I was wondering about “washing” them, in case they got dirty or maybe if you put some snack food in them. What would you suggest? Thank you!! Sue
    PS I visited your site and it is filled with such great ideas and thoughts! Thank you for the effort!!

    Reply
    • A Spoonful of Sugar says

      November 12, 2015 at 8:26 pm

      Thanks Sue. They should be fine to wash by hand. I would then suggest that you press them into shape when they have dried using an iron and some spray starch. Happy sewing!

      Reply
  28. Gail says

    July 27, 2016 at 4:53 am

    I am definitely going to be making a few of these tests.
    Do you think by applying modge podge to the entire tray would make it easier to wipe clean? Or would it ruin it’s integrity?
    Just a thought.

    Reply
  29. Gail says

    July 27, 2016 at 4:55 am

    Trays, I will be making trays….ha ha. Who wants to make a test?? Ay crumba!

    Reply
  30. Kay says

    July 30, 2016 at 12:54 pm

    I have just seen this tutorial on Pinterest, they will be going on my present making list for Christmas. x

    Reply
    • A Spoonful of Sugar says

      August 8, 2016 at 10:49 am

      Thanks Kay! They are a fun and quick little make.

      Reply
  31. Sandy says

    October 16, 2016 at 1:12 pm

    Lovely to make ?? Charm Square Trays.

    Reply
    • A Spoonful of Sugar says

      October 17, 2016 at 7:57 am

      Thanks Sandy 🙂

      Reply
  32. Mathilde says

    January 8, 2017 at 12:50 am

    I’ve been browsing your blog for years but this is the first project I actually make. I used leftovers from my latest quilt and embroidered the outside with feath stitch. No more bits of cut thread everywhere around my sewing machine, now they’ll go in the tiny tray and it’ll all be tidy!

    Thanks for this tutorial, it was super quick and easy and the result is adorable.

    Reply
    • A Spoonful of Sugar says

      January 8, 2017 at 9:25 am

      Thanks Mathilde – your tray sounds lovely! Best wishes for a happy and creative 2017.

      Reply
  33. Colleen says

    April 6, 2017 at 2:47 am

    Thank you for this lovely tutorial, I’m going to make for Easter gifts and fill with chocolates 😊

    Reply
    • A Spoonful of Sugar says

      April 8, 2017 at 9:33 am

      Thanks Colleen – Have a wonderful Easter.

      Reply
  34. Glenda Cassie says

    October 10, 2017 at 3:24 am

    I made these for all my friends for travel and used velcro in the corners instead of floss and they fold flat to tuck in any corner.

    Reply
    • A Spoonful of Sugar says

      October 12, 2017 at 6:28 am

      Velcro sounds like an inspired idea – perfect for travelling!

      Reply
  35. Mary says

    April 23, 2018 at 7:54 am

    These are adorable! I made a bunch for my sewing and crafting friends yesterday. Thank you!

    Reply
  36. Louise says

    February 12, 2019 at 12:11 pm

    These are just beautiful and useful for quick gifts.

    Would you please advise what batting is best for these?

    Thank you.

    (PS: I’m a newbie sewer, as you can probably tell from my question!) 🙂 🙂

    Reply
  37. Allison says

    July 11, 2019 at 11:18 am

    These look similar to some dice rolling traysI’ve seen people using as of late. With some tinkering (adding snaps at the corners to make them collapsible, as the ones I’ve seen are, and maybe making them stiffer), I can see these working!

    Reply
  38. Ramona says

    June 29, 2020 at 9:55 pm

    Hi there

    Your site is wonderful. My question is how to hand stitch the corners without having a knot show. I’m having trouble tying off. My threads look a bit ratty. Thanks!

    Reply
  39. Rogelia Gonzalez says

    November 3, 2023 at 2:33 am

    Muchas gracias, muy lindo

    Reply
  40. Tracy says

    February 18, 2024 at 8:45 pm

    I am fairly new to sewing anything. I came across your tray instructions and it seems to be a nice way to ease into projects. Thank you for sharing your Pattern .

    Reply

Leave a Reply Cancel reply

Your email address will not be published. Required fields are marked *

  • Email
  • Facebook
  • Instagram
  • Pinterest
  • Threads
  • TikTok
SUBSCRIBE TO NEWSLETTER
×

Categories

Archives

PURCHASE PDF PATTERNS

We offer over 100 affordable PDF sewing patterns available for download from our store website or Etsy store. Each pattern includes detailed instructions, numerous photos, and templates.

WEB STORE ETSY STORE

Instagram

🎉 Beginner Quilters, This One is for You! 🎉 🎉 Beginner Quilters, This One is for You! 🎉Want to sew a colourful Hexagon Trivet with just straight line quilting? This easy sewing project is perfect for beginners. No tricky binding to sew and you get a neat professional finish.Plus you can use 10 inch precut squares for a quick and satisfying make. Perfect for adding a handmade touch to your kitchen or gifting to a friend.Comment TRIVET and I'll send you the link.#easysewing #precutfabric #quiltlover #sewingforbeginners #handmadehome #handmadegifts #simplesewing
🏡💜 Home is where your heart is ❤️🏡I 🏡💜 Home is where your heart is ❤️🏡Introducing the Heart House Foundation Paper Piecing Quilt Block - a cosy design  that brings the warmth of home to every stitch. Available in 5 sizes (2  inch, 3 inch, 4 inch, 5 inch, and 6 inch) this sweet block is perfect for quilts, pillows, pouches and more!Because family is the heart of the home, and every home deserves a little love.Want the pattern? Comment HEART below, and I'll send you the link.#hearthousequiltblock #foundationpaperpiecing #quiltlove #homesweethome #sewingcommunity #sewinglove
✂️ Tip of the Week! ✂️Sewing with Libert ✂️ Tip of the Week! ✂️Sewing with Liberty Tana Lawn? 🌸✨ This stunning fabric deserves the best treatment! A fine needle is key to smooth, snag-free stitches—size 70/10 or 60/8 works like magic, gliding through the delicate weave effortlessly. Pair it with a sharp, fresh needle for crisp, professional results that let those gorgeous Liberty prints shine!Want more sewing tips delivered straight to you? Comment "NEWSLETTER" and I'll send you the link to sign up! 💌💬 What’s your go-to tip for sewing with Liberty fabric? Let’s swap ideas!#LibertyFabric #TanaLawn #SewingTips #FabricLover #QuiltingCommunity #SewingForFun #HandmadeSewing #TextileArt #DIYSewing #SewingInspiration
Turn your fabric scraps into something beautiful! Turn your fabric scraps into something beautiful! These Happy Scrappy Cards are the perfect DIY project - quick, beginner friendly, and fun to create with kids. Plus, they make a thoughtful Mothers Day card!✨️ Want the free tutorial? Comment CARDS and I'll send you the link!#scrapbuster #DIYcards #mothersdaycraft #sewingforfun #handmadegift #makerslife
Sewing isn't just stitches - it's life lessons. Wa Sewing isn't just stitches - it's life lessons. Want to see all 12 lessons? Comment LESSON and I'll send you the link to our free blog article.Quilting is more than just a creative pastime- it's a journey filled with valuable  life lessons. Whether you're a beginner or an experienced quilter, the process teaches persistence, patience, problem solving and self-expression.Read our article to discover all the lessons you can learn. What has quilting taught you? Share your most important lesson in the comments.Love the pillow designs in this post? Find my sewing patterns in my Pattern Store - link in profile.#sewingpatterns #DIYhomedecor #quiltedpillow #handmadehome #sewingproject #scrapbuster #sewingforfun #beginnersewing
Introducing my latest make—the Dresden Needleboo Introducing my latest make—the Dresden Needlebook! ✂️💖This little beauty is practical, charming, and packed with personality. For this version, I dove into my stash of small Japanese florals, mainly from the fabulous Atsuko Matsuyama, pairing a pink and aqua Dresden plate with a bright yellow center for a pop of cheer. The base? Sweet polka dots, finished with aqua gingham binding for a classic touch!Inside, I added fruit labels and appliqués for extra charm, and the felt pages (in a stunning pink wool felt!) keep pins and needles neatly in place. Plus, with two internal pockets, there’s space for all those little sewing essentials.The Dresden Needlebook has been one of my most-loved patterns this year! Want the pattern? Comment DRESDEN below, and I’ll send you a DM with the link! 🧵✨What are you sewing this week?#sewingpatterns #modernquilting #ʜᴀɴᴅᴍᴀᴅᴇᴡɪᴛʜʟᴏᴠᴇ #sewmuchfun #diycrafts #sewingaddict #creativemaker #sewinginspiration #fabriclover
Follow on Instagram

Featured Pattern

Travel Sewing Kit Pattern

Featured Tutorial

Retro Drawstring Bag

Featured Recipe

Lemon Pound Cake

Connect

  • Email
  • Facebook
  • Instagram
  • Pinterest
  • Threads
  • TikTok
SUBSCRIBE TO NEWSLETTER
×

Popular Posts

  • Liberty Tissue Cover
  • Pretty Liberty Drawstring Pouch
  • Sewing with Liberty Fabric
  • {Back to School} Tissue Cover
  • 10 Gifts to Sew for Mother’s Day
  • Pin Perfection: Everything you Need to Know about Sewing Pins
  • Charm Square Fabric Tray

Copyright © 2025 Lisa. K. Cox - A Spoonful of Sugar