A Spoonful of Sugar

Make. Bake. Create.

Menu
  • Home
  • About
    • About Us
    • Press
    • FAQ
    • Disclosure Policy
    • Contact Us
  • Crafts
    • Crochet
    • DIY
    • Embroidery/Cross stitch
    • Gift Wrapping
    • Knitting
    • Miscellaneous
    • Paper Crafts
  • Holidays
    • New Year’s
    • Australia Day
    • Back to School
    • Valentines Day
    • Easter
    • ANZAC Day
    • Mother’s Day
    • Father’s Day
    • Halloween
    • Christmas
  • Recipes
    • Appetizers
    • Bars & Slices
    • Bread & Pastries
    • Cakes
    • Cookies
    • Confectionery
    • Cupcakes & Muffins
    • Desserts
    • Drinks
    • Ice Cream
    • Jams/Preserves
    • Main Meals
  • Sewing
    • Sewing Tutorials
    • Quilting
    • Sewing & Quilting Patterns
  • Family
    • Back to School
    • Family Fun
    • Our Home
    • Parenting
    • Travel
  • Shop
    • Pattern Store
    • Etsy Store

Camping Fun!

April 15, 2010 By A Spoonful of Sugar - 21 Comments

I come from a very crafty family! About 12 years ago my parents used to have market stalls – Dad made lots of wooden toys (pull a longs, dolls cradles etc), and Mum specialised in painting the toys, as well as making dolls clothes and accessories. This was around the time my children, and my nieces and nephews were small so they always had plenty of wonderful toys to play with that Nan and Pop had made. Sarah’s dolls had the most beautiful clothing to be dressed in. One of Mum’s popular products was the Barbie Sleeping Bag. She even made one for my son’s, Action Man, so he wasn’t left out!

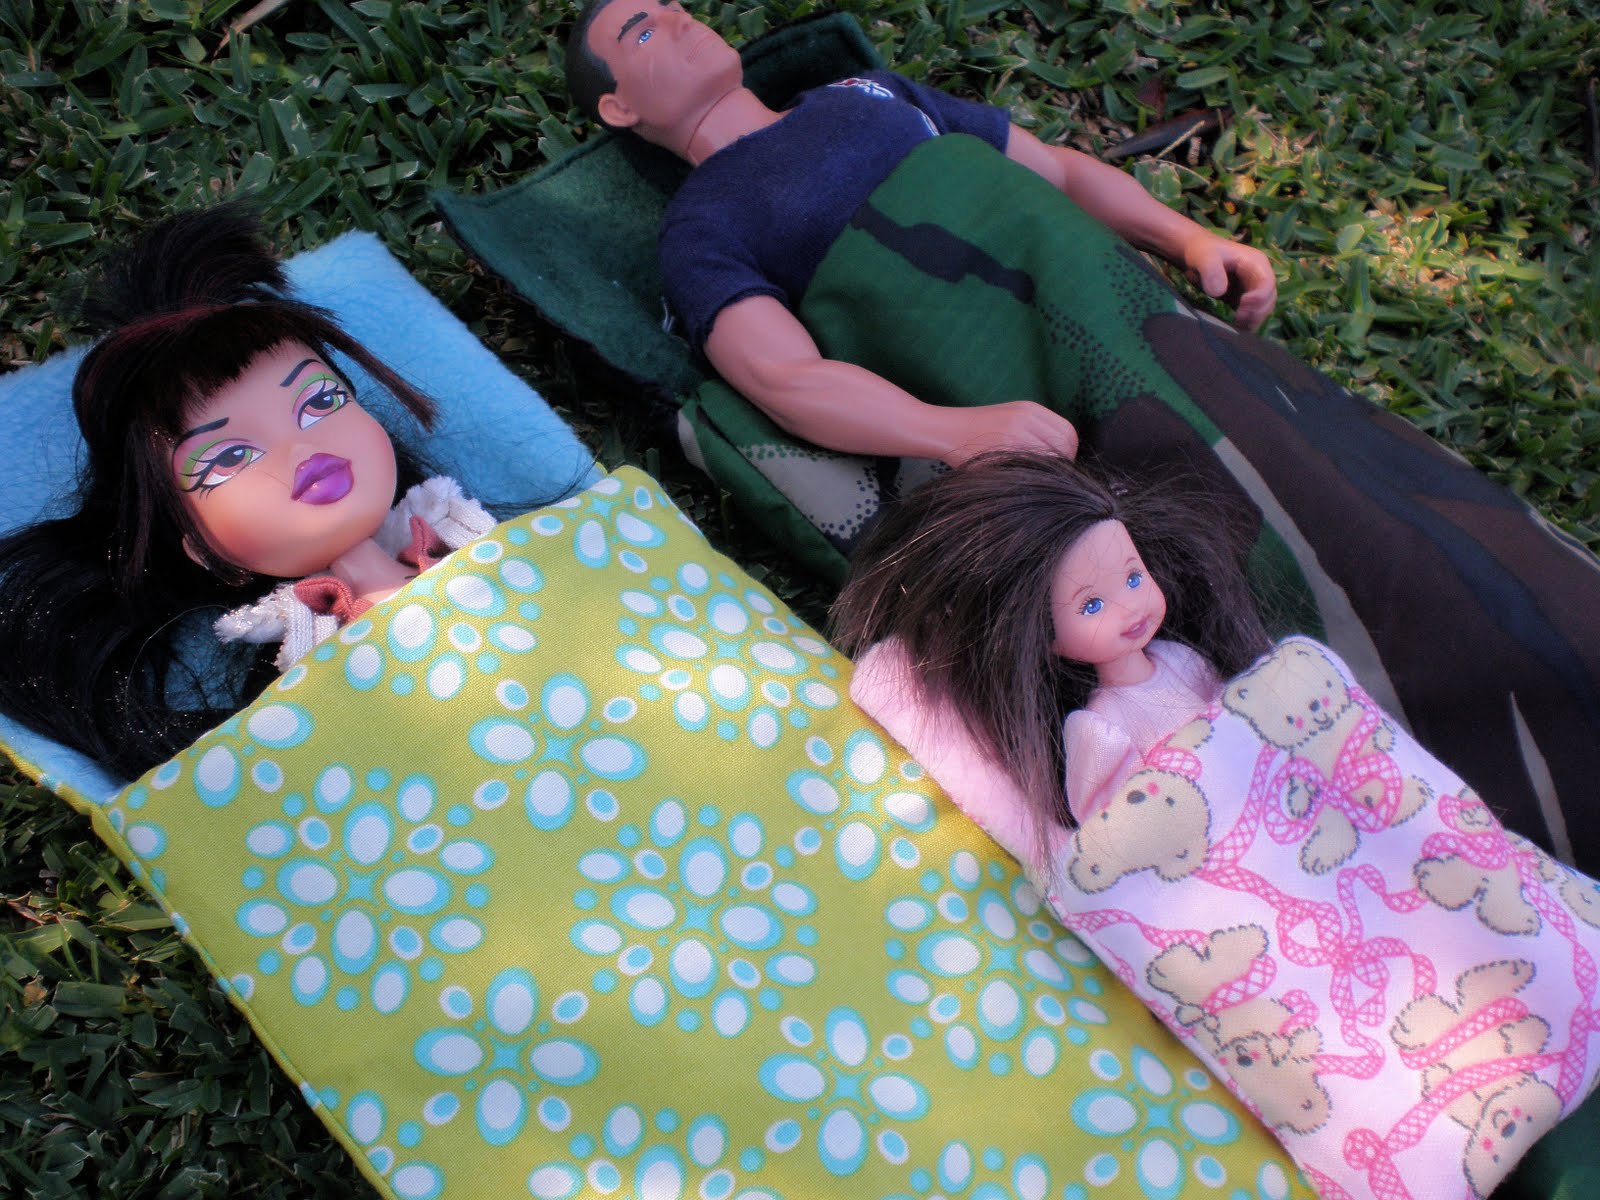
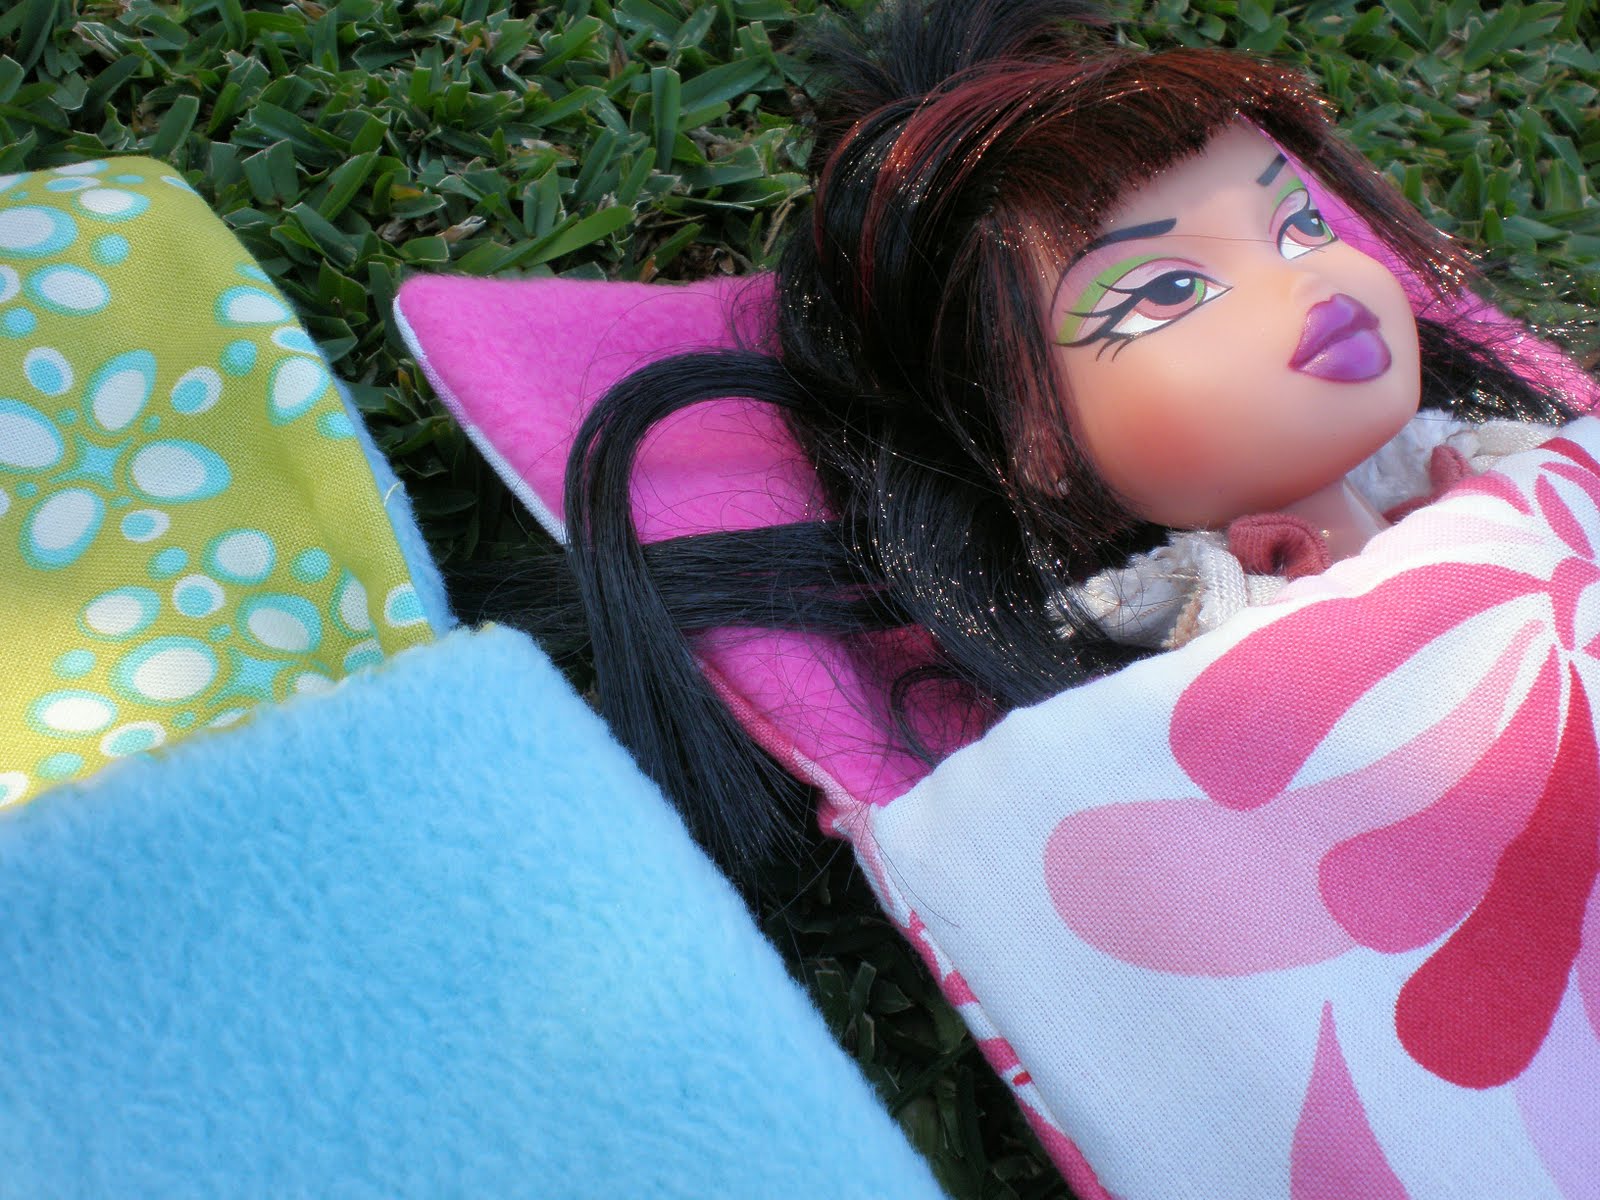
I made up a couple recently for a little friends Bratz dolls. I forgot to take photos of the process but it is fairly straight forward so will describe the steps in case you want to make one for yourself. The size can be adjusted to suit the size of the doll – they would look cute with Blythe dolls!

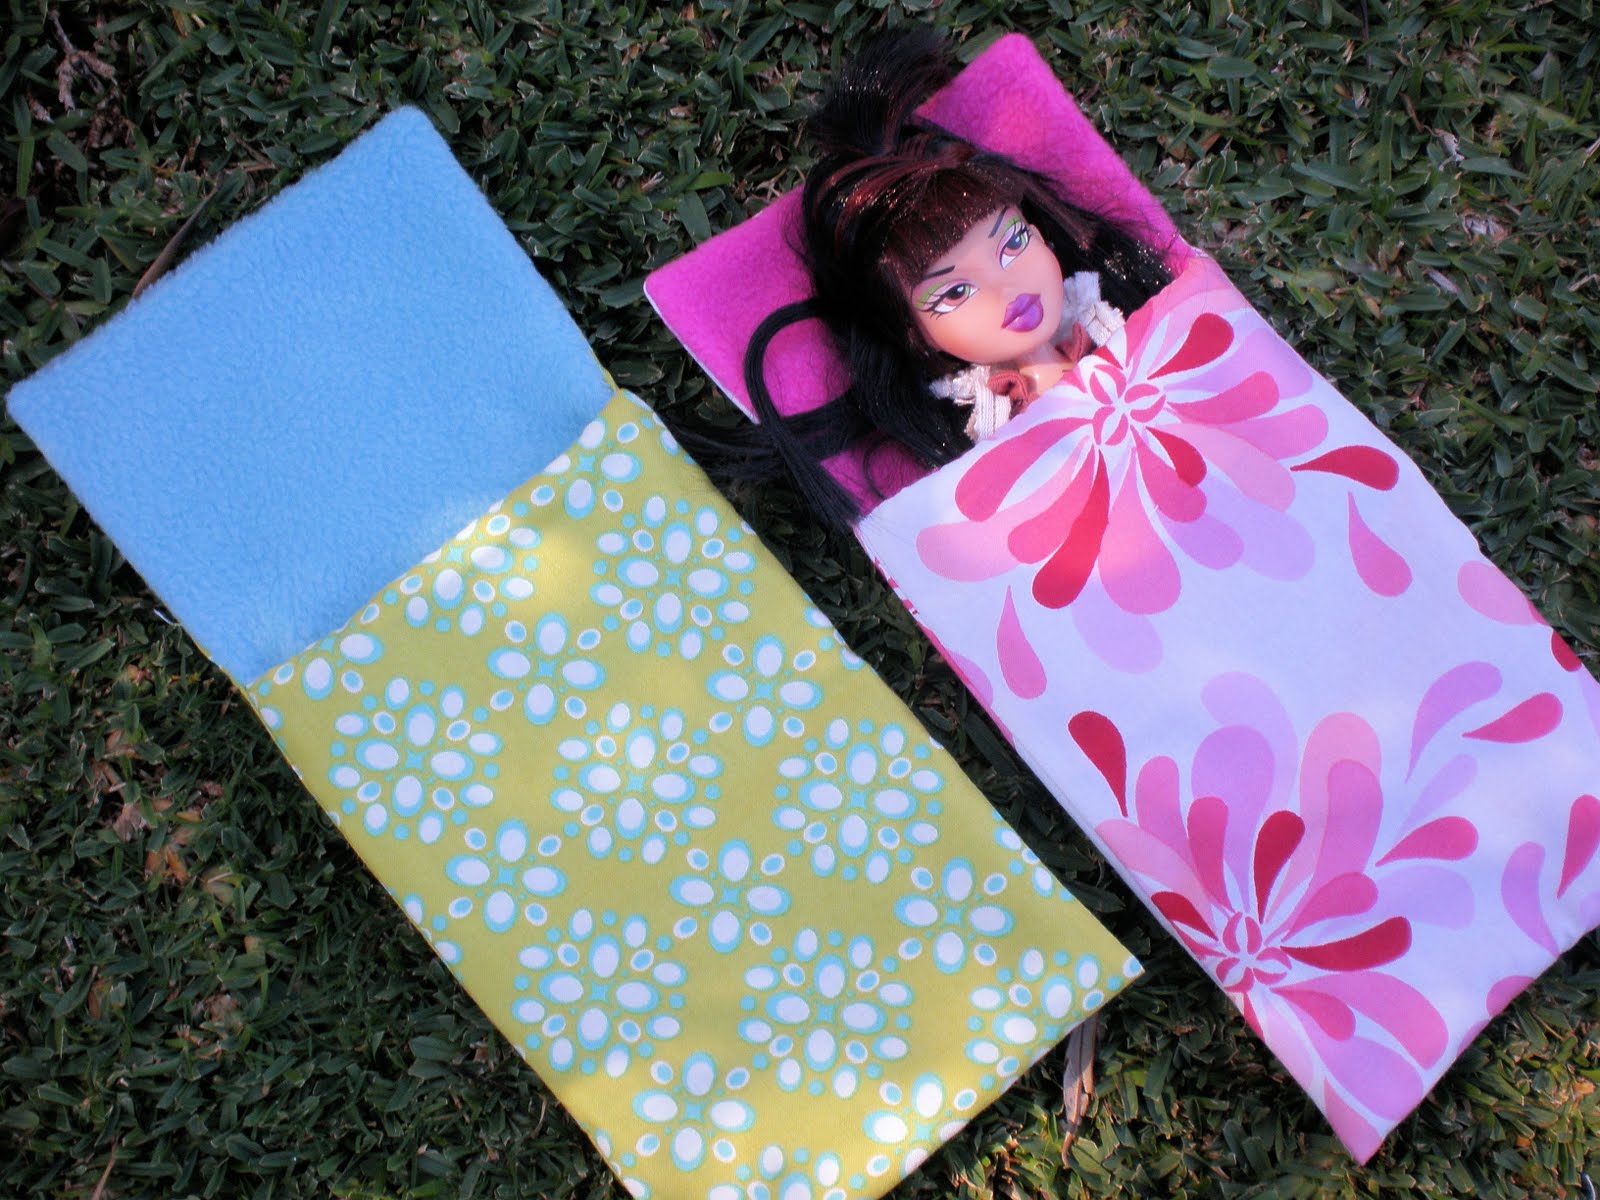
If you want to make some for a Bratz doll here is what you need:

  • Piece of polar fleece measuring 21 x 6 inches (53 x 15 cm)
  • Piece of quilting cotton measuring 21 x 6 (53 x 15 cm)
Lay out the fabric rectangles, and place a pin on each of the long edges, that is 12 1/2 inches (32 cm) from the end. Fold the rectangles of fabric with the right sides together where the pins are to form the sleeping bag shape (ie sleeping bag with an extra flap piece at the top to sit under the dolls head – refer to photo). With a 1/2 inch (1.2 cm) seam allowance, sew the side seams. Turn the cotton fabric piece out the right way. Place it inside the polar fleece piece so the right sides are facing, and pin at the side seams. Sew the  two pieces together along the sides and top of the flap piece. Clip corners, and turn out the right way through the gap in the front of the sleeping bag. Hand stitch the opening closed.
They are fully reversible for double the fun.
Super quick and super fun !
Sarah and I are having a great mail week! Our order from Kyoto General Store arrived a couple of days ago. Don’t forget that they have an offer for free shipping for the month of April and a special bonus for A Spoonful of Sugar readers. 
I also received a fabric order from Hancocks – Paducah – some lovely Hunky Dory, destined to be a quilt
and a few other pieces I couldn’t live without!
I am a bit behind on my emails this week – I have a few submissions I am busily working on but hope to catch up soon!
Posted by Lisa

Filed Under: Sewing Tutorials

« Things that Inspire……
Kids Craft: Decorated Candles and Matches – Mothers Day Project »

Comments

  1. randi says

    April 16, 2010 at 6:07 am

    those sleeping bags are just too cute. my daughter would have a blast with those!

    Reply
  2. Cheryl says

    April 15, 2010 at 10:13 pm

    How cute are those little sleeping bags…and very yummy mail goodies!

    Reply
  3. Posie Patchwork says

    April 15, 2010 at 11:32 pm

    Love the haul from Japan, anything Babushka is a winner for me!! Love Posie

    Reply
  4. Anita says

    April 16, 2010 at 12:33 am

    Hi there girls! The sleeping bags are sweet and it’s really nice to see old Action Man hasn’t missed out on a sleeping bag. I always laugh when I see the lips on the Bratz dolls, the girls love them. Kind regards, Anita.

    Reply
  5. meri says

    April 16, 2010 at 12:57 am

    What a good idea! And so easy to do!
    Beautiful shoppings 🙂
    Have a great weekend!

    Reply
  6. sewtakeahike says

    April 16, 2010 at 3:42 am

    Those little sleeping bags are so cute Lisa! We are actually going camping tonight and kayaking tomorrow but I’m taking the quilt I just made instead of our sleeping bags. A quilt is just a little cozier for cuddling!

    Reply
  7. Stephanie says

    April 16, 2010 at 4:14 am

    My son LOVED GI Joe when he was young. The camoflauge sleeping bag would have been perfect. It’s evident your family has a crafting gene.

    Reply
  8. Terriaw says

    April 16, 2010 at 5:39 am

    These are adorable. Reminds me of the sleeping bags and comforters I used to make for my barbie dolls when I was a little girl! Mine weren’t as posh to have fleece lining. Love your fabric shopping selections, especially the ones with the numbers and words.

    Reply
  9. suzitee says

    April 16, 2010 at 5:43 am

    Happy mail makes any week great! Love love love your Kyoto General Store goodies…but I’m not game to go shopping there! Too much cuteness 🙂 The new fabrics are divine…can’t wait to see them made up!

    Reply
  10. Tracy says

    April 16, 2010 at 6:15 am

    That is sooo CUTE! I can see making these for our nieces–thank you!! Fabric goodness… DELICIOUS! Happy Weekend ((HUGS))

    Reply
  11. Laura in Paris says

    April 16, 2010 at 6:25 am

    so talent goes from one generation to the other!!

    Reply
  12. Janellybelly says

    April 16, 2010 at 6:26 am

    I love your Kyoto & Fabric purchases (especially the Babushkas – I really do have an addiction). Speaking of addictions, I went to Balcatta TT today 🙂
    Janelle xx

    Reply
  13. em's scrapbag says

    April 16, 2010 at 1:33 pm

    The dolls look so cozy in there sleeping bags.
    You found some lovely fabric.

    Reply
  14. Little Lady Patchwork says

    April 16, 2010 at 5:14 pm

    Hi Lisa!

    Thanks for sharing the sleeping bag idea. I know lots of little girs (& Blythe fans) that would love to have one of those! You just gave me an idea :0)

    Luv the fabric purchses also :0)

    Reply
  15. Deanna says

    April 18, 2010 at 2:02 pm

    Oh boy oh boy, it’s been a long time since I’ve bought some really good fabric…I’m drooling over your stash!

    And cute sleeping bags…we have a sleeping bag on me and my daughter’s to do list of things to make for her AG doll…but pj’s are first. 🙂

    Reply
  16. Jill and Michelle says

    April 18, 2010 at 10:26 pm

    Great sleeping bags for the dolls! My project next week is a camping set for my 2 daughters’ barbie and bratz dolls! This should help me get started!

    Thanks ! 🙂

    Jill

    Reply
  17. Carrie P. says

    April 20, 2010 at 12:32 pm

    Beautiful fabrics and those little sleeping bags are too cute.

    Reply
  18. periwinkle says

    April 21, 2010 at 4:18 am

    can’t wait to see what you do with the word fabric – love it

    Reply
  19. Jenny says

    April 21, 2010 at 4:22 pm

    Even Action Man needs some warmth and comfort on those cold nights! Cute sleeping bags and what lovely goodies you received

    Reply
  20. Shannon says

    April 22, 2010 at 8:02 am

    Thanks for the sleeping bag directions. My nieces will love these! And I am looking forward to seeing that quilt…

    Reply
  21. Jill and Michelle says

    April 26, 2010 at 9:31 pm

    Just wanted to let you know I had a go at the sleeping bags (or rather Barbie and Bratz did! and put a link to your blog from mine!

    http://jembellish.blogspot.com/2010/04/dolls-take-charge-part-one.html

    Thanks again!

    Jill

    Reply

Leave a Reply Cancel reply

Your email address will not be published. Required fields are marked *

  • Email
  • Facebook
  • Instagram
  • Pinterest
  • Threads
  • TikTok
SUBSCRIBE TO NEWSLETTER
×

Categories

Archives

PURCHASE PDF PATTERNS

We offer over 100 affordable PDF sewing patterns available for download from our store website or Etsy store. Each pattern includes detailed instructions, numerous photos, and templates.

WEB STORE ETSY STORE

Instagram

A tiny pyramid that does it all — a pattern weight A tiny pyramid that does it all — a pattern weight for your sewing table, a book weight for cosy reading, or a scented sachet for your drawers. Small, sweet, and so satisfying to sew. Comment PYRAMID for the free pattern.Fabric: Something Blue by Tilda
@tilda_australia#sewingproject #tildafabric #beginnersewing #scrapsewing #Tildasomethingblue
Meet the sweetest little project you can sew in mi Meet the sweetest little project you can sew in minutes — the Pyramid Weight. Use it as a pattern weight, scented sachet, or even a book weight… all from one triangle of fabric. Comment PYRAMID for the free pattern.Fabric is Something Blue by Tilda, releasing 1 June 2026 — with thanks to @tilda_australia.#tildasomethingblue #tildafabric #freepattern #sewingtutorial #sewinglove
The Scrappy Strips Pouch is one of my favourite wa The Scrappy Strips Pouch is one of my favourite ways to use up leftover fabric strings. Today’s version is made from patchwork strips — a fun, relaxing sew that turns scraps into something beautiful and practical.The Scrappy Strips Pouch pattern has two versions - patchwork strings and selvedges - and two sizes. Comment SELVEDGE (or SELVAGE) for a link to the pattern.Pattern Details: Scrappy Strips Pouch Sewing Pattern is in our Pattern Store and Etsy Shop.#ScrappyStripsPouch #ScrapBustingSewing #PatchworkPouch #StringQuilting #SewingProjects
If you’ve ever wanted to add eyelets or grommets t If you’ve ever wanted to add eyelets or grommets to your sewing projects, here’s a quick look at how I install them using my DK93 snap press. It’s the same tool I use for snaps — and it makes installing eyelets beautifully quick and consistent.Here’s how I install the eyelets:Punch out the four holes using a hole‑cutting die.Place the eyelet into the hole.Press it into place using the snap press.That’s it — simple, sturdy, and it gives the Ribbon Pouch such an elevated, professional finish. I love how clean and secure the result is.Fabric shown: Tilda Something Blue, releasing June 1 — thank you @tilda_australia for the beautiful fabric.✨ If you’d like the Ribbon Pouch pattern (3 sizes), comment RIBBON and I’ll send the link straight to you.Ribbon Pouch Sewing Pattern: available in my Pattern Store and Etsy Shop (links in profile).#tildasomethingblue #tildafabric #sewingtips #handmadeeveryday #sewingtools
The Ribbon Pouch is one of my favourite quick‑to‑s The Ribbon Pouch is one of my favourite quick‑to‑sew gift bags, and I couldn’t resist making a light and dark version using the new Tilda Something Blue collection. Both pouches use the same print in different colourways — such a pretty way to show how fabric choice changes the whole mood.They’re finished with satin ribbon threaded through grommets, and topped with a tiny star tag. The boxed base helps them stand beautifully, and the ribbon closure makes them perfect for birthdays, thank‑you gifts, treats, or little treasures.This is a beginner‑friendly, scrap‑friendly, quick project you’ll want to sew again and again. Pattern includes 3 sizes.If you’d like the pattern, comment RIBBON and I’ll send the link straight to you.Pattern Details: Ribbon Pouch (3 Sizes) available in my Pattern Store and Etsy Shop.Fabric Details: Tilda Something Blue - releasing on 1 June 2026. Thanks to @tilda_australia#TildaSomethingBlue #TildaFabric #SewingPattern #BeginnerSewingProject #QuickSewingProject   
Sewing with scraps is one of my favourite ways to Sewing with scraps is one of my favourite ways to get creative — small pieces, leftover corners, charm‑square offcuts… they all have so much potential.Here are 10 scrap‑friendly projects that use small pieces beautifully. They’re quick to sew, beginner‑friendly, and perfect for gifting ✂️✨Save this for the next time you want to turn your scraps into something pretty.Which one would you sew first?  Tell me in the comments — I love seeing what you’re making.Patterns are available in my pattern store (link in profile) or comment PATTERNS and I will send you the link. #scrapsewing #scrapbusting #scrapfriendly #sewinginspiration #sewingideas
Follow on Instagram

Featured Pattern

Travel Sewing Kit Pattern

Featured Tutorial

Retro Drawstring Bag

Featured Recipe

Lemon Pound Cake

Connect

  • Email
  • Facebook
  • Instagram
  • Pinterest
  • Threads
  • TikTok
SUBSCRIBE TO NEWSLETTER
×

Popular Posts

  • Cord Cosy
  • Tips for Threading a Needle
  • Travel Accessories to Sew
  • Liberty Tissue Cover
  • Charm Square Fabric Tray
  • Happy Scrappy Cards
  • Life Lessons from Sewing and Quilting

Copyright © 2026 Lisa. K. Cox - A Spoonful of Sugar