A Spoonful of Sugar

Make. Bake. Create.

Menu
  • Home
  • About
    • About Us
    • Press
    • FAQ
    • Disclosure Policy
    • Contact Us
  • Crafts
    • Crochet
    • DIY
    • Embroidery/Cross stitch
    • Gift Wrapping
    • Knitting
    • Miscellaneous
    • Paper Crafts
  • Holidays
    • New Year’s
    • Australia Day
    • Back to School
    • Valentines Day
    • Easter
    • ANZAC Day
    • Mother’s Day
    • Father’s Day
    • Halloween
    • Christmas
  • Recipes
    • Appetizers
    • Bars & Slices
    • Bread & Pastries
    • Cakes
    • Cookies
    • Confectionery
    • Cupcakes & Muffins
    • Desserts
    • Drinks
    • Ice Cream
    • Jams/Preserves
    • Main Meals
  • Sewing
    • Sewing Tutorials
    • Quilting
    • Sewing & Quilting Patterns
  • Family
    • Back to School
    • Family Fun
    • Our Home
    • Parenting
    • Travel
  • Shop
    • Pattern Store
    • Etsy Store

Monogrammed Gift Tags

December 4, 2009 By Spoonful of Sugar - 21 Comments

Christmas is my favourite time of year and I really look forward to creating all the little finishing touches that add to the magic of the season. Simple is the theme for all my Christmas projects this year as I seem to be short on time.


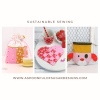
To fit in with my theme of red and white wrapping, I have made up some monogrammed gift tags using basic white shipping labels, some polka dotted scrapping booking paper, some red and white cut outs, and silver letters. They were assembled in next to no time!

I recently spent an enjoyable day with a special friend, teaching her to make a reversible tree skirt (something that has been on my Christmas list for years!).


Sarah and I were lucky enough to win a fantastic giveaway on Sheri Howard Designs recently. We won a copy of her book, Ruby Red Books, which features some wonderful applique designs. Sheri also included some fabrics that she used in her designs. Thanks again Sheri – it is a most inspiring book and will be a great addition to our quilting library.


We also received a package of Christmas candy from Myriam – much appreciated!


Posted by Lisa

Filed Under: Christmas

« Charming Ornaments – Part 2 – How To
A Lifesaver at Christmas Time….. »

Comments

  1. two hippos says

    December 5, 2009 at 1:59 am

    The gift tags are lovely, I am really going to have to invest in a few paper punches! The tags are a paerfect finishing touch.

    Reply
  2. Cassie @ You Go Girl says

    December 5, 2009 at 2:49 pm

    Love the tags. Love the red and white. A theme…I wish I could pull it off. I think my theme is Anything Goes…Make it Merry! LOL!

    Reply
  3. clare's craftroom says

    December 5, 2009 at 12:54 am

    Love your tags Lisa , funny I seem to be having a red and white theme going this year too .

    Reply
  4. Jodie says

    December 5, 2009 at 1:11 am

    Those tags are great …OMG a theme ????
    Does tired and distracted work as a theme???

    Reply
  5. Anne Heidi says

    December 5, 2009 at 2:18 am

    The tags are so cute! And the treeskirt too… Love that book, I bought it myself in Houston!

    Reply
  6. Cathy says

    December 5, 2009 at 4:34 am

    Love your gift tags Lisa, they look so professional and finish off your package so beautifully, thanks for sharing xo

    Reply
  7. texmorg says

    December 5, 2009 at 4:51 am

    Lisa your tags are gorgeous. You are so organised, I am still finishing my cards.
    xx Linda

    Reply
  8. LollyChops says

    December 5, 2009 at 7:44 am

    I love those tags and I wanted you to know that I ordered that little flourish punch because of you girls (those tea bag holders from a while back really inspired me).

    I have already started using it in my Christmas projects!!!!

    Holiday HUGS!

    Reply
  9. Celestial Charms says

    December 5, 2009 at 8:04 am

    Love the tags. I’m doing red & white this year for decorating. What a great idea to put on the initial for the tags. I think Santa is going to copy your idea this year, for easy sorting purposes under our Christmas tree. 😉
    Maureen

    Reply
  10. Mom's Place says

    December 5, 2009 at 9:12 am

    LOVE the tags!!! Great idea! I actually was thinking of doing something like this!

    Reply
  11. Thimbleanna says

    December 5, 2009 at 3:39 pm

    Very, very cool tags Lisa! I need to borrow them — they’ll look great with my new red and white theme LOL. I’m looking forward to making some tags this year and those are super cute!

    Reply
  12. Brenda @Cozy Little House says

    December 5, 2009 at 4:38 pm

    These are the cutest tags! Who wouldn’t enjoy a gift with that added to it?
    Brenda

    Reply
  13. Terriaw says

    December 5, 2009 at 4:42 pm

    I love love love your reversible tree skirt! That is a project that has been on my list for years too. I would love to make one just like that, especially with the cute binding finishing it off so nicely. Maybe one of these days, I’ll get to it.

    Love the idea of monogrammed gift tags too. I love simple!

    Reply
  14. Kristin says

    December 5, 2009 at 6:02 pm

    Those monogram gift tags are SO precious!

    Reply
  15. Chocolate Cat says

    December 5, 2009 at 11:51 pm

    I have a red and white theme too this year and these tags are a great idea for the bonbons I am making. Thank you.

    Reply
  16. myriam says

    December 6, 2009 at 4:09 am

    Hi hi,
    I am happy to hear that your goodies reached you – I was not really convinced of it. Wish you a peaceful time til Christmas Hugs Myriam

    Reply
  17. Shannon says

    December 6, 2009 at 9:02 am

    Love, love, LOVE that reversible tree skirt! I wish that I was your neighbor so that you could teach me to make one! 🙂 I am also completely smitten with those tags. Red/White is my very favorite color combo (Christmas or anytime), and these are lovely. I will be popping back to gaze at this post many times, I am sure!

    (p.s. congrats on the fun win!)

    Reply
  18. Shiree says

    December 6, 2009 at 11:57 am

    now those gift tags are a really neat idea, hmmmm

    Reply
  19. Cascade Lily says

    December 7, 2009 at 4:17 am

    Love the tags – what kind of adhesive do you use?

    A tree skirt is on my never-ending list too…

    Reply
  20. Handmade in Israel says

    December 7, 2009 at 5:02 am

    Oh, I love those tags! I get the feeling the receiving a beautifully wrtapped gift from you must be so exciting!

    Reply
  21. QuiltedSimple says

    December 7, 2009 at 8:20 am

    Love the gift tags – I’m HOPING to make my own this year – we’ll see how far I get:)
    Kris

    Reply

Leave a Reply Cancel reply

Your email address will not be published. Required fields are marked *

  • Email
  • Facebook
  • Instagram
  • Pinterest
  • Threads
  • TikTok
SUBSCRIBE TO NEWSLETTER
×

Categories

Archives

PURCHASE PDF PATTERNS

We offer over 100 affordable PDF sewing patterns available for download from our store website or Etsy store. Each pattern includes detailed instructions, numerous photos, and templates.

WEB STORE ETSY STORE

Instagram

Adding a handmade label is one of my favourite way Adding a handmade label is one of my favourite ways to personalise a project — and these little fabric + felt labels are so quick and satisfying to make.For this Ribbon Pouch, I used the Liberty Gifts from the Garden collection, which has the sweetest fruit motifs. They make perfect tiny labels for pouches, bags, and gifts.Here’s how to make your own:Press a piece of double‑sided fusible web to the back of your fabric.Cut around your chosen motif.Peel off the paper backing.Press the motif onto wool felt.Trim the felt with scalloped scissors.Sew the label onto the front of your pouch.Such a simple detail, but it adds so much charm. Fabric kindly gifted by @regent_street_fabrics — thank you!If you’d like to sew the Ribbon Pouch (3 sizes), comment RIBBON and I’ll send the pattern link straight to you.#SewingInspiration #FabricLabels #DIYLabels #LibertyFabric #LibertyGiftsFromTheGarden
A lot can change in 10 years ❤️ It’s been fun look A lot can change in 10 years ❤️ It’s been fun looking back at where I was in 2016 and how far life has come since then. Swipe for a little trip down memory lane.Back in 2016, my priorities were firmly centred around family. I was working full‑time, sewing in the guest room, sharing tutorials on my blog, and slowly dipping my toes into selling a handful of patterns on Etsy. It was a busy, full season — and creativity was something I fitted in around everything else.  Fast forward to 2026… I’m now retired and living the creative life I once dreamed of. My kids have grown up and are living in their own homes nearby. My husband and I are free to travel, explore, and enjoy this stage of life. And I get to spend my days designing, sewing, and connecting with this beautiful community.Life looks different now — in the best possible way.Were you following me back then, or what has changed for you over the past 10 years? I’d love to hear your story too.Tagging the lovely makers of my quilt: @arabesquescissors @ministryoffabric @belloquacity @alittlepatchwork @sameliasmum coleandtaffy @quiltymamaof4 @shequiltsalot @downgrapevinelane @lizzierosesews @lovethatfabric @sew_mimi.k #2026isthenew2016 #10yeartransformation #sewingjourney #sewingcommunity #aspoonfulofsugardesigns
Fall in love with sewing all over again ❤️I’ve Fall in love with sewing all over again ❤️I’ve rounded up 10 heart‑themed makes — from quick gifts to charming quilt blocks — perfect for weekend stitching or using up your favourite scraps. Whether you’re sewing for Valentine’s Day, birthdays, or just because, there’s something sweet for every maker.Comment HEART and I’ll send you a link to my Heart Pattern Collection.#sewingproject #heartsewing #quiltblock #scrapsewing #easytosew
Raw edge appliqué doesn’t have to feel fiddly or i Raw edge appliqué doesn’t have to feel fiddly or intimidating. With a few simple techniques, you can create neat, crisp shapes — even tiny details like penguin beaks and hearts.I’ve put together My Top 5 Secrets for Raw Edge Appliqué to help you feel confident, whether you’re brand new to appliqué or looking to refine your finish. Save this for your next sewing session.If you’d love a quick, beginner‑friendly project to practise these tips, my Penguin Love Mugrug is the sweetest Valentine’s make — scrap‑friendly, gift‑ready, and such fun to sew.Comment PENGUIN and I’ll send you the link to the pattern. Available now in our Pattern Store and Etsy shop.  #rawedgeapplique #appliquetips #sewingtipsandtricks #mugrugpattern #penguinlove
If you’ve ever wanted to add eyelets or grommets t If you’ve ever wanted to add eyelets or grommets to your sewing projects, here’s a quick look at how I install them using my DK93 snap press. It’s the same tool I use for snaps — and it makes installing eyelets beautifully quick and consistent.For this Ribbon Pouch, I used the Liberty Gifts from the Garden collection (printed on Lasenby cotton and released in January 2026). The colours and motifs pair so well with the little ribbon tie detail.Here’s how to install the eyelets:Punch out the four holes using a hole‑cutting die.Place the eyelet into the hole.Press it into place using the snap press.That’s it — easy peasy, and it gives the pouch such an elevated, professional finish. I love how clean and sturdy the result is.Fabric is Gifts from the Garden by Liberty - kindly provided by @regent_street_fabrics — thank you!If you’d like the Ribbon Pouch pattern (it comes in 3 sizes), comment RIBBON and I’ll send the link straight to you.Ribbon Pouch Sewing Pattern: available in our Pattern Store and Etsy shop ( links in profile).#SewingInspiration #SewingProjects #Eyelets #Grommets #SnapPress
The Twirling Treasures Hot Pad & Placemat Set show The Twirling Treasures Hot Pad & Placemat Set showcases one of my favourite FPP designs — a stunning kaleidoscope‑style block that always turns out beautifully. Kaleidoscope blocks are some of my most popular FPP patterns, and this set is such a fun way to use them.  This set includes six sizes, making it incredibly versatile: use them as hot pads, trivets, placemats, or simply as a way to add a pop of colour to your kitchen.For these samples, I went with a monochromatic scrap‑busting approach, pairing fabrics from the same colour family with a low‑volume background. The black‑and‑white striped binding adds such a crisp, modern finish. It’s a wonderful project for building your FPP confidence — and a fantastic way to use up those treasured scraps.The Twirling Treasures Hot Pad set is our Pattern of the Week. It is currently 25% off this week in our Pattern Store and Etsy Shop.If you’d like to sew your own set, comment TWIRL and I’ll send the pattern link straight to you.Happy sewing! Lisa 🌸#FoundationPaperPiecing #Quilting #HotPads #ScrapBuster #KitchenSewing
Follow on Instagram

Featured Pattern

Travel Sewing Kit Pattern

Featured Tutorial

Retro Drawstring Bag

Featured Recipe

Lemon Pound Cake

Connect

  • Email
  • Facebook
  • Instagram
  • Pinterest
  • Threads
  • TikTok
SUBSCRIBE TO NEWSLETTER
×

Popular Posts

  • Charm Square Fabric Tray
  • Merry Little Christmas Sewing Projects
  • {Back to School} Tissue Cover
  • Hexagon Fabric Tray
  • Raw Edge Applique Tips
  • Sewing Gifts 101: Easy and Affordable Ideas for Your Crafty Friends
  • Finding More Time to Sew

Copyright © 2026 Lisa. K. Cox - A Spoonful of Sugar