What Are Dresden Plates?
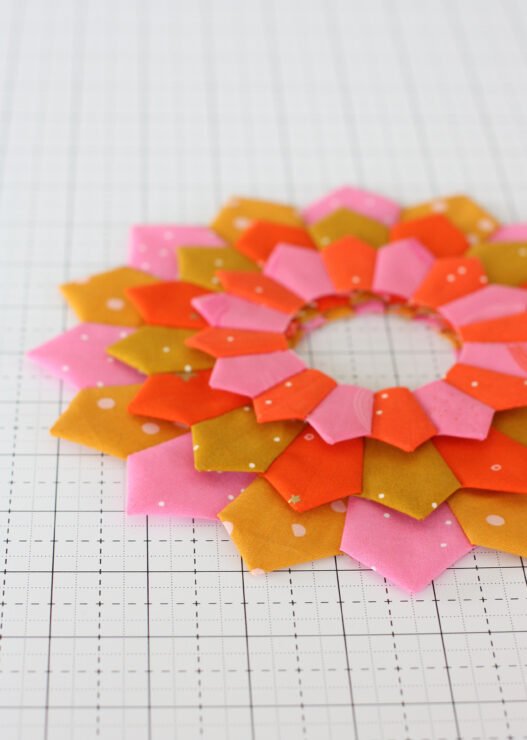
Dresden Plates are a classic quilt block design, consisting of fan-like fabric blades arranged in a circular pattern to create a stunning, flower-like motif. This timeless quilt block dates back to the early 1920s and gained popularity during the Great Depression, when quilters used fabric scraps to make decorative yet practical designs. The name originates from the elaborate porcelain plates produced in Dresden, Germany, which featured intricate floral patterns reminiscent of the quilt block’s shape.

Fabric Choices for Dresden Plates
The beauty of Dresden Plates lies in their versatility—you can create them in a scrappy mix or with carefully planned color gradients. Here are some fabric options to consider:
- Scrappy Look: Mix a variety of prints, solids, and textures to achieve a lively, vintage-inspired effect.
- Monochromatic: Use different shades of one color for a sophisticated, tone-on-tone style.
- Rainbow Effect: Blend bright solids or coordinating blenders to create a stunning burst of color.
- Florals & Prints: Choose floral or geometric prints to add movement and visual interest to each blade.
Top Tips for Perfect Dresdens
✨ 1. Precision Cutting – Use a rotary cutter and template to ensure consistent blade shapes. A well-cut blade will make piecing smoother and result in a polished design.
✨ 2. Accurate Folding – Take time to fold and press each blade carefully, achieving sharp and even tips for a clean finish.
✨ 3. Seam Alignment – Pin and stitch blades precisely to maintain symmetry and uniformity in your Dresden Plate.
✨ 4. Press with Care – Always press seams open or to one side, depending on your preference, to achieve a flat, professional finish.
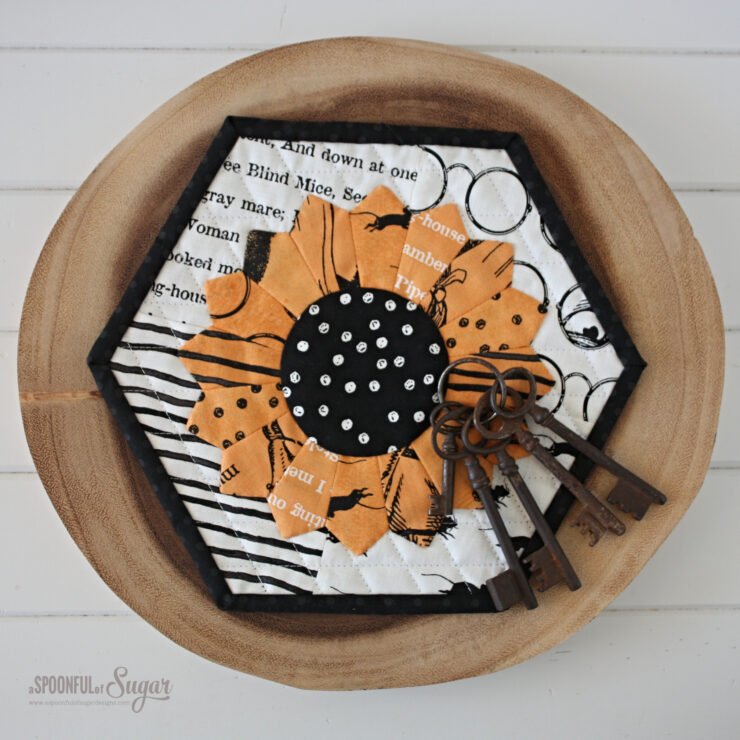
✨ 5. Flawless Centre Circle – The center circle completes the design, so take extra care in cutting and appliquéing it neatly.
✨ 6. Starch for Stability – Lightly spray your fabric with starch before cutting to prevent distortion and help maintain crisp edges.
✨ 7. Use Chain Piecing for Speed – When sewing multiple blades, chain piecing keeps momentum going and helps ensure consistency.
✨ 8. Experiment with Scalloped or Pointed Blades – Adding scalloped or pointed edges instead of rounded tips can enhance the uniqueness of your Dresden Plate.
✨ 9. Hand Appliqué for a Classic Look – If you love the traditional touch, consider hand-stitching your Dresden Plate onto your quilt background for a delicate effect.
✨ 10. Play with Layouts – Dresdens don’t have to be arranged in a traditional circular formation—half and quarter Dresden designs work beautifully for borders and modern layouts.

General Dresden Instructions:
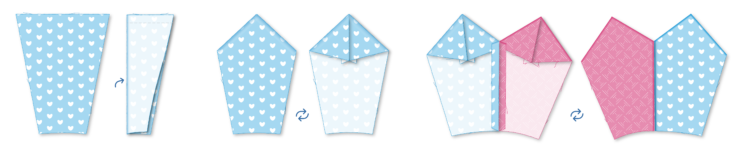
- Fold a wedge/blade in half lengthwise with the right sides facing and finger press or pin along the fold line. Using a ¼ inch seam allowance, stitch across the top edge of the wedge.
- Trim away 1/8th inch in the corner near the fold. Use a point turner to turn the wedge out the right way.
- Ensure the triangle point at the top of the wedge and the seam are centred along the finger pressed crease. This will result in even blades. Press. Repeat for all wedges.
- Arrange the wedges in a circle to work out the placement of fabrics/colours.
- Carefully line up two of the Dresden wedges with the right sides together and pin at the top and middle. Begin at the top and stitch together using a ¼ inch seam allowance. Backstitch at the top and bottom to secure. Press the seam allowance open or to one side. Continue adding blades until you have three sewn together. Repeat until you have 4 groups of three wedges. Then stitch each quarter together into a circle. Press so your Dresden plate is flat.
- Cut a circle from contrasting fabric for the centre using the template provided in your pattern. To prepare the centre circle, moisten the edges of the fabric circle with spray starch. Place the circle you prepared easier out of cardstock or use a Perfect Circle in the centre of the fabric circle on the wrong side of the fabric. Use the point of your iron to gently press the outside edge of the fabric circle so that it fits around the card. This will give you a neatly pressed circle for the centre of the Dresden.
- Hand stitch or machine stitch the Dresden to your project or quilt block. Stitch the centre circle in position.


Master these techniques and you’ll be stitching flawless Dresden Plates in no time!
Top 5 Tools for Perfect Dresden Plates
Having the right tools makes all the difference when sewing Dresden Plates. Here are five must-have tools to achieve precision, clean edges, and a flawless finish:
✨ 1. Dresden Ruler (Wedge Template) – A specialized ruler ensures consistent blade shapes and accurate sizing, making piecing much easier. Look for adjustable templates to create various Dresden sizes.
✨ 2. Point Turner – Essential for achieving crisp, sharp points on your Dresden blades. Use it to gently push out fabric tips before pressing for a polished look.
✨ 3. Small Rotary Cutter (28mm or 45mm) – A smaller rotary cutter gives you better control when cutting intricate wedge shapes, resulting in precise and clean edges.
✨ 4. Appliqué Pins or Glue Baste – These are perfect for securing your center circle before stitching, ensuring it stays in place and maintains a smooth finish.
✨ 5. Pressing Mat & Iron – A good pressing surface helps set seams neatly, and a high-quality iron ensures crisp folds and professional results in your final Dresden Plate.
Investing in these tools will make your Dresden projects easier and more enjoyable, leading to beautiful, well-crafted designs. Ready to put them to use? Check out our Dresden sewing patterns to start stitching today! ✨🧵

Dresden Needlebook – The Dresden Needlebook is a vibrant and functional sewing accessory, featuring two scrappy Dresden plates on the cover for a charming touch. With felt pages, two pockets for sewing essentials, and a convenient snap closure, it’s perfect for keeping your pins, needles, and tools secure—an ideal gift or a delightful addition to your own sewing kit!

Dresden Placemat (3 Sizes) – Dresden Placemats are perfect for a special afternoon tea and feature a “scrappy” Dresden plate with 16 petals and a coordinating centre, positioned on a low-volume hexagon. Whether you’re hosting a cozy tea party or adding a touch of elegance to your dining table, these placemats are sure to delight. Pattern is available in three sizes to suit all occasions – ideal for coasters/mug rugs, trivets, and full-sized placemats.
Creating beautiful Dresden Plates is all about precision, patience, and the right techniques. Whether you’re aiming for a traditional scrappy look or a modern monochromatic design, mastering these tips will help you achieve stunning results. With thoughtful fabric choices, careful piecing, and expert pressing, your Dresdens will truly shine. Be sure to check out our collection of Dresden quilt patterns, packed with step-by-step diagrams and expert tips to help you achieve stunning results.
Hello! Are you new here? If so, be sure to sign up for our newsletter here and receive a bonus sewing pattern and welcome discount. Our newsletter includes free tutorials, articles, and new patterns. Welcome to the world of sewing enthusiasts.
This post contains affiliate links. If you purchase through these links, I may earn a small commission at no extra cost to you. I only recommend products I love and use myself. Thank you for supporting my content!


What helpful tips!! I am going to try my hand at making some. this is keeper link.
Thanks so much Linda