A Spoonful of Sugar

Make. Bake. Create.

Menu
  • Home
  • About
    • About Us
    • Press
    • FAQ
    • Disclosure Policy
    • Contact Us
  • Crafts
    • Crochet
    • DIY
    • Embroidery/Cross stitch
    • Gift Wrapping
    • Knitting
    • Miscellaneous
    • Paper Crafts
  • Holidays
    • New Year’s
    • Australia Day
    • Back to School
    • Valentines Day
    • Easter
    • ANZAC Day
    • Mother’s Day
    • Father’s Day
    • Halloween
    • Christmas
  • Recipes
    • Appetizers
    • Bars & Slices
    • Bread & Pastries
    • Cakes
    • Cookies
    • Confectionery
    • Cupcakes & Muffins
    • Desserts
    • Drinks
    • Ice Cream
    • Jams/Preserves
    • Main Meals
  • Sewing
    • Sewing Tutorials
    • Quilting
    • Sewing & Quilting Patterns
  • Family
    • Back to School
    • Family Fun
    • Our Home
    • Parenting
    • Travel
  • Shop
    • Pattern Store
    • Etsy Store

Folded Star Ornament

October 26, 2013 By A Spoonful of Sugar - 13 Comments

After making our Folded Star Mat, we wanted to use the same fabric technique to make a Christmas Folded Star Ornament. These are fun Christmas ornaments to make and there are lots of colourful examples of Folded Star Ornaments on pinterest. All it takes is folding and pressing the fabric pieces, and then pinning them into place on a polystyrene ball. There is no sewing involved.

Materials:

  • polystyrene ball (7 inch circumference, approx 3 inch in height)
  • fat 1/8th of three fabrics – dark, medium, and light.
  • sequin pins
  • ribbon
  • fabric glue pen

Method for Folded Star Ornament:

Prepare the fabric by cutting:
  • Medium fabric (blue) – cut 10 squares measuring 2 1/2 inches
  • Light Fabric (grey) – cut 16 square measuring 2 1/2 inches
  • Dark Fabric (red) – cut 16 squares measuring 2 1/2 inches
Refer to our tutorial on the Folded Star Mat to see how to press the fabric pieces prior to pinning them in place. Press all the fabric squares into triangles.
Open up a piece of medium fabric (blue) and pin in place on the ball. Position four of the triangle of the same colour in place on top of the square to form the inner star. Turn the ball over and repeat for the other side of the ball.
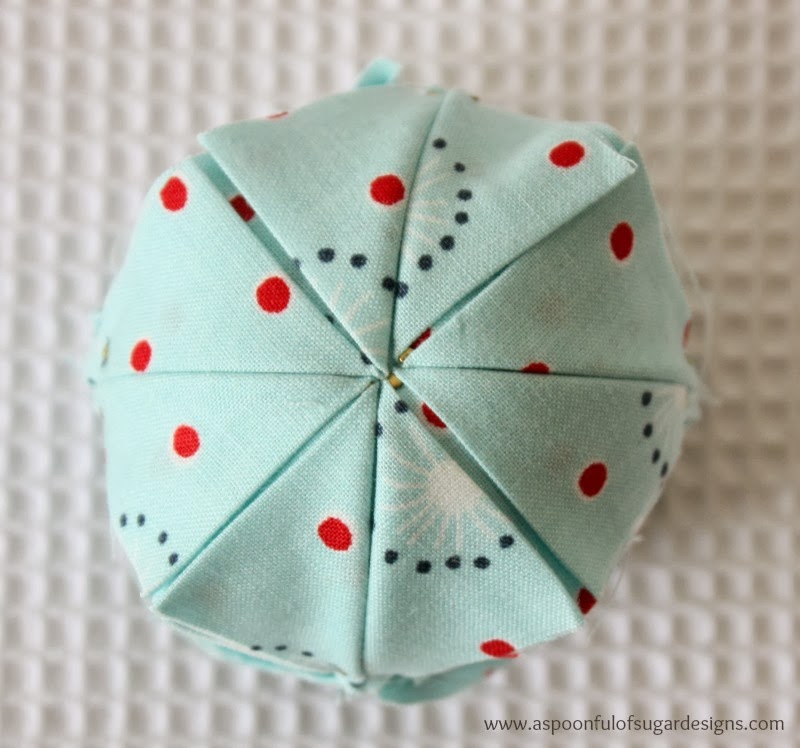
Pin the grey fabric triangles in place, positioning them approx 1/2 inch from the centre point of the blue star. Repeat for both sides of the ball.
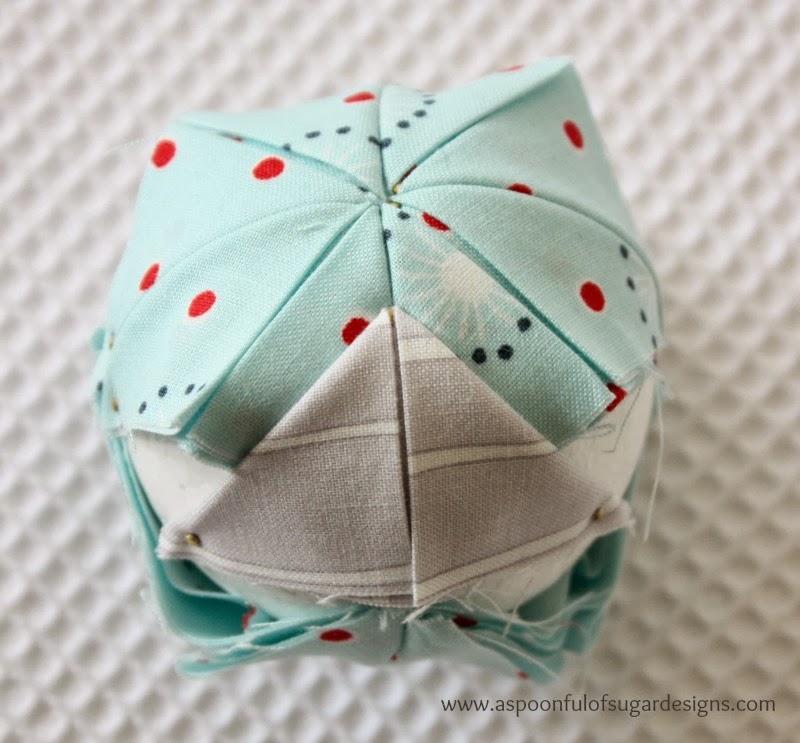
Pin the red triangles in place for the final round.
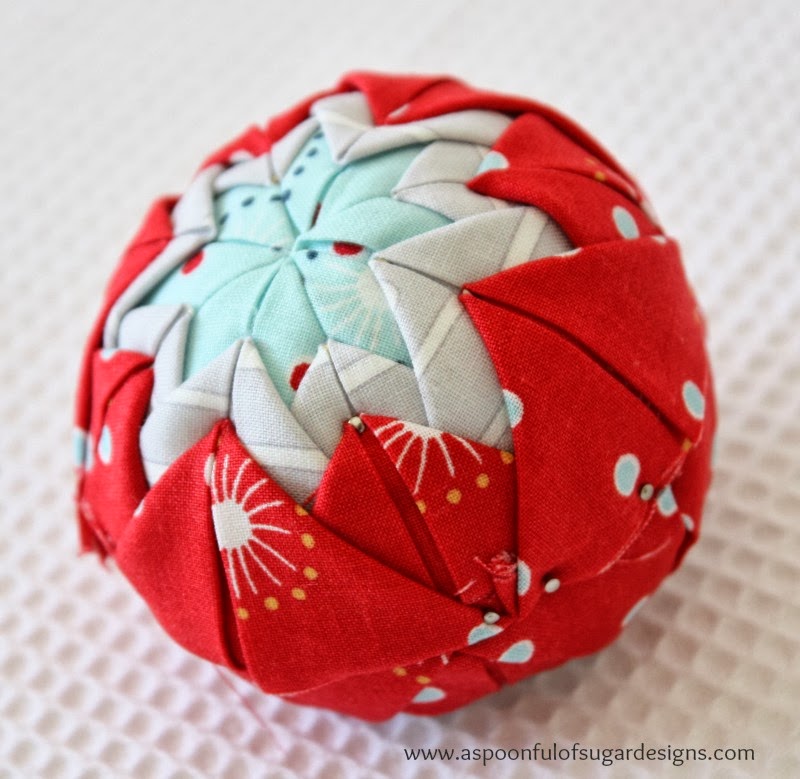
Use fabric glue to glue some ribbon around the centre of the ornament, covering up the raw edges of the fabric. Allow to dry. Pin a small piece of ribbon to the top of the ornament to create a hanging loop.
The Folded Star Ornament is a fun technique and would be a suitable project for older children to make for Christmas. Experiment with different fabric colour combinations to make some original decorations for your Christmas tree. You don’t need to use Christmas fabric, any patterned fabric in Christmas colours will work well, so it is a great stash buster project to use up little fabric scraps.
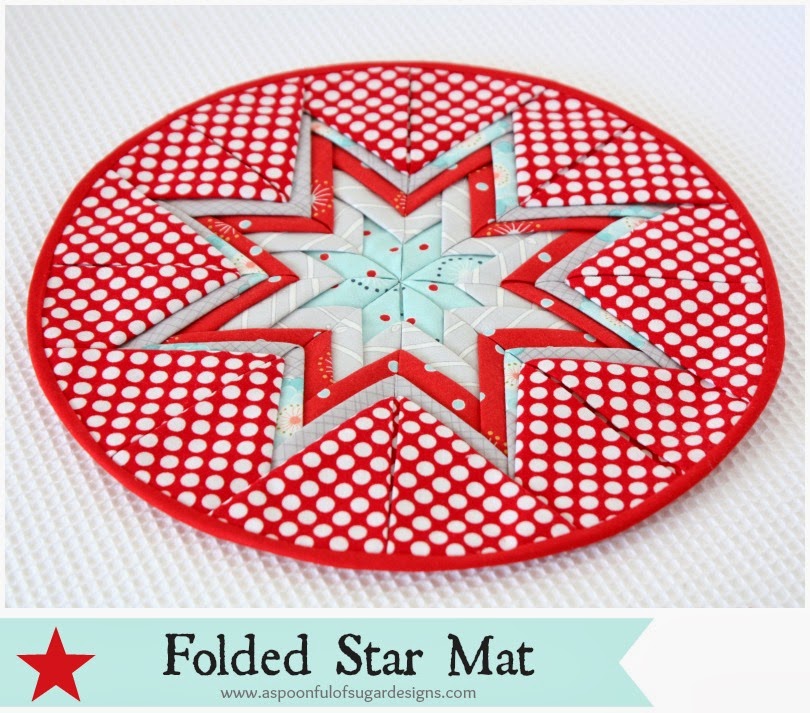
If you like this folded star patchwork technique, check out our Folded Star Mat Tutorial.
Filed Under: Christmas, Sewing Tutorials Tagged With: patchwork

« {Book Reviews} Crochet Titles
Guest Towel with Crochet Trim »

Comments

  1. Junebug613 says

    October 26, 2013 at 6:38 pm

    This is fantastic!! Thank you for sharing this wonderful tutorial!

    Reply
  2. Nastenka Nastasja says

    October 26, 2013 at 7:19 pm

    Amazing tutorial! Thank you for this magic Christmas idea! 🙂

    Reply
  3. Sandie @ crazy'boutquilts says

    October 26, 2013 at 8:41 pm

    LOL I was thinking about these when I saw the mat too. Just adorable!

    Reply
  4. Allie and Me design says

    October 26, 2013 at 11:25 pm

    Oh, how beautiful!
    each tree will be proud of it …
    many dear greetings
    Gesine

    Reply
  5. Barbara says

    October 27, 2013 at 12:01 am

    Beautiful, what a great idea!

    Reply
  6. Alejandra says

    October 30, 2013 at 11:55 am

    It is so beautiful! Thank you very much!!!!

    Reply
  7. Junebug613 says

    November 17, 2013 at 8:18 pm

    I made one of these yesterday, but the 3inch ball is too large. I had at least a half inch gap between the two halves. I am going to see if I can find smaller balls, or I may try cutting the fabric squares larger. I should have checked the math first. A ball with a 7inch circumference is closer to 2.25 inches tall.

    Reply
  8. Junebug613 says

    November 18, 2013 at 11:16 pm

    I tried this on a 2 1/2 inch ball and it was just right. The three inch ball was too large, unless you use a wide ribbon to go around, or cut larger squares(there was a 1/2 inch space between).

    Reply
  9. Supernan Sue says

    November 22, 2013 at 12:00 pm

    Thank you Lisa & Sarah for this fabulous tutorial for the star mat, I know what I shall be having a go at this weekend, I have plenty of festive material, and now I have a use for it. Thanks for the inspiration
    Sue

    Reply
  10. Linda Reinhardt says

    December 10, 2013 at 7:22 pm

    Thank you for sharing these beautiful gifts. I have made several as christmas gifts,Ty, Linda

    Reply

Leave a Reply Cancel reply

Your email address will not be published. Required fields are marked *

  • Email
  • Facebook
  • Instagram
  • Pinterest
  • Threads
  • TikTok
SUBSCRIBE TO NEWSLETTER
×

Categories

Archives

PURCHASE PDF PATTERNS

We offer over 100 affordable PDF sewing patterns available for download from our store website or Etsy store. Each pattern includes detailed instructions, numerous photos, and templates.

WEB STORE ETSY STORE

Instagram

Sew the sweetest little Halloween Treat Pouch — pe Sew the sweetest little Halloween Treat Pouch — perfect for mini chocolates, candy, gift cards, and spooky surprises.It’s quick to sew, scrap‑friendly, and a fun way to use your favourite Halloween fabrics.Mini Treat Pouch Sewing Pattern is available in my Pattern Store + Etsy Shop.Comment TREAT for a link to the pattern.#halloweensewing #treatpouch #scrapfriendlysewing #minisewingproject
#aspoonfulofsugardesigns
Pretty Little Details — Part 1: Hardware Highlight Pretty Little Details — Part 1: Hardware Highlights ✨ Sometimes it’s the smallest touches that make a handmade project feel extra special. Zipper charms, cord locks, leather tabs, beads, snaps… these tiny upgrades add personality, polish, and a little “designer” moment to your pouches and bags.I’ve gathered ten of my favourite hardware details and shared how I use them in my projects. Save this carousel for the next time you want to elevate your makes — it’s full of simple ideas you can add to almost any pattern.More Pretty Little Details coming soon. I hope this series inspires you to play with the little things that make handmade feel magical ✨
Bright fabrics, tiny pouches, and the cutest littl Bright fabrics, tiny pouches, and the cutest little closure hack ✨ Instead of hunting for narrow elastic cord, I use colourful hair ties — they’re sturdy, stretchy, and perfect for sewing into button‑loop closures on the Mini Treat Pouch. Such a simple trick, and it works
beautifully with bold prints like these Ruby Star Society favourites.This beginner‑friendly pattern includes full‑size templates and step‑by‑step photos, so you can sew a sweet little gift in no time.🪡 Comment TREAT for the pattern link
🛍️ Also available in our Pattern Store + Etsy Shop (links in bio)What sewing shortcut do you swear by? I love a clever hack that makes handmade gifts even sweeter ✂️#MiniTreatPouch #SewingHack #ScrapFriendlySewing #ModernSewingPatterns
#ASpoonfulofSugarDesigns
Sharing a new Quadra Pouch sewn in the upcoming Ti Sharing a new Quadra Pouch sewn in the upcoming Tilda Village Life collection. The same floral blender print appears in burgundy, ochre, teal and blue, giving each corner its own pretty moment.The Quadra has a clever flat base, folds completely flat between uses, and comes in three beginner‑friendly sizes. Such a handy little make.Comment QUADRA and I’ll send you the pattern link.Pattern Details: Quadra Pouch — available in our Pattern Store and Etsy Shop.#tildavillagelife #quadrapouch #drawstringpouch #sewingpattern
#flatbasepouch  @tilda_australia
✨ Small festive touches make handmade feel special ✨ Small festive touches make handmade feel special.This Mini Treat Pouch is quick to sew, beginner‑friendly, and perfect for gifting — especially when you add sweet details like stitched tags, ribbon trims, elastic loops, or wooden buttons.A tiny Christmas project that’s endlessly customisable and always fun to make.Comment TREAT for the pattern link.
Available in my Pattern Store + Etsy Shop.Fabric: Tilda Merry Little Christmas with thanks to @ tilda_australia#christmassewing #minitreatpouch #scrapfriendlysewing #giftbagpattern
#aspoonfulofsugardesigns
I’ve been sewing with the upcoming Tilda Village L I’ve been sewing with the upcoming Tilda Village Life collection, and couldn’t resist making a Quadra Pouch using all four floral blender colourways —burgundy, teal, ochre and blue. The small scale florals are perfect for small makes.The Quadra Pouch comes in three sizes, stands tall, and has a clever flat base with no boxed corners. I added a satin drawstring and a sew‑in tag for a sweet finish. They’re perfect for sewing supplies, gifts, or travel essentials.If you’d like the pattern link, comment QUADRA and I’ll send it straight through.
Available in our Pattern Store and Etsy Shop.Fabric: Tilda Village Life (available 1 October) with thanks to @tilda_AustraliaPattern: Quadra Pouch (3 Sizes) - available in our Pattern Store and Etsy Shop#quadrapouch #tildavillagelife #tildafabric #ilovetilda #2greenzebras
Follow on Instagram

Featured Pattern

Travel Sewing Kit Pattern

Featured Tutorial

Retro Drawstring Bag

Featured Recipe

Lemon Pound Cake

Connect

  • Email
  • Facebook
  • Instagram
  • Pinterest
  • Threads
  • TikTok
SUBSCRIBE TO NEWSLETTER
×

Popular Posts

  • Rediscovering Your Fabric Stash: Hidden Treasures, Changing Tastes, and Fresh Inspiration
  • Apple Crumble Slice
  • Liberty Scrap Gift Tags – A Quick, Pretty Project for Using Tiny Fabric Offcuts
  • Travel Accessories to Sew
  • Patchwork Fabric Tray
  • 10 Beginner Friendly Sewing Projects for Kids Going Back to School
  • Charm Square Fabric Tray

Copyright © 2026 Lisa. K. Cox - A Spoonful of Sugar