A Spoonful of Sugar

Make. Bake. Create.

Menu
  • Home
  • About
    • About Us
    • Press
    • FAQ
    • Disclosure Policy
    • Contact Us
  • Crafts
    • Crochet
    • DIY
    • Embroidery/Cross stitch
    • Gift Wrapping
    • Knitting
    • Miscellaneous
    • Paper Crafts
  • Holidays
    • New Year’s
    • Australia Day
    • Back to School
    • Valentines Day
    • Easter
    • ANZAC Day
    • Mother’s Day
    • Father’s Day
    • Halloween
    • Christmas
  • Recipes
    • Appetizers
    • Bars & Slices
    • Bread & Pastries
    • Cakes
    • Cookies
    • Confectionery
    • Cupcakes & Muffins
    • Desserts
    • Drinks
    • Ice Cream
    • Jams/Preserves
    • Main Meals
  • Sewing
    • Sewing Tutorials
    • Quilting
    • Sewing & Quilting Patterns
  • Family
    • Back to School
    • Family Fun
    • Our Home
    • Parenting
    • Travel
  • Shop
    • Pattern Store
    • Etsy Store

Weekend Baking: Chocolate Chip Cookies

September 24, 2011 By Spoonful of Sugar - 13 Comments

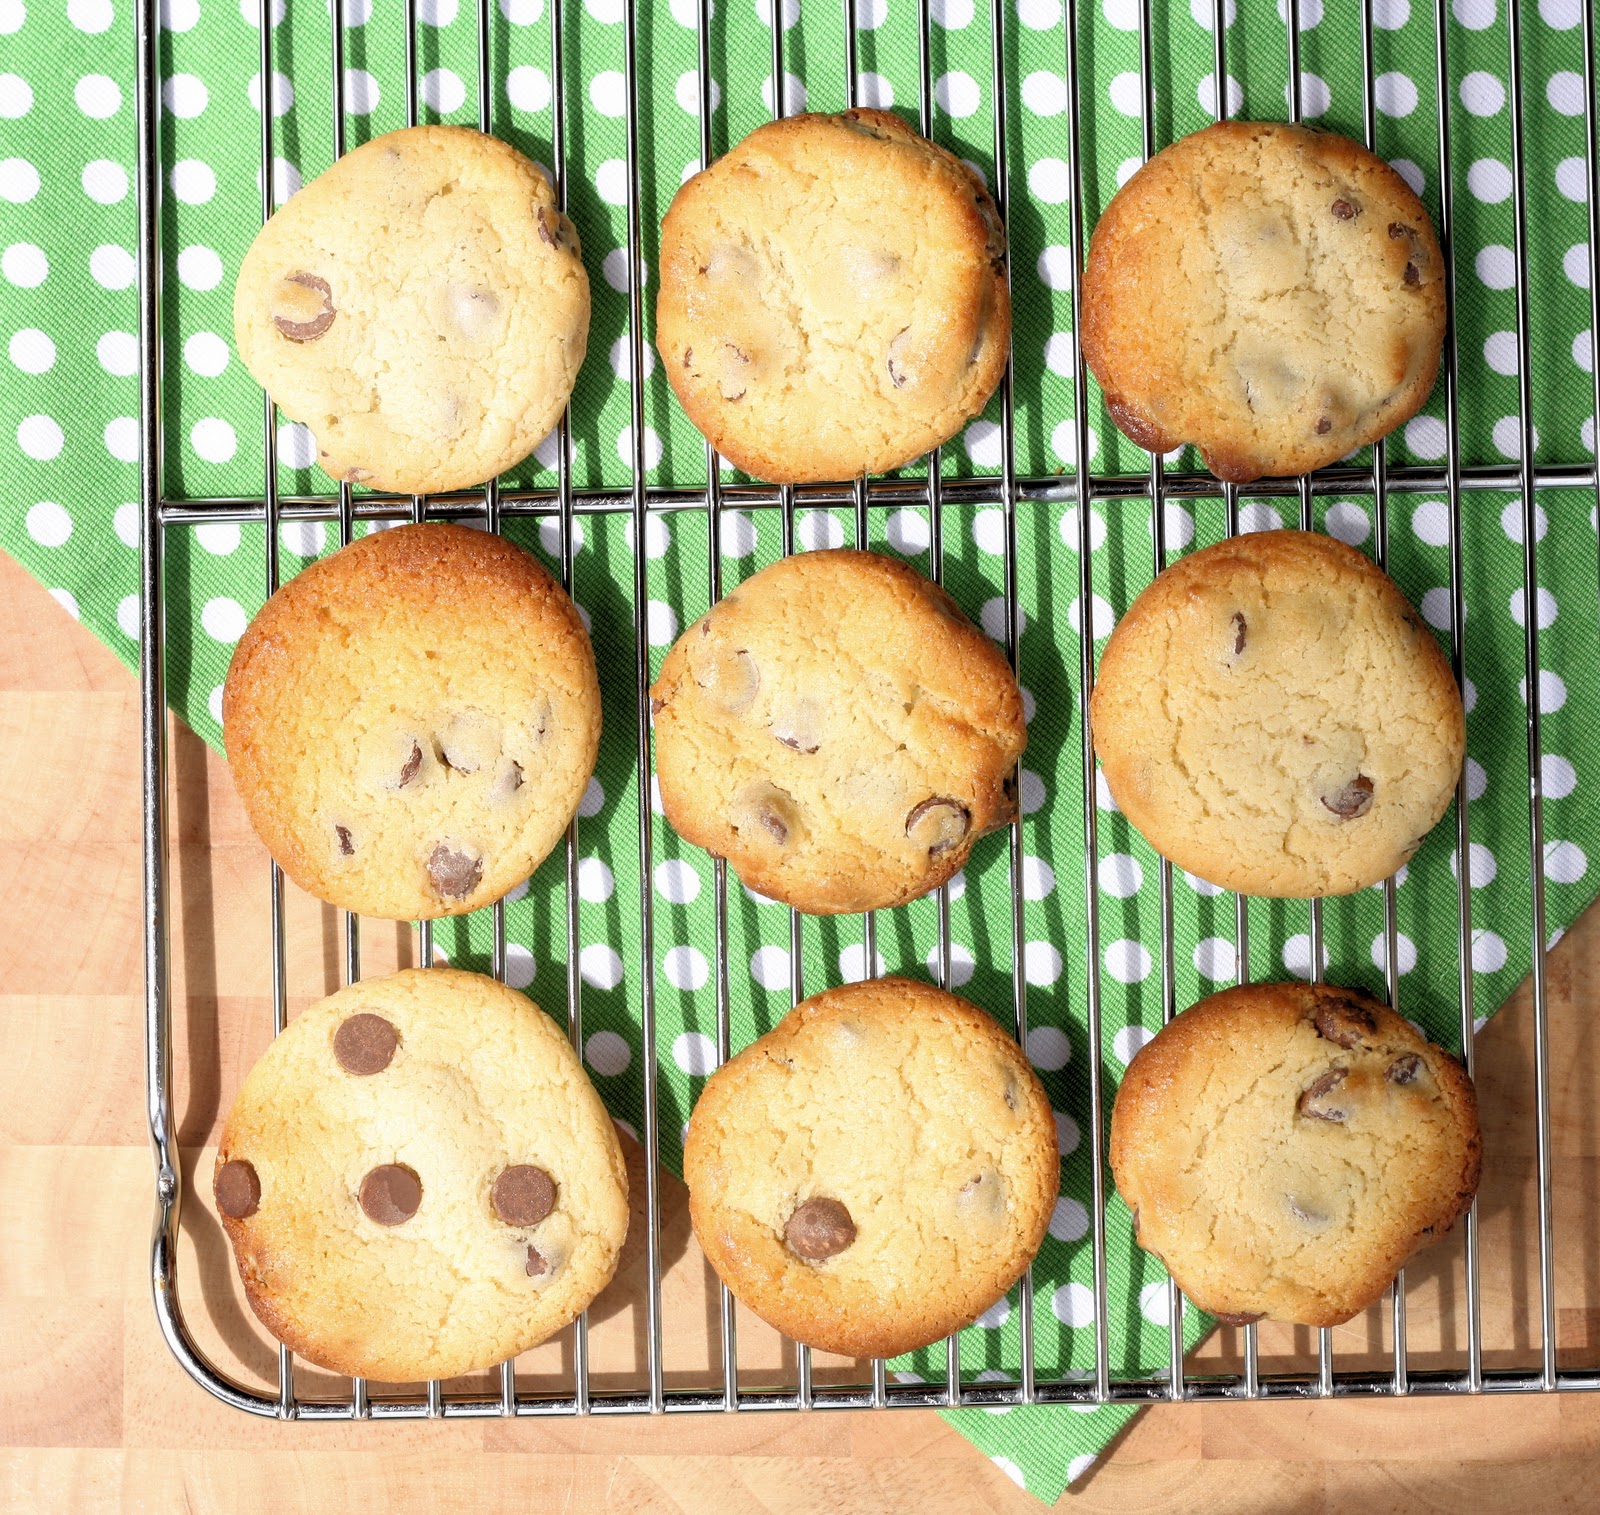
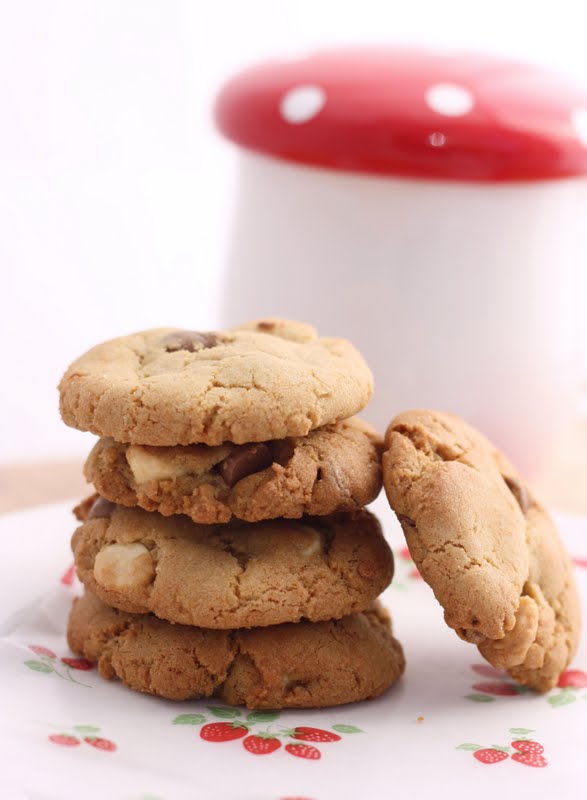
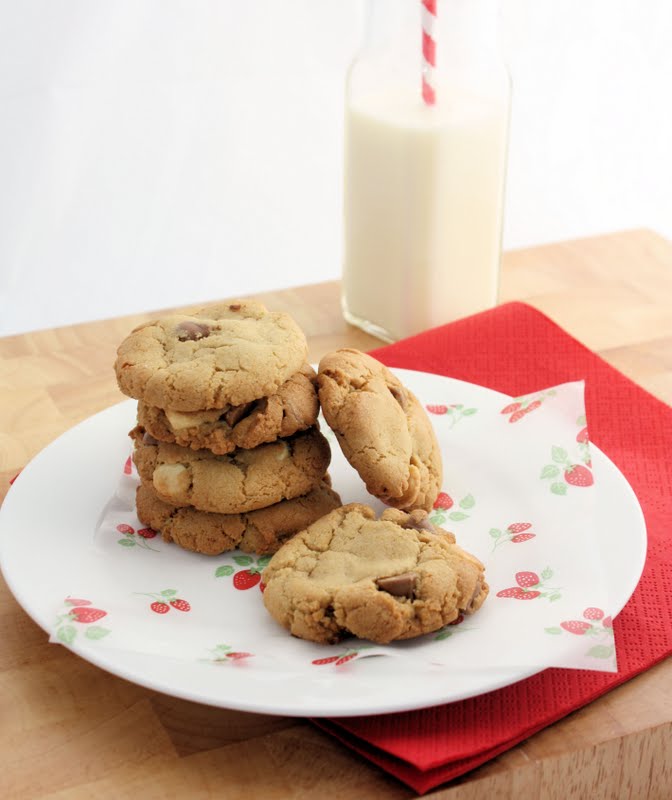
Sarah made up a big batch of chocolate chips cookies this weekend using a new recipe and I think it could become our favourite. It used a tin of condensed milk in the mixture which gave the cookies a lovely crumbly and chewy texture, whilst still being light and crisp on the outside. Not sure how many of these will be left for the lunch boxes this week – they are disappearing quickly. Sarah found the recipe over at Figs and Brie.
Ingredients
  • 180 g butter
  • 1/3 cup caster sugar
  • 395 g sweetened condensed milk
  • 1 1/2 cups self raising flour
  • 250 g dark chocolate chips

Directions

    1. Preheat oven to 180°C


  • Beat butter and sugar until creamy, then beat in sweetened condensed milk
  • Stir in flour, then dark chocolate chips, mix well
  • Roll heaped tablespoonfuls of mixture into balls, place on oven trays and press down gently
  • Bake for 15 minutes until golden.


What treats have you been baking this week? If you would like to share a favourite recipe, please add a photo and the name of the recipe below.

Here is our Weekend Baking button if you would like to play along:.

Photobucket


Filed Under: Cookies Tagged With: chocolate chip

« Rosemary Oil
Butterfly Quilt Progress »

Comments

  1. shez says

    September 24, 2011 at 10:36 pm

    i want to come and live at your house Lisa,lol yummy

    Reply
  2. Oops-Lah says

    September 24, 2011 at 11:24 pm

    You are a very bad influence, you know that? It seems I have to try out all your lovely recipes and guess who eats them afterwards ;)???

    Reply
  3. notyet100 says

    September 25, 2011 at 12:08 am

    Luv the cookies,..and they are eggless too

    Reply
  4. MadCraftyMama says

    September 25, 2011 at 5:34 am

    I have an almost identical recipe in my collection. I try not to make them very often because they are seriously addictive. Mostly gone in under 2 days!

    Reply
  5. Stephanie says

    September 25, 2011 at 6:29 am

    Yum. Sadly I’ve been cleaning instead of baking. Chocolate Chip cookies will be the first care package I send my son when he can start receiving mail.

    Reply
  6. Kalyan says

    September 25, 2011 at 7:43 am

    Just mouthwatering…looks so easy to prepare and delicious!

    Reply
  7. Bela says

    September 25, 2011 at 9:52 am

    Fairy Sarah magic hands!!!! Delicious, for sure!!
    Lots of love!!
    Bela

    Reply
  8. Sharon says

    September 25, 2011 at 2:40 pm

    These sound amazing. I love things that call for sweetened condensed milk. It has a special flavor that you can always taste!

    Reply
  9. Shannon says

    September 26, 2011 at 7:12 am

    mmm, you can never go wrong with chocolate chip!

    Reply
  10. JG says

    September 26, 2011 at 6:31 pm

    They look absolutely delicious!
    ~Judy

    Reply
  11. yuli-prezent says

    September 27, 2011 at 2:46 am

    I haven’t baked anything for ages! Your tasty chocolate chip cookies inspires me to bake. Hope I’ll find time this week for baking) Thanks a lot for the recipe!

    Reply
  12. Jacquie says

    September 27, 2011 at 2:53 am

    Love this recipe – it’s an old favorite in our family! The mixture freezes really well, so I normally make up Half and freeze half so there is always some freshly bake biscuits on hand after half an hour. Try substituting the dark choc for white choc and craisins for Xmas biscuits.

    Reply
  13. Jenny says

    September 27, 2011 at 2:44 pm

    Mmmmm look delicious-they would go down a treat in this house:)

    Reply

Leave a Reply Cancel reply

Your email address will not be published. Required fields are marked *

Weekend Baking: Chocolate Chip Cookies

August 28, 2011 By Spoonful of Sugar - 12 Comments

Sarah is on the mend again after her nasty virus that has plagued her over the past 2 weeks. She has spent the weekend competing in the Tournament of Minds (where she put her creativity to the test in a different way) and catching up on school work. During a break this afternoon she whipped up a batch of her favourite Chocolate Chip Cookies – a tried and tested recipe that taste delicious with a cold glass of milk. They also freeze well for the school lunches this week.

What we like about these cookies is that they don’t have too much butter, and are crisp on the outside and chewy on the inside.
Chocolate Chip Cookies
Ingredients:
1/4 cup butter, softened
1 cup brown sugar
1 egg
2 tablespoons golden syrup or honey
2 teaspoons vanilla extract
1 1/2 cups of plain or all purpose flour
1 teaspoon baking soda
1/4 teaspoon salt
3/4 cup chocolate chips
Preheat oven to 160 degrees C (325°F.)
In a large bowl, beat butter and brown sugar until well combined. Add egg, syrup and vanilla and beat until smooth.
Add the flour, baking soda and salt  to the butter-sugar mixture and stir by hand until almost combined; add chocolate chips and stir just until blended.
Drop spoonfuls of dough (or use a small ice-cream scoop) about  5 cm or 2” apart on a cookie sheet that has been sprayed with nonstick spray. Flatten each a little with a fork.  Bake for 10-12 minutes, or until pale golden and set around the edges but still soft in the middle. Transfer to a wire rack to cool.
Makes 20 cookies.

If you have been baking something recently, we would love for you to join in the fun and link your recipe up below.

If you would like to add our weekend baking button to your bog, here it is!

Photobucket


Filed Under: Cookies, Recipes Tagged With: chocolate chip

« Homemade Japanese Washi Tape
Book Review: Handmade Wedding »

Comments

  1. Beertje Zonn says

    August 28, 2011 at 12:48 am

    Mmmmmmm, I like Chocolate Chip Cookies

    Beertje Zonn

    Reply
  2. Handmade in Israel says

    August 28, 2011 at 12:52 am

    Beautiful photos! You know I already love these cookies 🙂

    Reply
  3. Simone de Klerk says

    August 28, 2011 at 1:05 am

    I’m going to make these! Thijme is visiting us for a day today, so This is special (o:
    PS: Love the little butter part and … crispy outside, chewy inside (o:

    Reply
  4. Simone de Klerk says

    August 28, 2011 at 3:35 am

    We just had some cookies. They were gooooooooooood! Great recipe (:

    Reply
  5. Terriaw says

    August 28, 2011 at 7:43 am

    These look delish! I love love cookies. The last batch I made was chocolate cookies with peanut butter chips – yummy!

    Reply
  6. MooseStash Quilting says

    August 28, 2011 at 8:48 am

    Those look yummy … and I do have to make cookies today. Have being the key word here! 🙂 🙂

    Reply
  7. Dogwood says

    August 28, 2011 at 2:17 pm

    Those cookies look wonderful.
    Oh, they would be lovely with a huge scoop of vanilla ice cream.
    Glad to hear Sarah in on the mend.
    Have a happy evening.
    Cory/Dogwood

    Reply
  8. Cathy (aka CrafteeCC) says

    August 28, 2011 at 3:47 pm

    these look sooo good 😉
    are there macadamias in this mix or did you use a mix of white & milk chocolate chips?

    Reply
  9. notyet100 says

    August 29, 2011 at 2:26 am

    Will add my link,cookies look so delicious

    Reply
  10. Jenny says

    August 29, 2011 at 4:05 am

    Yum they are making my mouth water!

    Reply
  11. Alex says

    August 29, 2011 at 1:13 pm

    I´ve tried then. They don´t only look tasty… They ARE very good.

    Greetings
    Alex from Germany

    Reply
  12. Christy says

    August 30, 2011 at 3:19 am

    yummy! sarah is such a talented baker. 🙂

    Reply

Leave a Reply Cancel reply

Your email address will not be published. Required fields are marked *

  • Email
  • Facebook
  • Instagram
  • Pinterest
  • Threads
  • TikTok
SUBSCRIBE TO NEWSLETTER
×

Categories

Archives

PURCHASE PDF PATTERNS

We offer over 100 affordable PDF sewing patterns available for download from our store website or Etsy store. Each pattern includes detailed instructions, numerous photos, and templates.

WEB STORE ETSY STORE

Instagram

Adding a handmade label is one of my favourite way Adding a handmade label is one of my favourite ways to personalise a project — and these little fabric + felt labels are so quick and satisfying to make.For this Ribbon Pouch, I used the Liberty Gifts from the Garden collection, which has the sweetest fruit motifs. They make perfect tiny labels for pouches, bags, and gifts.Here’s how to make your own:Press a piece of double‑sided fusible web to the back of your fabric.Cut around your chosen motif.Peel off the paper backing.Press the motif onto wool felt.Trim the felt with scalloped scissors.Sew the label onto the front of your pouch.Such a simple detail, but it adds so much charm. Fabric kindly gifted by @regent_street_fabrics — thank you!If you’d like to sew the Ribbon Pouch (3 sizes), comment RIBBON and I’ll send the pattern link straight to you.#SewingInspiration #FabricLabels #DIYLabels #LibertyFabric #LibertyGiftsFromTheGarden
A lot can change in 10 years ❤️ It’s been fun look A lot can change in 10 years ❤️ It’s been fun looking back at where I was in 2016 and how far life has come since then. Swipe for a little trip down memory lane.Back in 2016, my priorities were firmly centred around family. I was working full‑time, sewing in the guest room, sharing tutorials on my blog, and slowly dipping my toes into selling a handful of patterns on Etsy. It was a busy, full season — and creativity was something I fitted in around everything else.  Fast forward to 2026… I’m now retired and living the creative life I once dreamed of. My kids have grown up and are living in their own homes nearby. My husband and I are free to travel, explore, and enjoy this stage of life. And I get to spend my days designing, sewing, and connecting with this beautiful community.Life looks different now — in the best possible way.Were you following me back then, or what has changed for you over the past 10 years? I’d love to hear your story too.Tagging the lovely makers of my quilt: @arabesquescissors @ministryoffabric @belloquacity @alittlepatchwork @sameliasmum coleandtaffy @quiltymamaof4 @shequiltsalot @downgrapevinelane @lizzierosesews @lovethatfabric @sew_mimi.k #2026isthenew2016 #10yeartransformation #sewingjourney #sewingcommunity #aspoonfulofsugardesigns
Fall in love with sewing all over again ❤️I’ve Fall in love with sewing all over again ❤️I’ve rounded up 10 heart‑themed makes — from quick gifts to charming quilt blocks — perfect for weekend stitching or using up your favourite scraps. Whether you’re sewing for Valentine’s Day, birthdays, or just because, there’s something sweet for every maker.Comment HEART and I’ll send you a link to my Heart Pattern Collection.#sewingproject #heartsewing #quiltblock #scrapsewing #easytosew
Raw edge appliqué doesn’t have to feel fiddly or i Raw edge appliqué doesn’t have to feel fiddly or intimidating. With a few simple techniques, you can create neat, crisp shapes — even tiny details like penguin beaks and hearts.I’ve put together My Top 5 Secrets for Raw Edge Appliqué to help you feel confident, whether you’re brand new to appliqué or looking to refine your finish. Save this for your next sewing session.If you’d love a quick, beginner‑friendly project to practise these tips, my Penguin Love Mugrug is the sweetest Valentine’s make — scrap‑friendly, gift‑ready, and such fun to sew.Comment PENGUIN and I’ll send you the link to the pattern. Available now in our Pattern Store and Etsy shop.  #rawedgeapplique #appliquetips #sewingtipsandtricks #mugrugpattern #penguinlove
If you’ve ever wanted to add eyelets or grommets t If you’ve ever wanted to add eyelets or grommets to your sewing projects, here’s a quick look at how I install them using my DK93 snap press. It’s the same tool I use for snaps — and it makes installing eyelets beautifully quick and consistent.For this Ribbon Pouch, I used the Liberty Gifts from the Garden collection (printed on Lasenby cotton and released in January 2026). The colours and motifs pair so well with the little ribbon tie detail.Here’s how to install the eyelets:Punch out the four holes using a hole‑cutting die.Place the eyelet into the hole.Press it into place using the snap press.That’s it — easy peasy, and it gives the pouch such an elevated, professional finish. I love how clean and sturdy the result is.Fabric is Gifts from the Garden by Liberty - kindly provided by @regent_street_fabrics — thank you!If you’d like the Ribbon Pouch pattern (it comes in 3 sizes), comment RIBBON and I’ll send the link straight to you.Ribbon Pouch Sewing Pattern: available in our Pattern Store and Etsy shop ( links in profile).#SewingInspiration #SewingProjects #Eyelets #Grommets #SnapPress
The Twirling Treasures Hot Pad & Placemat Set show The Twirling Treasures Hot Pad & Placemat Set showcases one of my favourite FPP designs — a stunning kaleidoscope‑style block that always turns out beautifully. Kaleidoscope blocks are some of my most popular FPP patterns, and this set is such a fun way to use them.  This set includes six sizes, making it incredibly versatile: use them as hot pads, trivets, placemats, or simply as a way to add a pop of colour to your kitchen.For these samples, I went with a monochromatic scrap‑busting approach, pairing fabrics from the same colour family with a low‑volume background. The black‑and‑white striped binding adds such a crisp, modern finish. It’s a wonderful project for building your FPP confidence — and a fantastic way to use up those treasured scraps.The Twirling Treasures Hot Pad set is our Pattern of the Week. It is currently 25% off this week in our Pattern Store and Etsy Shop.If you’d like to sew your own set, comment TWIRL and I’ll send the pattern link straight to you.Happy sewing! Lisa 🌸#FoundationPaperPiecing #Quilting #HotPads #ScrapBuster #KitchenSewing
Follow on Instagram

Featured Pattern

Travel Sewing Kit Pattern

Featured Tutorial

Retro Drawstring Bag

Featured Recipe

Lemon Pound Cake

Connect

  • Email
  • Facebook
  • Instagram
  • Pinterest
  • Threads
  • TikTok
SUBSCRIBE TO NEWSLETTER
×

Popular Posts

  • Charm Square Fabric Tray
  • Merry Little Christmas Sewing Projects
  • {Back to School} Tissue Cover
  • Hexagon Fabric Tray
  • Raw Edge Applique Tips
  • Sewing Gifts 101: Easy and Affordable Ideas for Your Crafty Friends
  • Finding More Time to Sew

Copyright © 2026 Lisa. K. Cox - A Spoonful of Sugar