
2014 has been a great year for A Spoonful of Sugar and we have had so many lovely opportunities as a result of our blog! We are so grateful to our lovely readers for your wonderful comments and support. As a thank you for visiting us throughout the year, we wanted to share a final sewing tutorial for 2014. If you follow us on instagram, you will have seen our little Triangle Pouch that we made last week.

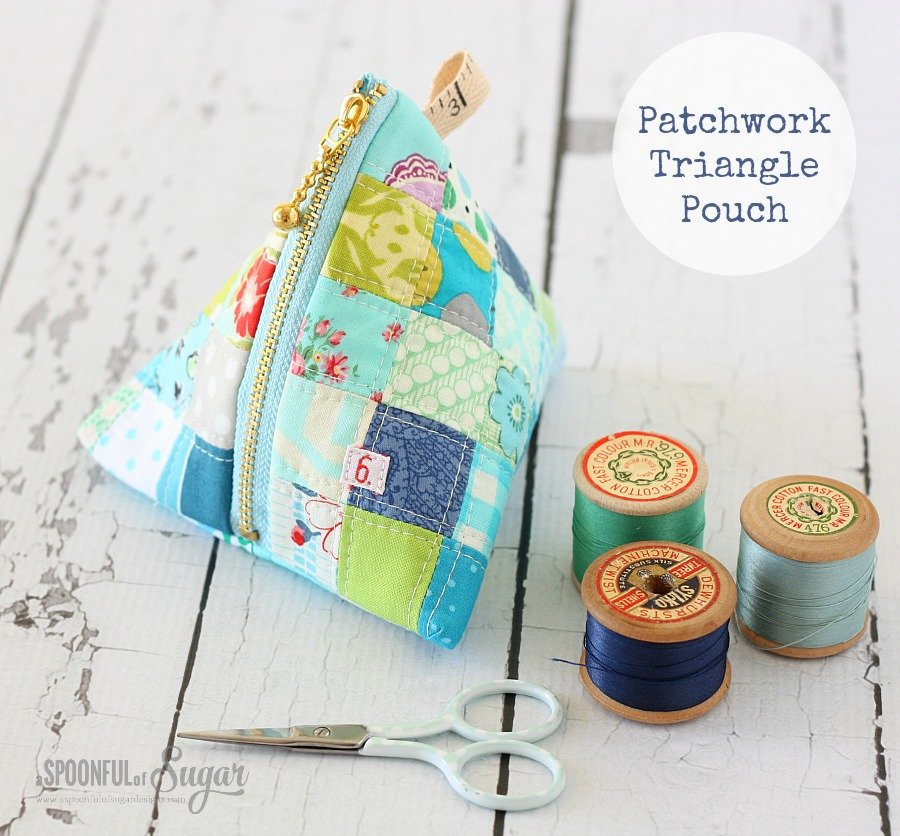
These little triangle pouches are fun to make and are perfect as small coin purses, to hold make-up essentials, or a few sewing supplies. Made from four strips of fabric, they are quickly assembled and make great little gifts. The fun part is choosing four co-ordinating fabrics. Be warned, it is hard to stop at one! I used 4 inch (10 cm) zippers I purchased in Japan – I love the antique style. You can also use continuous zipper tape.

Materials:
- 4 strips of cotton or linen fabric, measuring 1 1/2 inch x 9 inches (patchwork pouch exterior)
- rectangle of cotton fabric, measuring 8 1/2 x 4 1/2 inches (lining)
- length of ribbon, measuring 2 inches x 1/2 inch wide
- fusible wadding such as parlan, measuring 9 x 4 1/2 inches
- small leather label (optional)
- 4 inch metal zipper or 4 inches of continuous zipper tape + zipper pull
Finished Size: 4 inches across the front edge x 4 inches along zipper opening.
Method:
1. Stitch the four patchwork strips together to make a rectangle measuring 9 x 4 1/2 inches. Press the seams open. Press the fusible wadding to the wrong side of the patchwork panel. Using a stitch length of 3.5, stitch through both layers 1/8 inch from each seam.

2. Cut the patchwork panel in half so that you have two squares measuring 4 1/2 x 4 1/2 inches. Rotate one square 90 degrees and then stitch the squares together along one edge. You will now have a rectangle measuring 8 1/2 x 4 1/2 inches. (Refer to photo below).

3. To install the zipper we used the same technique that we used in our Pencil Case construction. This is an easy method for inserting zippers. Check out our pencil case post for more photos if you are unsure of the technique. Place the zipper face down on the left hand edge of the patchwork panel so that the edges are aligned. Baste in place. Place the lining panel face down on top of the patchwork panel. Stitch along the left edge using a 1/4 inch seam allowance. If you open it up, it should look like the photo below.

4. Bring the remaining patchwork edge over to the other side of the zipper and base in place. Bring the remaining edge of the lining around to the other side of the zipper so that all the edges are aligned. Stitch along the edge using a 1/4 inch seam. It should look like the photo below.

5. Open the zipper and turn the pouch out the wrong way. Centre the zipper along the bottom edge as shown. Stitch a 1/4 inch seam along the bottom edge and trim the excess part of the zipper. Overlock (serge) or zigzag the raw edges. My overlocker was packed away as we have a guest staying in the sewing room, so I used a small zigzag stitch to finish the raw edge. If you don’t like to have an exposed edge inside your pouch, you could cover it with a length of bias tape to hide the raw edge.

6. Turn the pouch out the right way. Fold the small piece of ribbon and baste it to the top edge as shown in the photo below.

(Optional) Add a small patch to the front of the pouch if desired (Refer to photo below).

7.Turn the pouch out so the lining is showing. Fold the top edge so that the end of the zipper is on one side. Pin and then stitch along the opening. Zigzag or serge the raw edges as shown in the photo below.

Turn the pouch out the right way, and it is ready to use.


You can check out our patchwork Triangle Pouch Variation here.
For more easy sewing projects, check out our Sewing Tutorials. Don’t forget to follow us on instagram to see our latest crafty projects.
Hello! Are you new here? If so, be sure to sign up for our newsletter here and receive a bonus sewing pattern and welcome discount. Our newsletter includes free tutorials, articles, and new patterns. Welcome to the world of sewing enthusiasts.


This is so sweet! I hope I can find some cute zippers to use for these!
Thanks Susan! You can find the zippers at Studio Mio (online + they also have a stand at most Australian craft Shows). Otherwise some Etsy sellers have them. Nice zippers make all the difference 🙂 Best wishes for the New Year.
Absolutely L🥰VE this !! Thanks for sharing!! 🙏🏽🙏🏽
This is soooo cute! I’m not much of a seamstress but I’ll try making these. 🙂
Thanks Nash! Best wishes for 2015.
Love these, so quick and such clear instructions, whipped one up in no time last night. Newly discovered your blog, signed up straight away! Thanks.
Thanks Robyn – so glad you found us! Best wishes for 2015!
Lovely tutorial – thanks for all you share – best wishes for 2015
Thanks so much Lesley! Health and happiness in 2015!
These are delightful and am sure would be great fun to use. Wishing you both a very happy new year!
Best wishes to you and your family Lisa for a wonderful 2015!
I just want to thank you for all the beautiful things you share with us. I will follow your blog also in this year and wish you another million ideas to see here. Have a healthy and successful year with a lot of joy, hope and love. Warmest regards from Germany
Thanks so much Undine! Best wishes to you also for 2015.
Where are the little labels from? They are cute!
Thanks Missy! The leather labels came from Etsy Seller SonSu in Korea. (There is a link above in the post).
I have made a few of these, but your directions are much better and more clear. I just DO NOT recommend hanging one on a leash to hold dog treats, unless you want your pup to eat the entire triangle bag! 🙂
Oh dear! 🙂 Best wishes for 2015.
just made one and it turned out adorable. thanks so much for this tute.
i tagged you on IG with my pic
I have made larger versions of these for years – I call it my wonky bag, great for shoes when travelling. (I think I first saw it in one of Nancy Zieman’s books.) But I’ve never seen such a pretty little one! You always use such beautiful, perfectly scaled fabrics and trims. I love your work. Thank you for sharing and inspiring.
Thanks for your sweet comment! They would make a great shoe bag in a larger size – must try that.
These are so pretty I just have to try one…. or two or even three! My sisters will love them! Thanks so much for another inspirational post. x
Beautiful thing 🙂 Very inspiring… Thank you
A question: do you think it could work well enough with simple (not metallic) zipper and maybe 8 different prints for strips? since it’s too difficult to pick just 4… :o)
Lily – A regular zipper would work just as well. I have seen a few made by other people with simple zippers. One lady has used charm squares and cut 8 different strips that are half the length which looks great. Have fun!
Wi made about 70 of these for a baby shower favor. I loved using charm packs since the squares were precut and the fabics were coordinated. I just grabbed any four squares and each pouch was beautiful. The guests loved them.
Wow – 70 is huge! They would have made great baby shower favours – I bet your guests were thrilled.
So cute! I have to make some of these. What about the leather tag? Where did you find something like that? Makes this look ver upscale!
Thanks Shelly. You can purchase leather tags from a number of Etsy sellers. I bought that one from Sonsu on Etsy, a store in Sth Korea.
Love this adorable pouch. The fabric is so pretty, and I love the zipper. It makes it shine!
Grace
I love it! Thank you for the easy to understand and follow tutorial.
If I may ask, where did you get your linen/twill tape tag? I love the look of linen or twill tape for tags.
Thank you,
Stephanie
Thanks Stephanie! That was some linen ribbon with French text on it that I have had in my stash for years. I bought it on Etsy from a Japanese seller. If you search for linen ribbon or linen tape on Etsy there are some lovely varieties available.
Excellent tutorial and lovely photos! Coincidentally, just yesterday, I clicked on a link for this same basic project elsewhere and got a 404 (found you through AllFreeSewing today). Will put these on my “to do” list. Many thanks!
Glad you found us Rochelle!Happy sewing.
truly precious and girly-girly,I used a pretty bead on a regular zipper to blend with the color in the fabrics that I used Ty for this lovely tutorial.
Thanks Gloria. Love the sound of your beaded zipper pull!
Fantastic instructions, can’t wait to sew this cutie. Until I get the zips, you’ve inspired me to hook up a pouch. Just crochet’d a rectangle and followed your construction instructions to sc the seams. Super!
What an inspired idea to crochet a pouch! Must add that to my list of things to make.
We are missionaries to Nicaragua and work in a remote community. I have been teaching sewing class for almost 3 years, teaching the ladies to make things to sell to feed and clothe their families. This is super cute and doesn’t take much fabric. I may have to use a normal 7″ plastic zipper and cut it to size. Supplies are not available here like in the states. Thanks for this great pattern and tutorial!
Hi Tamara – thanks for your lovely message. How wonderful that you are teaching ladies to sew and earn money for their families. So inspiring! Have a wonderful week. Lisa
I think these could be made for boys by using different shades of denim or some manly plaids!
Absolutely Sherry! They would look great made out of suiting fabric or wool plaid, with perhaps some leather to embellish. Happy sewing, Lisa
Thanks for the great tutorial! Just wanted to let you know that I was able to purchase the zippers at my local Fabricland (Nanaimo, BC, Canada).
It’s official….I am a complete idiot! I have tried 3 times to make this awesome little pouch…and I have failed 3 times!! Help!! What am I doing wrong???
Sorry to hear you are having issues. That is no fun at all. Perhaps you could ask a friend who sews for some advice? It is difficult to advise when I can’t see what the problem is. Zippers can be tricky. Good luck!
I am making these for teacher’s gifts for my kids. Yours are adorable!
Question: Can I use regular batting (or wadding) rather than the fusible kind or am I asking for trouble?
Hi Krystal – rgular batting would work well, just baste it well with basting spray or lots of pins before you quilt it. Great ideas for teachers gifts!
These are cute but the tutorial is not good at all. I am not good at sewing but was hoping for better instructions for beginners. Not all of the materials required are used. Where is the ribbon used?
i meant wadding.
Hi again Mary – the fusible wadding is ironed to the exterior fabric to give it a little more structure. Hope that helps 🙂
Sorry to hear that you had trouble following the tutorial. I put these together in my free time as a guide – perhaps you need to attend a sewing class for more instruction whilst you learn the basics. The ribbon is folded and inserted in the seam for a little tag – it is really just an optional embellishment. Good luck with your sewing!
i meant wadding instead of ribbon. i know where the ribbon is. i intend to attend a sewing class. these are really cute and i would love to make them.
Thanks Mary – good luck with your sewing adventures!
I think the instructions are excellent, the pouch is adorable, and you are a kind soul for sharing your skills with so many people just for the love of it! I visit here often for help and inspiration, but I don’t comment. I felt compelled to comment today after reading what Mary wrote. How rude! You dealt with it in a gracious manner. I fully understand if you prefer not to publish my comment or edit! I just wanted you to know. Many thanks.
Thanks Pippa for visiting and taking the time to comment. Really appreciate it 🙂 We have the nicest readers. Enjoy your week!
Thank you for the tutorial I will try it out
Happy sewing Maureen!
Your numbers aren’t matching up? 1.5 times 4 doesn’t equal 4.5
Four times 1.5 is 6.0 and then you have to take off 1/4 inch for each seam edge. Look at the picture and there are three seams when the four strips are sown toghether and so you take off six 14 inch seams (6 x 0.25 = 1.5 inch). So 6.0 minus 1.5 = 4.5. Voila!
I kept thinking there would be an extra 1.4 inch until I did the math on paper!
apologies, my slash mark in the fraction for one fourth did not always show up correctly!
these are soooo cute love the idear i am going to make o for my mum and dad
Can you share where you got thes zippers?
These are absolutely adorable!!!
Enjoy your sewiing posts!
I “love” this pouch. I can’t wait to try to make one for myself.
how long is the zipper you use?
I love this pouch! Can your pattern be used to sew and sell?
Hi Arnita – You can sell items made using my patterns in small quantities. Details on the pattern listing.
So cute! Here I am, recently moved with no idea where my sewing machine is!
When I find it, I’m going to start making these.
This is so cute. I can’t wait to make one. I am a grandmother now and I have more time to sew. I started a little website, at my age, gee. It is Fabric Art Fairy. I could probably use some of my fabric panels to make these. I will be dropping into often. Thanks for the wonderful tutorials.