A Spoonful of Sugar

Make. Bake. Create.

Menu
  • Home
  • About
    • About Us
    • Press
    • FAQ
    • Disclosure Policy
    • Contact Us
  • Crafts
    • Crochet
    • DIY
    • Embroidery/Cross stitch
    • Gift Wrapping
    • Knitting
    • Miscellaneous
    • Paper Crafts
  • Holidays
    • New Year’s
    • Australia Day
    • Back to School
    • Valentines Day
    • Easter
    • ANZAC Day
    • Mother’s Day
    • Father’s Day
    • Halloween
    • Christmas
  • Recipes
    • Appetizers
    • Bars & Slices
    • Bread & Pastries
    • Cakes
    • Cookies
    • Confectionery
    • Cupcakes & Muffins
    • Desserts
    • Drinks
    • Ice Cream
    • Jams/Preserves
    • Main Meals
  • Sewing
    • Sewing Tutorials
    • Quilting
    • Sewing & Quilting Patterns
  • Family
    • Back to School
    • Family Fun
    • Our Home
    • Parenting
    • Travel
  • Shop
    • Pattern Store
    • Etsy Store

Chopstick Wrappers

October 1, 2011 By A Spoonful of Sugar - 11 Comments

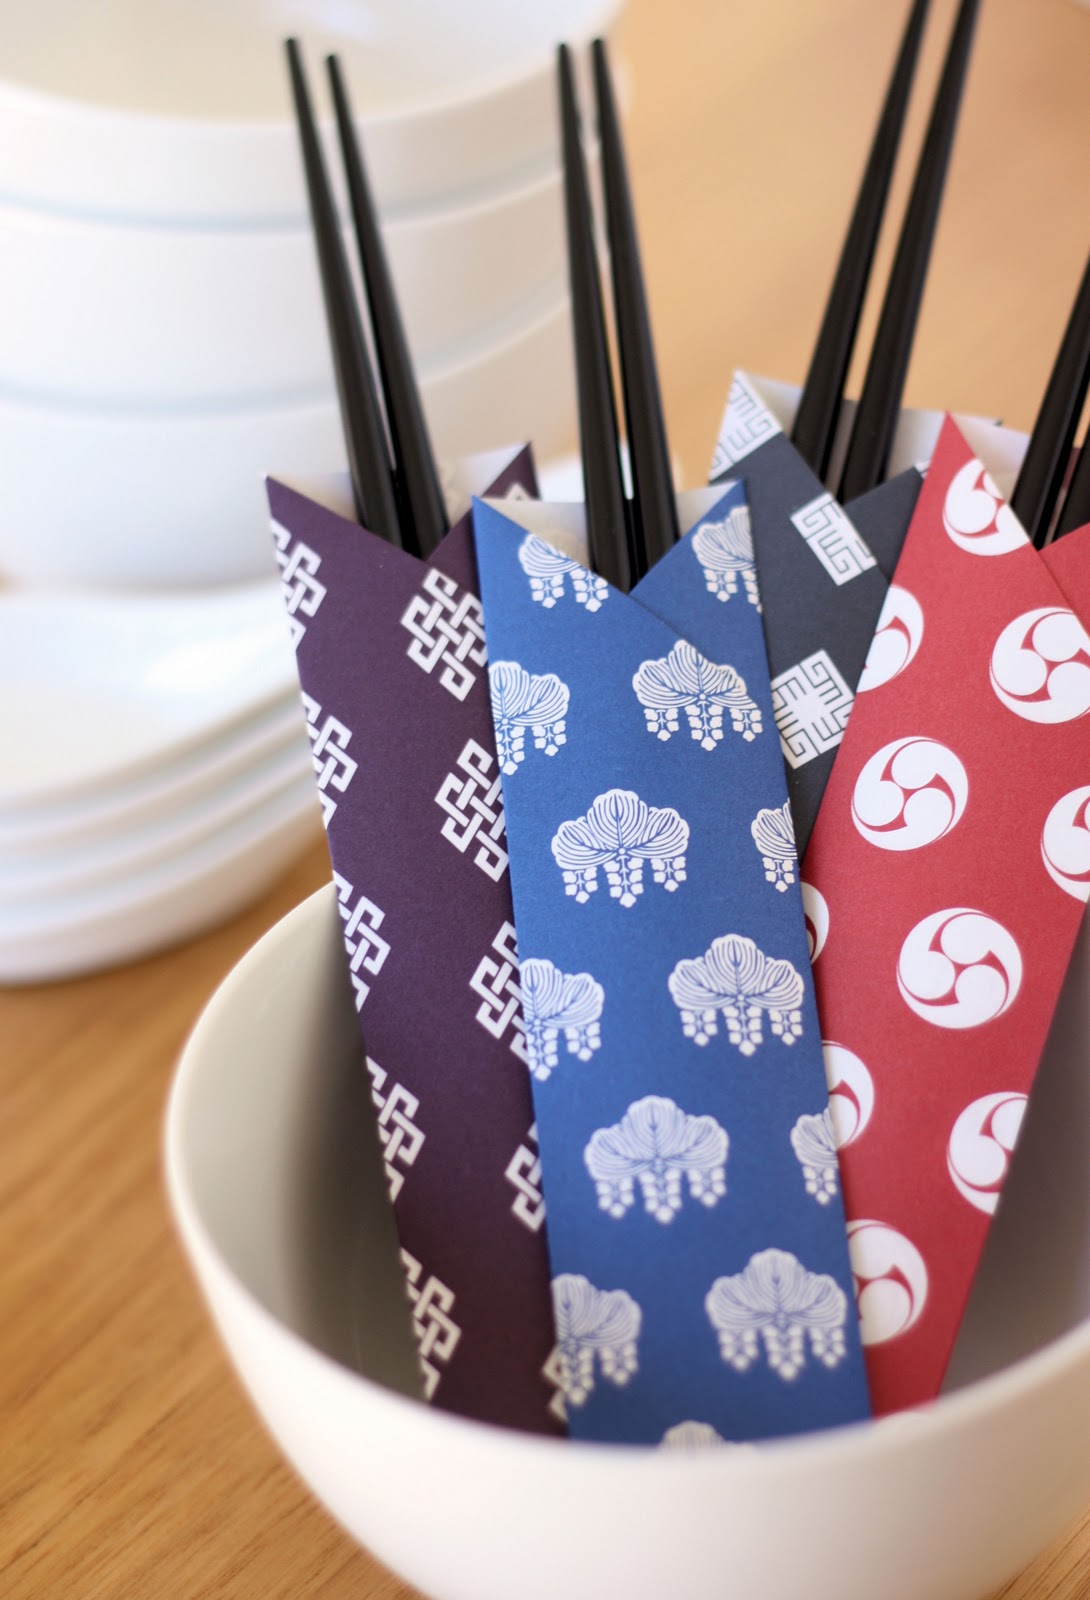
Our family love all things Asian  – and we have been lucky enough to travel as a family to Hong Kong, Malaysia, Singapore, and Japan. We eat a lot of stir fry’s and Asian inspired meals, and we are all pretty handy with chopsticks!

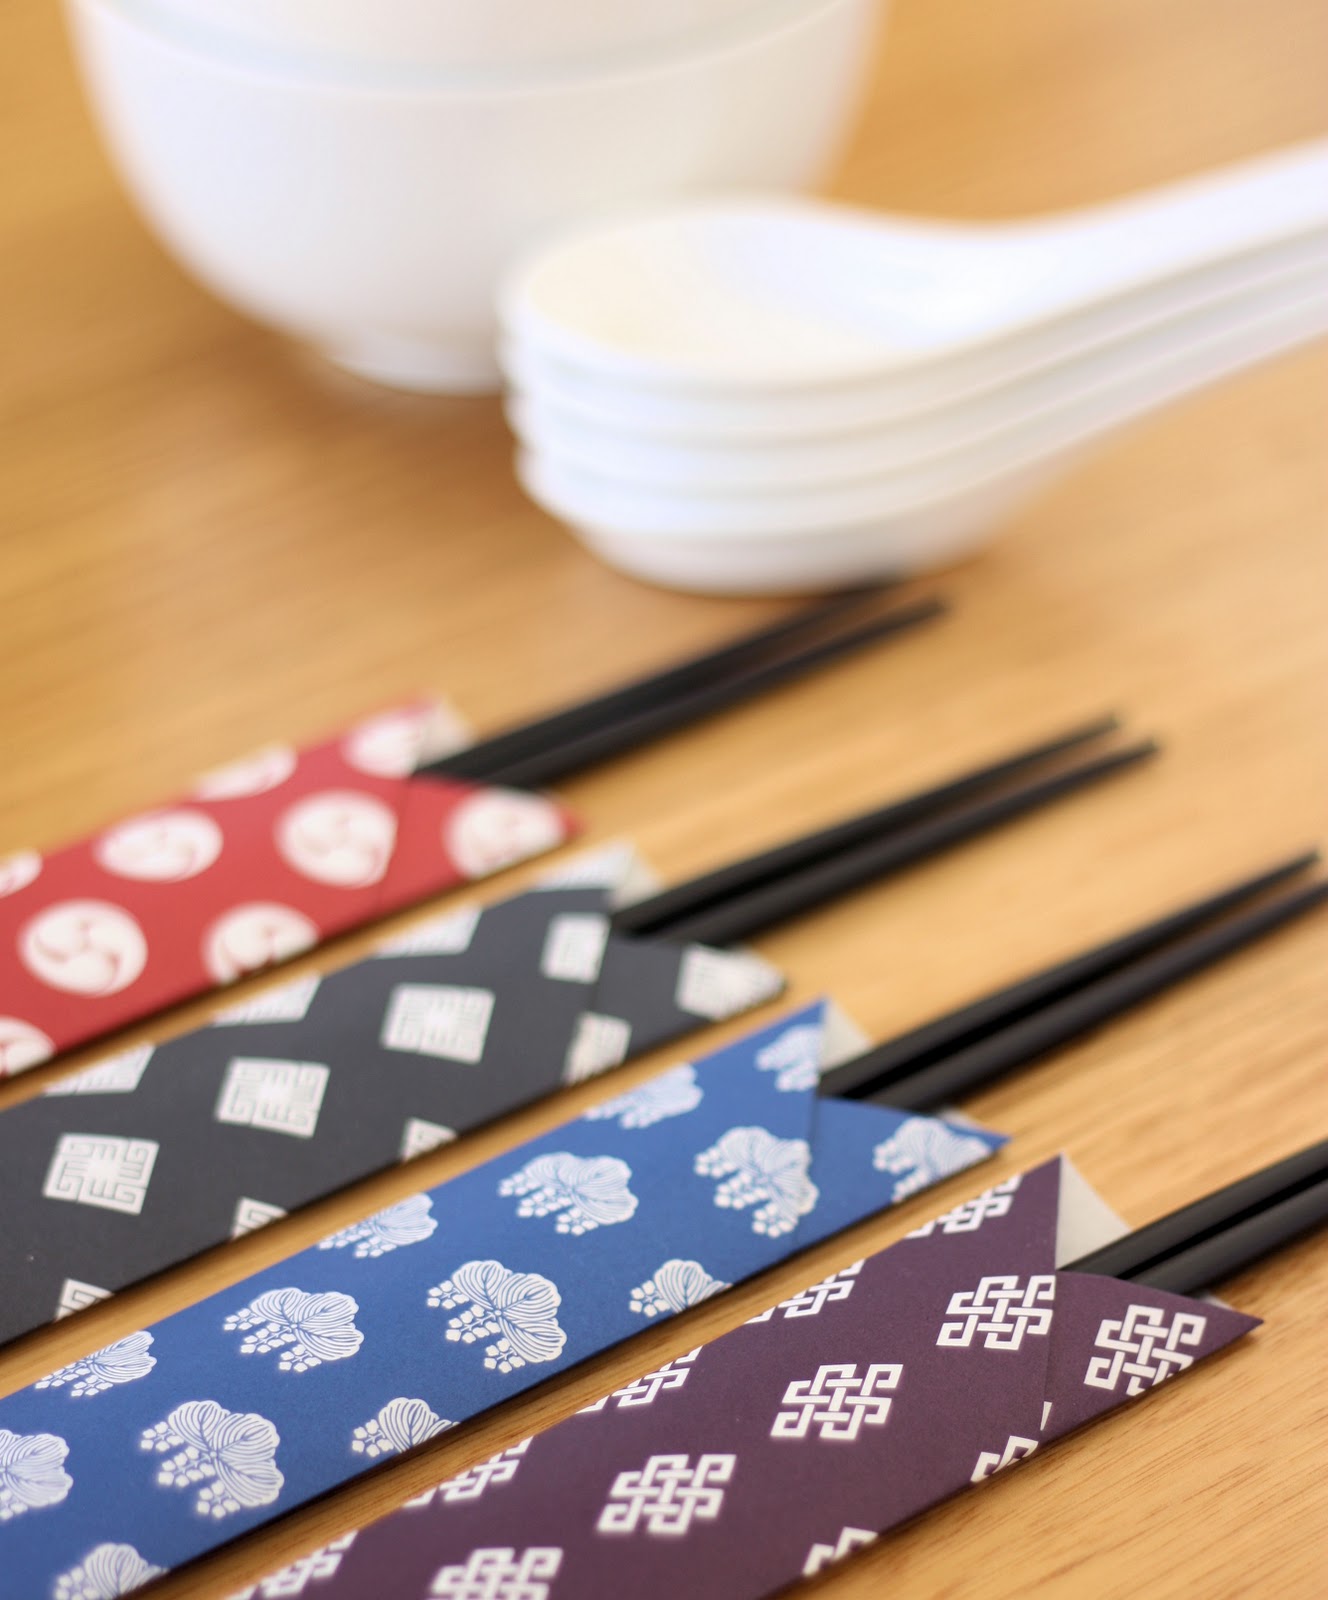
Chopstick wrappers can be easily made from origami paper, and add a nice touch to an Asian inspired meal.

To make each chopstick wrapper you need 1 sheet of origami paper 6 x 6 inches.
Fold the sheet of paper in half. Open out and then fold both long edges into the midline and fold, so that the fold lines divide the paper into four columns.

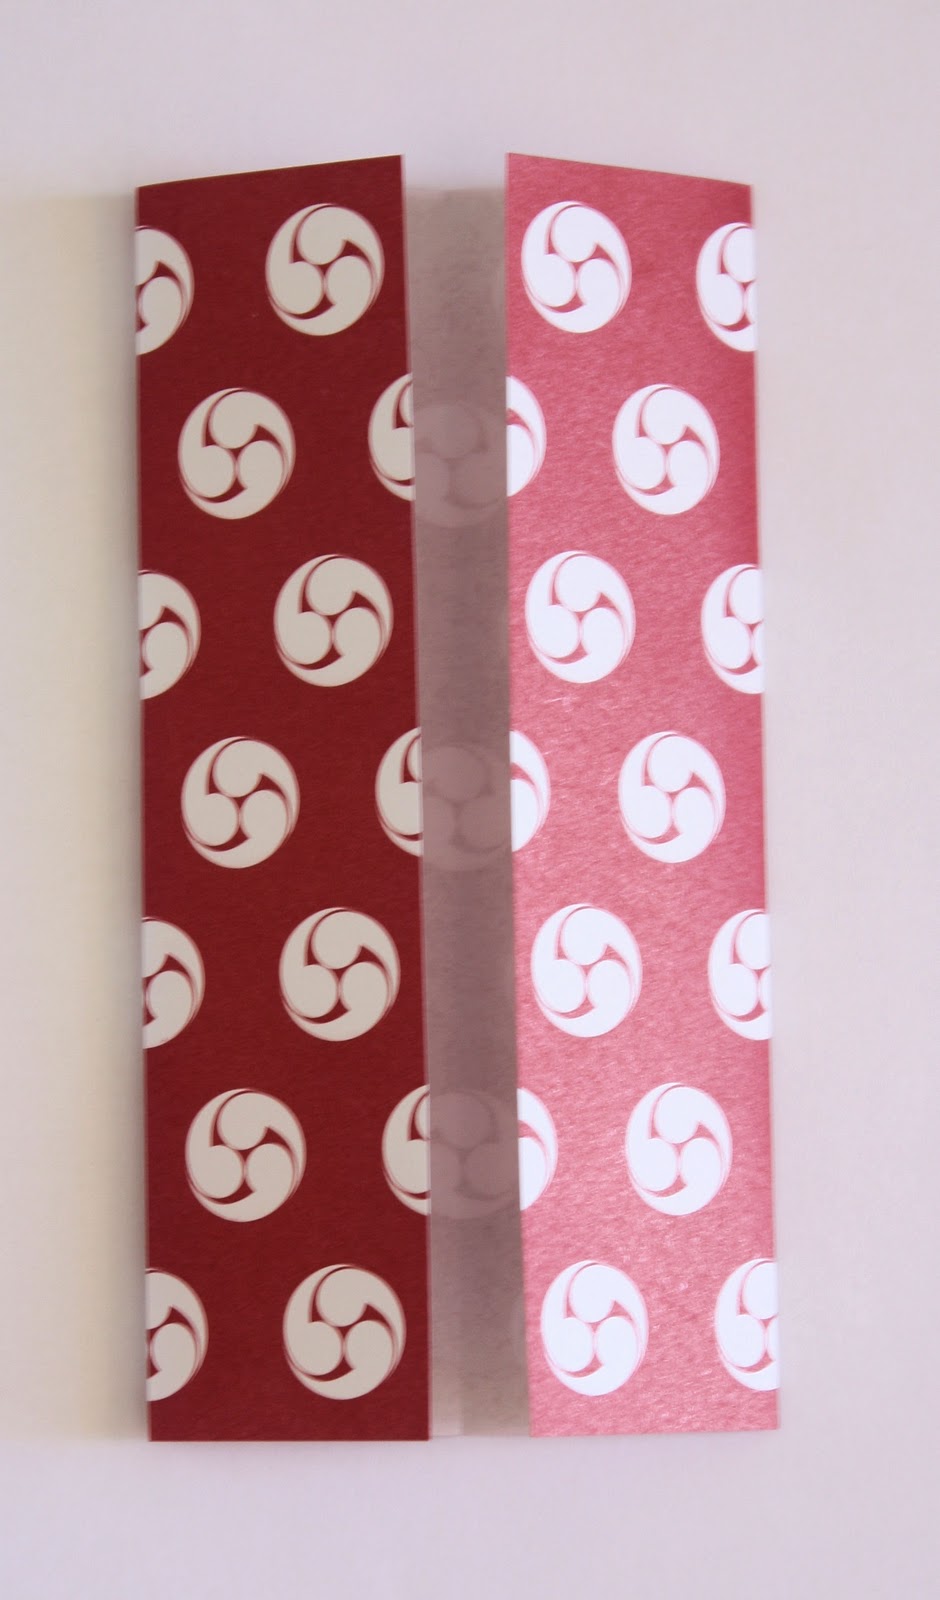
Open out so that the wrong side is facing up.
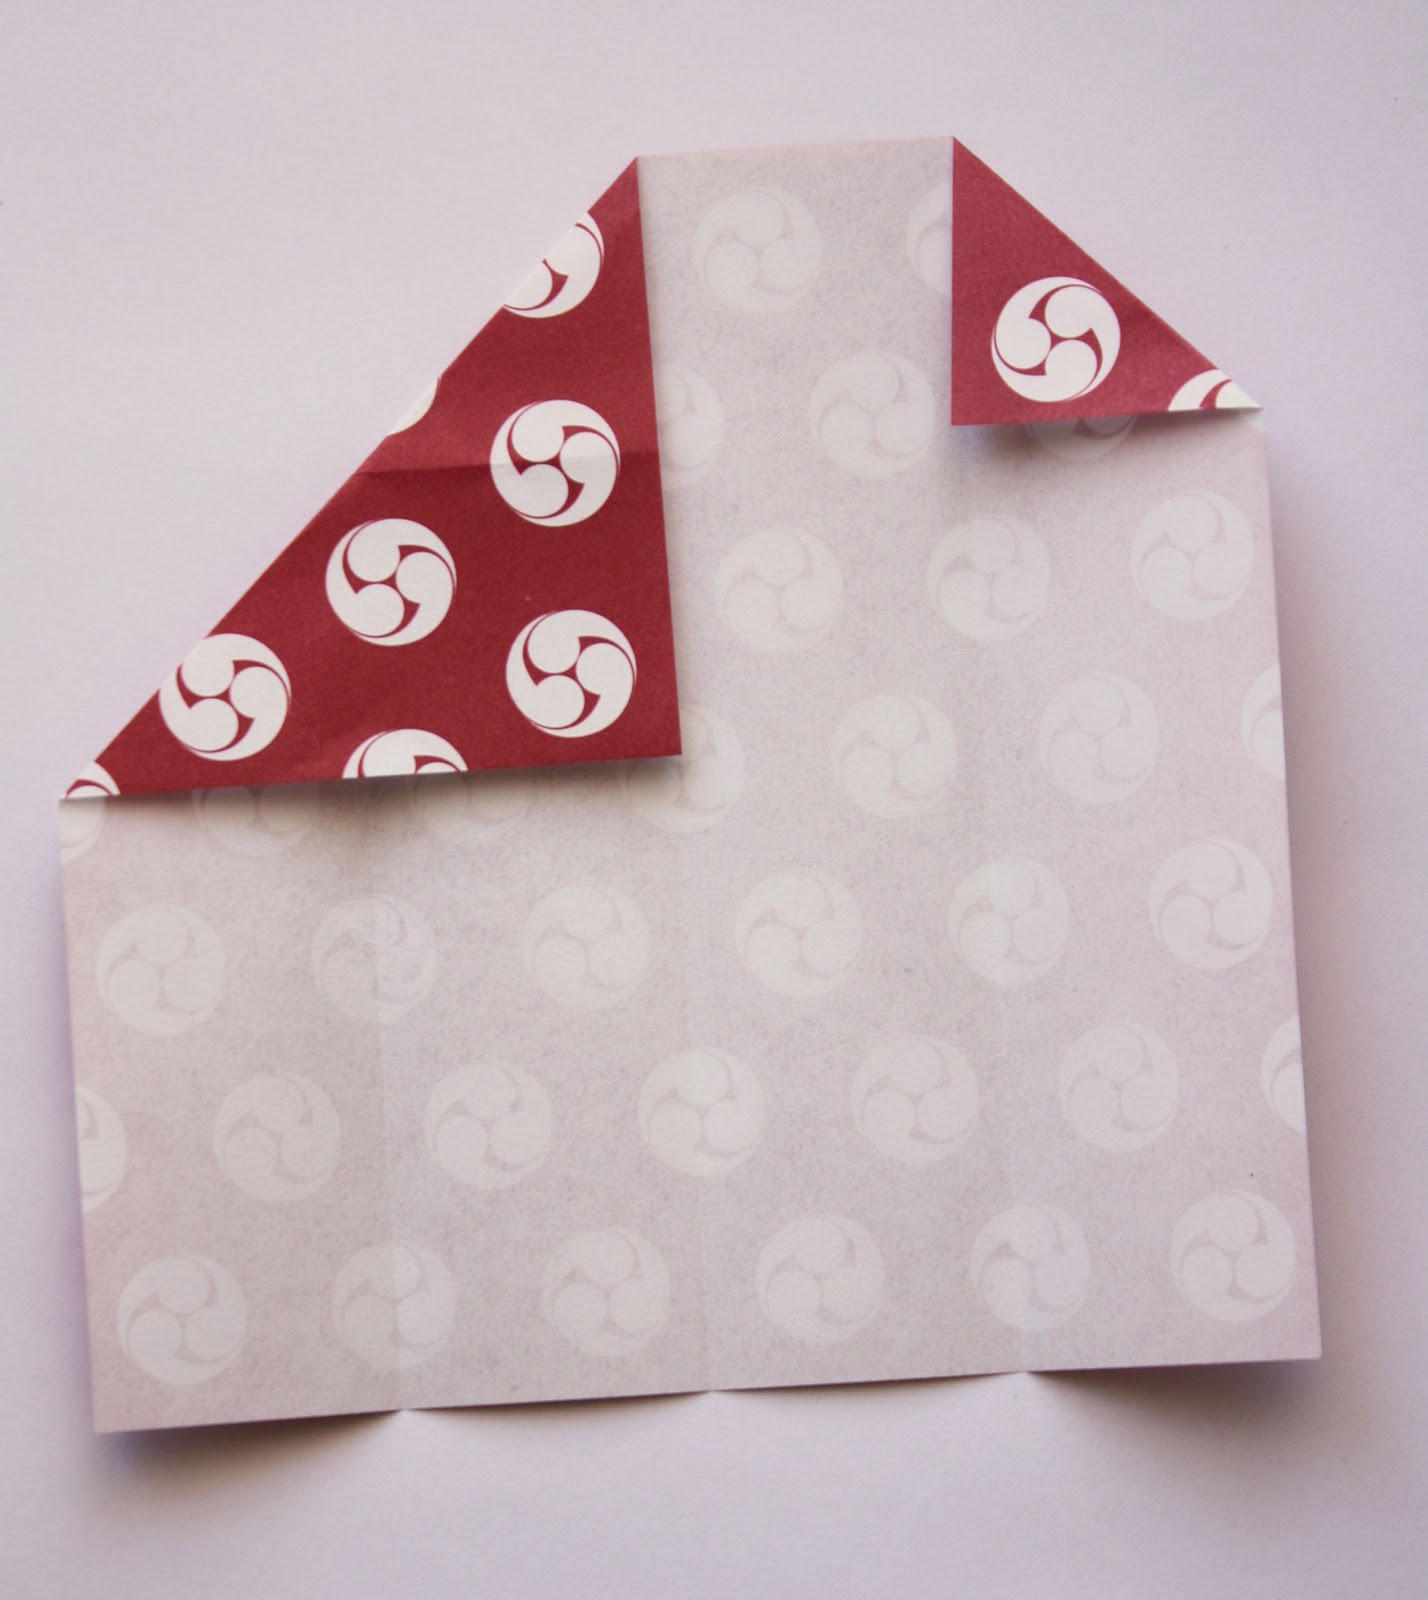
On the top right hand corner, fold the corner over so that it is in line with the right fold line.
On the top left hand corner, fold the corner over so that it is in line with the middle fold line (Refer to photo)

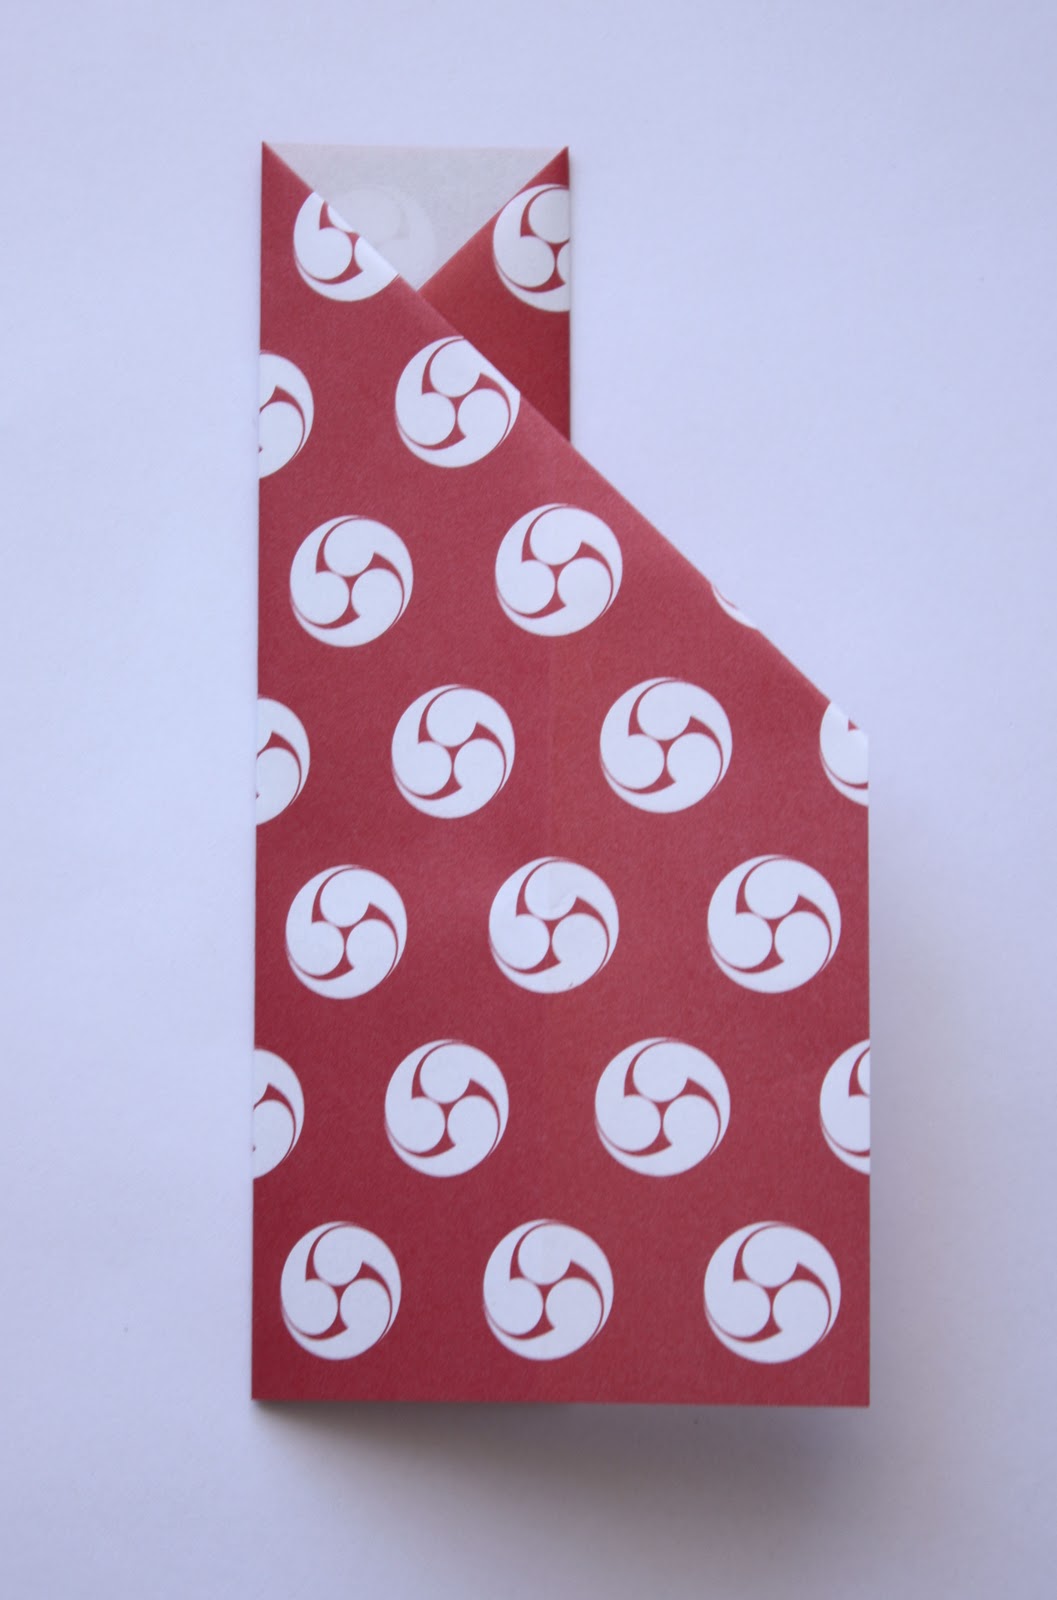
Fold the right side into the midline.

Fold the left side over as photographed.

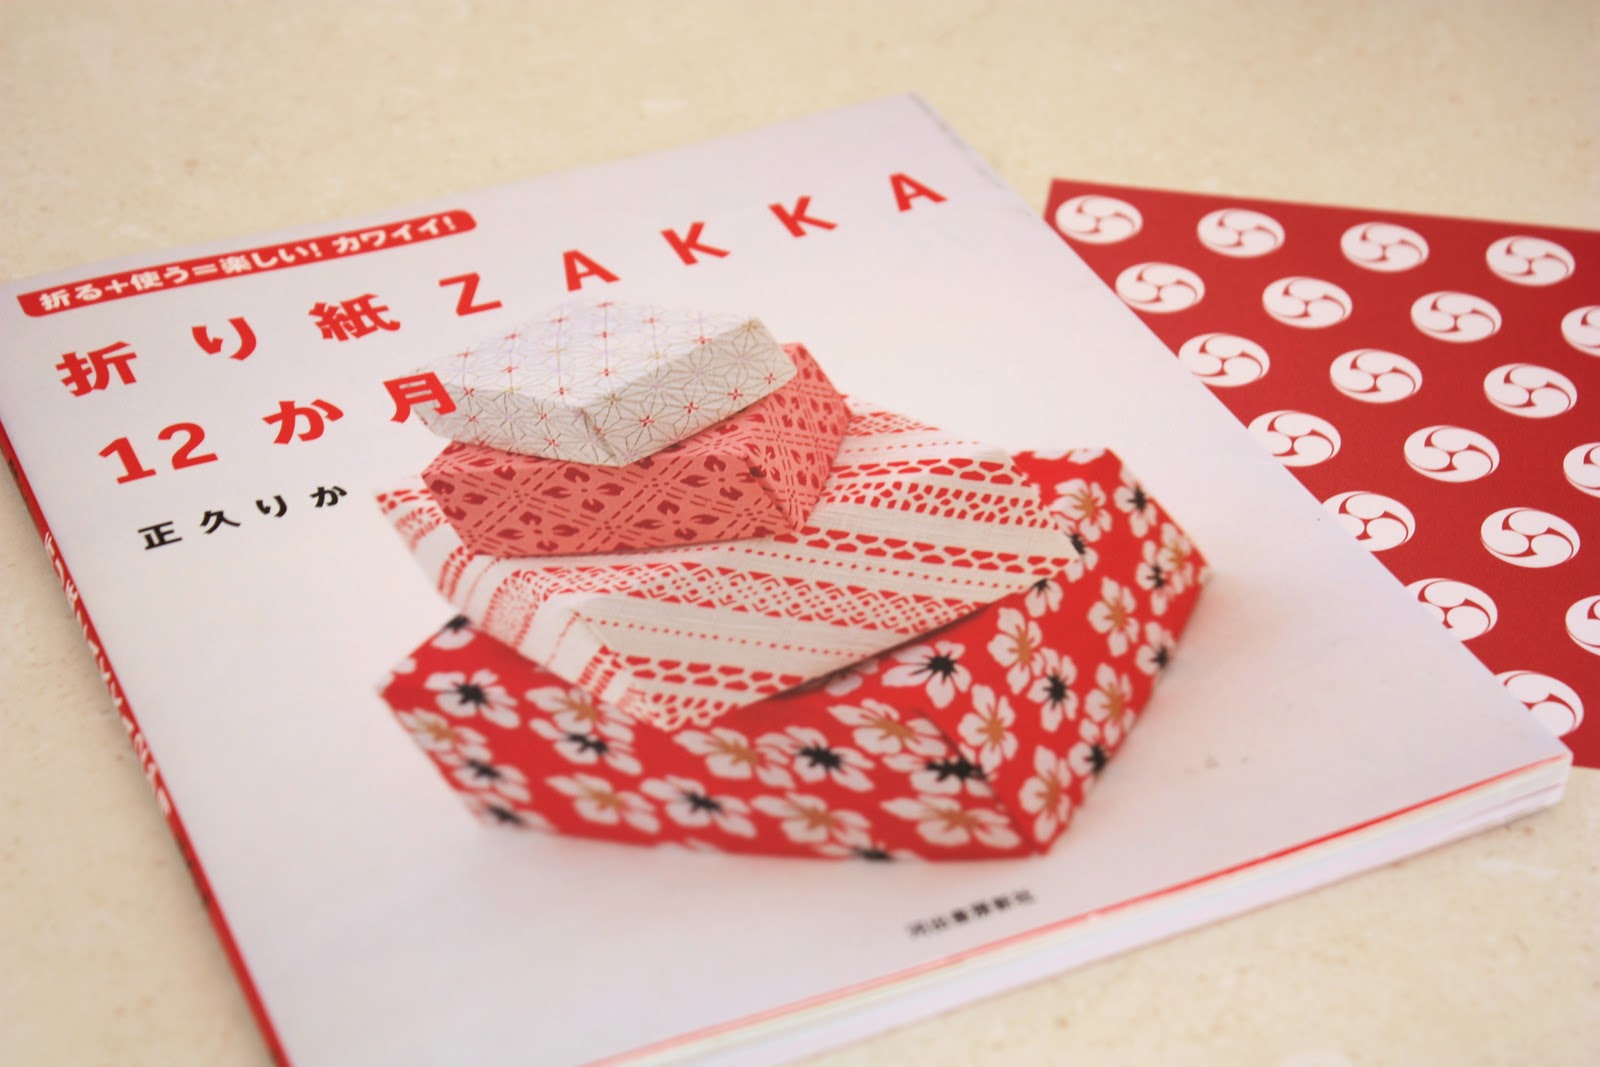
Inspired by  Zakka, a lovely book that I bought in Japan that has lots of origami packaging ideas.

You can find some lovely origami papers over at Crafty Japan.

Filed Under: Paper Crafts Tagged With: Chinese New Year, Japan, origami

« Homemade Christmas Ornaments
Weekend Baking: Meringues »

Comments

  1. Bela says

    October 1, 2011 at 8:43 am

    Perfect, Lisa, they are perfect!! I called my japanese husband to see this tutorial and he enjoyed it a lot too!!! Be sure I will make some chopstick wrappers to our next japanese dinner!!
    Thanks!!!
    Have a wonderful weekend!
    Bela

    Reply
  2. Sara says

    October 1, 2011 at 10:36 am

    You are making me want Chinese food:) Those are so cute!

    Reply
  3. Stephanie says

    October 1, 2011 at 1:34 pm

    I heart all things Japanese. LOVE the food. Great chopstick holders.

    Reply
  4. Chocolate Cat says

    October 1, 2011 at 4:31 pm

    What a sweet and simple touch to a meal, looking forward to using it. Thanks.

    Reply
  5. Linda says

    October 2, 2011 at 4:34 am

    How sweet are these,thanks for the tutorial.

    Reply
  6. Tania McCartney says

    October 2, 2011 at 3:07 pm

    Love! I’m going to get the kids to make a million over the hols…

    Reply
  7. Lillabilly says

    October 2, 2011 at 7:28 pm

    So nice! It’s little things like that which make a meal special. And now I am not only craving asian food, but cute Japanese packaging books too!!

    Reply
  8. RebeccaMom says

    October 2, 2011 at 8:17 pm

    These are beautiful! I love the wrappers and the papers too 🙂

    Reply
  9. Crafty Japan says

    October 3, 2011 at 4:50 am

    Hi girls,

    Great tutorial. Not sure if you were aware, but the origami paper designs you used here are actually very tradional Japanese family crest motifs 🙂 Very apt for a family dinner.

    I have some in store if you ever need to pick some extras up 😉

    Melanie

    Reply
  10. Thimbleanna says

    October 3, 2011 at 6:28 am

    Very cute Lisa — thanks for sharing these!

    Reply
  11. Jean says

    August 28, 2023 at 6:51 am

    These are adorable. The directions seem unfinished, however. How do you finish it off so the whole thing stays intact and the chopsticks do not fall out of the bottom?

    Reply

Leave a Reply Cancel reply

Your email address will not be published. Required fields are marked *

  • Email
  • Facebook
  • Instagram
  • Pinterest
  • Threads
  • TikTok
SUBSCRIBE TO NEWSLETTER
×

Categories

Archives

PURCHASE PDF PATTERNS

We offer over 100 affordable PDF sewing patterns available for download from our store website or Etsy store. Each pattern includes detailed instructions, numerous photos, and templates.

WEB STORE ETSY STORE

Instagram

🎉 Beginner Quilters, This One is for You! 🎉 🎉 Beginner Quilters, This One is for You! 🎉Want to sew a colourful Hexagon Trivet with just straight line quilting? This easy sewing project is perfect for beginners. No tricky binding to sew and you get a neat professional finish.Plus you can use 10 inch precut squares for a quick and satisfying make. Perfect for adding a handmade touch to your kitchen or gifting to a friend.Comment TRIVET and I'll send you the link.#easysewing #precutfabric #quiltlover #sewingforbeginners #handmadehome #handmadegifts #simplesewing
🏡💜 Home is where your heart is ❤️🏡I 🏡💜 Home is where your heart is ❤️🏡Introducing the Heart House Foundation Paper Piecing Quilt Block - a cosy design  that brings the warmth of home to every stitch. Available in 5 sizes (2  inch, 3 inch, 4 inch, 5 inch, and 6 inch) this sweet block is perfect for quilts, pillows, pouches and more!Because family is the heart of the home, and every home deserves a little love.Want the pattern? Comment HEART below, and I'll send you the link.#hearthousequiltblock #foundationpaperpiecing #quiltlove #homesweethome #sewingcommunity #sewinglove
✂️ Tip of the Week! ✂️Sewing with Libert ✂️ Tip of the Week! ✂️Sewing with Liberty Tana Lawn? 🌸✨ This stunning fabric deserves the best treatment! A fine needle is key to smooth, snag-free stitches—size 70/10 or 60/8 works like magic, gliding through the delicate weave effortlessly. Pair it with a sharp, fresh needle for crisp, professional results that let those gorgeous Liberty prints shine!Want more sewing tips delivered straight to you? Comment "NEWSLETTER" and I'll send you the link to sign up! 💌💬 What’s your go-to tip for sewing with Liberty fabric? Let’s swap ideas!#LibertyFabric #TanaLawn #SewingTips #FabricLover #QuiltingCommunity #SewingForFun #HandmadeSewing #TextileArt #DIYSewing #SewingInspiration
Turn your fabric scraps into something beautiful! Turn your fabric scraps into something beautiful! These Happy Scrappy Cards are the perfect DIY project - quick, beginner friendly, and fun to create with kids. Plus, they make a thoughtful Mothers Day card!✨️ Want the free tutorial? Comment CARDS and I'll send you the link!#scrapbuster #DIYcards #mothersdaycraft #sewingforfun #handmadegift #makerslife
Sewing isn't just stitches - it's life lessons. Wa Sewing isn't just stitches - it's life lessons. Want to see all 12 lessons? Comment LESSON and I'll send you the link to our free blog article.Quilting is more than just a creative pastime- it's a journey filled with valuable  life lessons. Whether you're a beginner or an experienced quilter, the process teaches persistence, patience, problem solving and self-expression.Read our article to discover all the lessons you can learn. What has quilting taught you? Share your most important lesson in the comments.Love the pillow designs in this post? Find my sewing patterns in my Pattern Store - link in profile.#sewingpatterns #DIYhomedecor #quiltedpillow #handmadehome #sewingproject #scrapbuster #sewingforfun #beginnersewing
Introducing my latest make—the Dresden Needleboo Introducing my latest make—the Dresden Needlebook! ✂️💖This little beauty is practical, charming, and packed with personality. For this version, I dove into my stash of small Japanese florals, mainly from the fabulous Atsuko Matsuyama, pairing a pink and aqua Dresden plate with a bright yellow center for a pop of cheer. The base? Sweet polka dots, finished with aqua gingham binding for a classic touch!Inside, I added fruit labels and appliqués for extra charm, and the felt pages (in a stunning pink wool felt!) keep pins and needles neatly in place. Plus, with two internal pockets, there’s space for all those little sewing essentials.The Dresden Needlebook has been one of my most-loved patterns this year! Want the pattern? Comment DRESDEN below, and I’ll send you a DM with the link! 🧵✨What are you sewing this week?#sewingpatterns #modernquilting #ʜᴀɴᴅᴍᴀᴅᴇᴡɪᴛʜʟᴏᴠᴇ #sewmuchfun #diycrafts #sewingaddict #creativemaker #sewinginspiration #fabriclover
Follow on Instagram

Featured Pattern

Travel Sewing Kit Pattern

Featured Tutorial

Retro Drawstring Bag

Featured Recipe

Lemon Pound Cake

Connect

  • Email
  • Facebook
  • Instagram
  • Pinterest
  • Threads
  • TikTok
SUBSCRIBE TO NEWSLETTER
×

Popular Posts

  • Liberty Tissue Cover
  • Pretty Liberty Drawstring Pouch
  • Sewing with Liberty Fabric
  • {Back to School} Tissue Cover
  • 10 Gifts to Sew for Mother’s Day
  • Pin Perfection: Everything you Need to Know about Sewing Pins
  • Charm Square Fabric Tray

Copyright © 2025 Lisa. K. Cox - A Spoonful of Sugar