A Spoonful of Sugar

Make. Bake. Create.

Menu
  • Home
  • About
    • About Us
    • Press
    • FAQ
    • Disclosure Policy
    • Contact Us
  • Crafts
    • Crochet
    • DIY
    • Embroidery/Cross stitch
    • Gift Wrapping
    • Knitting
    • Miscellaneous
    • Paper Crafts
  • Holidays
    • New Year’s
    • Australia Day
    • Back to School
    • Valentines Day
    • Easter
    • ANZAC Day
    • Mother’s Day
    • Father’s Day
    • Halloween
    • Christmas
  • Recipes
    • Appetizers
    • Bars & Slices
    • Bread & Pastries
    • Cakes
    • Cookies
    • Confectionery
    • Cupcakes & Muffins
    • Desserts
    • Drinks
    • Ice Cream
    • Jams/Preserves
    • Main Meals
  • Sewing
    • Sewing Tutorials
    • Quilting
    • Sewing & Quilting Patterns
  • Family
    • Back to School
    • Family Fun
    • Our Home
    • Parenting
    • Travel
  • Shop
    • Pattern Store
    • Etsy Store

Chocolate & Salted Caramel Tarts

December 18, 2015 By A Spoonful of Sugar - 5 Comments

Chocolate and salted caramel tarts made with Anchor creamSponsored by Anchor Cream

If you are planning your Christmas desserts, you can’t go past these delicious Chocolate and Salted Caramel Tarts, served with homemade Vanilla Bean Ice-Cream and fresh berries. They taste amazing and look so elegant.  We always plan the dessert first for Christmas and then work back from there! This year we will have 17 at our Christmas table so we need recipes suitable for a larger gathering and can be prepared in advance. We love desserts that are already portioned – it makes serving so much easier – and they are perfect for a Christmas celebration.

Anchor creamHave you seen the new Anchor cream, available from Woolworths supermarkets? It is beautiful fresh Australian cream, from dairy farms in Victoria, that has been designed with foodies in mind. It comes in 250 ml (1 cup) and 500 ml (2 cups) bottles which makes measuring so much easier. It also has measurement markers on the side of the bottle to allow for precise pouring and easy measurement. We love the screw top lid – no more messy drips/spills. When we were asked to put Anchor cream to the test, we knew the Chocolate and Salted Caramel Tarts would be ideal.
Chocolate and salted caramel tarts made with Anchor cream

Chocolate and Salted Caramel Tarts consist of a delicious chocolate shortcrust pastry, filled with a salted caramel filling, and then topped with piped chocolate ganache. They taste so good – it is hard to stop at one! To make 24 tarts, you will need 1 1/3 cups of Anchor Thickened Cream.

Chocolate & Salted Caramel Tarts
 
Print
Prep time
2 hours
Cook time
14 mins
Total time
2 hours 14 mins
 
Chocolate and Salted Caramel Tarts have a delicious chocolate shortcrust pastry, filled with a salted caramel filling, and topped with piped chocolate ganache.
Author: Sarah
Recipe type: Dessert
Cuisine: Baking
Serves: 24
Ingredients
  • Pastry
  • 11/4 cups plain (all purpose) flour
  • ¼ cup cocoa powder
  • ¼ cup icing (confectioners) sugar
  • ¼ teaspoon sea slat
  • 9 tablespoons cold unsalted butter
  • 1 large egg yolk
  • Salted Caramel Filling
  • ⅓ cup Anchor Thickened cream
  • ½ cup sugar
  • 70 grams (1/2 stick) butter, cut into pieces
  • ¼ teaspoon sea salt
  • Chocolate ganache:
  • 225 g dark baking chocolate, chopped
  • 1 cup Anchor thickened cream
  • 4 tablespoons unsalted butter, cut into pieces
Instructions
  1. To make tart shells: Put flour, cocoa, icing sugar, and slat in a food processor and pulse to combine. Add chopped butter and pulse until butter is cut in. Lightly whisk the yolk, and pulse it in. Turn the dough onto a work surface.
  2. Shape the dough into a disc. Roll out the dough evening until it is 2-3 mm thick (1/8 - 1/16 inch). Slide the sheet of dough onto a baking sheet and refrigerate for a couple of hours.
  3. Let the dough rest at room temperature for approx 10 minutes. Use a tart cutter to cut the shells.Lightly grease the tartlet pan, and fill with the pastry. Prick the crust all over and then freeze for 30 minutes.
  4. Bake in a preheated oven at 190 deg C (375 deg F) for 12-14 minutes.
  5. To make the salted caramel filling: Bring the cram to a boil in a small saucepan over medium heat. Remove from the heat.
  6. Pour the sugar over the bottom of a small frypan and put over medium heat. When the sugar starts to melt around the edges, stir until the sugar turns a light golden colour. Turn off the heat and add butter. Then add the cream. Put it back on the heat and stir until smooth (approx 1 minute). Then stir in the salt. Allow to cool completely.
  7. Fill cooled tart shells with a spoonful of the filling.
  8. Chocolate ganache: Put the chocolate in a medium heatproof bowl. Bring the cream to the boil and then pour it over the chocolate. Wait for a minute and then stir the cream/chocolate. Put it in the refrigerator and stir it occasionally until it has thickened.
  9. When the ganache is chilled, whip it for a minute, and then pipe it onto the filled tarts.
3.5.3208

Chocolate and salted caramel tarts made with Anchor cream

To make the Vanilla Bean Ice-Cream you will need 1 1/4 cups of Anchor Thickened Cream.  Our favourite Vanilla Bean ice-cream recipe is from Jeni’s Splendid Ice-Creams At Home. You can find Jeni’s Ice-Cream base recipe here and you add the seeds of vanilla bean to it. It is a delicious, velvety ice-cream which is the perfect accompaniment to the Chocolate and Salted Caramel Tarts.

Chocolate and salted caramel tarts made with Anchor cream

Anchor cream comes in Thickened, Light Thickened and Pure varieties, and is perfect for the home cook. It is suitable for whipping, pouring, and cooking and is available from Woolworths nationally.

Chocolate and salted caramel tarts made with Anchor cream

What are you planning for your Christmas dessert?Chocolate and salted caramel tarts made with Anchor cream

Filed Under: Desserts, Ice Cream Tagged With: caramel, Chocolate, dessert, icecream

« Christmas Decorating
DIY Snow Jars »

Comments

  1. Kathleen says

    December 19, 2015 at 3:13 am

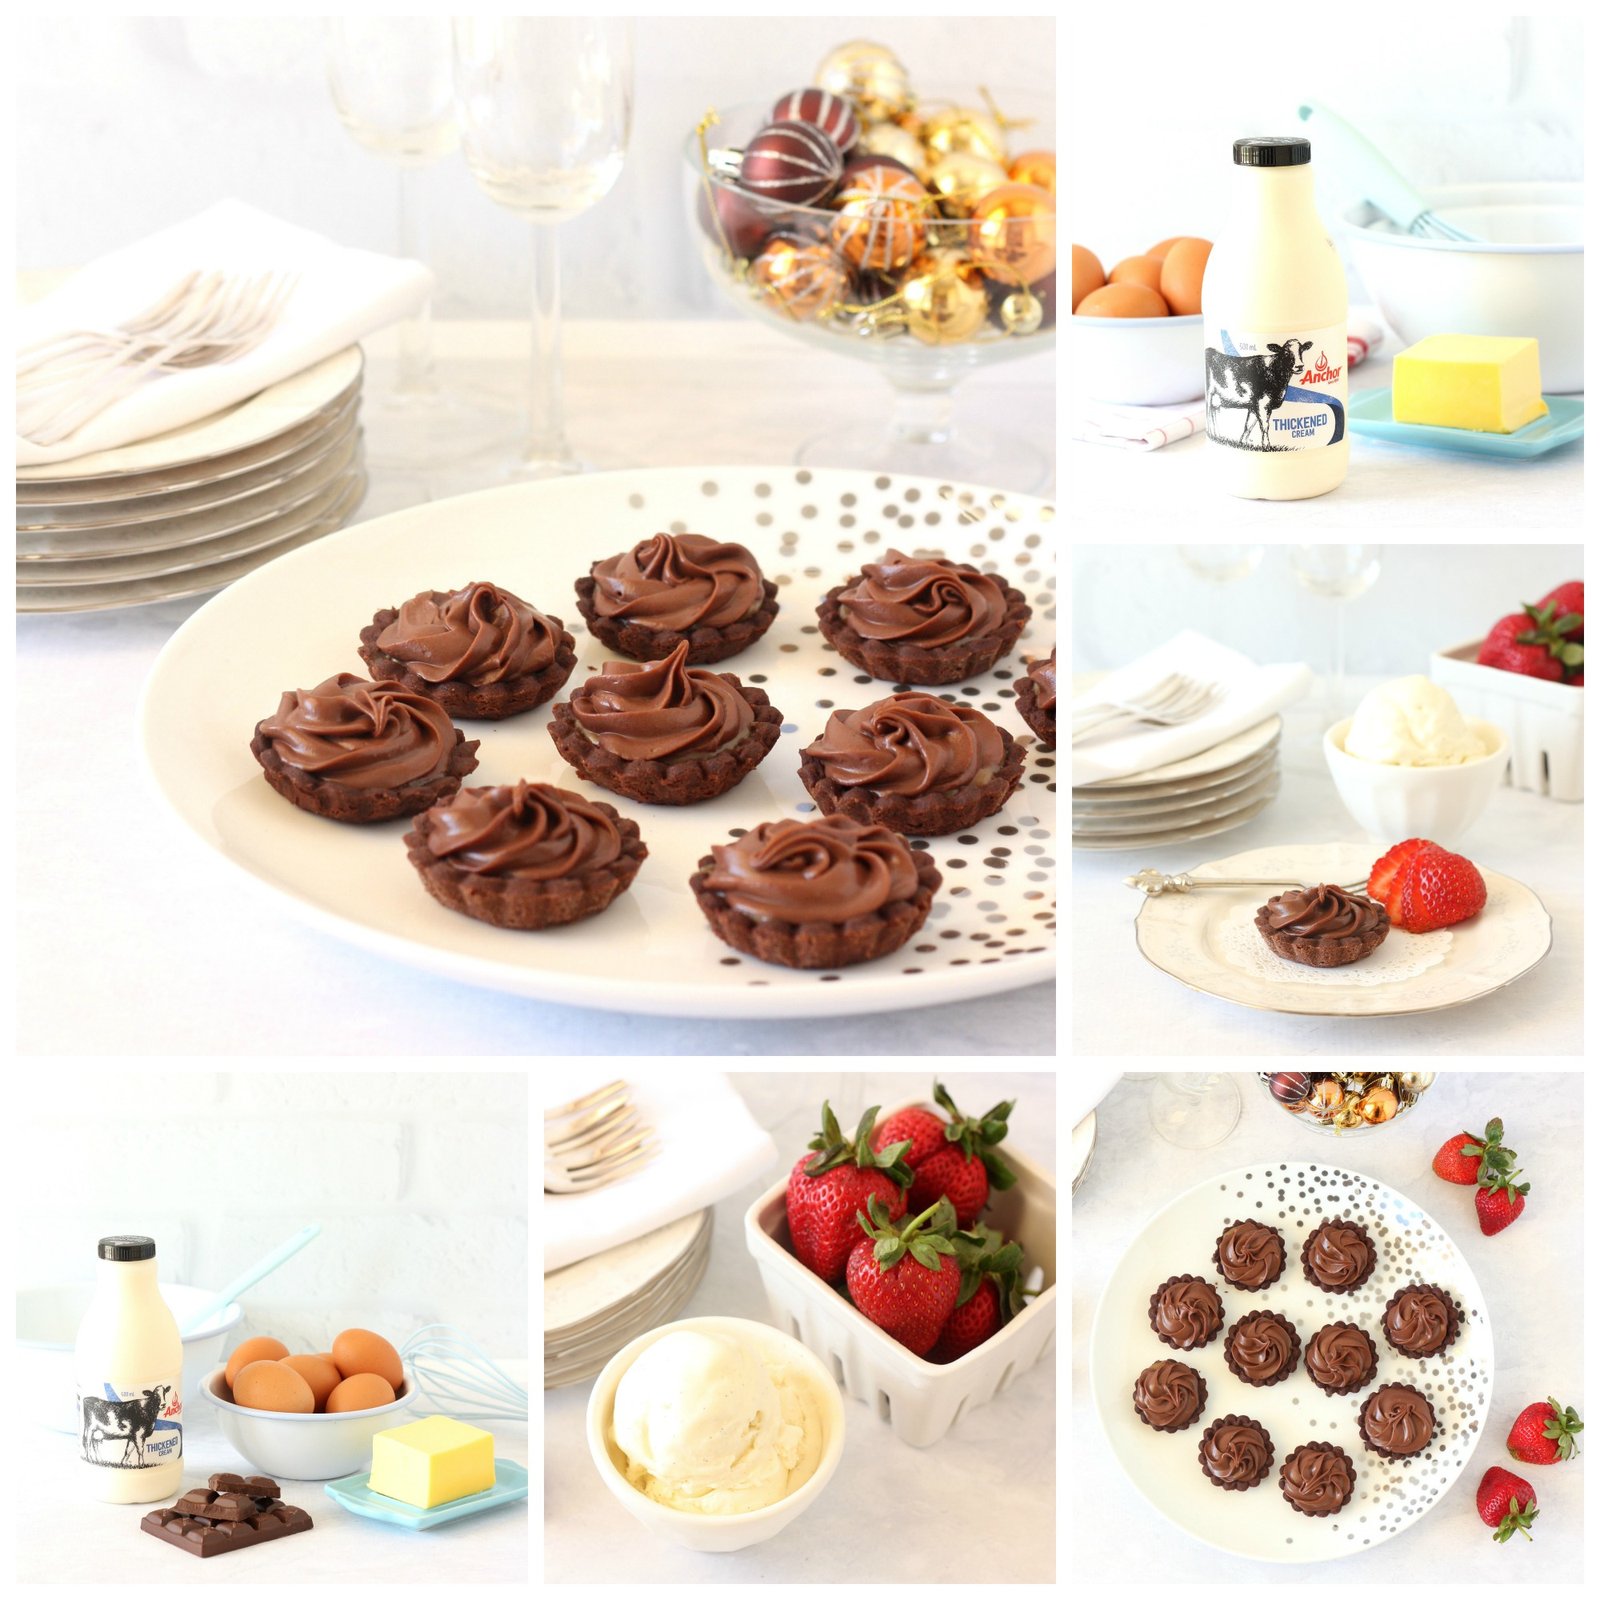
    Looks delicious! What if we can’t find Anchor Thickened Cream where we live? What do you suggest we use instead?

    Reply
    • A Spoonful of Sugar says

      December 19, 2015 at 10:22 am

      Hi Kathleen – Anchor cream is available in Australia from Woolworths. If you don’t have it where you are, if you are in the USA you can substitute heavy whipping cream or heavy cream, for the same result. Happy baking!

      Reply
  2. Suz says

    December 19, 2015 at 9:45 am

    These look delicious Lisa! Anything with salted caramel is a winner in my book! I think I need to pin this and make it once this heatwave in Victoria is over!

    Reply
    • A Spoonful of Sugar says

      December 19, 2015 at 10:19 am

      Hope it cools down for you soon! We have a mild Christmas forecast for Perth which will be a welcome change. You will love the tarts – they are so delicious. Our first batch is nearly gone 🙂

      Reply
  3. Lise says

    April 17, 2022 at 5:43 am

    Hey. I am from Denmark. I do not know what 11/4 is ?
    Is is for the flour. How do I measure that. In DK we do not use cups but grams.
    Can you help me measure the flour?

    Reply

Leave a Reply Cancel reply

Your email address will not be published. Required fields are marked *

Rate this recipe:  
  • Email
  • Facebook
  • Instagram
  • Pinterest
  • Threads
  • TikTok
SUBSCRIBE TO NEWSLETTER
×

Categories

Archives

PURCHASE PDF PATTERNS

We offer over 100 affordable PDF sewing patterns available for download from our store website or Etsy store. Each pattern includes detailed instructions, numerous photos, and templates.

WEB STORE ETSY STORE

Instagram

A lot can change in 10 years ❤️ It’s been fun look A lot can change in 10 years ❤️ It’s been fun looking back at where I was in 2016 and how far life has come since then. Swipe for a little trip down memory lane.Back in 2016, my priorities were firmly centred around family. I was working full‑time, sewing in the guest room, sharing tutorials on my blog, and slowly dipping my toes into selling a handful of patterns on Etsy. It was a busy, full season — and creativity was something I fitted in around everything else.  Fast forward to 2026… I’m now retired and living the creative life I once dreamed of. My kids have grown up and are living in their own homes nearby. My husband and I are free to travel, explore, and enjoy this stage of life. And I get to spend my days designing, sewing, and connecting with this beautiful community.Life looks different now — in the best possible way.Were you following me back then, or what has changed for you over the past 10 years? I’d love to hear your story too.Tagging the lovely makers of my quilt: @arabesquescissors @ministryoffabric @belloquacity @alittlepatchwork @sameliasmum coleandtaffy @quiltymamaof4 @shequiltsalot @downgrapevinelane @lizzierosesews @lovethatfabric @sew_mimi.k #2026isthenew2016 #10yeartransformation #sewingjourney #sewingcommunity #aspoonfulofsugardesigns
Fall in love with sewing all over again ❤️I’ve Fall in love with sewing all over again ❤️I’ve rounded up 10 heart‑themed makes — from quick gifts to charming quilt blocks — perfect for weekend stitching or using up your favourite scraps. Whether you’re sewing for Valentine’s Day, birthdays, or just because, there’s something sweet for every maker.Comment HEART and I’ll send you a link to my Heart Pattern Collection.#sewingproject #heartsewing #quiltblock #scrapsewing #easytosew
Raw edge appliqué doesn’t have to feel fiddly or i Raw edge appliqué doesn’t have to feel fiddly or intimidating. With a few simple techniques, you can create neat, crisp shapes — even tiny details like penguin beaks and hearts.I’ve put together My Top 5 Secrets for Raw Edge Appliqué to help you feel confident, whether you’re brand new to appliqué or looking to refine your finish. Save this for your next sewing session.If you’d love a quick, beginner‑friendly project to practise these tips, my Penguin Love Mugrug is the sweetest Valentine’s make — scrap‑friendly, gift‑ready, and such fun to sew.Comment PENGUIN and I’ll send you the link to the pattern. Available now in our Pattern Store and Etsy shop.  #rawedgeapplique #appliquetips #sewingtipsandtricks #mugrugpattern #penguinlove
If you’ve ever wanted to add eyelets or grommets t If you’ve ever wanted to add eyelets or grommets to your sewing projects, here’s a quick look at how I install them using my DK93 snap press. It’s the same tool I use for snaps — and it makes installing eyelets beautifully quick and consistent.For this Ribbon Pouch, I used the Liberty Gifts from the Garden collection (printed on Lasenby cotton and released in January 2026). The colours and motifs pair so well with the little ribbon tie detail.Here’s how to install the eyelets:Punch out the four holes using a hole‑cutting die.Place the eyelet into the hole.Press it into place using the snap press.That’s it — easy peasy, and it gives the pouch such an elevated, professional finish. I love how clean and sturdy the result is.Fabric is Gifts from the Garden by Liberty - kindly provided by @regent_street_fabrics — thank you!If you’d like the Ribbon Pouch pattern (it comes in 3 sizes), comment RIBBON and I’ll send the link straight to you.Ribbon Pouch Sewing Pattern: available in our Pattern Store and Etsy shop ( links in profile).#SewingInspiration #SewingProjects #Eyelets #Grommets #SnapPress
The Twirling Treasures Hot Pad & Placemat Set show The Twirling Treasures Hot Pad & Placemat Set showcases one of my favourite FPP designs — a stunning kaleidoscope‑style block that always turns out beautifully. Kaleidoscope blocks are some of my most popular FPP patterns, and this set is such a fun way to use them.  This set includes six sizes, making it incredibly versatile: use them as hot pads, trivets, placemats, or simply as a way to add a pop of colour to your kitchen.For these samples, I went with a monochromatic scrap‑busting approach, pairing fabrics from the same colour family with a low‑volume background. The black‑and‑white striped binding adds such a crisp, modern finish. It’s a wonderful project for building your FPP confidence — and a fantastic way to use up those treasured scraps.The Twirling Treasures Hot Pad set is our Pattern of the Week. It is currently 25% off this week in our Pattern Store and Etsy Shop.If you’d like to sew your own set, comment TWIRL and I’ll send the pattern link straight to you.Happy sewing! Lisa 🌸#FoundationPaperPiecing #Quilting #HotPads #ScrapBuster #KitchenSewing
The Ribbon Pouch is one of those little makes that The Ribbon Pouch is one of those little makes that feels special from the very first stitch. I made this sweet trio in the Liberty Gifts from the Garden collection, and the colours couldn’t be more perfect for gifting, organising, or adding a little beauty to your everyday.Each pouch features: 🌼 A simple ribbon tie closure 🎀 Optional sew‑in tags or DIY felt/fabric labels 🧵 Three practical sizes — perfect for notions, treats, or small gifts ✨ A quick, beginner‑friendly sewIf you’d like to make your own, comment RIBBON and I’ll send the pattern link straight to your inbox. Save this for your next weekend project — it’s such a satisfying little sew. Pattern is available in our Pattern Store.Thanks to @regent_street_fabric for the Gifts from the Garden fabric collection. (released Jan 2026)#SewingInspiration #SewingProjects #LibertyFabric #SewingPatterns #BeginnerSewing
Follow on Instagram

Featured Pattern

Travel Sewing Kit Pattern

Featured Tutorial

Retro Drawstring Bag

Featured Recipe

Lemon Pound Cake

Connect

  • Email
  • Facebook
  • Instagram
  • Pinterest
  • Threads
  • TikTok
SUBSCRIBE TO NEWSLETTER
×

Popular Posts

  • Charm Square Fabric Tray
  • Merry Little Christmas Sewing Projects
  • {Back to School} Tissue Cover
  • Raw Edge Applique Tips
  • Sewing Gifts 101: Easy and Affordable Ideas for Your Crafty Friends
  • Fabric Gift Pouch
  • Free Holiday Sewing Tutorials

Copyright © 2026 Lisa. K. Cox - A Spoonful of Sugar