A Spoonful of Sugar

Make. Bake. Create.

Menu
  • Home
  • About
    • About Us
    • Press
    • FAQ
    • Disclosure Policy
    • Contact Us
  • Crafts
    • Crochet
    • DIY
    • Embroidery/Cross stitch
    • Gift Wrapping
    • Knitting
    • Miscellaneous
    • Paper Crafts
  • Holidays
    • New Year’s
    • Australia Day
    • Back to School
    • Valentines Day
    • Easter
    • ANZAC Day
    • Mother’s Day
    • Father’s Day
    • Halloween
    • Christmas
  • Recipes
    • Appetizers
    • Bars & Slices
    • Bread & Pastries
    • Cakes
    • Cookies
    • Confectionery
    • Cupcakes & Muffins
    • Desserts
    • Drinks
    • Ice Cream
    • Jams/Preserves
    • Main Meals
  • Sewing
    • Sewing Tutorials
    • Quilting
    • Sewing & Quilting Patterns
  • Family
    • Back to School
    • Family Fun
    • Our Home
    • Parenting
    • Travel
  • Shop
    • Pattern Store
    • Etsy Store

Tutorial: Gathered Round Basket

March 19, 2011 By Spoonful of Sugar - 131 Comments

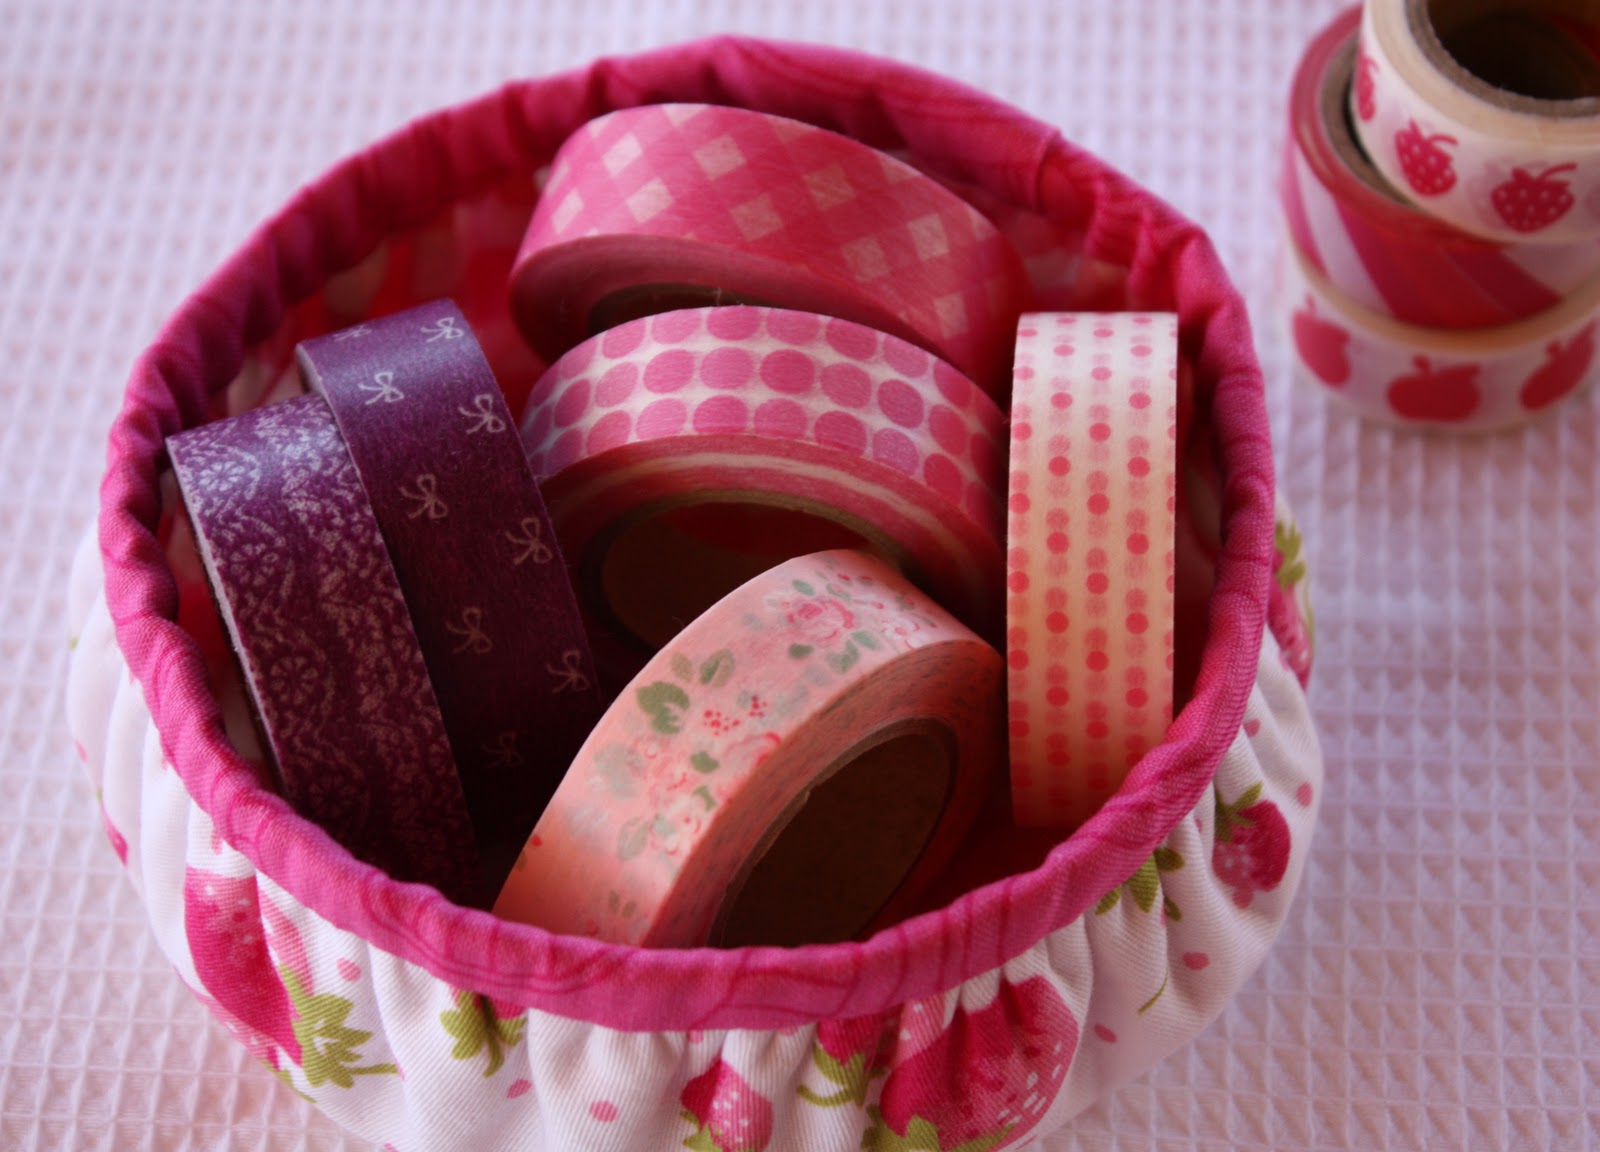
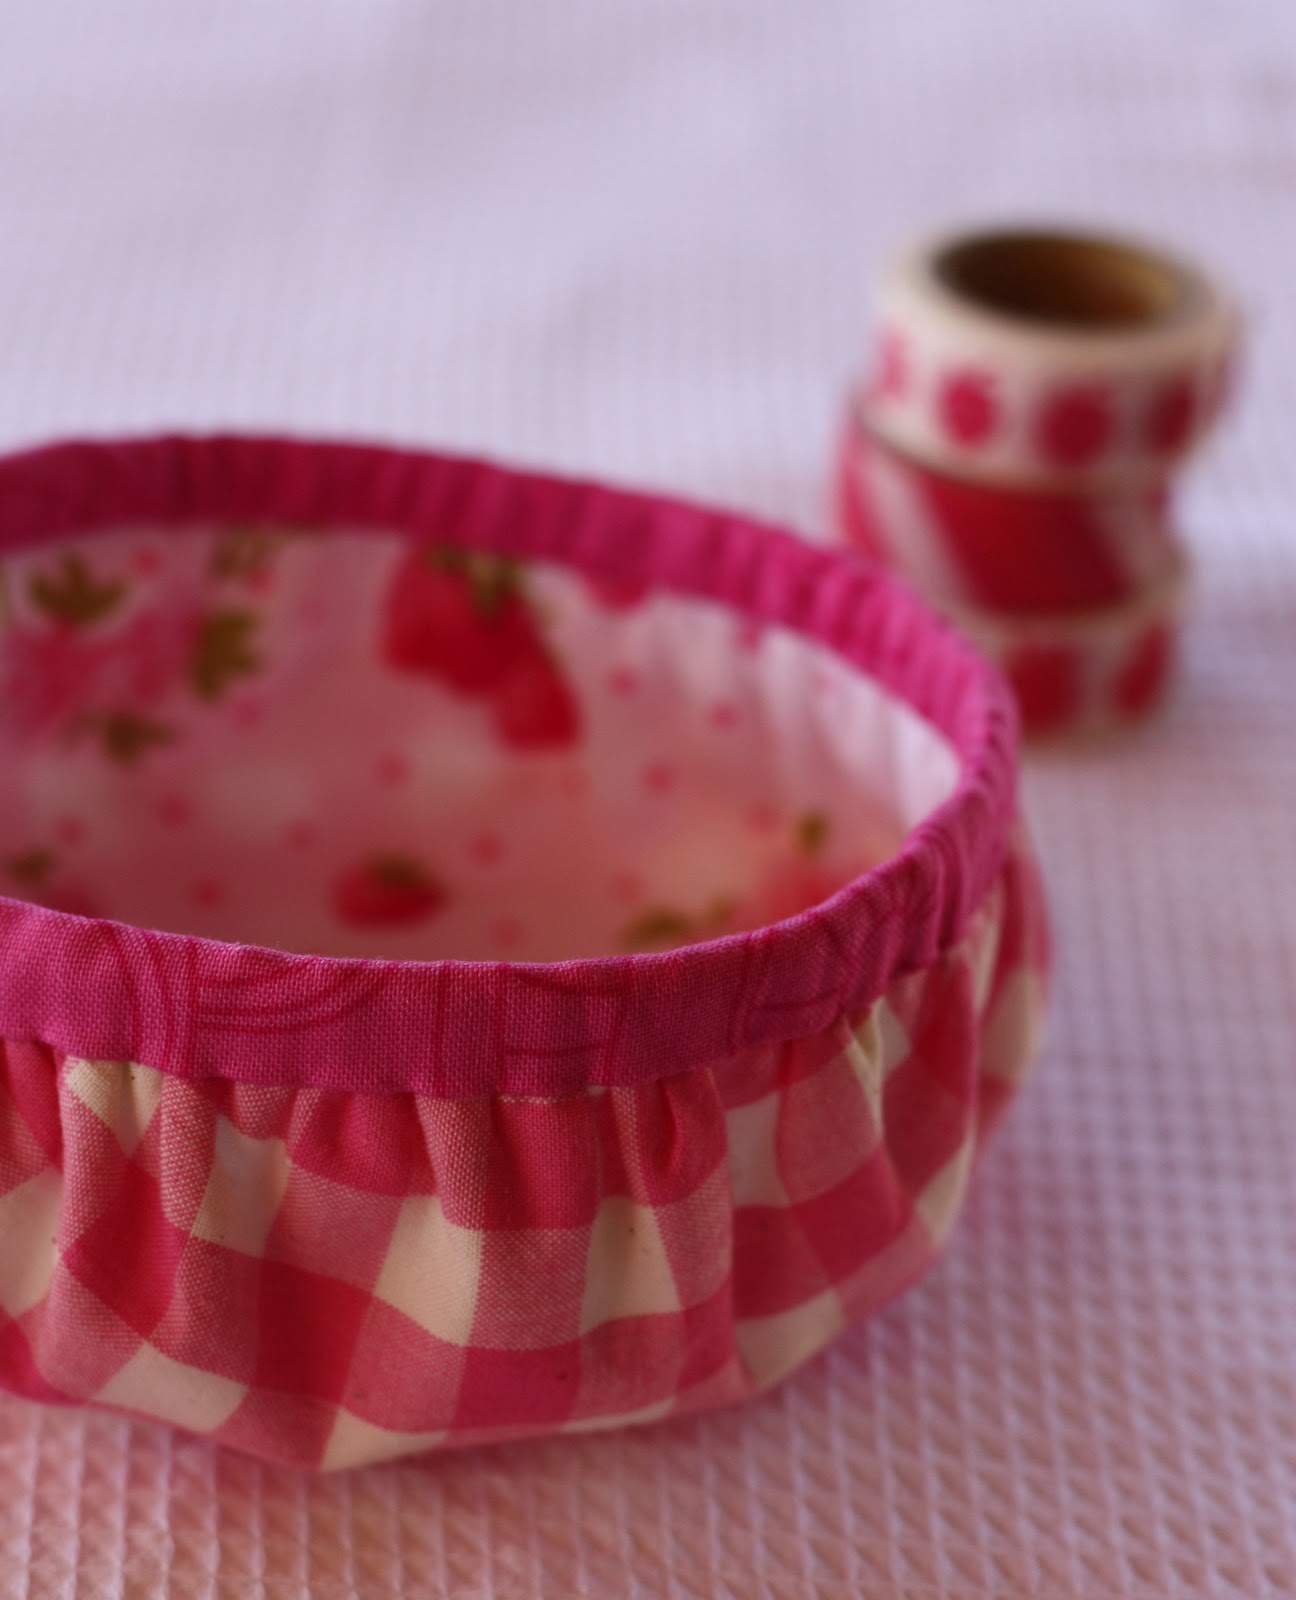
I had a few requests for instructions on how to make the gathered round basket that I made last week. This is an easy project and the baskets can be made in any size, are fully reversible,  and are useful for so many things.

Materials: (to make a basket measuring 4 1/2 inches diameter and 1 3/4 inches high)

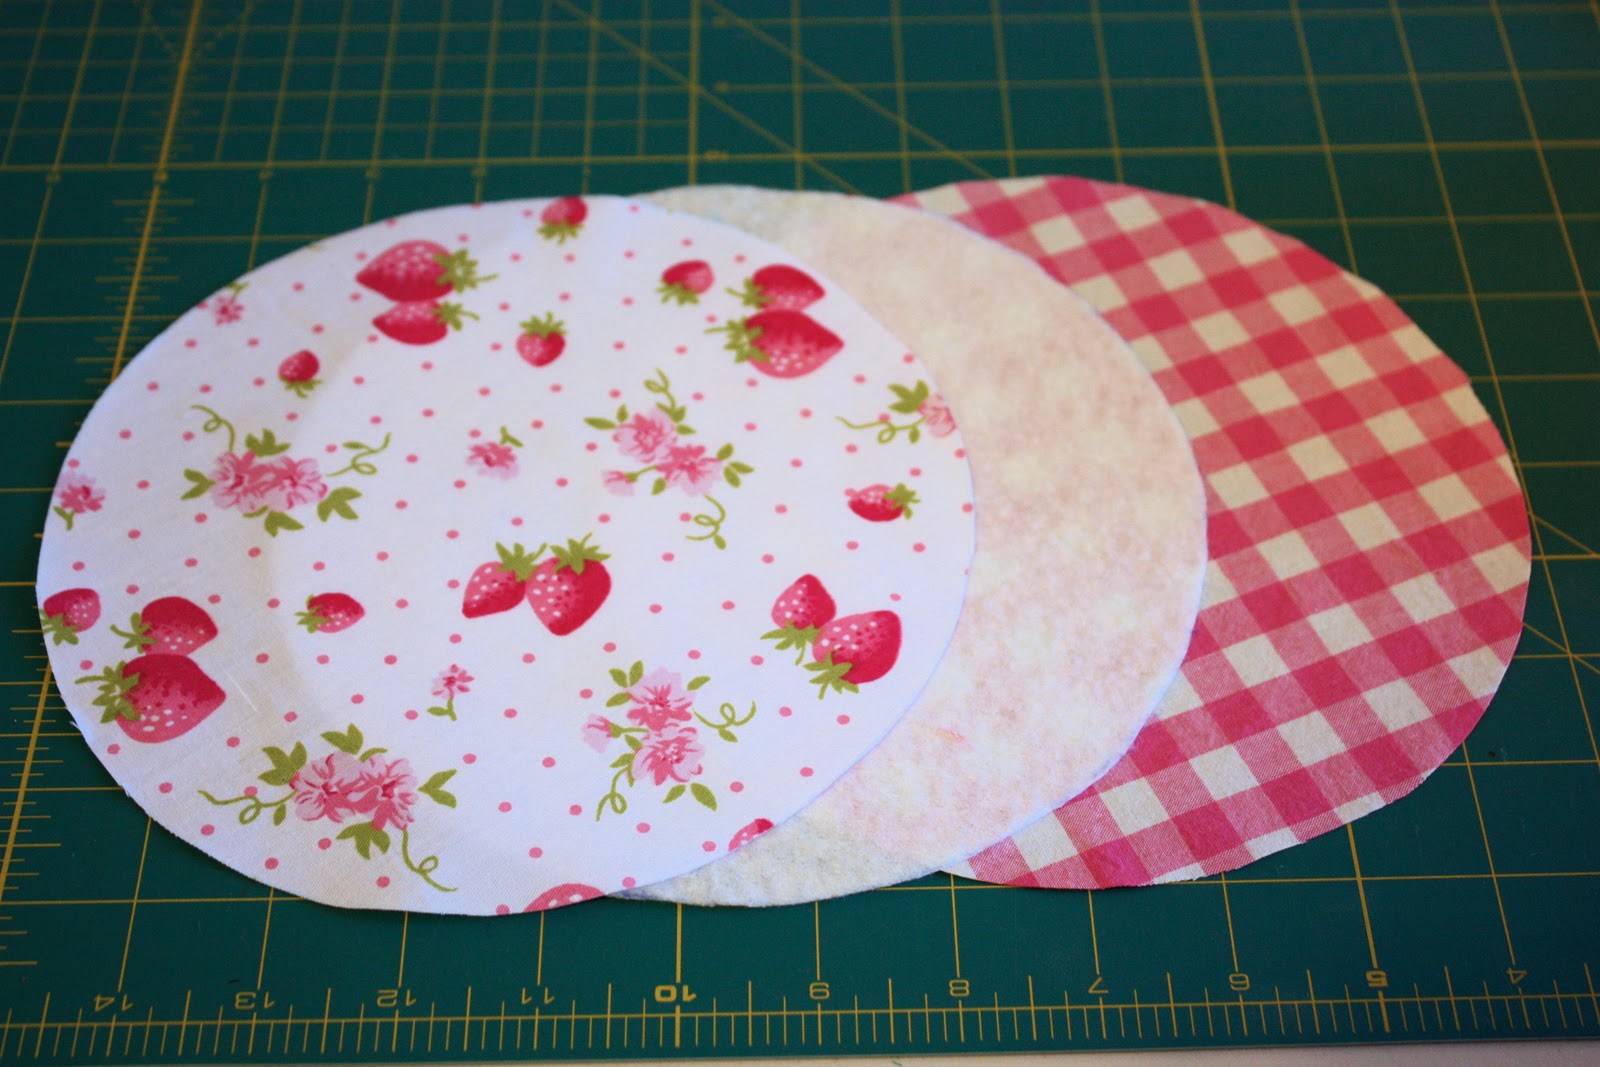
  • 2 pieces of cotton fabric cut into circles with a 8 inch diameter (I used a small side plate as a template)
  • 1 piece of fusible wadding (such as parlan or pellon) cut into a circle with an 8 inch diameter
  • strip of fabric measuring 2 1/4 inch x 14 inch (for binding)


Instructions:
1. Fuse the wadding to the fabric circle that will form the outside of the basket, following manufacturers directions.
 
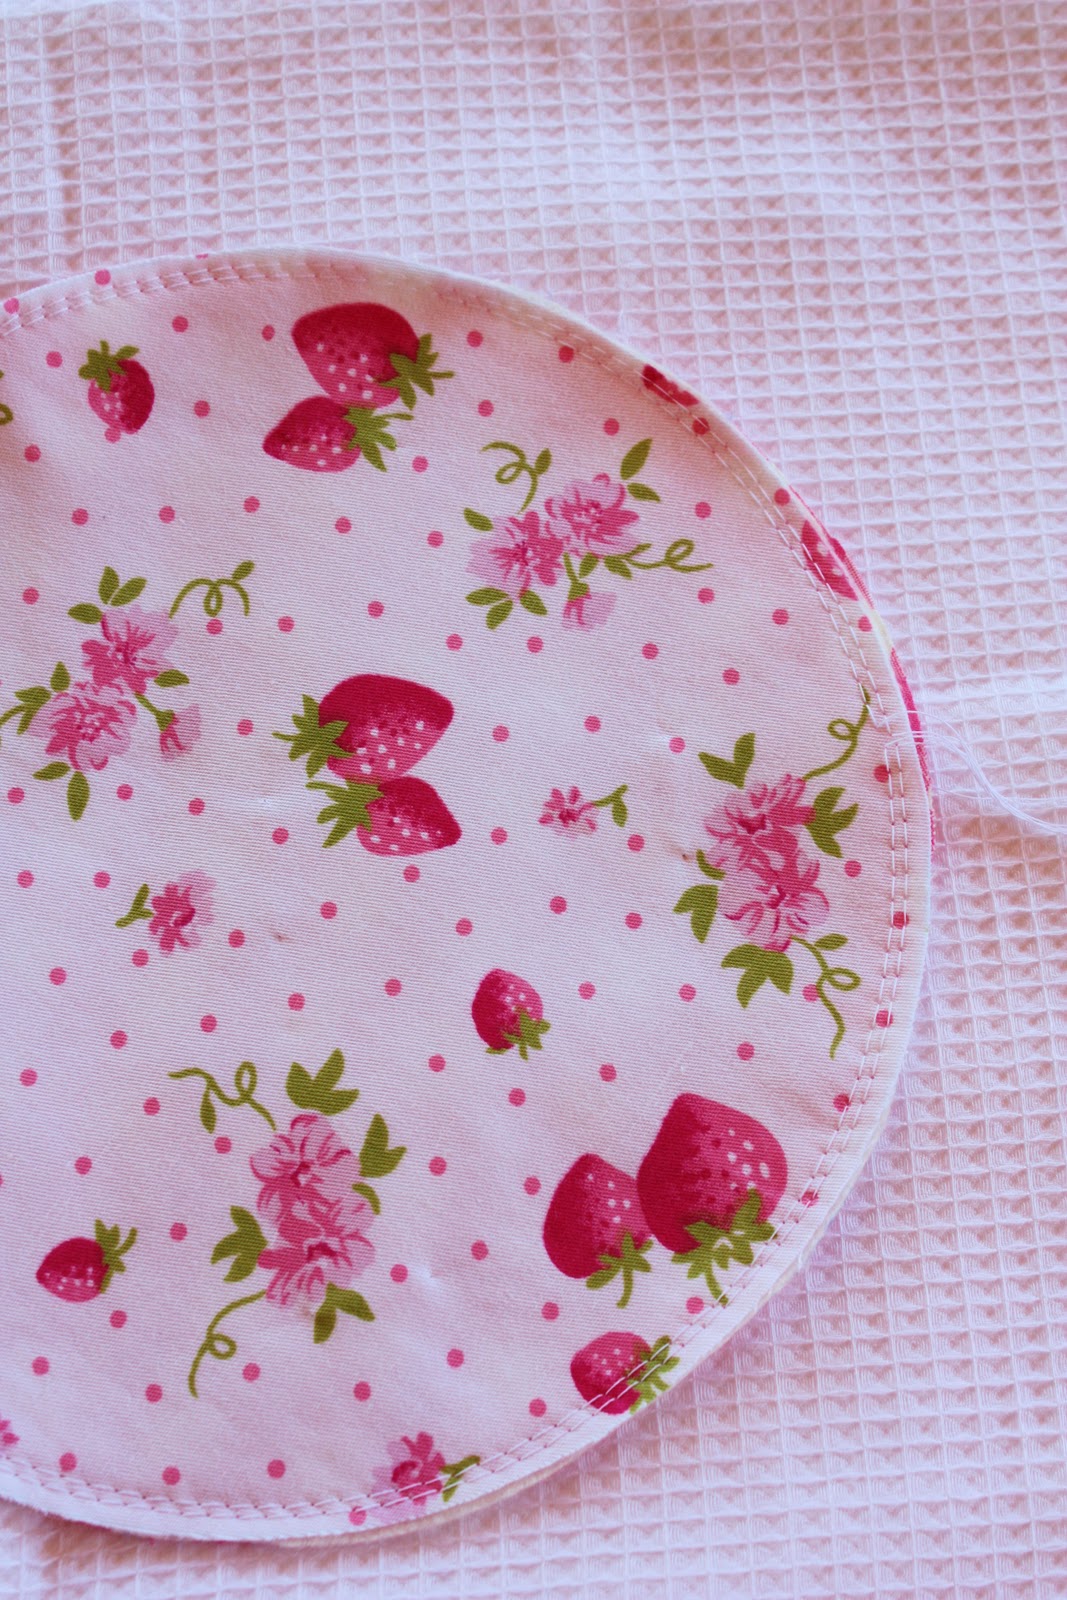
2. Baste the basket lining and basket outer together with the wrong sides facing.
 
3. Using a long straight stitch, sew a gathering stitch around the perimeter of the circle, close to the edge. Stitch a second gathering stitch close to the first gathering stitch. Ensure both gathering stitches are within the 1/4 inch seam allowance.


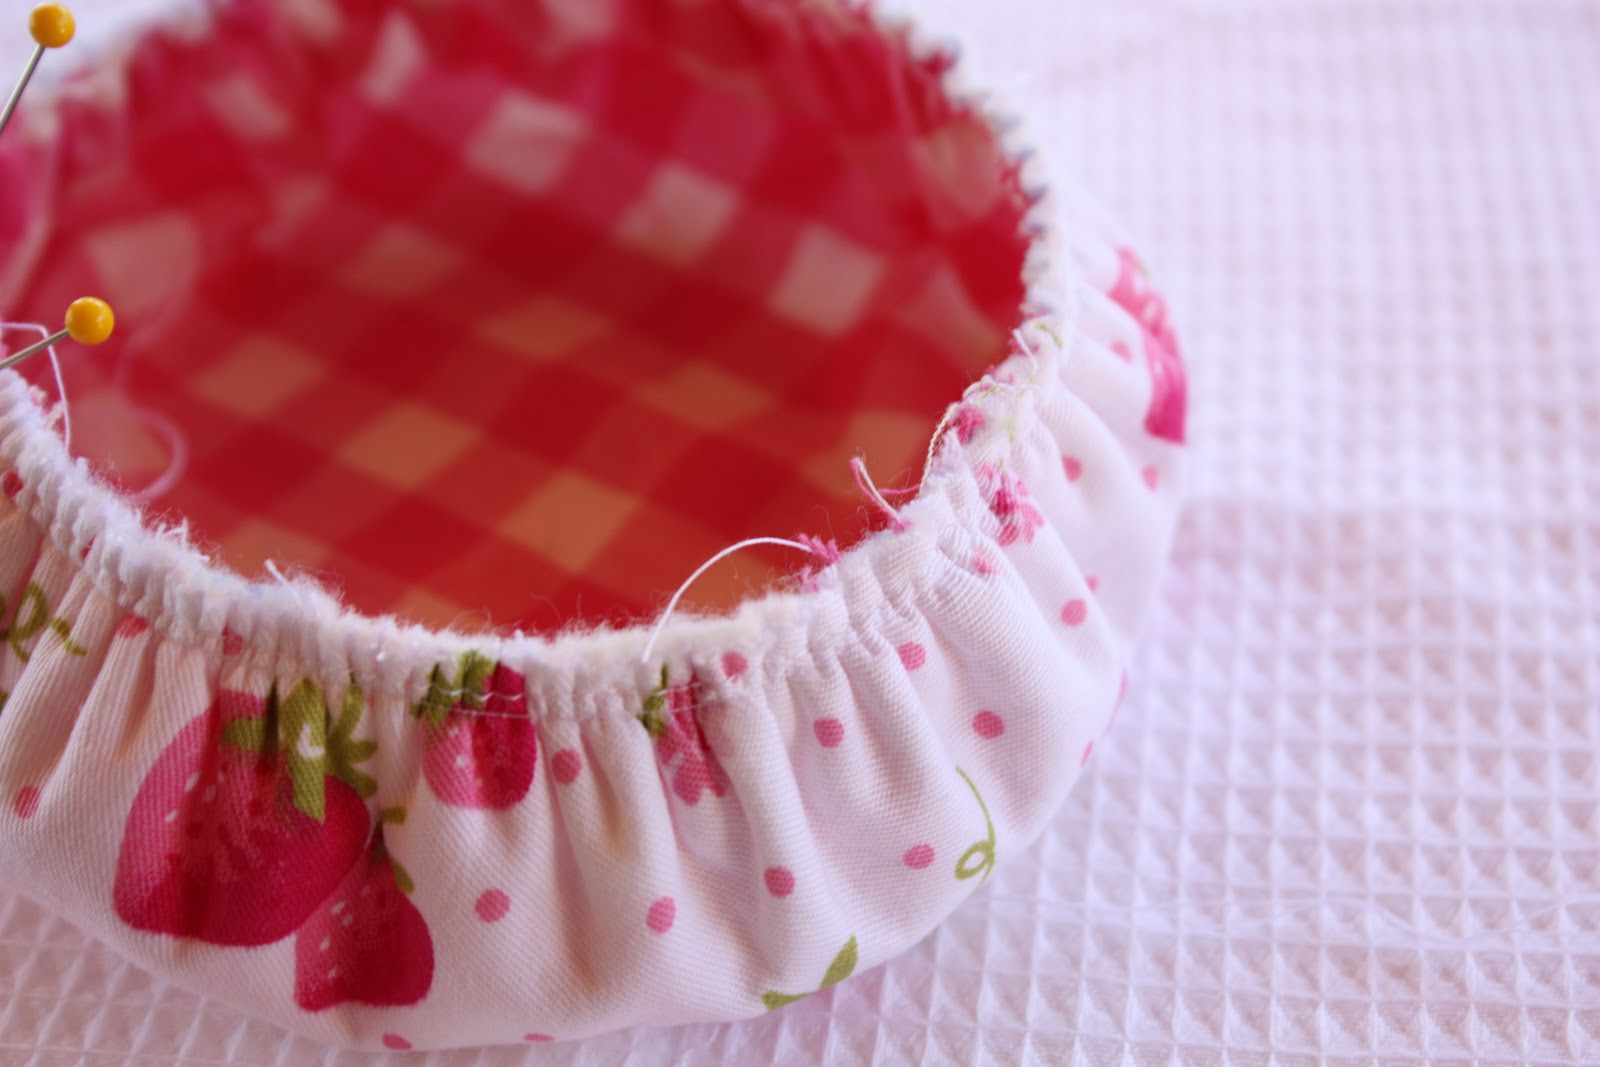
4. Gently pull the two ends of thread on the wrong side, the fabric will gather along the thread.
 
5. Secure the threads at one end to prevent the stitches from pulling out.
 
6. Even out the gathers until the circumference of the circle measures approximately 12 inches. When all the gathers are in place, use a standard machine stitch to stitch a 1/4 inch seam.


7. Press the binding strip in half lengthwise with the wrong sides facing.
 
8. Pin the binding to the outside of the basket and stitch in place.


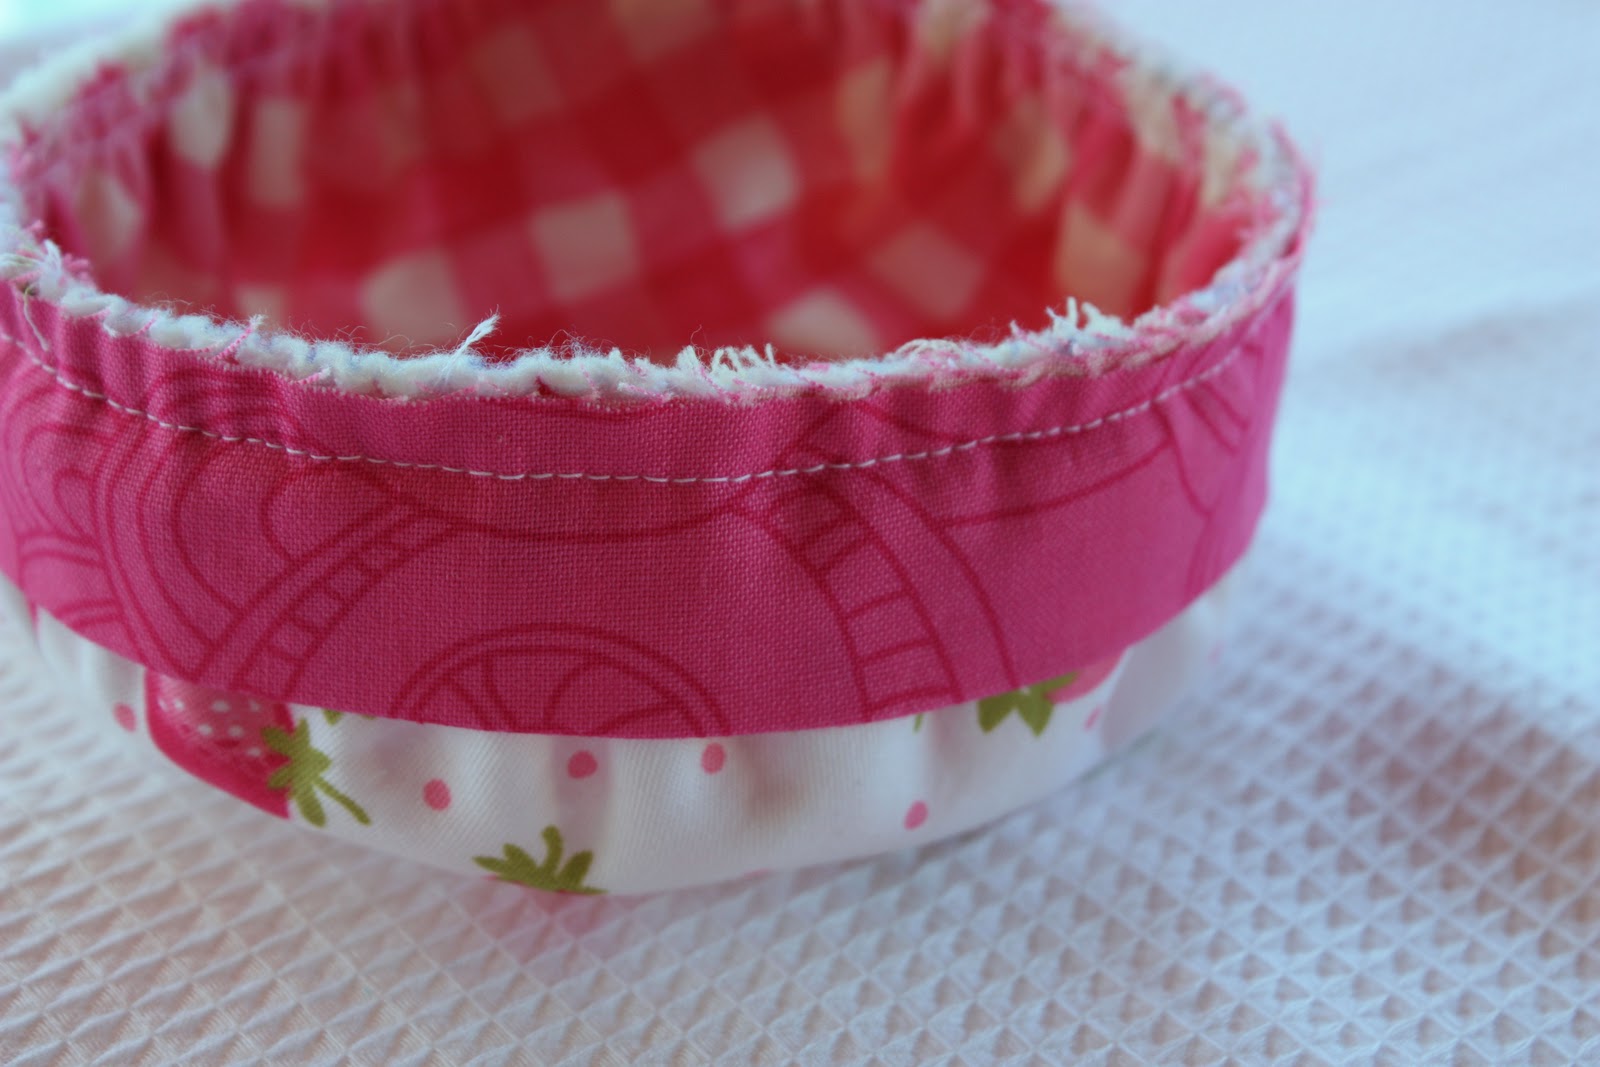
9. Fold the binding over to the inside of the basket and stitch in place by hand using a slip stitch to secure.


Edit 07/ 2012 – Just wanted to clarify in response to a few emails – The circles are 8 inches in diameter (the measurement you get if you rule a line through the centre of the circle) and when they are gathered they measure 12 inches in circumference (i.e all around the outside of the circle).
 

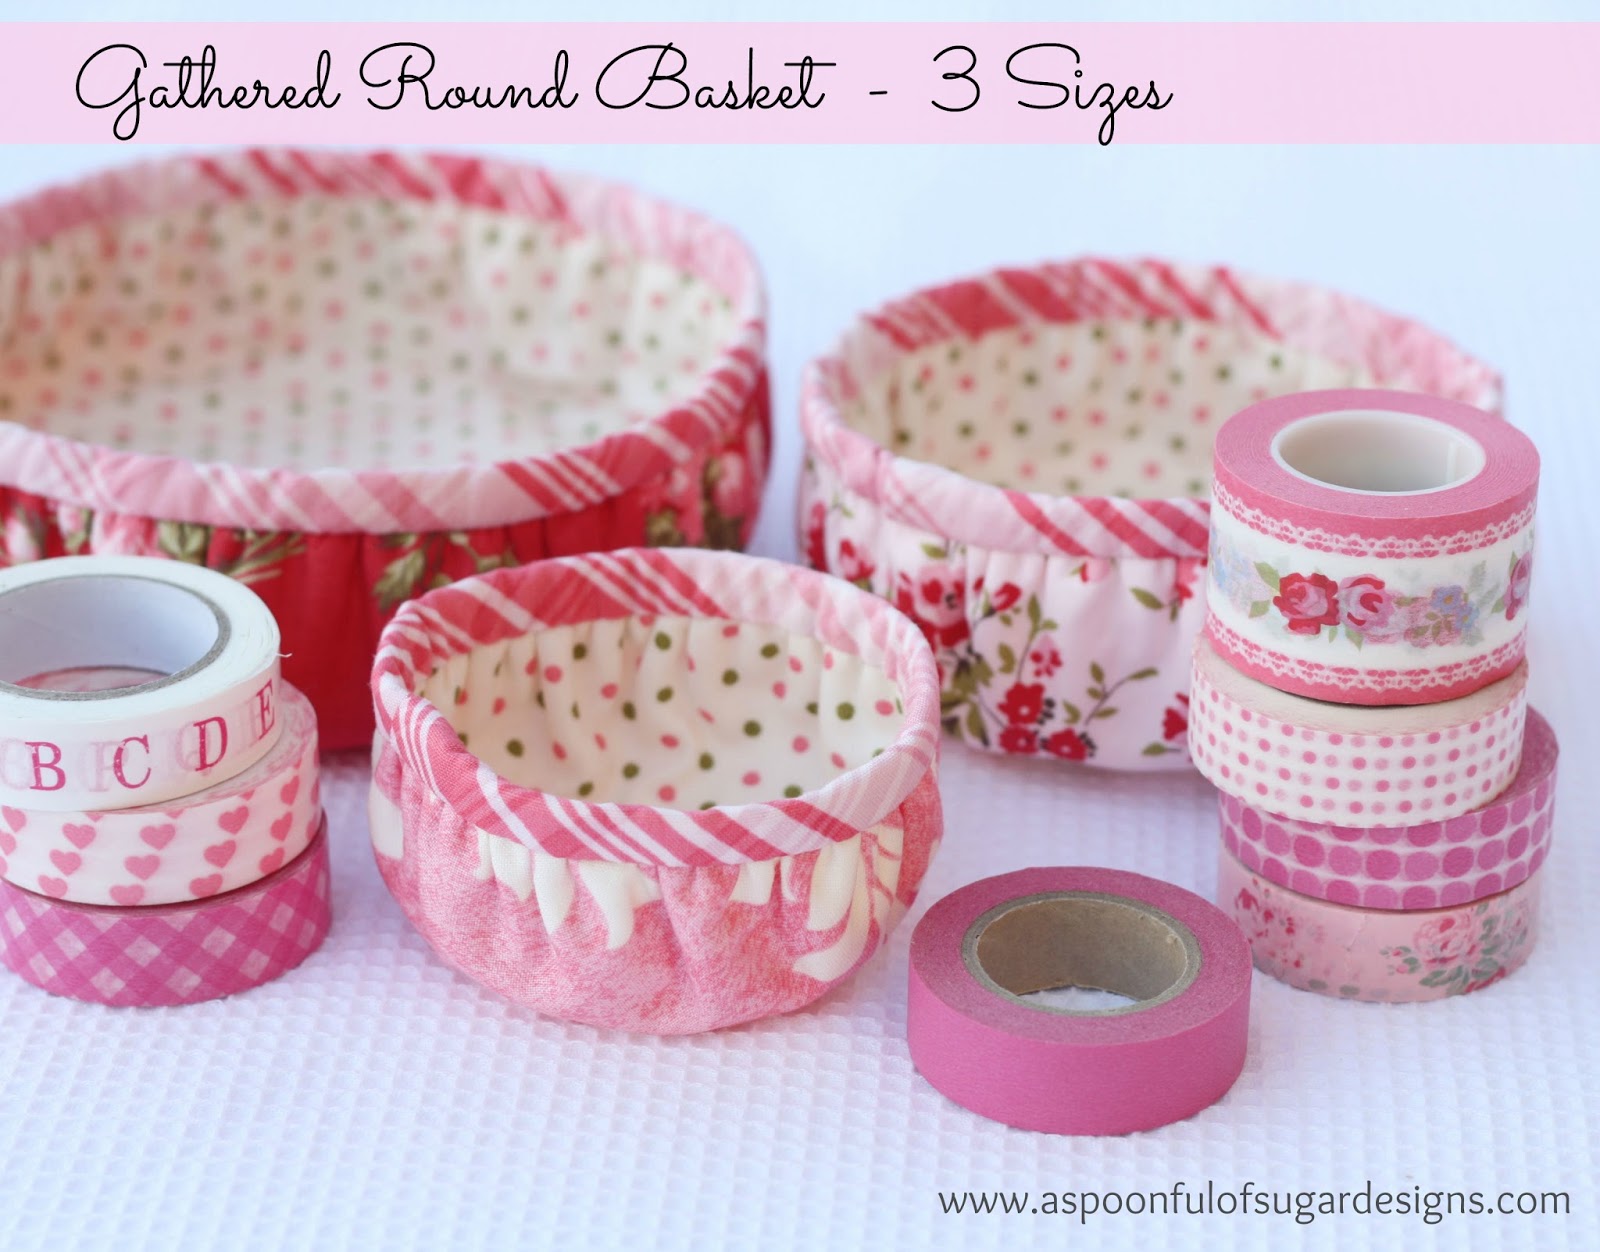
Check out Gathered Round Basket – 3 Sizes, to make three baskets that nest inside each other.


Hello! Are you new here? If so, be sure to sign up for our newsletter here and receive a bonus sewing pattern and welcome discount. Our newsletter includes free tutorials, articles, and new patterns. Welcome to the world of sewing enthusiasts.

Filed Under: Sewing, Sewing Tutorials Tagged With: fat quarter, scrap buster

« Hawaiian Leaf Pillow
@ Home »

Comments

  1. Jaime @ Our Journey says

    March 19, 2011 at 12:51 am

    Wow, GREAT tutorial! I love the basket! I placed a link to your tutorial under my “Inspirational Projects” section on my blog sidebar … it’s officially on my To Do list!

    Jaime
    http://www.ohsochichi.blogpsot.com
    http://www.theclayfamilyblog.blogspot.com

    Reply
  2. Posie Patchwork says

    March 19, 2011 at 1:40 am

    Oh yes, eye catching new header, nice work Sarah!! Lisa i just love the fabric bowl, brilliant, not to mention our shared obsession with washi tapes, love Posie

    Reply
  3. meri says

    March 19, 2011 at 1:48 am

    Thanks for the tutorial, Lisa!
    And the new header is beautiful!
    Missing Paris?? 😉

    Reply
  4. Roseanne says

    March 19, 2011 at 2:04 am

    Thanks for the tutorial I will have a go at making this one too.

    Reply
  5. periwinkle says

    March 19, 2011 at 2:13 am

    Lovely fabric, very pretty and great header – I wouldn’t know where to start.

    Reply
  6. Катаринка says

    March 19, 2011 at 2:24 am

    Спасибо за идею.
    Я всегда не любила пришивать круглое дно .
    А здесь этого делать не надо .))))))))))))))

    Reply
  7. Nicky says

    March 19, 2011 at 2:28 am

    I am going to make one of those cute baskets for sure – thanks for the knowhow! The banner is great but now I think that Paris is in Australia!? 😀 But I know how you feel – I love it too!

    Nicky

    Reply
  8. Simone de Klerk says

    March 19, 2011 at 3:11 am

    GORGEOUS!!! Makes a great present. And then I ask myself why present. Why not one for me???
    Have a lovely weekend!

    Reply
  9. Linda says

    March 19, 2011 at 3:13 am

    Thanks Lisa, i am going to give this a go, i have been itching to use some of my Pure by Sweetwater and this looks perfect.
    Sarah is a young lady with many talents.

    Reply
  10. Michele says

    March 19, 2011 at 3:25 am

    I was hoping you would post a tutorial. Cutest little holder I’ve ever seen! Thank you!

    Reply
  11. Sew Useful Designs says

    March 19, 2011 at 3:33 am

    Thank you for the tutorial Lisa, such a cute and quick project!

    I love your new header – Sarah is so very talented!!! 🙂

    Hugs to you both! Vikki xo

    Reply
  12. Stephanie says

    March 19, 2011 at 4:01 am

    Sweet strawberry basket. Yes, great new header!!!

    Reply
  13. Pooh's Abode says

    March 19, 2011 at 5:18 am

    Brilliant tutorial. Thanks so much for sharing – will definitely have a go at one. Thanks….xxx

    Reply
  14. Dmarie says

    March 19, 2011 at 5:25 am

    very nicely done…what a great tutorial. thanks!

    Reply
  15. yuli-prezent says

    March 19, 2011 at 5:50 am

    Thanks for the tutorial! The basket is so cute)))

    Reply
  16. Jule says

    March 19, 2011 at 6:04 am

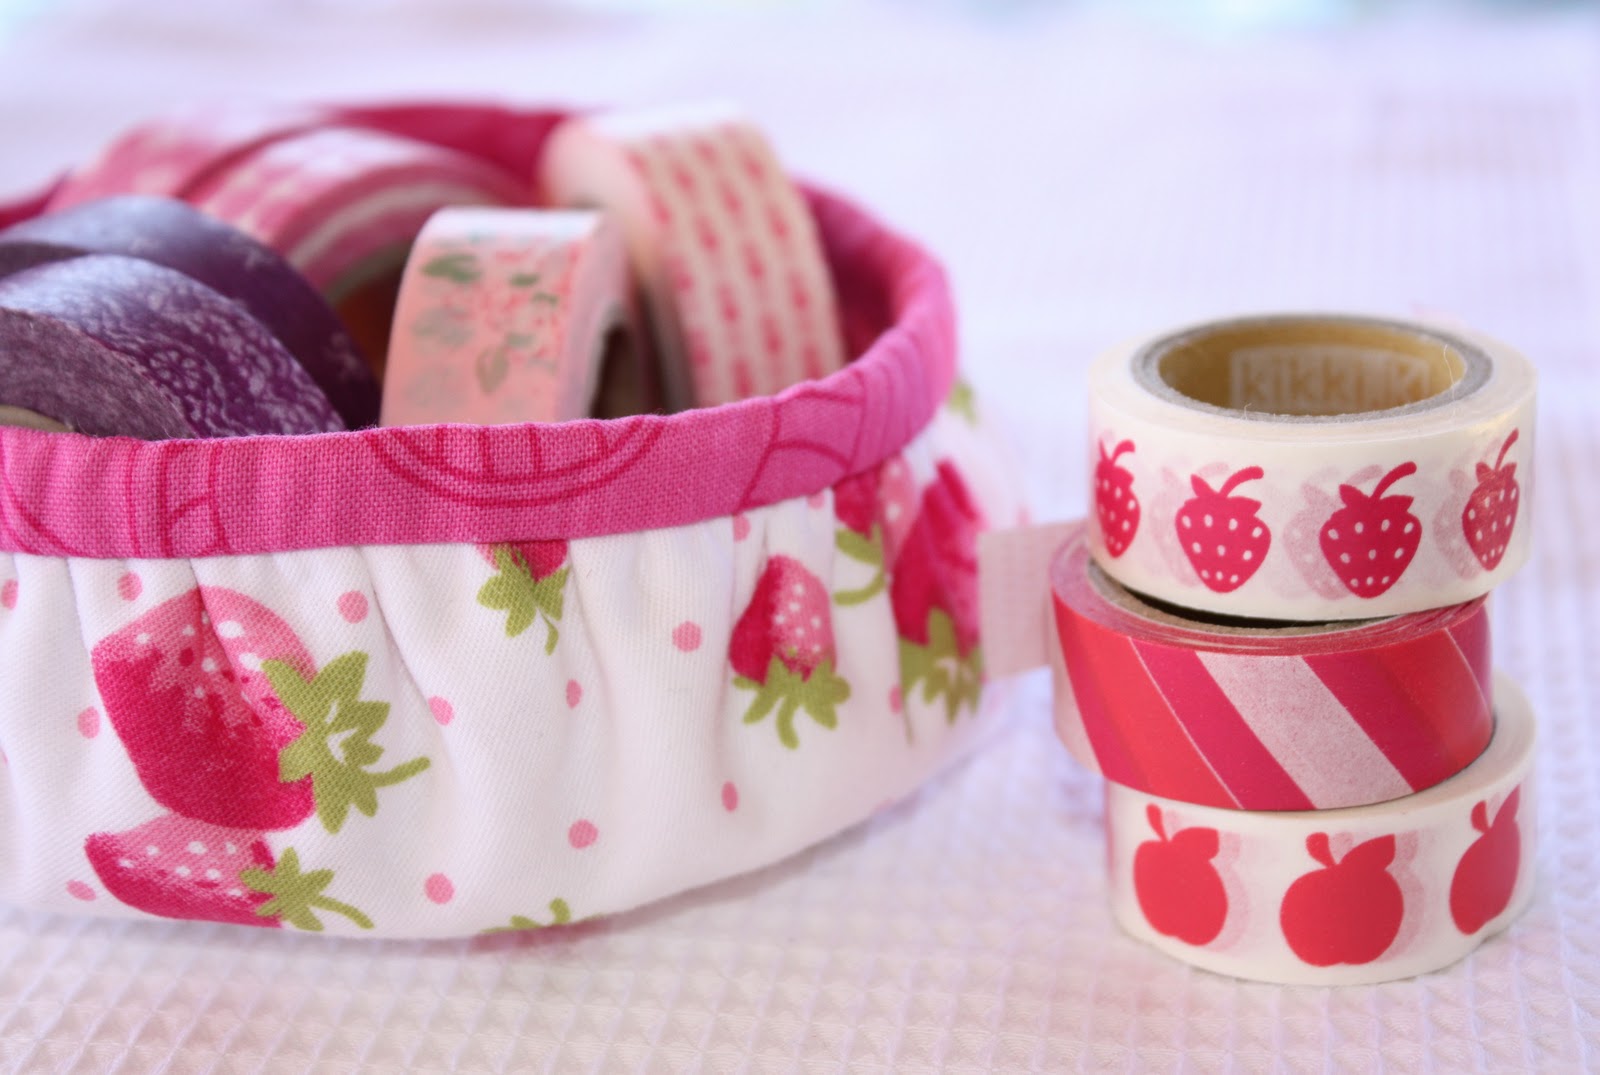
    Nice tutorial. AND you own the matching washi tape with strawberries … Supercute!
    Jule

    Reply
  17. Rumi says

    March 19, 2011 at 6:15 am

    I have a feeling I will be making many of these this year! What a great little gift for any occasion. Thanks for the tutorial.

    Reply
  18. pretty organized says

    March 19, 2011 at 6:18 am

    So beautiful…
    and pretty organized :o)
    ❤ alex.

    Reply
  19. Laura says

    March 19, 2011 at 6:23 am

    Thanks for sharing! I was hoping you’d do a tutorial for that basket. It’s adorable.

    Reply
  20. ferne says

    March 19, 2011 at 6:37 am

    Thanks for sharing! I love this and think it will be put to use in my sewing area right away!

    Reply
  21. casserole says

    March 19, 2011 at 6:47 am

    I love these so much!! I linked to your tutorial on Craft Gossip Sewing:
    http://sewing.craftgossip.com/tutorial-gathered-fabric-bowl/2011/03/19/

    –Anne

    Reply
  22. Luisa says

    March 19, 2011 at 6:51 am

    Love the basket so fun for spring or Easter.

    Reply
  23. Dandelion Quilts says

    March 19, 2011 at 6:53 am

    Super cute…I was wondering myself! Thanks for the great tutorial.

    Reply
  24. Dandelion Quilts says

    March 19, 2011 at 6:57 am

    PS- Sarah, I love the new header.

    Reply
  25. Terriaw says

    March 19, 2011 at 7:58 am

    This basket is so adorable! I love how easy it is, so I can’t wait to make a couple for myself and a couple for gifts. Perfect for my sewing friends. Love the girlie fabric you used for the sample.

    Cool header! I could use a refresher for my blog too.

    Reply
  26. Staci says

    March 19, 2011 at 8:30 am

    THank you! I had been looking at the photo trying to figure it out! Thank you for the tutorial so I don’t have to strain my poor brain!

    Reply
  27. jennifer says

    March 19, 2011 at 8:31 am

    Do you think that if I used an upholstery weight fabric I could skip the wadding?

    Reply
  28. sunny says

    March 19, 2011 at 8:48 am

    I’m making one today! Thanks for the great tutorial!

    Reply
  29. Barbara says

    March 19, 2011 at 9:30 am

    Super cute tutorial…I can’t wait to try it! And I love the new header as well (:

    Reply
  30. Bela says

    March 19, 2011 at 9:39 am

    The new header is so lovely, girls!! I love it! I have been to Paris and that is an adorable city! Romantic, charming!!
    This project is wonderful! So gorgeous!!! Be sure I will work on it!!!
    Thanks!
    Love!
    Bela

    Reply
  31. evamarie says

    March 19, 2011 at 11:32 am

    I love them and I’m going to be making them very soon! Eva-Marie from zusjeb.blogspot.com

    Reply
  32. Jen says

    March 19, 2011 at 11:34 am

    I love this basket! I needed a little thread catcher and I think this’ll be perfect:) So cute!

    Reply
  33. ulli says

    March 19, 2011 at 11:46 am

    ♥ so lovely! thanks for sharing. I had to make one today and placed a link in my blog.

    ulli

    Reply
  34. Lina says

    March 19, 2011 at 12:41 pm

    Love you new header! Thanks for the Gathered Round Basket tutorial!!! I am going to make one now! Again thanks for sharing!

    Reply
  35. Shirley says

    March 19, 2011 at 1:53 pm

    I can’t believe you put a tutorial together for this! I loved this little basket from the second I saw it and can’t wait to make one for myself. Thank you so much! I am also loving your new header. You and your daughter are so full of inspiration and talent.

    Reply
  36. sandra says

    March 19, 2011 at 3:46 pm

    great tutorial, hopefully I will be making one today.
    Thank you.

    Reply
  37. Julie says

    March 19, 2011 at 9:12 pm

    Great tutorial. I think I could make this!

    Reply
  38. Melanie Gray Augustin says

    March 19, 2011 at 11:39 pm

    That’s really sweet! I can imagine it holding little sweet (wrapped) treats in it as well 🙂

    Reply
  39. Meertje says

    March 20, 2011 at 1:18 am

    thank you, I love it!

    Reply
  40. moonstruckcreations says

    March 20, 2011 at 2:04 am

    This is gorgeous! I feel quite inspired to have a go myself!

    Would be a great organiser for my ribbons and embroidery threads, so much nicer than a carrier bag….

    and another full of little sweets would be quite nice too….

    Have a lovely weekend, Helenxx

    Reply
  41. Amy says

    March 20, 2011 at 6:56 am

    Hello, thank you for the tutorial. I will have to try one.Amy

    Reply
  42. Lillabilly says

    March 20, 2011 at 1:23 pm

    I LOVE IT! Thanks so much for such a great tute…those materials you used are stunning too! And let Sarah know I think she is a very talented young lady with an incredibly bright future!! Loving the colour scheme and eiffel tower…matches her newly made over room!!

    Reply
  43. kakot says

    March 20, 2011 at 1:51 pm

    simple and great!
    Thank you for a wonderful hour with my sewing machine 🙂

    Reply
  44. Ally Johnston says

    March 20, 2011 at 2:00 pm

    Very pretty and so simple to make. Thanks for the tutorial

    Reply
  45. Khris says

    March 20, 2011 at 5:17 pm

    Yep looks nice and easy…thanks for sharing the tutorial…I have linked to you on my Freebies for Crafters blog…hugs Khris

    Reply
  46. Dogwood says

    March 20, 2011 at 5:17 pm

    Very cute.
    It is on my list of things I want to make in the very near future!
    Thanks. Cory/Dogwood

    Reply
  47. Gloria J W says

    March 20, 2011 at 5:41 pm

    Just love the little baskets… and thank you so much..these would be great for my granddaughters for their easter eggs and then they could use them for their hair ties!! Wonderful…thank you for sharing
    Hugs

    Reply
  48. GardenofDaisies says

    March 20, 2011 at 8:32 pm

    I LOVE this basket!! I want to try to make one!

    Reply
  49. Jenny of Elefantz says

    March 20, 2011 at 9:31 pm

    I’m so glad you shared the pattern, Lisa – it’s adorable, and I can think of *many* ways to use it! Thanks so much! 🙂
    Hugs
    Jenny

    Reply
  50. ayumills says

    March 20, 2011 at 10:22 pm

    Wow it looks complicated to make at first, but you did such a great job showing how easy this can be done! Love this!

    Reply
  51. Vickie says

    March 21, 2011 at 3:39 am

    Very sweet little basket! Thanks for sharing! I love the header! Great job Sarah!

    Reply
  52. Barbara says

    March 21, 2011 at 3:32 pm

    Love the basket and tried to make it but was confused with the directions of cutting a 8 inch circle. Was the 8 inch right? How does the 8 inch circle have a circumfrence of 12 inches? Sorry for being so dumb but I love this basket and want to make one.

    Reply
  53. Kris says

    March 23, 2011 at 1:30 am

    I love the “Living Creatively”!

    Reply
  54. Emily says

    March 23, 2011 at 9:38 am

    Love it! And might try adding a strap to make it an Easter basket.
    Thanks for the great idea!

    Reply
  55. Amber says

    March 23, 2011 at 4:27 pm

    wow i love it! thanks so much for sharing! 🙂

    Reply
  56. Farah Muzaffar says

    March 25, 2011 at 2:32 pm

    Hello dear …

    What a cute idea you are sharing… really so practical and sweet project to do. Sure I will go for some for my craft table
    If you love to play with colours and flowers? Please visit me at
    http://craftaworld.blogspot.com/
    Love
    Farah

    Reply
  57. Anjeanette says

    March 27, 2011 at 4:57 pm

    This is just adorable! Thank you for sharing.

    Reply
  58. noviamy says

    April 1, 2011 at 5:44 am

    Nagyon szép! (Very nice!)
    Amy
    (www.amy-kreativ.blogspot.com)

    Reply
  59. Happy Cottage Quilter says

    April 2, 2011 at 6:52 pm

    How cute! And I do like your new header 🙂

    Reply
  60. Muriel says

    April 9, 2011 at 1:20 pm

    Merci/thank you

    Reply
  61. Kathy says

    April 9, 2011 at 2:38 pm

    This is just what I’ve been looking for! Thanks for sharing your tutorial.

    Reply
  62. Rebecca says

    April 15, 2011 at 7:40 am

    Gorgeous! I’d love to share this tutorial on the Examiner’s Arts & Crafts page. Please le tme know if you are interested. Cheers!

    Reply
  63. nane says

    April 24, 2011 at 5:00 am

    Thank you for this tutorial! It’s a wonderful basket.. When I am moved to my new flat, I will have to make some new accessoires and the basket will be one of them.. 🙂

    nane

    Reply
  64. Anonymous says

    April 26, 2011 at 7:07 am

    Hi, Easy to make but was disappointed in the size, I need larger. Thanks

    Reply
  65. Graciela says

    April 30, 2011 at 8:15 am

    Hi thanks for sharing !!!this is beatiful I will make sure
    kisses

    Reply
  66. Anna says

    June 22, 2011 at 10:46 am

    wah! those are darling! 🙂

    Reply
  67. Jantine says

    June 25, 2011 at 8:38 am

    Thank you, thank you, thank you!!! I will definitely go and make a few, I just love them to bits…

    Reply
  68. Elegantpaws says

    July 6, 2011 at 5:28 pm

    These are gorgeous, thank you so much for sharing! I found you through Pinterest and look forward to pouring over your blog!
    xx

    Reply
  69. michelle b. says

    July 6, 2011 at 6:52 pm

    I just LOVE the look of this…..Oh, everyone I know is going to get such a cute little gift this year!!! Thank you so much for sharing such an amazing project!!!!

    Reply
  70. beth says

    July 10, 2011 at 5:17 pm

    Perfect! I want to make a couple of these for my daughter’s dorm room!

    Reply
  71. Anonymous says

    July 24, 2011 at 10:26 am

    Hey, I just hopped over to your website via StumbleUpon. Not somthing I would normally read, but I liked your thoughts none the much less. Thanks for making some thing worth reading.

    Reply
  72. Tingtingmama says

    August 2, 2011 at 6:19 pm

    Love your great tutorial and yummy fabric choice! Who does not like it after coming upon a tutorial and say “hum, I could do that”? Well done.

    Reply
  73. Joana says

    August 7, 2011 at 10:36 am

    Adorei, muito lindo. Abraços !

    Reply
  74. Throckmorton Jones says

    August 20, 2011 at 8:03 am

    This is so cute! Love how simple it is!

    Reply
  75. Ivonne says

    August 22, 2011 at 11:14 am

    grazie bellisimo tutorial.
    un saluto dall Italia

    Reply
  76. LeAnne says

    September 14, 2011 at 6:36 am

    THUD….that was my jaw falling on the floor. SO stinkin’ cute. TFS!

    Reply
  77. Jodi-JoJoMia's Place says

    September 25, 2011 at 8:07 pm

    Such a cute and EASY basket, thanks for sharing, I love it.

    Reply
  78. Suzanne says

    November 30, 2011 at 4:43 am

    This is great! The possibilities are boundless. Thank you.

    Reply
  79. Joy says

    January 9, 2012 at 4:07 am

    Thanks so much for a great tut Lisa!! I made one too, so easy, I love it :o).
    Hugs,
    Joy :o)

    Reply
  80. Anonymous says

    February 22, 2012 at 6:35 pm

    I’m confused.

    If the circles are 8″, how can you gather them into 12″?

    Reply
  81. A Spoonful Of Sugar says

    February 22, 2012 at 11:15 pm

    Hi Anonymous

    The circles are 8 inches in diameter (the measurement you get if you rule a line through the centre of the circle) and when they are gathered they measure 12 inches in circumference (ie all around the outside of the circle). Hope that helps.

    Reply
  82. kristina says

    February 24, 2012 at 2:56 pm

    I love, love, love it!!!

    Reply
  83. kristina says

    February 24, 2012 at 2:56 pm

    I love, love, love it!!!

    Reply
  84. kristina says

    February 24, 2012 at 2:56 pm

    I love, love, love it!!!

    Reply
  85. Anonymous says

    May 4, 2012 at 11:55 am

    Looks too cute, thank you, I’ll definitely want to try this.

    Reply
  86. Colleen Kelbert says

    May 4, 2012 at 11:58 am

    Looks too cute; I’d love to try this.

    Reply
  87. Anonymous says

    July 12, 2012 at 9:33 pm

    I’m confused. If you’re starting with 8″ circles, how can you even out the gathers to a 12″ circumference?

    Reply
  88. Anonymous says

    July 20, 2012 at 9:55 am

    cute & washable and you can collapse it.

    Reply
  89. Anonymous says

    July 24, 2012 at 2:56 pm

    RE: I’m confused.
    23 February 2012 9:35 AM

    Visually, didn’t make sense. Thanks for clearing that up.

    Reply
  90. Anonymous says

    August 13, 2012 at 7:58 am

    Love this! I’m making several today. My nieces will adore these as catch-alls on their dressers and nightstands. Thank you!

    Reply
  91. Anonymous says

    August 13, 2012 at 8:56 am

    Hi, I am new and absolutely love this. Is this possible to make in a larger size? I thought I would try to make a large one, starting out with an eighteen inch circle. Are my calculations correct to gather the top to a 24 inch circumference? You have described the pattern so well, I feel it is very possible to make a larger one.

    Reply
  92. Meena says

    August 14, 2012 at 7:55 am

    Hi, I ‘ve never really commented before on sewing blogs.. but your project is so creative and simple that i couldn’t resist it! you’ve given a brilliant idea. Been wanting to make a basket but shying away. i guess i’d definitely do one of yours! thank you very much.

    Reply
  93. Eusa Maciel says

    September 22, 2012 at 6:08 pm

    Lisa and Sarah,
    I love to see your blog and your tutorials.
    Thank you!
    Eusa
    http://www.patchretalhinhos.blogspot.com.br

    Reply
  94. Anonymous says

    December 1, 2012 at 8:50 pm

    Hi Girls,

    I would like to make different sizes of this lil’ basket as a set. Could you please send me the details for a 12″ & a 16″ in diameter baskets?

    Thx,
    Lynda

    Reply
  95. Rosa Forino says

    December 5, 2012 at 1:42 pm

    si parla di voi su https://www.facebook.com/pages/Kreattiva/144623015570424 spero non vi dispiaccia ciao rosa

    Reply
  96. Pam @Threading My Way says

    January 19, 2013 at 4:11 am

    What a quick way to make a fabric basket and so pretty with the gathers!!! I’ll have to try this…

    Reply
  97. Pam @Threading My Way says

    January 19, 2013 at 5:14 am

    Hi Lisa and Sarah, I’ve featured your Gathered Round Fabric Basket today… Threading Your Way Features.

    Reply
  98. La Pecora Nera says

    March 19, 2013 at 6:26 am

    Hi, great tutorial! Thanks for sharing us:-)
    Hugs from Italy, Emanuela

    Reply
  99. Jean says

    March 22, 2013 at 4:24 pm

    This is a very pretty item for a gift. If I don’t have fusible batting/wadding, could I use regular wadding? I think the fusible type just keeps it from shifting as you sew. Perhaps I could just baste the regular kind in place to start with? Thanks.

    Reply
  100. Jean says

    March 22, 2013 at 4:26 pm

    Could you use regular wadding instead of the fusible kind? I don’t have any fusible kind at home but was thinking about using the regular kind to make one of these.

    Reply
  101. A Spoonful Of Sugar says

    March 22, 2013 at 4:36 pm

    Jean – If you use regular wadding, use basting spray or baste the layers to hold it all together while it is being gathered.

    Reply
  102. Nueyer Dua says

    May 13, 2013 at 5:33 pm

    That’s so cute! Mine’s a boring kind of fabric box made from old curtains and bedsheets

    Reply
  103. CIELY FRANCO says

    May 15, 2013 at 12:19 am

    Hermosas estas cesticas, adecuadas para un obsequio.
    Muchas gracias por el tutorial, bien explicado.

    Reply
  104. MissHaz says

    June 9, 2013 at 8:13 am

    Beautiful little holder, especially after work rather than seeing we have our accessories lying around-this holder helps!

    Reply
  105. Cherry Blossom Handmade Gifts says

    August 2, 2013 at 10:50 am

    Oh wow these would be so cute holding my craft supplies, great idea. Love the fabric choices 🙂 I’m a sucker for florals ! Gill

    Reply
  106. Diah Rothman says

    August 19, 2013 at 9:57 pm

    Thanks for the tutorial and I have made the 3 sizes…… Thanks again…..!!!!

    Reply
  107. Miracle Spyer says

    August 23, 2013 at 4:17 am

    These look soooooo very adorable!
    I was wondering where you got that pink floral washi taoe from? Would love to get my hands on it!
    -Nash

    Reply
  108. maria cláudia says

    September 24, 2013 at 8:10 am

    thanks for the tutorial Lisa! I will have a go at making this one too. 🙂

    Reply
  109. Custodian75 says

    November 26, 2013 at 3:50 am

    It looked so cute that I had to make it. It’s really easy. But yours looks much better than mine.

    Reply
  110. Lucy Bella says

    December 6, 2013 at 4:11 am

    🙂 happy with this tutorial ! thanks a ton ! i just made one for me and added a bit of zipper and a bow to it and it turned out into the cutest clutch i have ever made 🙂 and i shared it here:
    http://hobbiesinn.blogspot.in/2013/12/cute-gather-round-clutch.html

    Reply
  111. Linda says

    March 12, 2014 at 2:15 pm

    Hi. Really cute. Have you tried making larger ones? Would you run into problems with them keeping their shape/the sides staying upright do you think?

    Reply
    • A Spoonful of Sugar says

      March 12, 2014 at 3:05 pm

      Hi Linda – We haven’t tried making any bigger ones but it should work OK as long as they weren’t too big.

      Reply
  112. Véronique says

    May 25, 2014 at 2:09 pm

    un bien joli projet, que j’ai envie de réaliser aujourd’hui,
    bonne journée de fête des Mère
    amicalement
    Véro

    Reply
  113. ofelya says

    June 26, 2014 at 3:59 pm

    thank you for this great tutorial. i skipped the wadding and went for a really heavy fabric (the kind used for upholstering chairs). the results aren’t as cute as yours, but it will do 🙂

    Reply
    • A Spoonful of Sugar says

      June 26, 2014 at 5:08 pm

      Thanks Ofelya. Your baskets sound like they would be very sturdy. There are some great upholstery fabrics around.

      Reply
  114. Patricia Brissos says

    August 24, 2014 at 11:59 pm

    Love it and most certainly going to try to make some for me! Thank you!

    Reply
  115. benta says

    March 25, 2015 at 12:11 am

    Thank you – great instructions! Made and posted about here https://www.blogger.com/blogger.g?blogID=386128260762249969#allposts

    Reply
  116. Sandi King says

    April 17, 2015 at 1:42 pm

    i may be a little dense, but i can’t find the tutorial for the postage stamp hot pad. they are so cute and i would like to make several.
    thanks

    Reply
    • A Spoonful of Sugar says

      April 17, 2015 at 7:55 pm

      Hi Sandi There isn’t a tutorial a such but you can find more details here:
      http://aspoonfulofsugardesigns.com/2014/08/postage-stamp-pot-holder-fabric-scraps/

      regards Lisa

      Reply
  117. Susan Jerabek says

    September 30, 2015 at 12:32 am

    Is there an unfinished seam on the inside bottom….or did I miss something? To make this reversible, you would have to make two separate pieces and then sew them together around the top edge. Otherwise, if you sew both bottom circles together and then add the side piece….you end up with either a surged or unfinished edge on the inside.
    Am I correct? The picture looks like your inside basket is total finished with no seam allowance/unfinished edge showing.

    Reply
    • A Spoonful of Sugar says

      September 30, 2015 at 6:27 am

      Hi Susan – there is no side pieces or seams. It is made by sewing two circles together, gathering the top edge, and then adding the binding to hide the gathering. Hope this helps!

      Reply
  118. Carole @ From My Carolina Home says

    April 15, 2016 at 6:41 am

    Featured your tutorial on my blog today – https://frommycarolinahome.wordpress.com/2016/04/12/cute-fabric-bowl/

    Reply
    • A Spoonful of Sugar says

      May 1, 2016 at 9:37 pm

      Thanks so much Carole! Sorry for the late response – I have been unwell and haven’t been able to check my emails. i really appreciate the feature.

      Reply
  119. MaryEllen Edwards says

    January 2, 2022 at 9:45 am

    Happy New Year! Just what I need to get me going on my many projects! This is going to the top of my list. Thank you for the inspiration and great tutorial!

    Reply

Leave a Reply Cancel reply

Your email address will not be published. Required fields are marked *

  • Email
  • Facebook
  • Instagram
  • Pinterest
  • Threads
  • TikTok
SUBSCRIBE TO NEWSLETTER
×

Categories

Archives

PURCHASE PDF PATTERNS

We offer over 100 affordable PDF sewing patterns available for download from our store website or Etsy store. Each pattern includes detailed instructions, numerous photos, and templates.

WEB STORE ETSY STORE

Instagram

🌟 Tilda Week Sew-Along! Free Pattern 🌟To 🌟 Tilda Week Sew-Along! Free Pattern 🌟Today’s free project is the perfect beginner-friendly make—cute reusable makeup pads! They’re a quick, scrap-busting way to teach someone to sew using your treasured Tilda fabric scraps. Plus, they’re as pretty as they are practical! ✨Want the free pattern? Comment MAKEUP and I’ll send you the link!Check back all week for more Tilda-inspired creations! 💖#TildaFabric #SewingProject #BeginnerSewing #ScrapBuster #SustainableSewing #CraftingWithTilda #SewistCommunity #HandmadeWithLove @tilda_australia
#freesewingpattern
🌸 Celebrating Tilda Week! 🌸This week, we’re embracing the beauty, charm, and endless possibilities of Tilda fabric—the perfect blend of soft, dreamy cotton and vintage-inspired prints. ✨Here are 5 things we absolutely love about Tilda fabric: 🪡 Soft & Dreamy – Smooth, high-quality cotton with an elegant feel. 🌷 Vintage Charm – Nostalgic florals and timeless designs. 🎨 Color Harmony – Thoughtfully curated palettes for effortless mixing. 🎭 Versatile Designs – Perfect for quilts, dolls, and home décor projects. 📖 Whimsical Aesthetic – Each print tells a romantic, inspiring story.Ready to get creative? All patterns featured during Tilda Week are available in our Pattern Store and Etsy shop! Find the links in our profile and explore endless possibilities with Tilda fabric. Cover pattern is the  Ribbon Gift Box.✨ Check out our other posts for more sewing inspiration. 💖 Share your favourite Tilda project.#TildaFabric #SewingLove #TildaWeek #QuiltingMagic #DIYWithTilda #tildaaustralia #twogreenzebras #sewfun #fabricaddict
✨ 10 Must-Sew Projects Featuring Tilda Fabric  ✨ 10 Must-Sew Projects Featuring Tilda Fabric ✨Tilda fabric, designed by Tone Finnanger, has a magical way of bringing projects to life. With its soft floral prints, whimsical motifs, and beautifully curated color palettes, it's a dream for any sewist! 🌸 This week, the new Tilda Wallflower range was released, and to celebrate I'm sharing Tilda posts all week.Today, I’m showcasing 10 of my most popular patterns, all made using gorgeous Tilda fabric ranges. From delicate florals to charming animals and cozy blenders, there's something for every style! 💕All patterns are available in our pattern store & Etsy shop—find the links in our profile! ✂️💬 Which Tilda collection is your favorite? Let me know in the comments!Thanks to @tilda_australia for providing the fabric used in these projects. #TildaFabric #TildaLovers #SewingPatterns #SewistsOfInstagram #QuiltingLife #HandmadeWithLove #SewingInspiration #FabricAddict #SewMuchFun #TildaProjects #CreativeSewing #tildaaustralia #twogreenzebras
✨ Meet your new Sewing Buddy! ✨This little ✨ Meet your new Sewing Buddy! ✨This little pincushion is not just handy—it's packed with personality! 💕 I stitched up two charming versions—one in lush green, the other in dreamy thistle—each featuring a fussy-cut face on the pocket for a whimsical, flower-child touch. 🌼With perfectly paired blender fabrics, Tilda Wallflower makes mixing and matching effortless, giving your projects that beautifully coordinated look. Whether you're making one for yourself or as a thoughtful handmade gift, this sweet sewing companion is a must-have! 🪡✨💖 Want the pattern? Comment "BUDDY" and I'll send you the link!Big thanks to @tildaaustralia for the gorgeous Wallflower fabric!#TildaFabric #TildaWallflower #SewingBuddy #SewMuchFun #HandmadeSewing #QuiltLove #PincushionPerfection #RetroFlorals #SewingInspiration #FabricObsessed #SewistCommunity
🌸 Introducing the Tilda Wallflower Collection! 🌸 Introducing the Tilda Wallflower Collection! 🌸Retro charm meets floral beauty in this stunning new fabric collection by Tone Finnanger, inspired by the dreamy designs of the 1960's and 1970's. And what better way to showcase these gorgeous prints that with the Dresden Needlebook.Using a machine blanket stitch, I secured the Dresden plate to the cover - giving it a polished, sturdy finish. But the real shows topper? A carefully fussy cut face in the Dresden centre, capturing the whimsical flower child vibe. 🌷 So sweet, so vintage, so Tilda!Dresden Needlebook is a functional way to keep your sewing essentials neat and organised. Want the pattern? Comment DRESDEN and I'll send you the link.Are you a Tilda lover? Stick around! This week I'll be sharing more sewing projects that are perfect for these sweet floral prints. Check back each day for more inspiration.❤️ Share this with friends who adore Tilda. Big thanks to @tildaaustralia for the stunning Wallflower fabrics.#ilovetilda #tildaaustralia #tildawallflower #dresdenneedlebook #sewinglove #sewmuchfun #sewingcommunity #twogreenzebras
🧵 Advice for my younger self: Start sewing soon 🧵 Advice for my younger self: Start sewing sooner, you'll thank me later!POV: Granny crafts aren't just charming, they're good for your mental health. The rhythmic hum of your sewing machine, the joy of creating something with your hands, and the satisfaction of turning fabric into something useful - it's pure therapy.Sewing teaches patience, creativity, and mindfulness. It's a stress reliever, a confidence booster, and a way to slow down in a fast paced world.Want to know more about the mental health benefits of sewing? Comment HEALTH below and I'll send you a link to my article. ❤️#sewingtherapy #mindfulmaking #craftingforwellness #sewingformentalhealth #grannycrafts #handmadehappiness #slowstitching #sewinglove
Follow on Instagram

Featured Pattern

Travel Sewing Kit Pattern

Featured Tutorial

Retro Drawstring Bag

Featured Recipe

Lemon Pound Cake

Connect

  • Email
  • Facebook
  • Instagram
  • Pinterest
  • Threads
  • TikTok
SUBSCRIBE TO NEWSLETTER
×

Popular Posts

  • Dress Form Gift Tags
  • Lavender Sachets
  • Sewing with Scraps
  • Charm Square Fabric Tray
  • Sew Small, Sew Smart: The Joy of Making Bags and Pouches.
  • Retro Drawstring Bag
  • Apple Crumble Slice

Copyright © 2025 Lisa. K. Cox - A Spoonful of Sugar