A Spoonful of Sugar

Make. Bake. Create.

Menu
  • Home
  • About
    • About Us
    • Press
    • FAQ
    • Disclosure Policy
    • Contact Us
  • Crafts
    • Crochet
    • DIY
    • Embroidery/Cross stitch
    • Gift Wrapping
    • Knitting
    • Miscellaneous
    • Paper Crafts
  • Holidays
    • New Year’s
    • Australia Day
    • Back to School
    • Valentines Day
    • Easter
    • ANZAC Day
    • Mother’s Day
    • Father’s Day
    • Halloween
    • Christmas
  • Recipes
    • Appetizers
    • Bars & Slices
    • Bread & Pastries
    • Cakes
    • Cookies
    • Confectionery
    • Cupcakes & Muffins
    • Desserts
    • Drinks
    • Ice Cream
    • Jams/Preserves
    • Main Meals
  • Sewing
    • Sewing Tutorials
    • Quilting
    • Sewing & Quilting Patterns
  • Free Patterns
  • Shop
    • Pattern Store
    • Etsy Store

Covered Tape Measure Tutorial

July 19, 2008 By A Spoonful of Sugar - 64 Comments

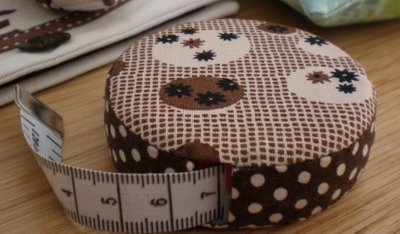
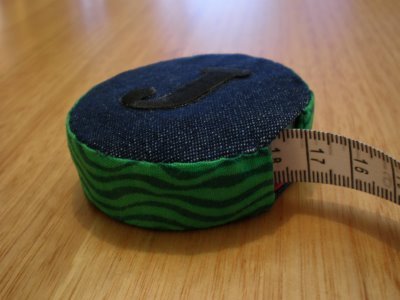
I had a number of lovely comments about the Covered Tape Measure that I made for Carla as part of Linda’s Pincushion Swap. So I have whipped up a couple more and made a tutorial for those that are interested! They are quick and easy, and a great way to use up those little scraps!

You can find the Tutorial here: Tutorial – Covered Tape Measure
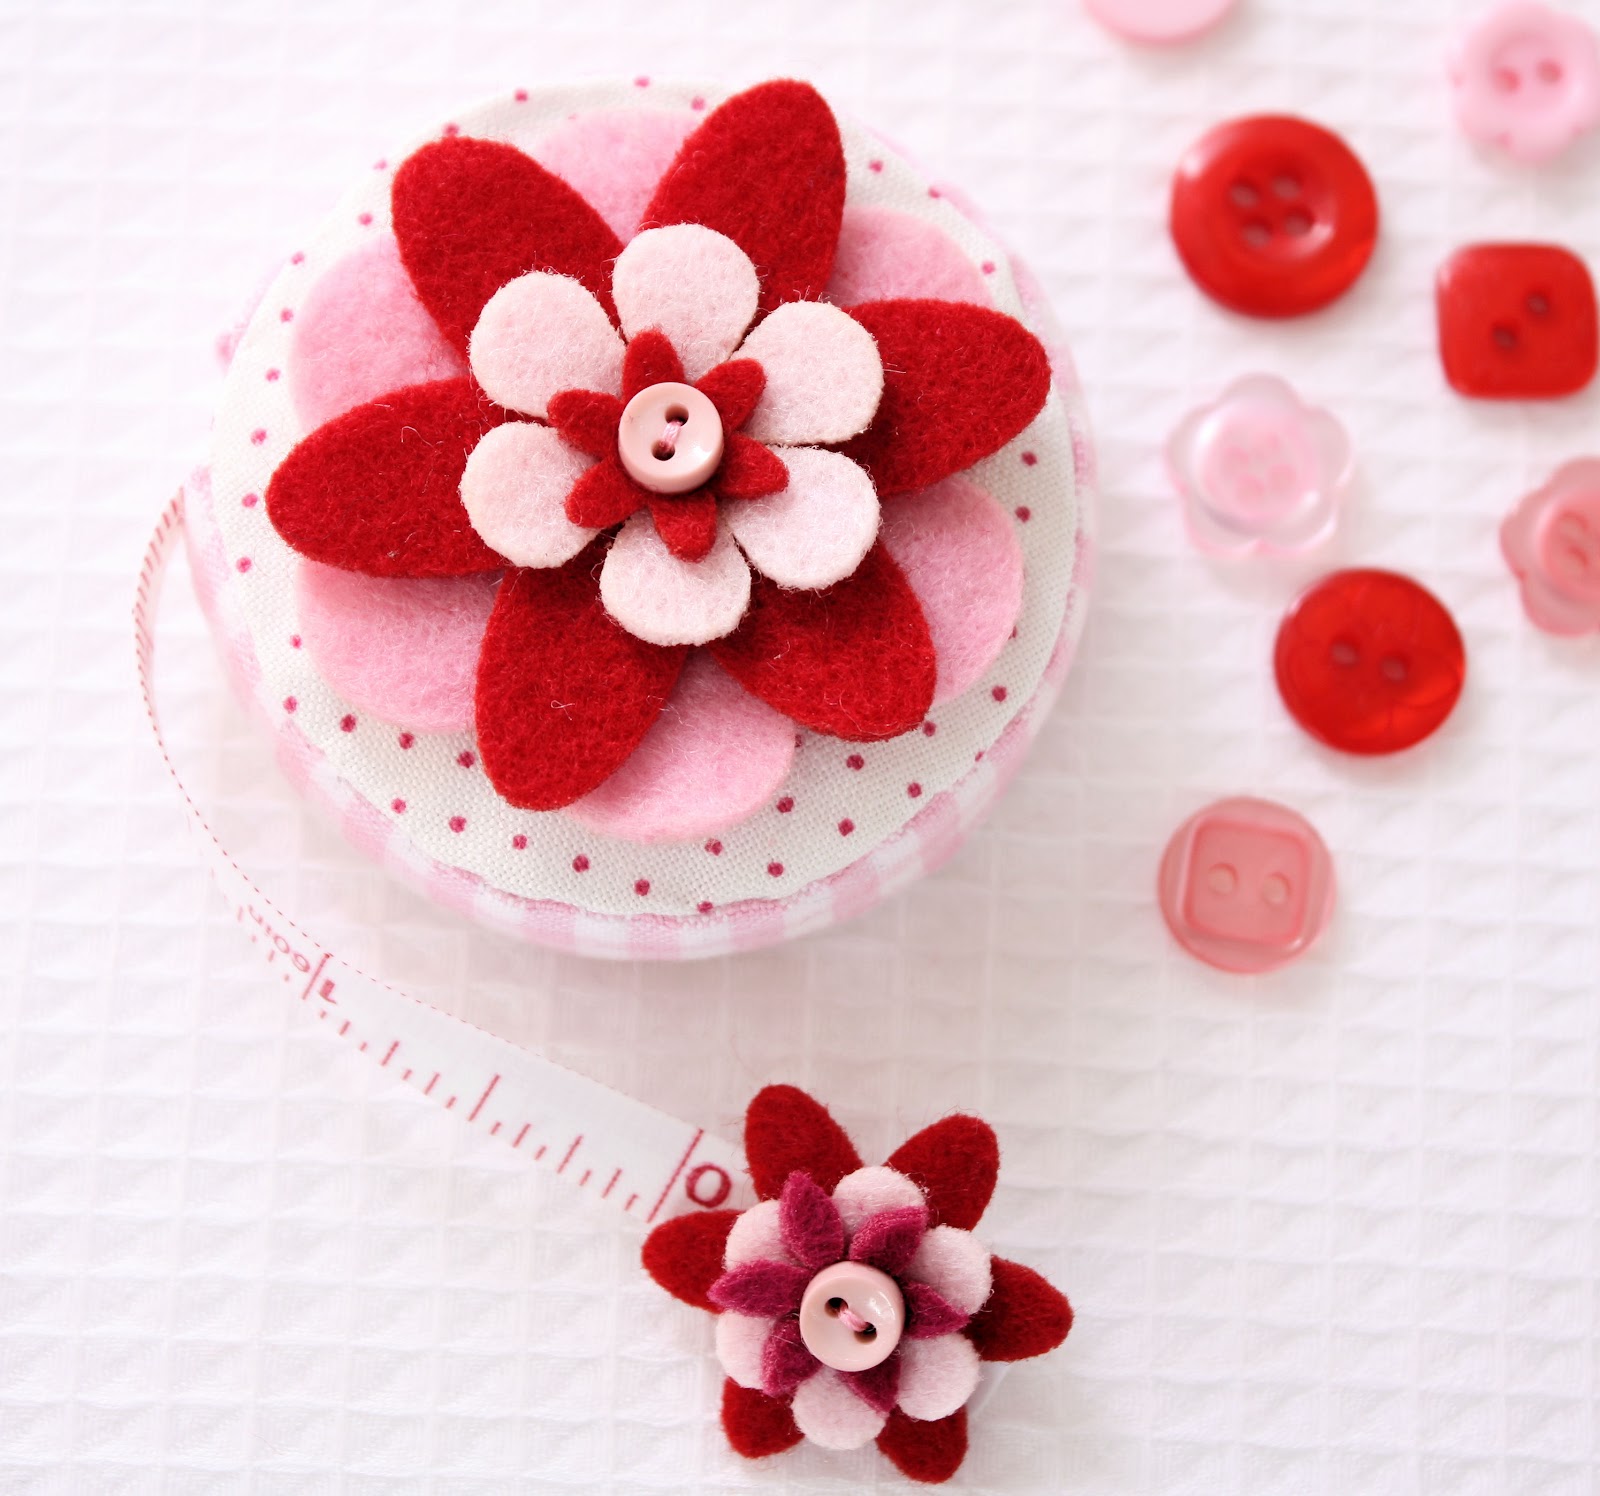
You can embellish your covered tape measure by adding embroidered details, yo yo’s, buttons, appliques etc. If you make any, I would love to see them!


Hello! Are you new here?

If so, be sure to sign up for our newsletter here and receive a bonus sewing pattern and welcome discount. Our newsletter includes free tutorials, articles, and new patterns. Welcome to the world of sewing enthusiasts.

Filed Under: Sewing, Sewing Tutorials

« Great Mail Day
Things That Make Me Smile….. »

Comments

  1. Erin says

    July 19, 2008 at 8:38 pm

    Love this! Thanks for sharing – However…remember you didn’t know what Mod Podge was, well…What the heck is vlisoflex (Sp?) Going to put this on my to do list…your handsewing (slipstitch) is fantastic. Did you sew from the inside or outside? I don’t see a stitch at all.

    Reply
  2. Fiona @ Dragonfly-Crafts says

    July 19, 2008 at 8:49 pm

    What a great idea girls. I’ll be saving that tutorial for sure.

    Reply
  3. handmaiden says

    July 19, 2008 at 10:27 pm

    this is going on my expanding to do list….I do have a yo yo maker and have made some bits but looking for ideas on what to do with them
    sharon

    Reply
  4. Stephanie says

    July 19, 2008 at 5:48 pm

    Love it however the link takes me to Google Page Creator…hmmm!

    Reply
  5. Kristin says

    July 19, 2008 at 6:27 pm

    Awesome; thank you for the tutorial! This will be on my project list for the coming weeks!

    Reply
  6. Dandelion Quilts says

    July 19, 2008 at 7:20 pm

    Thanks, Lisa. I was wondering how you did that! I love tutorials. 🙂 A good little stocking stuffer for a sewer I know!

    Reply
  7. Christy says

    July 19, 2008 at 9:14 pm

    you’re so clever and super crafty! will try your tutorial soon!

    take care…

    Reply
  8. Jacquie says

    July 19, 2008 at 9:31 pm

    I’m going to check this out. Thanks so much for doing the tutorial. I agree it would be a great stocking stuffer.

    Reply
  9. LizzieJane says

    July 19, 2008 at 10:14 pm

    Thanks for the tutorial, it was so kind and sweet of you.

    Reply
  10. Suzanne says

    July 19, 2008 at 10:21 pm

    I love those tape measure covers. I would keep them out with my sewing and craft as they add there own creative inspiration.

    Reply
  11. The Quilt Buddy says

    July 19, 2008 at 11:56 pm

    Thanks for the tutorial! Can’t wait to give it a try!

    Reply
  12. Hoppo Bumpo says

    July 20, 2008 at 12:35 am

    What a great tutorial – its really well written and beautifully photographed. I can’t wait to give it a go.

    Reply
  13. periwinkle says

    July 20, 2008 at 12:36 am

    thank you – i love tutorials and have added it to my list
    lisa x

    Reply
  14. myra says

    July 20, 2008 at 5:29 pm

    That is so awesome! Thanks for the tutorial!

    Reply
  15. Holly says

    July 20, 2008 at 6:40 pm

    How fabulous. Thanks for sharing.

    Reply
  16. Tine says

    July 20, 2008 at 4:10 am

    Thank you! This is going on my to-do list for Christmas-presents!!

    Reply
  17. driftwood says

    July 20, 2008 at 4:15 am

    so cute, and so clever!

    Reply
  18. Linda says

    July 20, 2008 at 8:11 pm

    Great tutorial. If it’s ok with you I’ll link it on my blog, some of the swappers may like to include it in their swap bags.

    Reply
  19. Kellie says

    July 20, 2008 at 6:31 am

    You are so very clever! Thanks! I can’t wait to have a go at these!

    Reply
  20. melissa s. says

    July 20, 2008 at 7:30 am

    thanks for the tutorial! i’m thinking of making a cute cover for my husband’s construction tape measure, hee!

    Reply
  21. eileen says

    July 20, 2008 at 10:24 am

    This is absolutely delightful! Thank you so much for the great tutorial!

    Reply
  22. QuiltedSimple says

    July 20, 2008 at 1:12 pm

    great tutorial. Hopefully i’ll get some sewing time in tonight – we shall see.
    Kris

    Reply
  23. Jessica says

    July 20, 2008 at 1:42 pm

    maybe if I did this, I wouldn’t loose my tape measure as often!

    Reply
  24. Rach says

    July 20, 2008 at 3:16 pm

    What a great idea! I can never find mine when I need it. Perhaps I could do one in high-vis orange like the work vests…

    Reply
  25. Leanne says

    July 20, 2008 at 4:18 pm

    Wow that is great thanks for the tutorial. I will have a go Very clever PDF I haven’t mastered that sort of technology yet.

    Reply
  26. Leni and Rose says

    July 20, 2008 at 4:40 pm

    Fabulous! Thanks for the tutorial. It’s so easy to follow, just the way I need it!

    Reply
  27. Louise says

    July 20, 2008 at 8:10 pm

    Wow Lisa, this is just fantastic!! I know heaps of people who would love this as a little christmas gift – thanks!!

    Reply
  28. Rachel says

    July 21, 2008 at 1:54 pm

    Wow – already 30 comments on this! : )
    It’s a great tutorial and your photographs make it easy to follow – thanks!

    Reply
  29. Selina says

    July 21, 2008 at 3:25 am

    Nice choice of fabrics. xx

    Reply
  30. mellyandrosie says

    July 21, 2008 at 7:46 pm

    WOW – so cute!!! I may have to follow the tutorial one day if I find the time
    (as if!!!) Thanks so much for the link =)

    Reply
  31. Katy says

    July 21, 2008 at 7:08 am

    those tape measures are brilliant, I love them!!!

    Reply
  32. Tonya says

    July 21, 2008 at 9:30 am

    What a great tutorial, yours are so cute! Definitely gonna have to try this out : )

    Reply
  33. Claudia says

    July 21, 2008 at 4:04 pm

    Oh, so nice! I will try that lovely tutorial as soon as I have some free time. Thank you 🙂

    Reply
  34. Ritch in Love says

    July 21, 2008 at 11:23 pm

    *gasp* I LUUUUVVVVVV IT!!!

    Reply
  35. corry says

    July 21, 2008 at 11:40 pm

    This is awesome! Thanks for the tutorial!

    Reply
  36. Alison Boon says

    July 22, 2008 at 12:14 am

    What a treat for everyone. I like the applique idea as well.

    Reply
  37. Tracy says

    July 22, 2008 at 5:02 am

    Just love those!! I love ideas to make everyday things even more pretty–thanks! Happy Day ((HUGS))

    Reply
  38. upstateLisa says

    July 22, 2008 at 1:12 pm

    Wow! what a great idea!!!!! Good idea to make for my quilting friends!

    Reply
  39. Kate says

    July 22, 2008 at 4:20 pm

    Great tutorial – thanks for sharing!

    Reply
  40. Melissa Goodsell says

    July 23, 2008 at 3:53 am

    Thanks so much – this is awesome…I’ll put a link on my blog next post Lisa 🙂
    Melx

    Reply
  41. Arlene says

    July 23, 2008 at 3:39 pm

    I love the covered tape measure!!!! How fun is that? Love it! You have such a fun blog!

    Reply
  42. susan says

    July 23, 2008 at 10:53 pm

    i agree great tute
    i need to get a little stock pile of tape measures so i can make bunches!!!!
    thanks! and you do just use the cardboard as a template, right? you dont leave it in…

    Reply
  43. Susan says

    July 24, 2008 at 2:44 am

    I also love the tutorial and appreciate it very much. Like the other Susan, I wondered about the cardboard… leave it in, take it out?

    What great little gifts these will be!

    Reply
  44. Dawn says

    July 24, 2008 at 7:26 am

    I can’t get the tute to open…
    🙁
    I’ll try again later.

    Reply
  45. Simply Stork says

    July 24, 2008 at 6:49 pm

    wonderful tutorial…thank you so much :o)

    ~simply~

    Reply
  46. Lisa says

    July 25, 2008 at 3:01 am

    oooooooooo

    Yay now I can have a go at one of my own. Thanks Lisa

    Reply
  47. Melanie Gray Augustin says

    July 25, 2008 at 4:11 am

    That is so cool and so timely! I have a covered one that I adore and recently bought a bunch of uncovered ones to make. Of course, I had to figure out how to do it and now I don’t! Thank you!

    Reply
  48. jillytacy says

    July 27, 2008 at 10:44 am

    Lisa, your tutorial looks lovely! Thanks for sharing it with us! I want to give this a try. Of course I need more time in my day to get all of the things I want to try done. Hopefully I can try this soon.

    Reply
  49. Linnea says

    July 28, 2008 at 7:59 am

    How cute! Thanks for the tutorial! I am going to have to make one. Maybe one for my husband too, I can just see him carrying one around on a construction job.

    Reply
  50. Cassie says

    July 31, 2008 at 4:09 pm

    Hi Lisa,

    It’s been a while since I’ve stopped by for a visit. I have been much too busy! There are so many cool things to see. I wish I could smell your soap. Your Baby Lime Syrup Cakes look divine. And, I love the covered tape measures. Mine is a hideous pink plastic thing. I can’t wait to try this.

    Toodles,
    Cassie

    Reply
  51. All Things Lovely says

    August 15, 2008 at 2:01 am

    What a brilliant idea! Thankyou so much for the tutorial, they will be perfect for little Christmas gifts.

    Reply
  52. Danielle says

    August 19, 2008 at 11:09 pm

    Thanks so much for the tutorial. It’s been added to the “TO DO” list.

    Reply
  53. melissa says

    August 24, 2008 at 6:35 pm

    love this tutorial. hope you don’t mind i’ve linked to it from my blog.

    Reply
  54. Riches Stitches says

    February 17, 2009 at 3:50 pm

    Lisa,
    I am an avid crafter and a team member of our local community craft group, which is a not for profit organisation, in fact we only charge a $3 entrance fee to cover costs and offer free craft classes (none of the teachers get paid and they teach voluntarily). I was wondering if you would kindly give me permission to copy your tutorial instructions and teach a small group of ladies your Covered Tape Measures. I have made a number of these wonderful Covered Tape Measures myself as gifts for crafting friends and as we are always looking for new things to teach at our group I thought that this would fit in nicely with my theme for next term called ‘One Week Wonders’. I am hoping to teach quick to make crafts that can be completed in a couple of hours. I wait to hear your response and any conditions that you may have.
    Regards Jane 8o)

    Reply
  55. Marissa says

    March 28, 2009 at 9:54 am

    I would love to make this, but your bandwidth has been exceeded. Can I get your 4 tutorials in e-mail form? mlhefner at gmail dot com. Thanks!

    Reply
  56. Carine Calé says

    October 7, 2009 at 11:34 pm

    Amazing!!!
    Thank you very much, Dear Lisa!!!
    Kind Regards…
    Carine

    Reply
  57. smootha girl says

    March 11, 2011 at 10:36 am

    Hi Lisa.
    Thank you so much for this tutorial. I made this tape measure cover and it was so easy to do.
    You can check it in here: http://agulheiro.blogspot.com/2011/03/bolsa-para-fita-metrica.html

    Reply
  58. Anonymous says

    November 29, 2012 at 9:24 am

    This comment has been removed by a blog administrator.

    Reply
  59. Anonymous says

    November 29, 2012 at 1:17 pm

    This comment has been removed by a blog administrator.

    Reply
  60. Anonymous says

    November 29, 2012 at 1:26 pm

    This comment has been removed by a blog administrator.

    Reply
  61. Anonymous says

    November 29, 2012 at 1:52 pm

    This comment has been removed by a blog administrator.

    Reply
  62. Anonymous says

    November 29, 2012 at 2:10 pm

    This comment has been removed by a blog administrator.

    Reply
  63. Anonymous says

    November 30, 2012 at 7:48 pm

    This comment has been removed by a blog administrator.

    Reply
  64. Anonymous says

    November 30, 2012 at 11:14 pm

    This comment has been removed by a blog administrator.

    Reply

Leave a Reply Cancel reply

Your email address will not be published. Required fields are marked *

  • Email
  • Facebook
  • Instagram
  • Pinterest
  • Threads
  • TikTok
SUBSCRIBE TO NEWSLETTER
×

Categories

Archives

PURCHASE PDF PATTERNS

We offer over 100 affordable PDF sewing patterns available for download from our store website or Etsy store. Each pattern includes detailed instructions, numerous photos, and templates.

WEB STORE ETSY STORE

Instagram

From a simple hexie flower to a sweet drawstring p From a simple hexie flower to a sweet drawstring pouch!This beginner-friendly project combines a little English Paper Piecing with simple sewing to create the perfect gift, project pouch, or scrap-friendly make.💬 Comment GARDEN and I'll send you the pattern link.Pattern Details: Hexie Garden Pouch ( available in our Pattern Store and Etsy Shop).#hexiegardenpouch #englishpaperpiecing #eppsewing #pouchpattern #beginnersewing
zip 🎄 Quick. Cute. Giftable. 🎄 The Mini Treat Po zip🎄 Quick. Cute. Giftable. 🎄The Mini Treat Pouch is one of those projects you'll find yourself making again and again. It's quick to sew, fun to personalise, and perfect for Christmas gifting.Fill it with candy, gift cards, jewellery, beauty treats, sewing notions, or other little treasures. Add a ribbon tab or decorative patch for an extra-special finishing touch.Featuring a fold-over top, button loop closure, handy back pocket, and fully lined construction, it's a sweet little project that's as practical as it is charming.Which fabric would you choose? ❤️ Red 💚 Green 💙 Blue✨ Comment TREAT for the pattern link.The Mini Treat Pouch pattern is available in my Pattern Store and Etsy shop.#christmassewing #tildafabric #tildamerrylittlechristmas #giftsewing #pdfsewingpattern
The pattern you've been asking for just got even b The pattern you've been asking for just got even better! 🎄The Hexie Holiday Placemat is now available in 2 sizes, giving you more options for holiday decorating and gift giving. Use the smaller size for mugs and treats, or the larger size for festive table settings.Perfect for Christmas fabrics, holiday scraps, and foundation paper piecing enthusiasts.Comment HOLIDAY and I'll send you the link! ❤️#foundationpaperpiecing #christmassewing #quiltingprojects #sewingpattern #tildafabric
Looking for a fun way to package small gifts, fest Looking for a fun way to package small gifts, festive treats, gift cards, or little treasures? 🎁The Mini Treat Pouch is as practical as it is cute, featuring:
• A sweet button and elastic closure
 • A handy back pocket for notes, gift cards, or tags
 • A beginner-friendly design that's quick to sew
 • Perfect for Christmas gifting and everyday surprisesThis version is stitched in beautiful Merry Happy fabric by Ruby Star Society, bringing a cheerful and modern holiday feel to every pouch.
❤️Comment TREAT below and I'll send you the link to the pattern! ✨Available in our Pattern Store and Etsy Shop.#SewingPattern #ChristmasSewing #RubyStarSociety #HandmadeGiftIdeas
#MiniTreatPouch
🐈 Which Sleepy Cat are you? Are you a Classic Cat 🐈 Which Sleepy Cat are you?Are you a Classic Cat who loves timeless fabrics, a Festive Cat already planning Christmas sewing, or a Spooky Cat embracing all things Halloween?Swipe through and find your Sleepy Cat personality, then tell us in the comments!✨ Comment SLEEPY and I'll send you a link to the Sleepy Cat Mug Rug pattern.Pattern Details: Sleepy Cat Mugrug pattern - available in our Pattern Store and Etsy Shop#sleepycatmugrug
#sewfun #sewingpattern #giftstosew #englishpaperpiecing
Who says a Holly Jolly Tree has to be Christmas-th Who says a Holly Jolly Tree has to be Christmas-themed? 🍂This version is stitched in beautiful Village Life fabrics, featuring warm rusts, ochres, and earthy tones that feel right at home for fall decorating, Thanksgiving gatherings, or even Halloween displays.The same design you love, reimagined for a whole new season. ✨Comment TREE for a link to our free Holly Jolly Tree pattern.Fabric: Village Life by Tilda @tilda_australia#tildavillagelife #HollyJollyTree #FallDecor #AutumnSewing
#ThanksgivingDecor
Follow on Instagram

Featured Pattern

Travel Sewing Kit Pattern

Featured Tutorial

Retro Drawstring Bag

Featured Recipe

Lemon Pound Cake

Connect

  • Email
  • Facebook
  • Instagram
  • Pinterest
  • Threads
  • TikTok
SUBSCRIBE TO NEWSLETTER
×

Popular Posts

  • Halloween Sewing Projects to Make This Weekend
  • Apple Crumble Slice
  • 9 Pumpkin Projects to Sew This Fall
  • Pumpkin Patch {Halloween Applique}
  • Pretty Little Details: Hardware Highlights
  • Triangle Pouch
  • Harvest Leaf Coasters

Copyright © 2026 Lisa. K. Cox - A Spoonful of Sugar