A Spoonful of Sugar: Sew 20 Simple Projects to Sweeten Your Surroundings Zakka Style

A Spoonful of Sugar

Make. Bake. Create.

Subscribe to our Newsletter

Menu
  • Home
  • About
    • About Us
    • Advertising
    • Press
    • FAQ
    • Disclosure
    • Grab a Button
    • Contact Us
  • Crafts
    • Crochet
    • DIY
    • Embroidery/Cross stitch
    • Gift Wrapping
    • Knitting
    • Miscellaneous
    • Paper Crafts
  • Holidays
    • New Year’s
    • Australia Day
    • Back to School
    • Valentines Day
    • Easter
    • ANZAC Day
    • Mother’s Day
    • Father’s Day
    • Halloween
    • Christmas
  • Recipes
    • Appetizers
    • Bars & Slices
    • Bread & Pastries
    • Cakes
    • Cookies
    • Confectionery
    • Cupcakes & Muffins
    • Desserts
    • Drinks
    • Ice Cream
    • Jams/Preserves
    • Main Meals
  • Sewing
    • Sewing Tutorials
    • Quilting
    • Sewing & Quilting Patterns
  • Family
    • Back to School
    • Family Fun
    • Our Home
    • Parenting
    • Travel
  • Shop
    • Etsy Store
    • Craftsy Store

{Back to School} Mini Drawstring Pouch

January 24, 2014 By A Spoonful of Sugar - 10 Comments

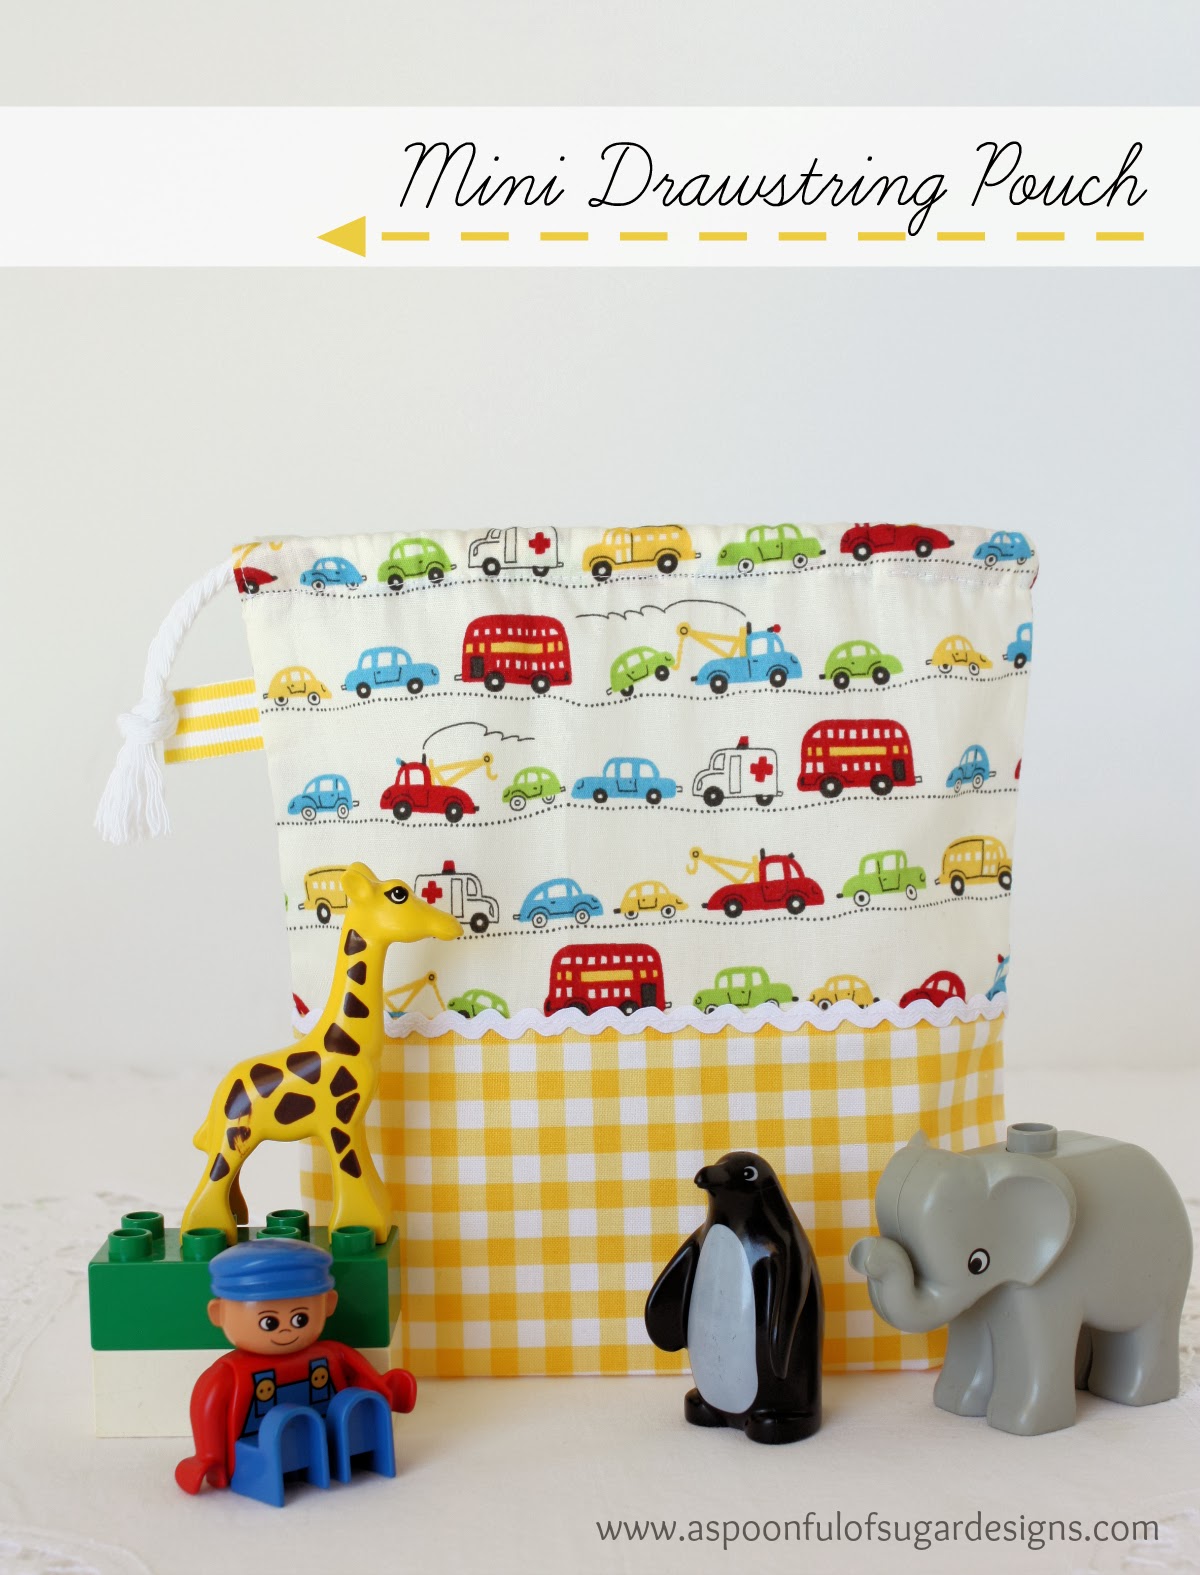
Have you ever noticed how some coffee beans come packaged in a stand up pouch? It is this style of coffee bag that inspired our latest drawstring pouch. Made with a cheerful print and partnered with some gingham, it features a stand up design with a drawstring opening. Sized at 7 3/4 inches x 7 3/4 inches, the Mini Drawstring Pouch is perfect for storing all manner of things in a school bag or suitcase (e.g. tissues, toiletries, small toys, school supplies etc).

The Mini Drawstring Pouch is a handy size and would make a fun gift for someone starting school.

The fun part of this project is coordinating some small novelty prints with gingham/checks/dots, and adding coordinating trim and ribbon accents.

Materials:
  • Gingham fabric measuring 8 1/4 x 9 inches
  • Cut 2 pieces of fabric from a small novelty print, each measuring 8 1/4 x 6 inches
  • Ricrac or pompom trim, cut 2 lengths measuring 8 1/4 inches
  • Ribbon, cut a length measuring 2 1/2 inches
  • 24 inches piping cord
1. Using 1/4 inch seam, stitch the novelty print rectangles to each end of the gingham print, as shown below. Overlock/serge raw edges of seam allowance and press.
2. Stitch pompom trim or ricrac to each seam.
3. Fold the ribbon in half and baste in place 2 1/4 inches down from the top left hand side of the pouch.
4. Overlock the raw edges around the outside of the fabric.

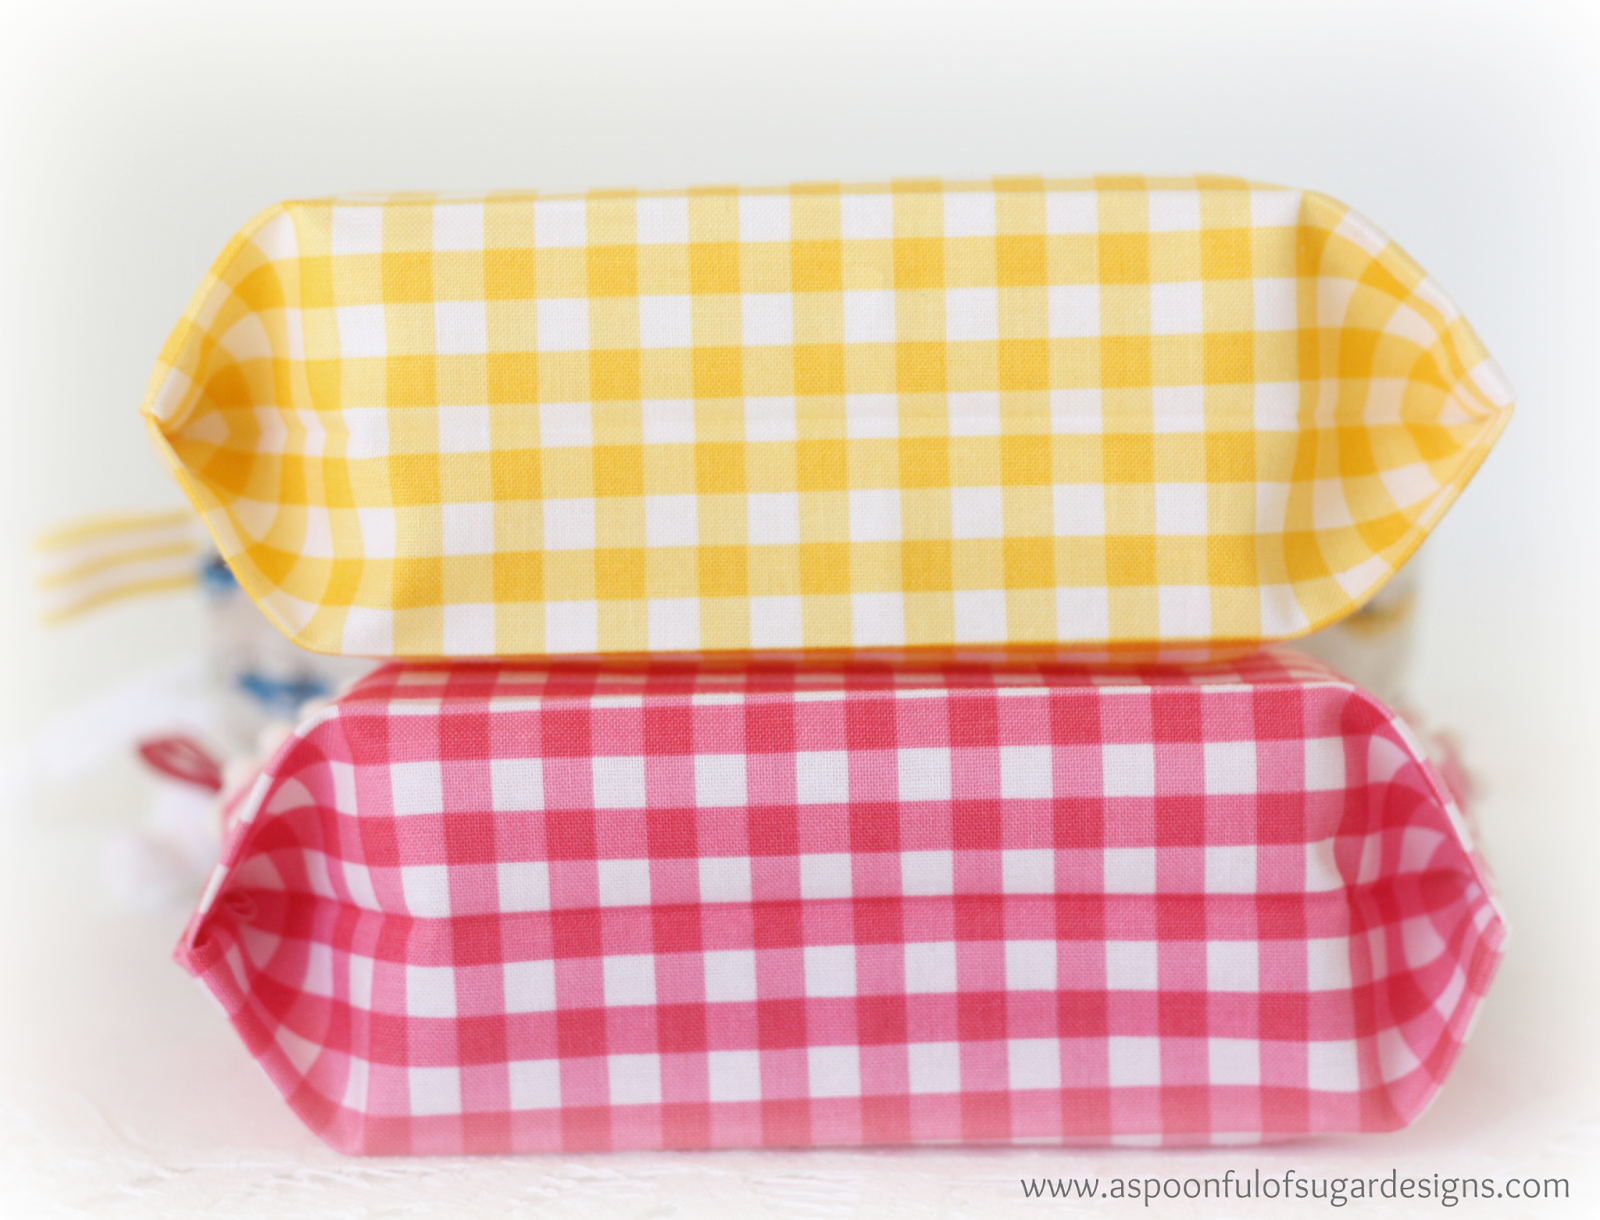
5. Fold the pouch in half with the right sides together. Use a pin to mark the bottom of the pouch and 1 inch above the fold line. Fold the bottom edge over by 1 inch and press (as shown in photo below).
6. Stitch the right hand side of the pouch from the top to the bottom, catching the fold in the bottom of the pouch. On the left hand side, stitch from 1/2 inch above the ribbon tag, to the bottom of the pouch (as marked with a pin in the photo below).
7. Stitch the seam allowance in place around the opening at the top of the left hand side of the pouch (refer to photo below).
8. Fold over 1/2 inch around the top opening of the pouch. Press. Fold over another 1/2 inch and press. Stitch in place. Thread the piping cord through the channel at the top of the pouch. Tie the ends of the cord in a knot.
Check out some of our other pouch tutorials:
Knitting and Crochet Pouch
Pretty Drawstring Pouch
Fabric Gift Pouch

Filed Under: Back to School, Sewing, Sewing Tutorials Tagged With: bag

Never miss a post.

Get fresh new ideas delivered right to your inbox!

« Origami Pinwheel Envelopes
Chewy Honey Coconut Granola Bars »

Comments

  1. Sandra says

    February 25, 2014 at 5:04 am

    I LOVE these pouches and decided to make my granddaughter one. When I folded the top to the inside 1/2 inch and then folded again 1/2 inch, the opening for the cording was on the inside of the bag. Where did I go wrong?

    Reply
    • A Spoonful of Sugar says

      February 25, 2014 at 6:44 am

      Hi Sandra – On the side of the pouch with the ribbon tag, don’t sew the top 1 3/4 inches. That way when you fold down 1/2 inch and then another 1/2 inch to make the casing, there will be the opening on the outside. Hope this is clear.

      Reply
  2. serena says

    August 13, 2014 at 10:11 am

    Beautuful !!! Where are these fabrics from?

    Reply
    • A Spoonful of Sugar says

      August 13, 2014 at 11:37 am

      Thanks Serena – the gingham is a Riley Blake gingham and comes in a large range of colours. The other fabrics I have had in my stash for a while. The car fabric is a Japanese print from “D’s Selection” produced by Junko Maisuda (Japan}.

      Reply
  3. Michele T says

    September 1, 2014 at 9:51 am

    So pretty and I love how you stitched the bottom! I don’t like squaring off the corners of bags. Just wondering, is there a way to make a lining and fold the top over rather than a drawstring? Hoping to make some bags as favors for my daughters baby shower. Thank you!

    Reply
    • A Spoonful of Sugar says

      September 1, 2014 at 4:47 pm

      Thanks Michele. If you made the lining about at least an inch longer, there should be enough fabric to fold over to make a channel for the drawstring. Enjoy planning for the baby shower!

      Reply
  4. Ginny says

    January 12, 2015 at 8:29 am

    I want to tell you how much I love this site. I have used so many of your ideas. I love this project and made several for my grand daughter. Each one has a themed fabric to match the contents. It helps her keep her toys organized. The unique pouch fold at the bottom is so much easier than traditional boxing. Thank you for sharing your great ideas.

    Reply
    • A Spoonful of Sugar says

      January 12, 2015 at 9:47 pm

      Thanks so much Ginny! Drawstring bags are great for kids toys! Have a lovely week, Lisa

      Reply
  5. Tania says

    February 21, 2015 at 1:47 am

    Love these! I made 2 today using a retro fruit print and a modern ticking fabric on bottom. They look adorable. Can’t wait to make a bunch more.

    Reply
    • A Spoonful of Sugar says

      February 22, 2015 at 9:46 am

      Thanks Tania. Fruit and ticking stripe sound like the perfect match!

      Reply

Leave a Reply Cancel reply

Your email address will not be published. Required fields are marked *

  • Email
  • Facebook
  • Google+
  • Instagram
  • Pinterest
  • RSS
  • Twitter
Follow on Bloglovin

My Book

Instagram

Tea always tastes better when brewed and served in Tea always tastes better when brewed and served in fine bone china don't you think? I made a trivet to match my favourite teaset - Polka  Rose by @royalalbertengland . It was fun to find all the pretty mint green florals in my fabric stash. đź’šđź’šđź’š
.
Pattern: Hexie Heart Placemat PDF Sewing Pattern ( link in profile- available in my Etsy store). 
.
#hexieheartplacemat #valentinessewing #tinyfloralsanonymous #sewpretty #royalalbert #teaset #creativehome #sewforhome #fpp #foundationpaperpiecing #quiltinglife #sewallthethings #aspoonfulofsugardesigns #hexieholidayplacemat #pdfsewingpattern #patchwork
I had fun sewing this Valentine's inspired Heart C I had fun sewing this Valentine's inspired Heart Clasp Purse using a kit from @zakkaworkshop . I had the perfect heart fabric in my stash.  The kit comes with full sized templates, hardware ( clasp and paper string), and lots of step by step instructions and photos to guide you through the process. It has been a while since I have made a clasp purse but it was fairly straightforward. Check out  other Heart Clasp Purses by following #heartclasppurse and #zakkaworkshop  Perfect Valentine's project.
.
.#pursemaker #pouchmaker #makersgonnamake #heartclasppursekit #giftstosew #valentinessewing #creativelife #zakka #sewzakka #fabricismyfun #sewsewsew #heartbag
Very excited to share that my Valentine's Love Not Very excited to share that my Valentine's Love Notes tutorial is featured on @oprahmagazine in the Creative DIY Valentine's Day Card Ideas article. These miniature Valentine's feature a fabric heart and can be made in next to no time.
.
Head to our blog and search for Love Notes for all the details.  www.aspoonfulofsugardesigns.com
.
#aspoonfulofsugardesigns #valentinescard #scrapbuster #heart #fabric #creativelife #kidscraft #quickcraft #10minutecraft #livecreatively #handmadecards #cardmaker #craftersofinstagram #makersgonnamake #lovenotes
Heart themed projects are always fun to sew for Va Heart themed projects are always fun to sew for Valentine's Day. One of my favourite patterns is the Heart of the Home Mini Quilt. Swipe to see how it looks in different fabrics.

1. Memory Lane and Cabbage Rose @tilda_australia 
2. Flower Sugar @lecien_fabrics 
3. High Tea by @quiltingintherain for @lecien_fabrics 

Pattern available in my Etsy store.
.
#quilt #quiltersgonnaquilt #quiltersofinstagram #makersgonnamake #fpp #patchworkfun #creativelife #sewsewsew #valentinessewing #sewallthethings #scrapbuster #heartofthehomeminiquilt #aspoonfulofsugardesigns
Load More… Follow on Instagram

Featured Pattern

Travel Sewing Kit Pattern

Featured Tutorial

Harvest Drawstring Bags

Featured Recipe

Lemon Pound Cake

Subscribe via Email


A Spoonful of Sugar on Etsy

Categories

Archives

Connect

  • Email
  • Facebook
  • Google+
  • Instagram
  • Pinterest
  • RSS
  • Twitter

Popular Posts

  • Pot Holder Pattern
  • Golden Syrup Cake
  • Crocheted Scarf {Free Pattern}
  • Triangle Pouch
  • Business Card Wallet
  • Retro Drawstring Bag
  • How to Make a Pencil Case

Copyright © 2021 - Powered by Genesis Framework and a Creative Life - Designed by: Bellano Web Studio - Log in