A Spoonful of Sugar

Make. Bake. Create.

Menu
  • Home
  • About
    • About Us
    • Press
    • FAQ
    • Disclosure Policy
    • Contact Us
  • Crafts
    • Crochet
    • DIY
    • Embroidery/Cross stitch
    • Gift Wrapping
    • Knitting
    • Miscellaneous
    • Paper Crafts
  • Holidays
    • New Year’s
    • Australia Day
    • Back to School
    • Valentines Day
    • Easter
    • ANZAC Day
    • Mother’s Day
    • Father’s Day
    • Halloween
    • Christmas
  • Recipes
    • Appetizers
    • Bars & Slices
    • Bread & Pastries
    • Cakes
    • Cookies
    • Confectionery
    • Cupcakes & Muffins
    • Desserts
    • Drinks
    • Ice Cream
    • Jams/Preserves
    • Main Meals
  • Sewing
    • Sewing Tutorials
    • Quilting
    • Sewing & Quilting Patterns
  • Family
    • Back to School
    • Family Fun
    • Our Home
    • Parenting
    • Travel
  • Shop
    • Pattern Store
    • Etsy Store

DIY Ombre

October 2, 2012 By A Spoonful of Sugar - 3 Comments

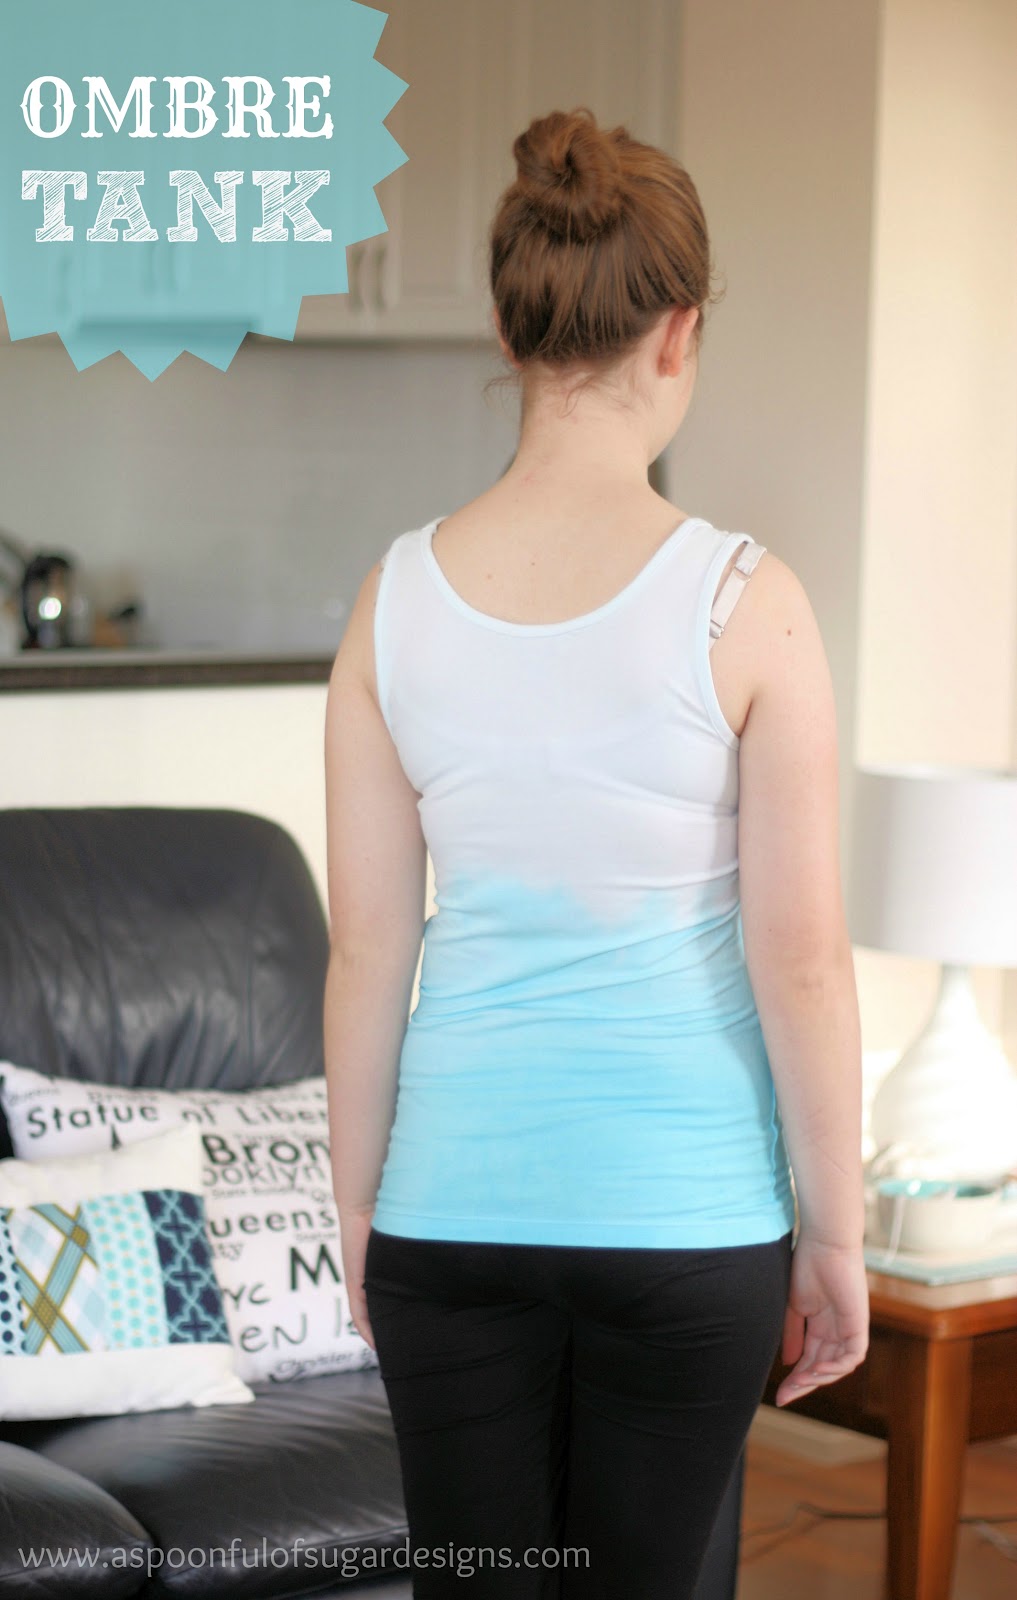
Sarah has a few DIY projects that she wants to create over the school holidays. First up was a DIY Ombre Tank which will be perfect for summer.  This project only uses a small amount of dye but the rest of the package will be used in another of her projects which we will share soon.

You will need:
  • white tank (Sarah bought a Target Essentials Tank)
  • powdered dye (Sarah used Dylon in Turquoise).
  • salt
  • bucket or ice cream container.
  • small recycled container
  • gloves
  • disposable spoon
  • colour catcher
  • Firstly, wash the tank in cold water. Mix a small quantity of dye (approximately 2-3 teaspoons) with a little water in a recycled container, and stir until dissolved. (Check dye package and follow manufacturers instructions).
  • Fill your bucket or ice-cream container with 2-3 litres of water and 3 tablespoons salt and mix until the salt is dissolved. Add 1/3 of the dye mix, and dip the bottom 3/4 of the tank in the water. Leave for 10 -15 minutes for the dye to soak in. Remove the tank.
  • Add half of the remaining dye mix to the water. Dip the bottom half of the tank in the water and leave for 10 – 15 minutes. Remove the tank.
  • Add the remaining dye mix to the water. Dip the bottom 1/4 of the tank in the water and leave for 10 – 15 minutes. Remove the tank.
  • Rinse the tank well in cold water. Then wash in the washing machine on a warm cycle using a small amount of detergent, with a colour catcher. Leave to dry. The tank will be lighter after it has been washed.
Note: Tank may need to be washed separately for the first few times to ensure the dye is set and colourfast.

Sarah enjoyed her dye project and is currently working on another. We love school holidays and having more time for crafty projects.

For your daily sugar fix you can follow us on facebook, twitter, and google plus.  

Filed Under: Crafts, Miscellaneous Tagged With: dyeing

« Pumpkin Cake
{Book Reviews} Party! and The Cake Parlour Sweet Tables »

Comments

  1. CBH says

    October 2, 2012 at 7:11 am

    Thank you so much for this post. I want to let you know that I posted a link to your blog in Creative Busy Bee Craft Inspirations, under the Page 3 post on Oct. 02, 2012. Thanks again.

    Reply
  2. Anita says

    October 2, 2012 at 11:02 pm

    Hi Lisa & Sarah,
    Great job on the tank top, looks fantastic!! The way our weather is coming in, we will need the tank tops sooner rather than later!!
    Cheers, Anita.

    Reply
  3. Terriaw says

    October 4, 2012 at 6:20 am

    I love the ombre look, which turned out beautifully on this tank. I would love to try this, so thanks for sharing this DIY!

    Reply

Leave a Reply Cancel reply

Your email address will not be published. Required fields are marked *

  • Email
  • Facebook
  • Instagram
  • Pinterest
  • Threads
  • TikTok
SUBSCRIBE TO NEWSLETTER
×

Categories

Archives

PURCHASE PDF PATTERNS

We offer over 100 affordable PDF sewing patterns available for download from our store website or Etsy store. Each pattern includes detailed instructions, numerous photos, and templates.

WEB STORE ETSY STORE

Instagram

One little pouch, endless possibilities! ✨ Tonight One little pouch, endless possibilities! ✨ Tonight I’m filling mine with beauty minis, sewing notions, and even Easter eggs 🐣. What would you tuck inside yours? Save this idea for your next handmade gift!”Comment MINI for a link to the pattern.Mini Drawstring Gift Bag Pattern is available in our pattern store and etsy shop.#minidrawstringbag #beginnersewingpattern #scrapfriendlysewing #sewingcommunity #giftstosew
A tiny project that makes a big difference in your A tiny project that makes a big difference in your sewing room. Perfect for chargers, earbuds, sewing cords and all those little tangly bits. Comment CORD for the free pattern.Free Pattern: Cord Cosy Sewing Pattern#sewingtutorial #scrapbustingsewing #sewingorganisation #freepatternfriday #aspoonfulofsugardesigns--
A tiny hack that makes the cutest Bunny Coaster ta A tiny hack that makes the cutest Bunny Coaster tail — pompom trim! It’s quick, sweet, and adds the perfect little pop of texture to your spring makes.Comment BUNNY and I’ll send you the link to our Bunny Coaster pattern. It’s a favourite for Easter crafting and is available in both our Pattern Store and Etsy shop.Happy spring stitching! 🌸🐰✨#bunnycoaster #eastersewing #springsewing  #sewinghack  #sewistsofinstagram
This little Dice Bag does so much more than hold d This little Dice Bag does so much more than hold dice. Flat base, four mesh pockets, reversible design… it’s one of those clever makes you’ll use again and again.Comment DICE for the pattern link — it’s our Pattern of the Week, so it’s 25% off for the next few days.  Pattern Details: Dice and Drawstring Bag Sewing Pattern#dicebag #beginnersewing #drawstringpouch #sewingcommunity #dungeonsanddragonsdice
Small sewing projects are my favourite — quick to Small sewing projects are my favourite — quick to make, scrap‑friendly, and so handy around the sewing room. This little project is perfect for organising your tools, gifting, or keeping your supplies tidy on the go. Originally designed as a dice bag, this little pouch has so many other uses!If you love practical makes that sew up fast and get used again and again, this one’s for you.Comment DICE and I’ll send you the pattern link. This is our Pattern of the Week, so save 25% off this week only.Save this for your next weekend sewing session. ✨Pattern Details: Dice and Drawstring Bag Sewing Pattern (Available in our Pattern Store and Etsy Shop)Fabric: Tilda Jubilee range, with thanks to @tilda_australia#dicebag #sewingpattern #drawstringpouch #quicksew #beginnersewing
🍀 Feeling lucky? 🌈 Or just craving a pop of colour 🍀 Feeling lucky? 🌈 Or just craving a pop of colour? Here are some bright, happy projects to sew — perfect for St Patrick’s Day or any day you want a rainbow moment. Save this for later ✨ All patterns are available in my shop.  #sewingprojects #sewinginspiration #rainbowsewing #stpatricksdaycrafts #sewingpatterns
Follow on Instagram

Featured Pattern

Travel Sewing Kit Pattern

Featured Tutorial

Retro Drawstring Bag

Featured Recipe

Lemon Pound Cake

Connect

  • Email
  • Facebook
  • Instagram
  • Pinterest
  • Threads
  • TikTok
SUBSCRIBE TO NEWSLETTER
×

Popular Posts

  • Gathered Round Basket – 3 Sizes
  • Hexie Pincushion {Free Sewing Tutorial}
  • The Ultimate Resource for Vintage Haberdashery Lovers
  • Easter Projects to Sew
  • The Ultimate Guide to Drawstrings
  • Merry Little Christmas Sewing Projects
  • Tutorial: Gathered Round Basket

Copyright © 2026 Lisa. K. Cox - A Spoonful of Sugar