A Spoonful of Sugar

Make. Bake. Create.

Menu
  • Home
  • About
    • About Us
    • Press
    • FAQ
    • Disclosure Policy
    • Contact Us
  • Crafts
    • Crochet
    • DIY
    • Embroidery/Cross stitch
    • Gift Wrapping
    • Knitting
    • Miscellaneous
    • Paper Crafts
  • Holidays
    • New Year’s
    • Australia Day
    • Back to School
    • Valentines Day
    • Easter
    • ANZAC Day
    • Mother’s Day
    • Father’s Day
    • Halloween
    • Christmas
  • Recipes
    • Appetizers
    • Bars & Slices
    • Bread & Pastries
    • Cakes
    • Cookies
    • Confectionery
    • Cupcakes & Muffins
    • Desserts
    • Drinks
    • Ice Cream
    • Jams/Preserves
    • Main Meals
  • Sewing
    • Sewing Tutorials
    • Quilting
    • Sewing & Quilting Patterns
  • Family
    • Back to School
    • Family Fun
    • Our Home
    • Parenting
    • Travel
  • Shop
    • Pattern Store
    • Etsy Store

Making a Pencil Case

August 22, 2013 By A Spoonful of Sugar - 41 Comments

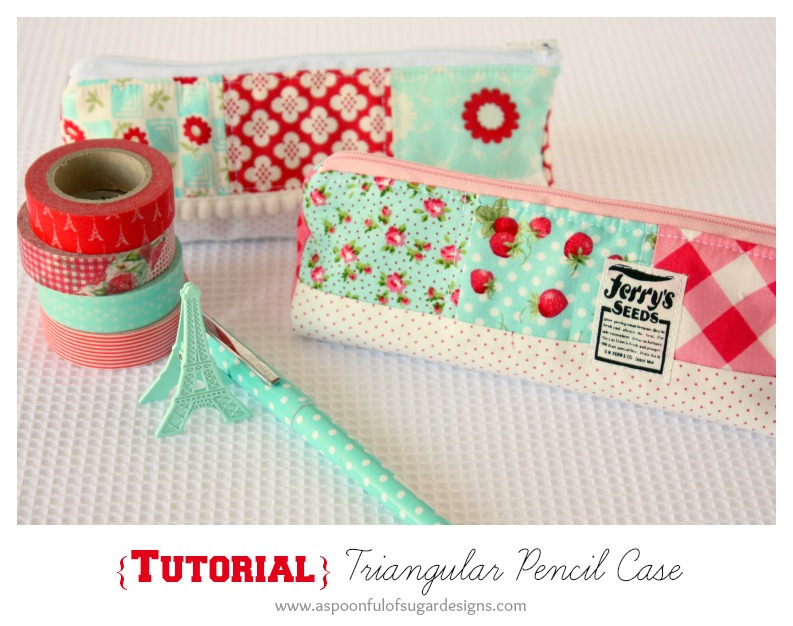
Thanks for all the lovely feedback and comments on our Triangular Pencil Case! Due to popular demand we have put together a tutorial so you can make your own pencil case.

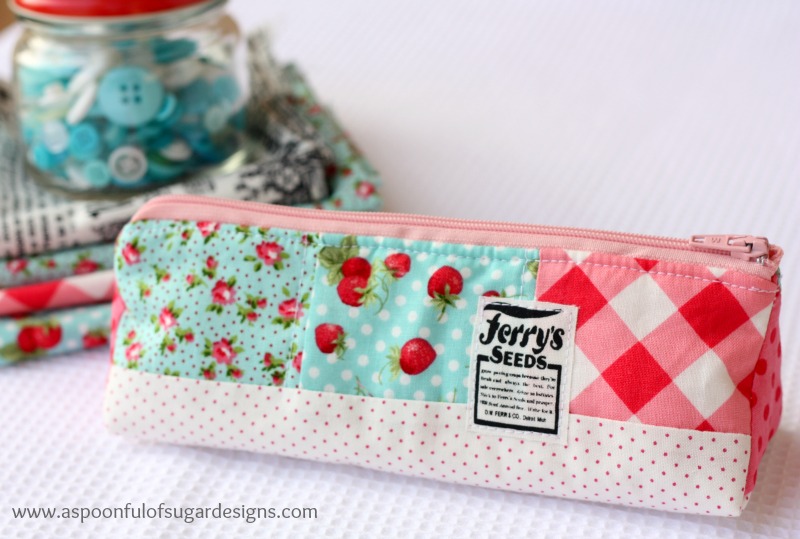
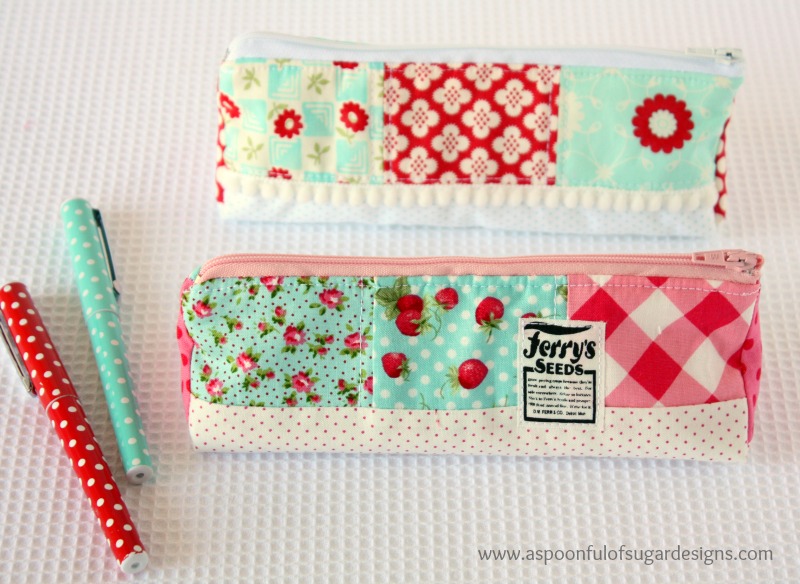
The triangular pencil case is the perfect project for using some of your treasured scraps. It features a patchwork panel on each side, and you can embellish it with pompom trim, appliqué patches, or ribbon to put your own creative spin on it. This project is suitable for anyone with some basic zipper skills.

Making a Pencil Case

Materials:

  • Cut 6 rectangles measuring 3 x 2 1/4 inches
  • Cut 1 rectangle measuring 8 x 4 1/2 inches
  • Cut 2 triangles measuring 2 3/4 inches on each side 
  • Cut 1 rectangle measuring 8 x 8 inches (lining)
  • Cut 2 triangles measuring 2 3/4 inches on each side (lining)
  • cotton batting measuring 8 x 12 inches
  • Zipper – 7 inches in length or longer
Optional: Embellish with pompom trim, appliqué patches, ribbon etc.
Template for Triangle can be found here.
Seam allowances 1/4 inch.
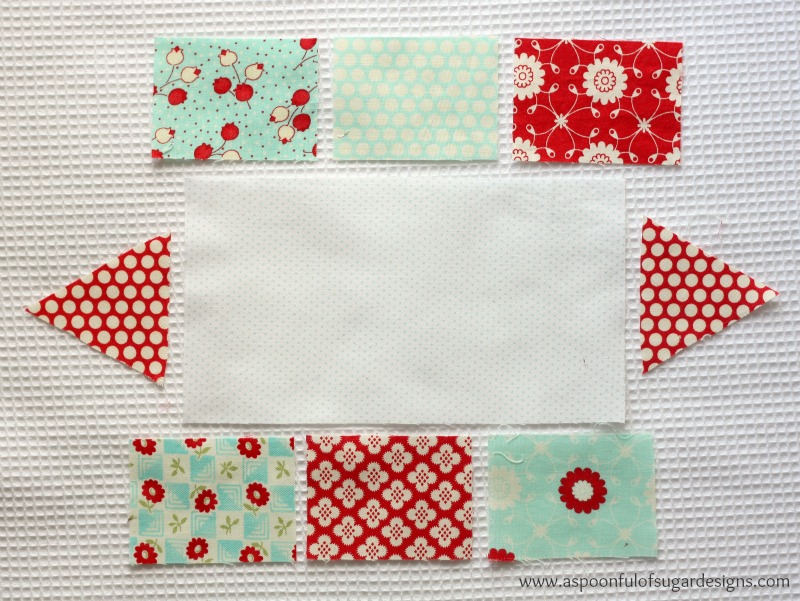
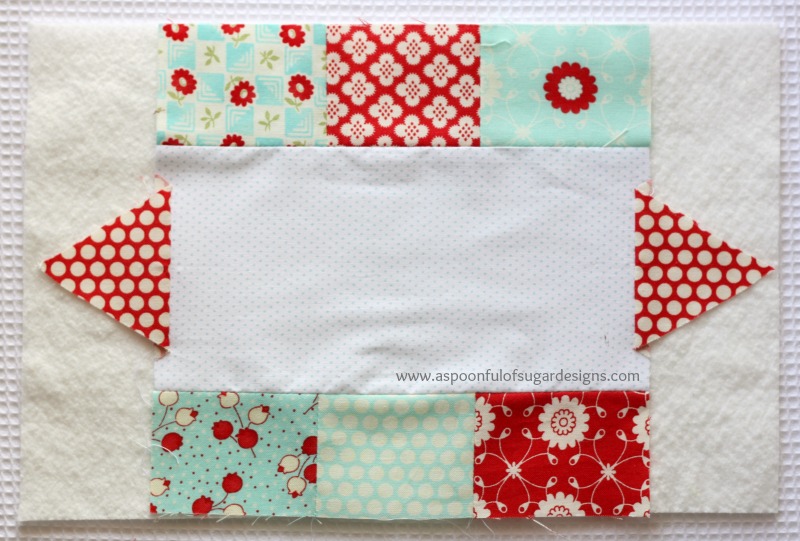
1. To assemble the front of the pencil case, stitch the three patchwork rectangles together into a strip and attach it to the polka dot panel. Repeat for the remaining patchwork rectangles.  Centre the two triangles on the side as pictured, and stitch in place. Fold open the triangles and press.
2. Lay the pencil case on the batting and pin in place.

3. Quilt the layers together as desired, and trim batting. Add pompom trim/appliqués/ribbon etc as desired.

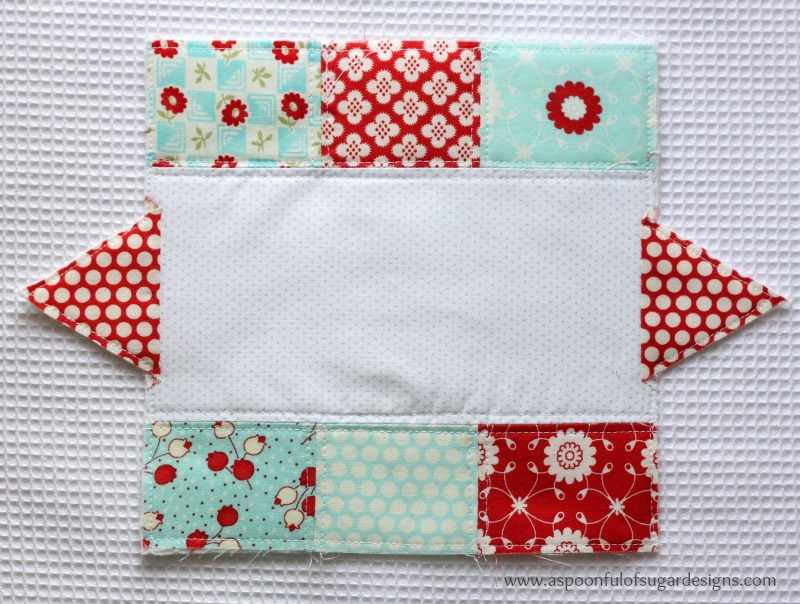
4. With a water erasable pen, mark the point 1/4 inch down from the tip of the triangle. Pin the side of the triangle to the side of the pencil case and pin in place. Stitch in place stopping at the blue mark. Repeat for both sides of each triangle.
5. With the wrong side of the pencil case facing, pin the zipper in place on one side as shown, and stitch in place. Open the zipper and repeat for the other side.Turn the pencil case out the right way and press. Top stitch around the edge of the zipper.

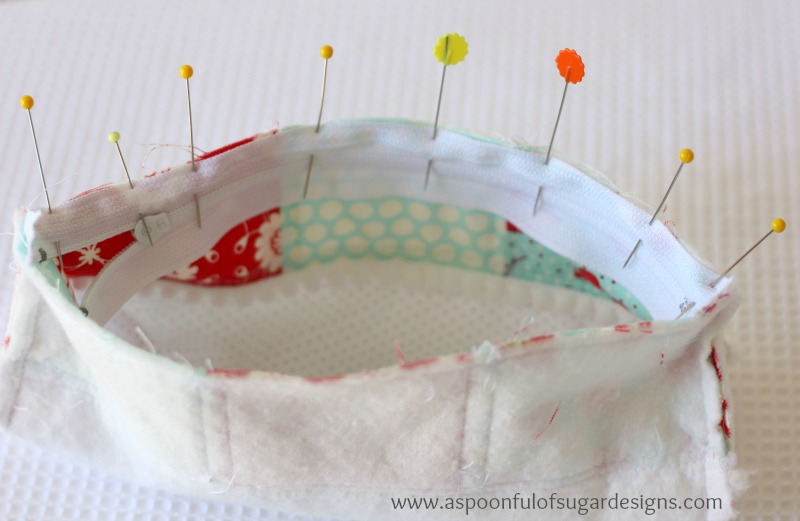
6. Stitch the lining pieces together in the same way that you pieced the pencil case exterior. Press under 1/4 inch along the opening. Pin the lining inside the pouch and hand stitch in place. 

If you are looking for an easy pencil case tutorial, check out “How to Make A Pencil Case”.

Filed Under: Back to School, Sewing, Sewing Tutorials Tagged With: bag, zipper

« Chocolate Cupcakes
Spring Lawn Care and Father’s Day Giveaway »

Comments

  1. Sabahnur says

    August 22, 2013 at 12:51 am

    cutie 🙂

    Reply
  2. shez says

    August 22, 2013 at 1:20 am

    this is gorgeous thankyou so very much for sharing.xx

    Reply
  3. Melody says

    August 22, 2013 at 1:30 am

    A great project. Thank you so much.

    Reply
  4. Patchwork and Play says

    August 22, 2013 at 2:54 am

    Another sweet pouch/pencil case! Thanks for sharing your expertise!

    Reply
  5. KaHolly says

    August 22, 2013 at 3:55 am

    Thanks so much!! I was hoping…

    Reply
  6. Crafty Craft Fairs says

    August 22, 2013 at 7:02 am

    So cute, thanks for the tutorial 🙂 G x

    Reply
  7. Annerose says

    August 22, 2013 at 7:25 am

    Sehr schön vielen lieben Dank für die Erklärung.
    Grüße aus Deutschland Annerose

    Reply
  8. Joan says

    August 22, 2013 at 8:07 am

    Thank you for the tutorial. The pencil case is lovely.

    Reply
  9. Liliana says

    August 22, 2013 at 8:25 am

    Such a cute pouch, thank you for the tutorial!

    Reply
  10. Steph @ Three Loud Kids! says

    August 22, 2013 at 10:05 am

    I wish I was more crafty, because this is really cute and I know my daughter would adore this!

    Reply
  11. Christine M says

    August 22, 2013 at 1:55 pm

    Thanks for the great tutorial.

    Reply
  12. Miracle Spyer says

    August 26, 2013 at 6:14 am

    Cutest pencil case ever!Loooooooving the fresh patterns on it!
    Nash onceuponherdream.blogspot.com

    Reply
  13. Sarah says

    September 4, 2013 at 8:10 pm

    Gorgeous pencil case. Thank you so much for the tutorial.

    Reply
  14. Lix Hewett says

    September 6, 2013 at 3:50 pm

    Love it! Thank you!

    Reply
  15. Anonymous says

    September 16, 2013 at 4:29 am

    Thanks for teaching us this pencil pouch.
    I am motivated to learn and try this at this age {54}.

    With love
    Anita Kadian

    Reply
  16. Anonymous says

    September 16, 2013 at 8:25 am

    Love it, and your choice of fabrics. I like the idea it will stay sitting upright when you unzip it and start poking around inside for something. Great idea for a toiletry case for traveling, maybe in a waterproof material.

    Reply
  17. Hen says

    December 10, 2013 at 10:13 am

    Thank you very much for this tutorial. I have just made one for my son to give as a secret santa gift and he is thrilled with it!
    Hen x

    Reply
  18. Vanessa says

    March 8, 2014 at 1:59 pm

    Love the colors your chose! 🙂

    http://cafecraftea.blogspot.com

    Reply
    • A Spoonful of Sugar says

      March 8, 2014 at 3:14 pm

      Thanks Vanessa – we can’t resist aqua and red 🙂

      Reply
  19. izosik says

    March 16, 2014 at 4:11 am

    Nice project and tutorial.

    Reply
    • A Spoonful of Sugar says

      March 16, 2014 at 5:17 pm

      Thanks Izosik!

      Reply
  20. Pam says

    March 31, 2014 at 11:41 pm

    This is so cute! I made one for my crochet hooks and it turned out perfectly. I included your tutorial in a little roundup of patchwork bags and pouches on my blog: http://www.leavesandstitches.com/2014/03/21/weekend-pinspiration-pretty-pouches/. Thanks so much!

    Reply
    • A Spoonful of Sugar says

      April 1, 2014 at 6:21 am

      Thanks so much Pam. They would make great little crochet hook cases. Lisa

      Reply
  21. Annie says

    April 2, 2014 at 8:51 am

    Gorgeous design! I am honestly a little worried about how i’ll be able to handstitch the lining in, though. Is there any other way i could stitch in the lining with a sewing machine? Thanks!

    Reply
    • A Spoonful of Sugar says

      April 2, 2014 at 10:51 am

      Hand stitching the lining gives a neater finish and as it is on the inside, you can’t really see if your stitching is that neat. Alternatively you could machine stitch it in as you would for any other zippered pouch.

      Reply
  22. Katherine says

    August 13, 2014 at 9:13 am

    Love your tutorial, so easy to follow.
    Can you tell us what fabric line you used and where to get it?

    Thanks

    Reply
    • A Spoonful of Sugar says

      August 13, 2014 at 11:39 am

      Hi Katherine – the fabrics I have had in my stash for a while. A couple of them are from Bonnie and Camille’s Bliss range, and the others are from Annies Farm Stand by Lakehouse Dry Goods.

      Reply
  23. Emily says

    May 28, 2015 at 3:48 am

    I love this tutorial. Thank you!!! Can I ask where you got the seed tags? Those are really cool;)!!

    Reply
  24. claudia says

    February 16, 2016 at 12:16 pm

    I had this as my sewing project for my class tonight. I am so excited how it’s coming around. Now I only have to put the zipper, which I’ll learn how on my next class. Thank you so much for sharing your pattern and showing how to put it together.

    Reply
    • A Spoonful of Sugar says

      February 16, 2016 at 9:23 pm

      Thanks Claudia – enjoy your classes!

      Reply
  25. ulrikes smaating says

    November 6, 2016 at 1:56 am

    Hej,
    this is really a cute case, can you see it on my blog?
    http://ulrikes-smaating.blogspot.dk/2016/11/planer-und-stifteetui.html
    greetings from denmark Ulrike :0

    Reply
  26. Esther says

    February 1, 2017 at 6:38 pm

    It looks super cute, but mine isn’t working out. I have tripple checked the measurements, but somehow the triangles seem to be too small to fill the space… I am puzzled.

    Reply
  27. Paula says

    July 31, 2017 at 9:57 am

    what are the apex finished dimensions on this? Such a sweet composition of fabrics and design

    Reply
    • Paula says

      July 31, 2017 at 9:58 am

      That should have been approximate dimensions!!

      Reply
  28. A Spoonful of Sugar says

    March 22, 2014 at 11:27 am

    Thanks for linking! Such a lovely group of zippered pouches. Scrap projects are so much fun!

    Reply

Leave a Reply Cancel reply

Your email address will not be published. Required fields are marked *

  • Email
  • Facebook
  • Instagram
  • Pinterest
  • Threads
  • TikTok
SUBSCRIBE TO NEWSLETTER
×

Categories

Archives

PURCHASE PDF PATTERNS

We offer over 100 affordable PDF sewing patterns available for download from our store website or Etsy store. Each pattern includes detailed instructions, numerous photos, and templates.

WEB STORE ETSY STORE

Instagram

The Scrappy Strips Pouch is one of my favourite wa The Scrappy Strips Pouch is one of my favourite ways to use up leftover fabric strings. Today’s version is made from patchwork strips — a fun, relaxing sew that turns scraps into something beautiful and practical.The Scrappy Strips Pouch pattern has two versions - patchwork strings and selvedges - and two sizes. Comment SELVEDGE (or SELVAGE) for a link to the pattern.Pattern Details: Scrappy Strips Pouch Sewing Pattern is in our Pattern Store and Etsy Shop.#ScrappyStripsPouch #ScrapBustingSewing #PatchworkPouch #StringQuilting #SewingProjects
If you’ve ever wanted to add eyelets or grommets t If you’ve ever wanted to add eyelets or grommets to your sewing projects, here’s a quick look at how I install them using my DK93 snap press. It’s the same tool I use for snaps — and it makes installing eyelets beautifully quick and consistent.Here’s how I install the eyelets:Punch out the four holes using a hole‑cutting die.Place the eyelet into the hole.Press it into place using the snap press.That’s it — simple, sturdy, and it gives the Ribbon Pouch such an elevated, professional finish. I love how clean and secure the result is.Fabric shown: Tilda Something Blue, releasing June 1 — thank you @tilda_australia for the beautiful fabric.✨ If you’d like the Ribbon Pouch pattern (3 sizes), comment RIBBON and I’ll send the link straight to you.Ribbon Pouch Sewing Pattern: available in my Pattern Store and Etsy Shop (links in profile).#tildasomethingblue #tildafabric #sewingtips #handmadeeveryday #sewingtools
The Ribbon Pouch is one of my favourite quick‑to‑s The Ribbon Pouch is one of my favourite quick‑to‑sew gift bags, and I couldn’t resist making a light and dark version using the new Tilda Something Blue collection. Both pouches use the same print in different colourways — such a pretty way to show how fabric choice changes the whole mood.They’re finished with satin ribbon threaded through grommets, and topped with a tiny star tag. The boxed base helps them stand beautifully, and the ribbon closure makes them perfect for birthdays, thank‑you gifts, treats, or little treasures.This is a beginner‑friendly, scrap‑friendly, quick project you’ll want to sew again and again. Pattern includes 3 sizes.If you’d like the pattern, comment RIBBON and I’ll send the link straight to you.Pattern Details: Ribbon Pouch (3 Sizes) available in my Pattern Store and Etsy Shop.Fabric Details: Tilda Something Blue - releasing on 1 June 2026. Thanks to @tilda_australia#TildaSomethingBlue #TildaFabric #SewingPattern #BeginnerSewingProject #QuickSewingProject   
Sewing with scraps is one of my favourite ways to Sewing with scraps is one of my favourite ways to get creative — small pieces, leftover corners, charm‑square offcuts… they all have so much potential.Here are 10 scrap‑friendly projects that use small pieces beautifully. They’re quick to sew, beginner‑friendly, and perfect for gifting ✂️✨Save this for the next time you want to turn your scraps into something pretty.Which one would you sew first?  Tell me in the comments — I love seeing what you’re making.Patterns are available in my pattern store (link in profile) or comment PATTERNS and I will send you the link. #scrapsewing #scrapbusting #scrapfriendly #sewinginspiration #sewingideas
I save every selvedge (or selvage) — the colour do I save every selvedge (or selvage) — the colour dots, the tiny prints, the designer names… they’re too pretty to throw away.Here’s how I turn them into something useful:
• lay them diagonally on a square of fusible interfacing
• overlap slightly
• stitch close to the printed edge
• keep building until you have a panelIt’s such a fun way to use scraps and create something totally unique ✂️✨If you’d like the Scrappy Strips Pouch pattern, comment SELVEDGE or SELVAGE and I’ll send you the link.Pattern Details: Scrappy Strips Pouch Pattern is available in my Pattern Store and Etsy Shop.#scrappystripspouch #selvage #scrapbuster #sewingcommunity #sewingtip
A little Something Blue for tonight’s sewing sessi A little Something Blue for tonight’s sewing session 💙I’m packing my Makers Caddy with supplies for my next project — fabric, thread, tassels, lavender… I can’t wait to share it with you soon.There’s something so calming about soft blues, tidy supplies, and a project all ready to go — it makes the whole sewing process feel extra special.Hope this brings a little mid‑week inspiration to your feed ✂️✨If you’d like the link to the Makers Caddy, comment CADDY and I’ll send it to you.Fabric: Tilda Something Blue with thanks to @tilda_australiaPattern Details: Makers Caddy Sewing Pattern - available in our Pattern Store and Etsy Shop.#tildasomethingblue #ilovetilda #sewingcommunity #tildaaustralia #sewingpattern
Follow on Instagram

Featured Pattern

Travel Sewing Kit Pattern

Featured Tutorial

Retro Drawstring Bag

Featured Recipe

Lemon Pound Cake

Connect

  • Email
  • Facebook
  • Instagram
  • Pinterest
  • Threads
  • TikTok
SUBSCRIBE TO NEWSLETTER
×

Popular Posts

  • Cord Cosy
  • Tips for Threading a Needle
  • Travel Accessories to Sew
  • Liberty Tissue Cover
  • Charm Square Fabric Tray
  • Happy Scrappy Cards
  • Crocheted Scarf {Free Pattern}

Copyright © 2026 Lisa. K. Cox - A Spoonful of Sugar