If you’ve been sewing for a while, you’ve probably noticed that the humble selvedge (or selvage if you’re in the US) has quietly become a little treasure in the scrap‑sewing world. Those tiny printed edges — once trimmed off and tossed aside — are now being collected, sorted, and stitched into the sweetest patchwork projects.
Over the years, I’ve found myself saving more and more of them. They’re colourful, quirky, and full of personality… and they tell the story of the fabrics we love. Today I’m sharing why I save my selvedges, how I store them, and some simple ways to sew with them — including my newest pattern designed especially for selvedges and strings.
Selvedge or Selvage — What’s the Difference?
You’ll see both spellings used online, and they mean exactly the same thing.
- Selvedge is the spelling used in Australia, the UK, and much of Europe.
- Selvage is the spelling used in the United States.
Both refer to the tightly woven edge of the fabric that prevents fraying. So whether you save your selvedges or your selvages, you’re in the right place.
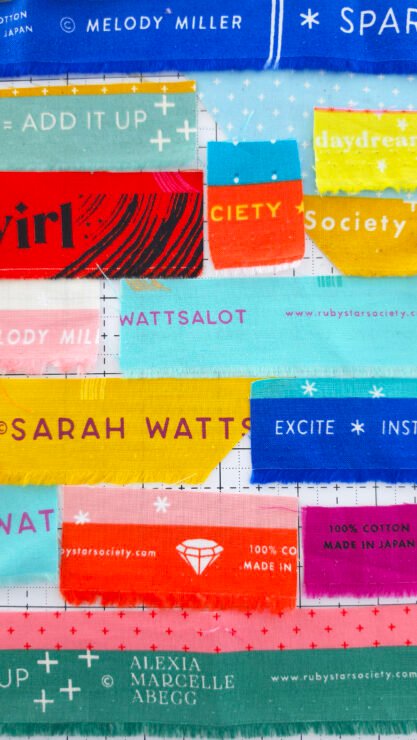
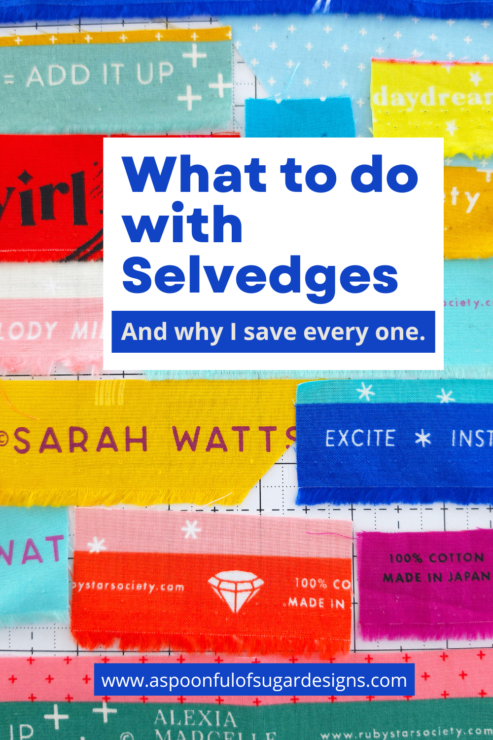
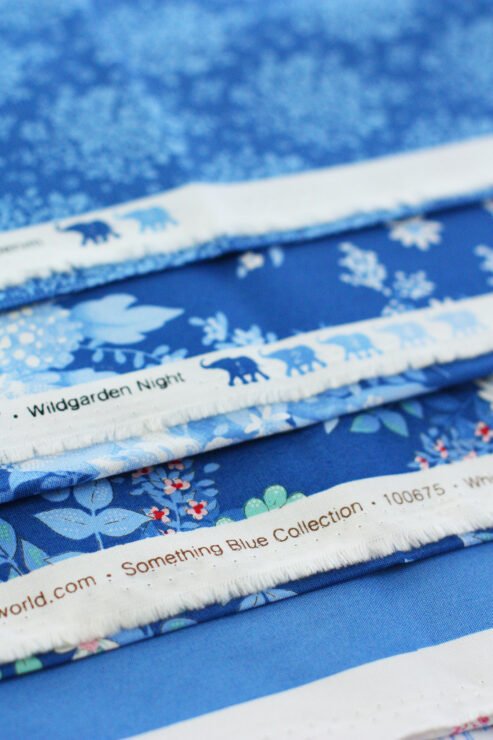
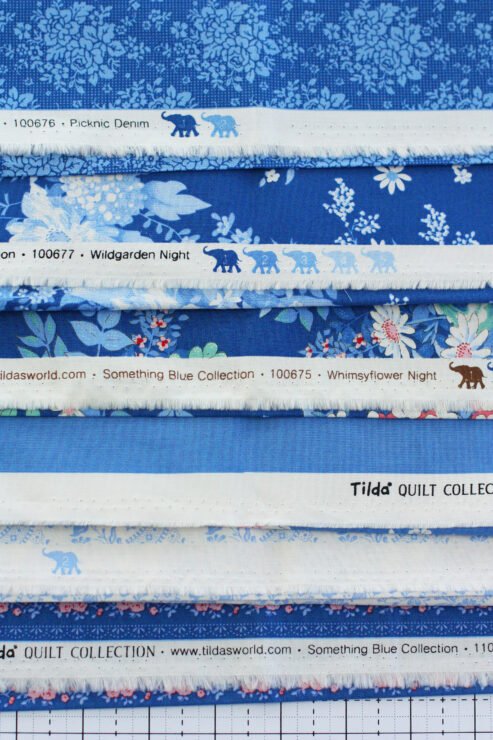
Why I Save Selvedges
There’s something so charming about these little strips. I save them because:
- They’re full of colour dots, text, and tiny motifs
- They capture the “story” of a fabric line
- They’re perfect for small, satisfying projects
- They make beautiful patchwork panels
- They turn leftovers into something useful and sweet
And honestly… they just make me happy. There’s nothing like seeing a bundle of selvedges from past quilts and projects — it’s like a tiny scrapbook of your sewing life.
What Makes a Good Selvedge Worth Keeping
Not all selvedges are created equal, so here’s what I look for:
- Colour dots (my favourite!)
- Designer names or collection titles
- Cute printed icons or shapes
- Interesting fonts
- A clean, straight edge
- At least 1–1½ inches of usable width
If the printed section is pretty, I keep it. If it’s plain white with nothing interesting, I usually let it go.
How I Store My Selvedges
Keeping selvedges organised makes them much easier to use. A few simple ideas:
- Glass jars — pretty and practical
- Small baskets — sorted by colour
- Zip pouches — sorted by length
- A dedicated “selvedge box” near your cutting table
I personally keep mine in a plastic shoebox with my other scrap fabrics.
Tips for Sewing with Selvedges
Sewing with selvedges is fun and beginner‑friendly, but a few tips make the process smoother:
- Press them flat before sewing
- Overlap edges slightly to avoid gaps
- Use a shorter stitch length for strength
- Stitch close to the printed edge for a neat finish
- Layer them on interfacing to keep everything stable
- Mix selvedges with strings for extra texture
Once you start, it’s wonderfully addictive.
Easy Projects to Make with Selvedges
Selvedges shine in small, structured projects. Some ideas:
- Zipper pouches
- Drawstring bags
- Coasters
- Bookmarks
- Patchwork panels
- Needle books
- Mini quilts
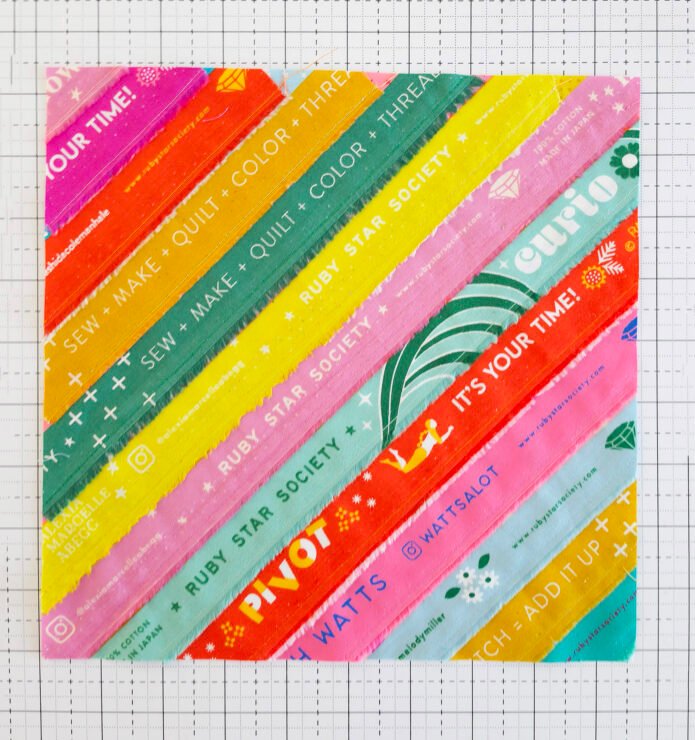
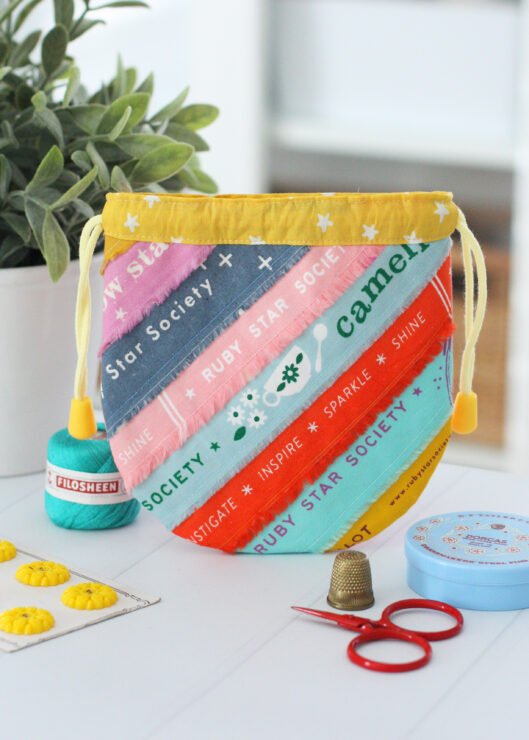
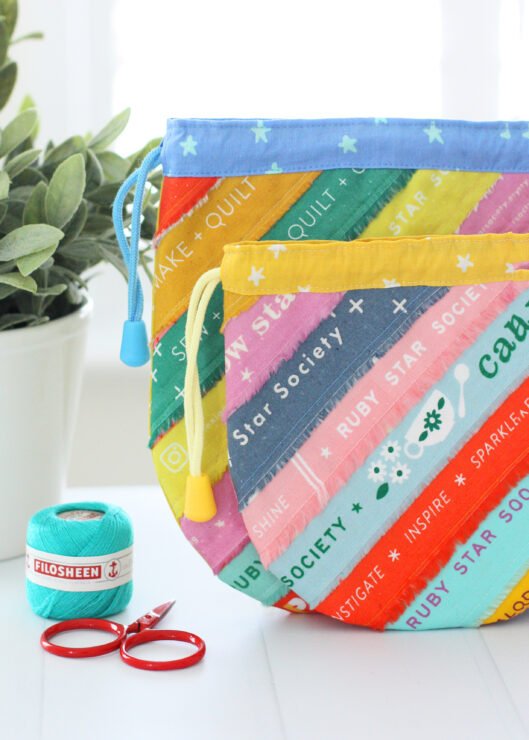
And of course… my newest pattern: Scrappy Strip Pouch
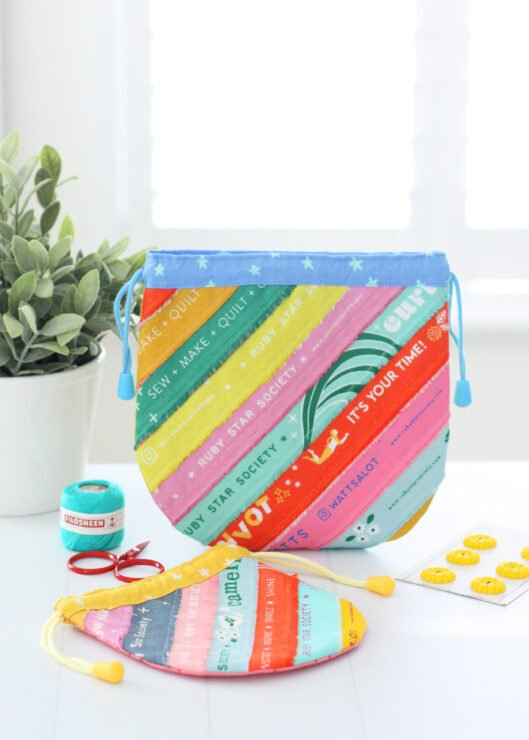
The Scrappy Strips Pouch — Made for Selvedges and Strings
If you’re looking for a sweet, practical project to use your selvedges, the Scrappy Strips Pouch is designed especially for them. It features:
- A striking diagonal selvedge (or strings) panel
- Two practical sizes
- A neat fold‑over casing
- A smooth drawstring closure
- A beginner‑friendly construction
It’s perfect for organising notions, gifting, or turning your favourite scraps into something beautiful.
You can find the pattern here: Scrappy Strips Pouch (2 Sizes) – A Spoonful of Sugar Shop
More Selvedge Projects Coming Soon
I love sewing with selvedges, and I’ll be adding more selvedge‑friendly patterns to this post as they’re released. If you enjoy scrap sewing, be sure to check back — or join my newsletter so you don’t miss the next one.
Sign up to the newsletter here
Do You Save Your Selvedges?
I’d love to know how you use yours. Drop a note below to inspire us with your ideas.
Share your projects on Instagram using #scrappystripspouch or #aspoonfulofsugardesigns — seeing your makes is always the highlight of my week.


Yes, I do save my selvages and plan on making things with them, first up, your scrappy strips pouch!
I’m in the US and I’ve always spelled it “selvedge “! 🤷🏼♀️I save the pretties in a vintage blue mason jar… it’s stuffed, so I need to get sewing!